Rose electronics Xtensys Nstallation And Operations Manual
Cat5 kvm switch system
Hide thumbs
Also See for Xtensys:
- Installation and operation manual (48 pages) ,
- Quick installation manual (4 pages)

Related Manuals for Rose electronics Xtensys


Summary of Contents for Rose electronics Xtensys
-
Page 1: Installation And
Xtensys CAT5 KVM SWITCH SYSTEM INSTALLATION OPERATIONS MANUAL 10707 Stancliff Road Phone: (281) 933-7673 Houston, Texas 77099 WWW.ROSE.COM... - Page 3 Rose Electronics warrants Xtensys™ system to be in good working order for one year from the date of purchase from Rose Electronics or an authorized dealer. Should this product fail to be in good working order at any time during this one-year warranty period, Rose Electronics will, at its option, repair or replace the Unit as set forth below.
-
Page 5: Table Of Contents
Xtensys System Installation ............................8 Connecting the KVM station ............................ 8 Connecting the User Station to Xtensys Switch ...................... 8 Connecting the Local KVM Station and Computers to Xtensys Switch ..............8 Powering up the system .............................. 9 LED Indicators ................................9 Configuring the Xtensys Switch ........................... - Page 6 Figures Page # Figure 1. Typical Application ............................7 Figure 2. OSD Menu Structure ............................10 Figure 3. Main Menu ..............................11 Figure 4. Configure System ............................12 Figure 5. Configure Computers ............................. 14 Figure 6. Configure KVM menu............................. 15 Figure 7.
-
Page 7: Disclaimer
The Xtensys system takes the worry out of what type of CATx cabling is used and its lengths. Upon power-up it will automatically adjust the video gain and skew based on the CATx cable type and length, providing a crisp, clear display from all connected computers. -
Page 8: Features
ATRX Kit (CAB-04R005 / ACC-ATRX – for flash upgrading) Installation and operations manual If the package contents are not correct, contact Rose Electronics or your reseller, so the discrepancy can be quickly resolved. Registration Register your product for future updates by registering at http://www.rose.com/htm/online-registrationform.htm... -
Page 9: System Overview
A KVM user station, consisting of a Keyboard, Video monitor, and Mouse, connects directly to the corresponding connectors on the rear panel of the user station. A KVM station can also be connected directly to the Xtensys switch for local access to all connected equipment. -
Page 10: Site Planning
Up to a total of 1,000 feet of CAT5, CAT5e, or CAT6 industry standard cables can be used. The unique feature of Xtensys is that the length and type of cable will be automatically compensated for and the skew, equalization and gain automatically adjusted to provide the clearest possible display with no manual adjustments. -
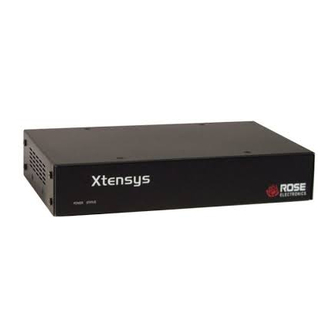
Page 11: Xtensys Models - Front View
MODELS Xtensys Models – Front View Description / Model Indicators User station XTR-11 XTR-12 XTR-14 XTR-18 Power / Status Indicators Switch 8, 16, or 32 CPU ports Power / Status Indicators Switch 48 or 64 CPU ports Power / Status... -
Page 12: Rear View
Figure 11). Check if KVM station #8 is connected to a computer name. If so notify the remote user on KVM port #8 that you are going to connect to a CPU port and for them to save their work and disconnect. XTENSYS INSTALLATION AND OPERATIONS MANUAL... -
Page 13: Typical Application
Typical Application The flexibility of the Xtensys system Up to a total enables it to configure to almost any of 1,000’ of system environment. CATx cable The User Station is available with one local KVM Station connectors and 1, 4, or 8 RJ45 link ports. -
Page 14: Xtensys System Installation
NOTE: The Xtensys User Station, configured with 4 or more link ports, can be installed several different ways. The most common installation is to connect each of the link ports (RJ45) to different Xtensys switches. The link port can also be connected directly to a standalone computer with an Intelligent Information Transmitter installed. -
Page 15: Powering Up The System
Configuring the Xtensys Switch The Xtensys switch must have the CPU ports configured for either a UTP connection or a Serial connection. The default configuration is UTP. Only the CPU ports that are connected to a serial device have to be configured for serial functions. -
Page 16: Osd Menu Structure
Saving configuration changes from user stations to an Xtensys switch is limited to XTR-11 user stations only. Saving the configuration items to an Xtensys switch is not possible from an XTR-12, or XTR-14 User Station XTENSYS INSTALLATION AND OPERATIONS MANUAL... -
Page 17: Main Menu
The main menu will display on top of a currently connected computers video. If no computer is connected to supply the video, the display’s background is black. The following pages explain each of the Xtensys menus and the options available. XTENSYS INSTALLATION AND OPERATIONS MANUAL... -
Page 18: Configure System
Print screen Scroll lock Rate (chars/sec) (Default: 20) / Delay (Default: Fast) This option adjusts the KVM keyboard action when you hold down a key to repeat a single character. Valid inputs are 1-31. XTENSYS INSTALLATION AND OPERATIONS MANUAL... - Page 19 Use the arrow keys to select the desired color and press [Enter]. Note: Do not set the background color and text color the same, you will see nothing but that color screen. XTENSYS INSTALLATION AND OPERATIONS MANUAL...
-
Page 20: Configure Computers
Selecting the type field for a selected computer and pressing enter will display the selection choices for that port. Select UTP or one of the serial options for each CPU (RJ45) port. NOTE: DO NOT PROGRAM COMPUTER PORT #1 FOR SERIAL XTENSYS INSTALLATION AND OPERATIONS MANUAL... -
Page 21: Configure Kvm
This group is assigned to a profile name which defines how the computers (defined by the group) can be accessed. The profile is then assigned to a user or users. XTENSYS INSTALLATION AND OPERATIONS MANUAL... -
Page 22: Configure User
[Enter]. A selection box will display listing the profiles available. Select the profile to assign to the selected user and press [Enter]. Use the page up/down keys for more profiles. Profiles are defined on the “Configure profile” menu. XTENSYS INSTALLATION AND OPERATIONS MANUAL... -
Page 23: Configure Profile
[Enter]. An input box will display. Type in a new share value in seconds and press [Enter]. Valid share values are 0 to 9999 seconds. The share value is only valid if the profile mode is share. XTENSYS INSTALLATION AND OPERATIONS MANUAL... - Page 24 [Enter]. Valid times are 0 to 9999 minutes. A value of 0 (zero) disables the automatic logout function. If login is enabled for a KVM station, but the Logout time is set to zero, the user remains logged in until they manually log out using the [Ctrl] L command. XTENSYS INSTALLATION AND OPERATIONS MANUAL...
-
Page 25: Configure Group
This group is assigned to a profile name. The profile defines how the computers (defined by the group) can be accessed. The profile is then assigned to a user or users. XTENSYS INSTALLATION AND OPERATIONS MANUAL... -
Page 26: Configure Language
Selecting “Language” from the “Main” menu displays a choice box with 6 different language options. Select the language needed and press [Enter]. This changes all the menus and displayed information to that selected language. The language options are: English Francais Deutsch Espanol Italiano Portugues XTENSYS INSTALLATION AND OPERATIONS MANUAL... -
Page 27: System Status
The computer status display reports the firmware version (FM column) of the CATx transmitter connected to each computer. The uptime, CATx transmitter voltage, CATx transmitter temperature and users are also reported. Figure 12. Computer Status XTENSYS INSTALLATION AND OPERATIONS MANUAL... -
Page 28: Figure 13. Video Status
Each Xtensys switch component will report the installed firmware revision (If applicable) to this screen. The Activity column indicates the communication status between all installed boards. Figure 14. Device Status XTENSYS INSTALLATION AND OPERATIONS MANUAL... -
Page 29: Save Configuration
Unit. Once power is cycled, unsaved changes are lost and the previously saved configuration settings will be effective. Figure 15. Save menu XTENSYS INSTALLATION AND OPERATIONS MANUAL... -
Page 30: User Operating Instructions
Xtensys switch and its capabilities. To start using your Xtensys switch, you first need to become familiar with the keyboard commands. The available keyboard commands are shown in the table below. All keyboard commands start with an attention sequence by pressing and releasing the left [Ctrl] key, then the additional command characters. -
Page 31: Alternative Or Third Party Switching
Figure 16 shows the Computer select menu. This menu is created from the system configuration. The configuration used to produce the below menu is an XTR14 user station (4 port) and a 4 x 8 Xtensys switch. To invoke this menu, press and release the left Ctrl key, then press the Esc key. -
Page 32: Video Setting Keyboard Commands
Xtensys unit or a user station. Figure 17. CPU information Video Setting Keyboard Commands Video amplification, equalization, red skew, green skew, and blue skew can be adjusted if needed using simple keyboard commands. -
Page 33: Status Commands
The status window shows: The port each computer is connected to List of computers by name The firmware version Uptime Voltage Temperature Users Figure 19. Computer Status menu XTENSYS INSTALLATION AND OPERATIONS MANUAL... -
Page 34: Figure 20. Video Status Menu
Figure 20. Video Status menu Pressing the F5 will display the Device status window. This window shows: Device name Uptime Firmware versions Activity OSD F/W version Figure 21. Device Status menu XTENSYS INSTALLATION AND OPERATIONS MANUAL... -
Page 35: Serial Port Usage (Rs232)
Serial port usage (RS232) The serial port on both the Xtensys switch (RJ12) and the User station (DB9) are used to update the unit’s firmware. The following procedure for establishing a connection from your standalone computer or Notebook computer to the Xtensys switch’s serial port or a User station uses Windows HyperTerminal™. -
Page 36: Figure 22. Serial Options
Option 1. Receive new main program from serial port (This card only) When a new main program is available, it can be obtained from Rose Electronics or downloaded from our web site at www.rose.com. The diagnostic screen that is displayed when the Xtensys switch is first turned on shows the main program version that is presently installed. - Page 37 Identify and correct the transmit problem and press “Y”, then [Enter] to try again. Press “N” and then [Enter] and the prompt "Hit enter to boot” appears. Press the [Enter] key to re-start the Xtensys switches diagnostics with the firmware unchanged.
-
Page 38: Serial Device Features
Serial Device Features The serial feature of Xtensys allows you to connect a KVM station to a serial device such as the serial port on a Unix or Sun computer, a communication device, or any other supported device with a serial port. The serial device is connected to the RJ45 CPU port on the Xtensys switch with a serial cable. -
Page 39: Serial Switching Commands
Using an external computer, laptop, or terminal, you can issue commands to Xtensys to switch any KVM station to any CPU port. Connect the computer, laptop, or terminal to the Xtensys serial port using an RJ to DB9 cable (Rose Electronics part number: KIT-ATRX). -
Page 40: Service Information
This Unit does not contain any internal user-serviceable parts. In the event a Unit needs repair or maintenance, you must first obtain a Return Authorization (RA) number from Rose Electronics or an authorized repair center. This Return Authorization number must appear on the outside of the shipping container. See Limited Warranty for more information. -
Page 41: Safety
This Xtensys switch has been tested for conformance to safety regulations and requirements, and has been certified for international use. Like all electronic equipment, the Xtensys switch should be used with care. To protect yourself from possible injury and to minimize the risk of damage to this Unit, read and follow these safety instructions. -
Page 42: Troubleshooting
The mode of the keyboard does not match that of the computer. Issue the mode command, usually 1 for IBM PS/2s, and 2 for all others. The default setting of the Xtensys is mode 2. Sometimes an incorrect mode will confuse the computer or keyboard. -
Page 43: Appendix A. Initial Factory Default Settings
Profil x (x = 1 – 80) Access N/A (from group menu) Mode Share Share 2 seconds Scan 5 seconds Logout 240 minutes Group Name Group x (x = 1 – 80) Assignment All computers to all groups Language (Type) English XTENSYS INSTALLATION AND OPERATIONS MANUAL... -
Page 44: Appendix B. General Specifications
User Station: RJ45 Local KVM: MD6, HD15, USB Keyboard / Mouse PS/2, Sun, USB (PC, Sun, Mac) Chassis Metal Scan Interval 0 – 255 seconds Indicators On-Line / selected LEDs / Power Switches IEC 320 Power XTENSYS INSTALLATION AND OPERATIONS MANUAL... -
Page 45: Appendix C. Parts And Cables
CPU to PC w/ DB9 serial port nnn=length in feet CAB-XTS-RJ45-nnn CPU to Cisco/Sun w/ RJ serial port nnn=length in feet Options: -L = Local Port – PS2 -LU = Optional PS/2 & USB local ports XTENSYS INSTALLATION AND OPERATIONS MANUAL... -
Page 46: Appendix D. Rack Mounting
Four 6-32 x 3/8” flat head mounting screws. To rack mount your Xtensys unit, attach the two rack mounting brackets to your unit with the short flange against the unit using the four screws provided. Secure the mounting brackets to the rack using the appropriate size bolts, nuts and lock washers. -
Page 47: Appendix E. Serial Console Protocol (Standard, Switch, Event Configuration)
“Standard”. In this mode all functions and features operate normally. Setting this protocol to “Switch” configures Xtensys to send port switching commands to the serial port. When a command is given to the main unit to switch to CPU port #5, this command is also sent to the serial port. - Page 48 XTENSYS INSTALLATION AND OPERATIONS MANUAL...
- Page 50 10707 Stancliff Road Phone: (281) 933-7673 Houston, Texas 77099 WWW.ROSE.COM...
Need help?
Do you have a question about the Xtensys and is the answer not in the manual?
Questions and answers