Rimage Professional 3400 User Manual
Hide thumbs
Also See for Professional 3400:
- User manual (283 pages) ,
- Diagnostic manual (14 pages) ,
- Upgrade installation (4 pages)
Table of Contents
Advertisement
Quick Links
Advertisement
Table of Contents

Related Manuals for Rimage Professional 3400


Summary of Contents for Rimage Professional 3400
-
Page 1: Professional 5400N
Professional 3400 Professional 5400N Everest 400 Printer... - Page 2 Rimage® is a registered trademark of the Rimage Germany Corporation. Professional™ and Everest™ are trademarks Tel: +49-(0) 6074-8521-0 of the Rimage Corporation. Dell™ is trademark of Dell Fax: +49-(0) 6074-8521-100 Computer Corporation. FireWire™ is a trademark of Apple Computer, Inc. Windows® is a registered trademark of Microsoft Corporation.
-
Page 3: Table Of Contents
Ribbon Requirements ................................13 Everest 400 Ribbons ....................................13 Label Design Requirements ..............................14 Print Requirements ................................14 Identify the Parts of the Professional 3400 and 5400N ..............15 Front View ....................................15 Back View ....................................16 3400 ......................................... 16 5400N ........................................ - Page 4 Rimage Professional 3400 and 5400N User Guide Change the Print and Retransfer Ribbons ..................27 Change the Print Ribbon ................................ 27 Remove the Print Ribbon ..................................27 Install the Print Ribbon .................................... 29 Change the Retransfer Ribbon ............................... 30 Remove the Retransfer Ribbon................................31 Install the Retransfer Ribbon ...................................
-
Page 5: Introduction
Rimage Professional 3400 and 5400N Specification document found at www.rimage.com/support. From the Support menu select: Professional Series > Product Name > User Manuals tab. Note: Your Professional 3400 or 5400N system may not look exactly like the model featured in this user guide. About this User Guide •... -
Page 6: Accessory Kit
Getting Started with Your Rimage Software guide • Marketing CD Unpacking and Setup Instructions To unpack your Professional 3400 or 5400N, refer to the unpacking label on the autoloader box. For setup instructions, refer to the Setup and Installation Guide that shipped with your product. 2001431_B... -
Page 7: Important Information
• Current firmware and driver downloads Technical Support Rimage offers a variety of service and support options for the Professional 3400 and 5400N including Next Business Day On-site Agreements, Exchange Services, and Software Subscriptions and Support. Please contact your Rimage Value Added Reseller or Rimage for additional information and pricing. -
Page 8: Optical Disc Recording Software Disclaimer
For applications outside in hazardous radiant exposure. North America, refer to the nearest Rimage office for assistance in selecting a locally approved power cord. • Never use any optical instrument in conjunction with this •... -
Page 9: Country-Specific Cautions And Warnings For Wideband Data Transmission Systems: 2400-2483.5 Mhz
(MPE). But it is desirable that it should be installed and operated keeping the radiator at least 20cm or more away from person’s body (excluding extremities: hands, wrists, feet and ankles). Compliance Information Product Professional 3400 Professional 5400N Model RAS26... -
Page 10: Professional 3400 And 5400N Specifications
Refer to page 12 for the Everest 400 printer specifications. Note: he most up-to-date technical specifications for the Professional 3400, 5400N, and integrated Everest 400 printer are located at www.rimage.com/support. From the Support menu select: Professional Series > Product Name > User Manuals tab. - Page 11 Output bin The external output bin (on the left side of the autoloader) holds up to 8 discs. Note: Through the Rimage software, you can designate a bin in the carousel to be the output bin. In this case, the output bin holds up to 50 discs before operator intervention is required.
-
Page 12: Everest 400 Printer Specifications
Refer to the Printer Requirements section on page 13 for the correct printer ribbons. requirements Use Rimage Media Kits™ for optimum recording and print performance. Label design requirements Refer to the Label Design Requirements section on page 14 for label design requirements. -
Page 13: Printer Requirements
Ribbon Requirements Important! • Rimage only supports the use of Rimage brand ribbons in our printers. Printer issues that occur as a result of using ribbons from manufacturers other than Rimage are not included under your Rimage warranty or maintenance agreement. -
Page 14: Label Design Requirements
The hole is 15 mm (0.59”) The printable area and hub sizes vary depending on the disc manufacturer. Note: The media that are in Rimage Media Kits have a printable area of 118-24 mm. On most labels, print settings of 118 mm and 24 mm are recommended. -
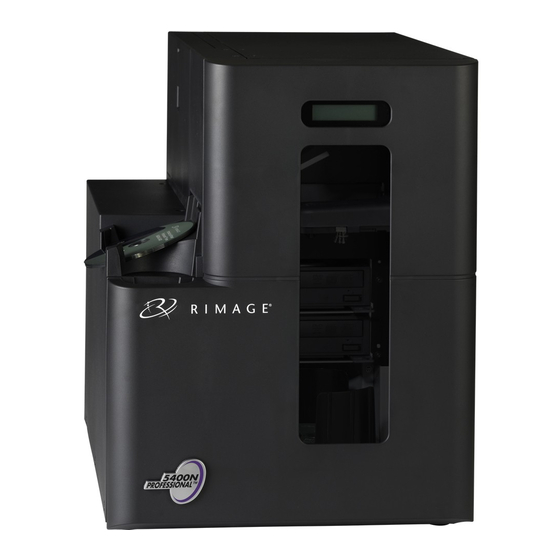
Page 15: Identify The Parts Of The Professional 3400 And 5400N
Identify the Parts of the Professional 3400 and 5400N This section describes the hardware and features of the 3400 and 5400N systems. Front View Control Panel Operator Panel Front Door Integrated Everest 400 Printer Disc Dispenser Printer Door Output Bin... -
Page 16: Back View
Rimage Professional 3400 and 5400N User Guide Back View 3400 Power Switch USB Cable Power Cord 5400N Power Switch Network Cable Power Cord 2001431_B... -
Page 17: Parts Information
PC Power Button Only the 5400N has the PC power button. The PC power button powers on the embedded computer. Refer to the Operate the Professional 3400 and 5400N section on page 19 for more information. Disc Dispenser When a disc is complete, the lift arm places discs on the disc dispenser. The disc dispenser moves completed discs to the output bin on the left side of the autoloader. - Page 18 Rimage Professional 3400 and 5400N User Guide 2001431_B...
-
Page 19: Operate The Professional 3400 And 5400N System
Operate the Professional 3400 and 5400N System This section provides the information needed to operate your system. Power On the System 1. Press the power switch on the rear of the autoloader. The system powers on, including the integrated printer. -
Page 20: Pause The System
Rimage Professional 3400 and 5400N User Guide Pause the System You can pause the system to add discs to the carousel. 1. Open the front door. The operation pauses. 2. Close the front door. The operation resumes. Load the Discs You can load up to 50 discs in each input bin. -
Page 21: Place A Disc On The Printer Tray
Place a Disc on the Printer Tray Use this procedure to manually place a disc on the printer tray. Press the printer tray button on the control panel. The printer tray opens. Place the disc on the print pad with the printable surface facing up and the stacking ring facing the print pad. - Page 22 Rimage Professional 3400 and 5400N User Guide 2001431_B...
-
Page 23: Set Your Printing Preferences On A Windows Pc
3. From the dropdown menu, select Properties. The Rimage Everest 400 Properties dialog box opens. 4. From the Rimage Everest 400 Properties dialog box, select the Advanced tab. 5. At the bottom of the Advanced tab, select Printing Defaults… The Rimage Everest 400 Printing Defaults dialog box opens. -
Page 24: Set The Media Type, Media Size, Orientation And Ribbon Type
Note: If you select Monochrome for the ribbon type, select Grayscale or Text. When you have made the desired choices in the Rimage Everest 400 Printing Preferences window, select Apply. Select OK to close the Rimage Everest 400 Printing Preferences window. -
Page 25: Adjust The Print Alignment And Color Density
Select OK to save the changes. The Printable Area Settings window closes. 4. When you have made the desired choices in the Rimage Everest 400 Printing Preferences window, select Apply. 5. Select OK to close the Rimage Everest 400 Printing Preferences window. Adjust the Print Alignment and Color Density. - Page 26 Rimage Professional 3400 and 5400N User Guide 2001431_B...
-
Page 27: Change The Print And Retransfer Ribbons
Allow more time for greater temperature and humidity differences. Important! • Rimage supports only the use of Rimage brand ribbons in our printers. Printer issues that occur as a result of using ribbons from manufacturers other than Rimage are not included under your Rimage warranty or maintenance agreement. - Page 28 Rimage Professional 3400 and 5400N User Guide Lay the print ribbon carrier on its back. Tip: Perform cleaning procedures while the print ribbon is removed. For more information refer to the Clean the Everest 400 Printer section on page 37.
-
Page 29: Install The Print Ribbon
Install the Print Ribbon 1. Remove the new print ribbon from the packaging. 2. Install the print ribbon on the print ribbon carrier. Important! When you install the new print ribbon on the carrier, do not rotate the ribbon past the black cleaning bars. -
Page 30: Change The Retransfer Ribbon
Allow more time for greater temperature and humidity differences. Important! • Rimage supports only the use of Rimage brand ribbons in our printers. Printer issues that occur as a result of using ribbons by manufacturers other than Rimage are not included under your Rimage warranty or maintenance agreement. -
Page 31: Remove The Retransfer Ribbon
Remove the Retransfer Ribbon Printer Cover 1. Open the printer cover. Latch Lift the cover latch to release the cover. b. Lower the printer cover. Printer Cover Left Side of Autoloader Retransfer Ribbon Carrier Turn the center latch counterclockwise to unlock it. d. -
Page 32: Install The Retransfer Ribbon
Rimage Professional 3400 and 5400N User Guide Lift up on the supply roll to remove it from the left side Used Supply Roll of the carrier. d. Set the supply roll aside. e. Lift the retransfer ribbon carrier off of the used retransfer ribbon and set it aside. - Page 33 Bring the supply roll up and around the guide rollers on the left side of the Supply Roll carrier. d. Press down to install the supply roll, as shown. Note: Make sure that the retransfer ribbon winds underneath the supply roll. Guide Rollers 4.
- Page 34 Rimage Professional 3400 and 5400N User Guide 2001431_B...
-
Page 35: Maintain The 3400 And 5400N
Maintain the 3400 and 5400N This section provides maintenance information for the 3400 and 5400N systems, including the integrated Everest 400 printer. Important! For optimum performance, keep the 3400 and 5400N in a clean, dust-free environment. Overview Regular preventative maintenance of your system can help to ensure error-free recordings and clean printed labels. Maintenance also involves cleaning the system. -
Page 36: Preventative Maintenance Schedule
Rimage Professional 3400 and 5400N User Guide Preventative Maintenance Schedule Task Tools Frequency Autoloader Maintenance Wipe down the lift arm shaft and pay close attention to: Lint-free cloth Weekly • The area around the base of the shaft • The area just above the lift arm Wipe down all surfaces of the autoloader, including: •... -
Page 37: Clean The Everest 400 Printer
Clean the Everest 400 Printer Regular cleaning helps to keep your Everest 400 printer in optimal operating condition. Clean the Print Head Tools required: • Sponge swabs with long handles (included in the Everest cleaning kit) • 99% Isopropyl alcohol 1. -
Page 38: Clean The Tacky Rollers
Rimage Professional 3400 and 5400N User Guide 3. Prepare the printer for use. Install the print ribbon carrier. b. Turn the center latch clockwise to lock it. Close the printer cover. The system is ready for use. Clean the Tacky Rollers Tools required: •... - Page 39 4. Inside the printer, use the sponge swab to wipe tacky roller 2. Tacky Roller 2 5. Prepare the printer for use. Install the print ribbon on the print ribbon carrier. For specific instructions, refer to the Change the Print Ribbon procedure on page 27.
- Page 40 Rimage Professional 3400 and 5400N User Guide 2001431_B...
-
Page 41: Operate Gemini Utilities
Operate Gemini Utilities The Rimage software includes an application called Gemini Utilities, which is used to change the display name of the system and to enable the beeper. Gemini Utilities is only available on the Professional 5400N and the Professional 3400 running Rimage Network Software Suite.
Need help?
Do you have a question about the Professional 3400 and is the answer not in the manual?
Questions and answers