OWC Mercury Elite Pro Assembly Manual
External usb3.0 |firewire 800/400 | esata hard drive
Hide thumbs
Also See for Mercury Elite Pro:
- User manual ,
- Assembly manual (24 pages) ,
- Assembly manual & user manual (16 pages)
Table of Contents
Advertisement
Quick Links
Advertisement
Table of Contents

Related Manuals for OWC Mercury Elite Pro


Summary of Contents for OWC Mercury Elite Pro
- Page 1 OWC Mercury Elite Pro Assembly Manual...
- Page 2 This page left blank intentionally...
-
Page 3: Table Of Contents
OWC Mercury Elite Pro Table of Contents 1 INTRODUCTION 1.1 SYSTEM REQUIREMENTS 1.1.1 Mac Requirements 1.1.2 PC Requirements 1.1.3 Supported Hard Drives 1.2 PACKAGE CONTENTS 1.3 ABOUT THIS MANUAL 1.4 PORT VIEW & CABLE CONNECTIONS 1.5 DETAILED VIEW 1.5.1 LED Indicator 2 SYSTEM SETUP 2.1 HARD DRIVE ASSEMBLY... -
Page 4: Introduction
(when used with auxiliary bracket, not incuded) 1.2 Package Contents Item ➀ ➂ ➀ Power Supply ➁ Power Cable ➃ ➂ OWC Mercury Elite Pro ➁ ➃ Vertical Stand ➄ ➄ USB 2.0 (A-B) cable ➅ FireWire 400 (1394A) Cable ➅ ➆... -
Page 5: Port View & Cable Connections
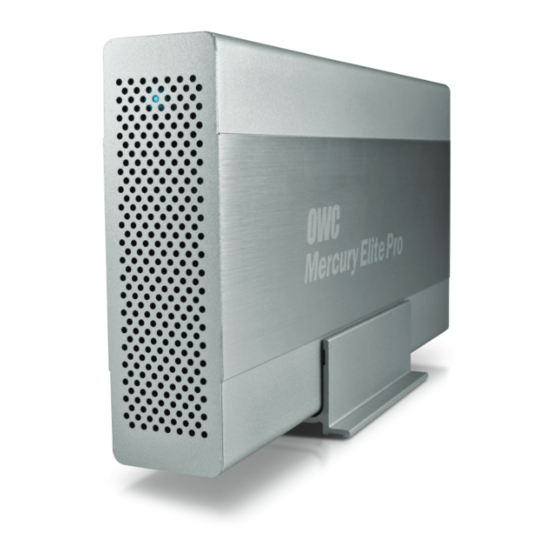
1.5 Detailed View 1.5.1 LED Indicator The OWC Mercury Elite Pro has a single cool blue LED at the front of the hard drive enclosure. It will illuminate blue when powered on, and flash on drive activity (both reading and writing). -
Page 6: System Setup
2 SYSTEM SETUP This guide will get you up and running quickly, demonstrating how to install your own 3.5” drive into the OWC Mercury Elite Pro enclosure. Your computer is a static-sensitive device. It is susceptible to invisible damage if not protected during installation. -
Page 7: Hard Drive Assembly
2.1 Hard Drive Assembly & Installation ➀ On the bottom of the OWC Mercury Elite Pro enclosure you will find 2 Phillips screws. Remove those two screws and the drive compartment will slide out towards the front of the enclosure. Remove the outer shell to proceed with drive installation. - Page 8 OWC Mercury Elite Pro Chapter 2 - System Setup 2 SYSTEM SETUP 2.1 Hard Drive Assembly & Installation (continued ➂ Place your drive mechanism into the chassis and onto the bridge card, and press the drive towards the ports to firmly affix the drive into the SATA connector.
- Page 9 2.2 Computer Connections The OWC Mercury Elite Pro requires external power to operate. Insert the power adapter into a wall outlet and plug it in to the back of the OWC Mercury Elite Pro. To use the OWC Mercury Elite Pro, connect any interface cable to the drive and the computer.
-
Page 10: Desktop Use Options
2 SYSTEM SETUP 2.3 Desktop Use Options The OWC Mercury Elite Pro includes a vertical stand and also rubber feet for those who wish to stack multiple drives on top of each other. For those that do not want adhesive rubber feet or prefer a more elegant solution, a horizontal desk stand has been designed and is available at: http://eshop.macsales.com/item/Other%20World%20Computing/MEP1STAND/... -
Page 11: Formatting
Click on the “Initialize” button. (If this does not appear, open Disk Utility located in /Applications/Utilities) ➁ Select the device with no volumes attached to it; in this picture, that would be the 320.07 GB OWC device. Click on the picture of the drive icon next to the text. - Page 12 OWC Mercury Elite Pro Chapter 3 - Formatting ➂ Once you’ve selected the OWC device, you will notice the above change in the Disk Utility application. Click on the “Erase” tab in this picture. ➃ You then need to name the volume that you want to format, and erase it.
- Page 13 Click the erase button to confirm you wish to erase the disk. ➅ After a few moments, the erase command will complete and the OWC Mercury Elite Pro volume will mount on your desktop. You can quit Disk Utility, you’re all set!
- Page 14 OWC Mercury Elite Pro Chapter 3 - Formatting 3.2 Removing the GUID Partition Scheme Only for XP, 2000, ME and earlier. (XP 64-BIT, Vista & Windows 7 can continue to the next section) If you are not installing a brand-new hard drive into your enclosure, it may have a GUID drive partition already installed on it, especially if it was originally used with a Macintosh.
- Page 15 Instructions for other operating systems can be found at http://www.macsales.com/format. IMPORTANT NOTE: This procedure will erase all data on your hard disk drives in the OWC Mercury Elite Pro. Back up any important data before proceeding! With the drive connected to the computer ➀...
- Page 16 OWC Mercury Elite Pro Chapter 3 - Formatting Your drive will ➃ appear similar to how Disk 1 does below. Notice that the space on the lower right reads as “Unallocated.” Right click in this space and choose “New Partition.”...
- Page 17 OWC Mercury Elite Pro Chapter 3 - Formatting If you like, you can specify ➇ the drive letter designation for your new drive. Otherwise, one will automatically be assigned. Click “Next. ” Before you can use ➈ the drive, it must be formatted.
- Page 18 OWC Mercury Elite Pro Chapter 3 - Formatting Once you ➀➀ have finished with the formatting wizard, you will see that your new drive (represented as “Disk E” in this case) will display a message of “Formatting. ” This should only take...
- Page 19 OWC Mercury Elite Pro Chapter 3 - Formatting At this point, you may close the Computer Management win- ➀➂ dow. Your drive is ready to use and can be found in “My Computer. ” Using your new Storage Solution on both Macs and PCs? MacDrive™...
-
Page 20: Troubleshooting & Tips
USB connection and see if the device works properly. If these suggestions do not work, try the OWC Mercury Elite-A Pro mini on a different computer, if available to you. 4.2 Tips To properly dismount any connected hard drives from your computer, you need to follow a few simple steps. -
Page 21: Appendix
OWC Mercury Elite Pro, and a second copy on either your internal hard drive or another storage medium, such as an optical backup, or on a sec- ond external hard drive. -
Page 22: Customer Service
OWC Mercury Elite Pro Chapter 6 - Customer Service 6 CUSTOMER SERVICE 6.1 Before Contacting Customer Service •Read this manual and review Chapter 4: Troubleshooting & Tips. •Try to confirm the problem is with the hard drive. If you have a second computer, move the enclosure to that system and verify that the solution does not function with that machine. - Page 23 This page left blank intentionally...
- Page 24 Copyrights: Copyright © 2009-11 Other World Computing, Inc. All rights reserved. No part of this publication may be reproduced, stored in a retrieval system, or transmitted in any form or by any means, electronic, mechanical, photocopying, recording or otherwise, without the prior written consent of Other World Computing. Changes: The material in this document is for information only and subject to change without notice.
Need help?
Do you have a question about the Mercury Elite Pro and is the answer not in the manual?
Questions and answers