Table of Contents
Advertisement
Advertisement
Table of Contents

Subscribe to Our Youtube Channel
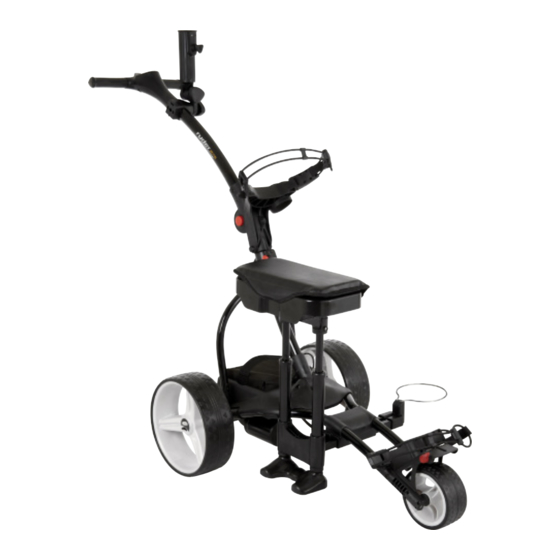
Summary of Contents for MGI Ryder R75
- Page 1 Instruction/Service Manual...
-
Page 2: Table Of Contents
6. Warranty Exclusions 7. Parts Installed During Warranty 8. Preventative Maintenance Program 9. Cleaning Your Buggy 10. Rear Wheel Axles 11. Clutches 12. Upper & Lower Bag Straps 13. Correcting the Alignment of Your Buggy 14. MGI Service Schedule 15. Service Record... - Page 3 INDEX INSTRUCTION MANUAL PAGE 1. Most Important points to read prior to using your buggy 2. Charging and care of the Battery 3. Fitting the Battery 4. Battery Lead Fuse 5. Fail Safe Connection 6. Attaching / Removing Wheels 7. Free Wheeling Gear System 8.
-
Page 4: Maintenance / Service Manual Page
5. Warranty Policy Ryder R75 is covered for a period of 24 months from date of the purchase, MGI or an authorised service centre or person will repair or replace free of charge any parts found to be defective in materials or workmanship under normal use provided that: 1. -
Page 5: Warranty Exclusions
To properly maintain the warranty of your MGI motorised buggy, it is essential that this work is carried out. If the work carried out by the authorised service centre is to replace parts that are part of the maintenance schedule, the owner will be charged for the parts and labour. -
Page 6: Clutches
11. Clutches [See Maintenance Schedule] The rear wheel clutches located in the wheel, need to be checked to confirm they function correctly and should be replaced as per the Service Schedule. Try and turn the Right Hand clutch/wheel in an anti clock wise direction – if you cannot it is functioning correctly. -
Page 7: Mgi Service Schedule
It is the owner’s responsibility to ensure that all periodical checks, necessary adjustments and services are carried out. If in doubt please contact the MGI service centre on 1300 644 523. Any work performed on your buggy should be recorded on your service record (see page 5) regardless of the work. -
Page 8: Service Record
The tools to tighten all nuts and bolts are provided with your maintenance / service and instruction manual. As part of MGI’s Preventative Maintenance Program, if the six monthly services are carried out by an authorised service centre, you will be charged for that service. -
Page 9: Instruction Manual Page
- Assemble the buggy placing the rear wheels on their correct side [see page 8] 2. Charging and care of the battery The Ryder R75 is designed to take either the standard SLA 21/28 amp/hr battery OR MGI’s Lithium Ion 12 volt battery. The charger should be matched with its respective battery by ensuring the same coloured connector is on the battery. -
Page 10: Fitting The Battery
LED Indicator -The Red LED illuminates to indicate the charger is power on. -The Yellow LED indicates the battery is charging. -The LED will turn Green when the battery is fully charged. -The LED will flash Green when the battery is on float charge. -The 12v SLA charger will power off automatically after being on float charge for three hours. -
Page 11: Fail Safe Connection
If it is properly in position it will not move. 7. Free wheeling The Ryder R75 buggy uses a free wheeling gear system. This means that drive will only occur when the speed control is turned on. If for some reason your buggy stops operating during your golf round, your buggy can free wheel by pushing the buggy forward. -
Page 12: Folding / Unfolding The Buggy
[Diagram 4] MOST IMPORTANT: DEPRESS THE SEAT WITH YOUR HAND BEFORE SITTING. DO NOT USE THE SEAT ON UNEVEN SURFACES. *MGI does not warrant any seat support brackets that are damaged or bent. -
Page 13: Fitting Your Golf Bag
9. Fitting your Golf Bag Securing the top bag strap 1. Provide a good position for the positioning of both ends of the elasticised straps 2. Stretch the longer end of the strap and secure to the extended shorter end 3. -
Page 14: Frequently Asked Questions
Question: Is it important to register my purchase for warranty purposes? Answer: You must register your purchase as soon as possible with MGI. You can register on line www.mgi-golf.com. The serial number for your buggy is located underneath the top handle scorecard compartment. -
Page 15: Further Information
In the Melbourne, Sydney and Queensland metro areas, there are mobile service vans that attend most golf courses and retailers. MGI invests large amounts of capital into advancing the mechanical and electronic features of its range of buggies. Should you have any feedback or suggestion, which would further enhance the performance of our buggies, we would welcome your correspondence. -
Page 16: Troubleshooting Guide
14.Troubleshooting guide (ensure battery is connected before going through this process) TOP BOX RH LED REPLACE BATTERY MOTOR CONTROLLER LED No.1 LOOSE CONNECTIONS TOP BOX RH LED REPLACE TOP BOX MOTOR CONTROLLER LED NO.1 TOP BOX RH LED SPEED CONTROL REPLACE TOP BOX TOP BOX LH LED TOP BOX RH LED...


Need help?
Do you have a question about the Ryder R75 and is the answer not in the manual?
Questions and answers
Wiring of potentiomer. There are five wires - which three control potentiometer?