
Related Manuals for Jensen VM9114


Summary of Contents for Jensen VM9114
-
Page 1: Operating Instructions
VM9114 Operating Instructions CLOSE VM9114 TILT WIDE 160 Watts A / V INPUT watts peak 40W x 4... -
Page 3: Table Of Contents
VM9114 CONTENTS Thank you for choosing a Jensen product. We hope you will find the instructions in this owner’s manual clear and easy to follow. If you take a few minutes to look through it, you’ll learn how to use all the features of your new Jensen VM9114 Mobile Multimedia Receiver for maximum enjoyment. - Page 4 VM9114...
-
Page 5: Features
VM9114 FEATURES Congratulations on your purchase of the Jensen VM9114 Mobile Multimedia Receiver. It’s a good idea to read all of the instructions before beginning the installation. We recommend having your Jensen VM9114 installed by a reputable installation shop. •... - Page 6 VM9114 • Rotary Encoder Audio Control WARNING! Never install this unit where operation and viewing could interfere with safe driving conditions. WARNING! To reduce the risk of a traffic accident (except when using for rear view video camera) never use the video display function while driving the vehicle.
-
Page 7: Controls And Indicators
VM9114 CONTROLS AND INDICATORS 1. CLOSE/OPEN Press to activate the automatic mechanical system and move the TFT monitor into viewing position. Press again to close the TFT. 2. PIC/BAND Press to adjust the Brightness and Contrast (see “Image/Display Settings” on page 6). - Page 8 VM9114 Press and hold to activate the LOC feature. Repeat to deactivate. 12. RESET Press to reset system settings to factory default (except the password and parental lock setting). 13. A/V Input Attach a compatible A/V device. CLOSE WIDE TILT...
-
Page 9: Using The Tft Monitor
VM9114 USING THE TFT MONITOR Open/Close TFT Monitor Open TFT Monitor Press the OPEN button (1) on the front panel to activate the mechanism that moves the display panel into the viewing position. Close TFT Monitor Press the OPEN button (1) on the front panel to load the display panel back into the compartment. -
Page 10: Aspect Ratio
4 to 3 ratio of horizontal to vertical, leaving a blank area on the right and left sides of the display. STANDBY Screen becomes black. Touch screen to resume. Video Output Modes RGB Mode RGB Mode CVBS Mode VM9114... - Page 11 VM9114 3. Press the PIC button on the monitor (2) 1-3 times to exit the picture adjustment menu. Parking Brake Inhibit When the pink "Parking" wire is connected to the vehicle Parking Brake circuit, the front TFT monitor will display video when the Parking Brake is engaged.
-
Page 12: Operating Instructions
VM9114 OPERATING INSTRUCTIONS Power On / Off Press the /SRC button (10) on the unit to turn the unit on. You can also turn on the unit by pressing the OPEN button (1) and opening the TFT screen. Press and hold the button to power off the unit.The monitor is drawn back... -
Page 13: Volume Adjustment
VM9114 External Devices External peripheral devices, including a game console, camcorder, navigation unit, iPod, Zune, etc. can be connected to this unit via RCA output using an A/V Media Adapter Cable (not included). Connect the external device to the A/V Media Adapter Cable and then plug the cable into the A/V INPUT connector (13) on the front of the radio. -
Page 14: System Reset
(When the pink wire is grounded via the Parking Brake circuit, video will be displayed.) Table 3: Audio Adjustments Adjustable Range User Acoustic Urban Rave Latin Dance Hip Hop Rock -14 to +14 -14 to +14 -14 to +14 Grid Grid VM9114 [RESET] Button... -
Page 15: Setup Menu
VM9114 SETUP MENU To access system settings, touch the “SETUP” menu. The “GENERAL” sub-menu appears highlighted in blue. RADIO Rating Hardware P.VOL TS Cal DEMO Accessing Menu Items Touch the sub-menu name to select a sub-menu (Language, Audio, RDS, etc.). The features available for adjustment under the highlighted sub-menu option will appear in the center of the screen. - Page 16 • FM Frequency Band - 87.5MHz~108.0MHz • AM Frequency Spacing - 9kHz • AM Frequency Band - 531kHz~1602kHz • FM Frequency Spacing - 200kHz • FM Frequency Band - 88.1MHz~107.9MHz No beep sounds When turned on, an audible beep tone confirms each function selection. VM9114...
- Page 17 VM9114 supported by the DVD, then the default language is used. Setting Options Language English On Screen Display appears in English. Subtitle English DVD subtitles automatically appear in English when avail- able. Auto DVD subtitles appear according to the default subtitle lan- guage specified on the disc.
- Page 18 Aux In source). If the monitor is in display mode, the monitor automatically switches to CAMERA mode upon reverse driving. When the reverse driving stops, the monitor return to its original input mode. Function VM9114...
- Page 19 VM9114 P.VOL Sub-menu Features Setting Options Source RADIO Choose a source for which you would like to increase the rel- ative volume (LEVEL). DISC USB1 Level Increase relative volume for specified source up to 6 deci- bels. TS Cal (Screen Calibration) To access the “Screen Calibration”...
-
Page 20: Tuner Operation
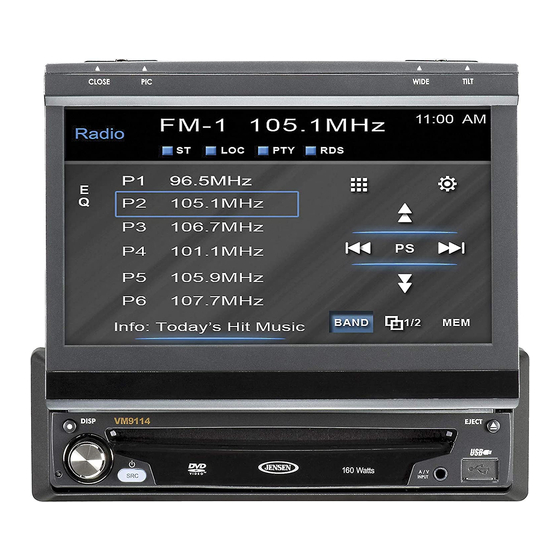
18. MEM: View screen used to enter current channel into preset memory : Touch to view the SETUP menu 20. PS (Preview Scan): Touch to scan all stations available, stopping for 5 seconds at each and continuing until a station is selected FM-1 P1 87.5 MHz BAND VM9114 01:02 PM... -
Page 21: Manual Tuning
VM9114 Switching to Radio Tuner Source • Touch the top left corner of the screen to view the SOURCE MENU. Touch “Radio”. • Press the SRC button (10) on the front panel or remote control (8) to switch to the AM/FM or RADIO source. - Page 22 To scan the AM or FM band for a preview of available stations in your particular area, touch the PS button (20). Touch again to stop preview scan. Preset: _ E x i t P1 87.5 MHz P2 90.1 MHz P3 98.1 MHz P4 106.1MHz P5 107.9MHz P6 102.9MHz VM9114...
- Page 23 VM9114 Local Radio Station Seeking (LOC) When the Local function is on, only radio stations with a strong local radio signal are played. To activate the Local function in AM/FM tuner mode, press and hold the rotary encoder (11). When the Local function is active, the LOC...
-
Page 24: Dvd/Vcd Video Operation
VM9114 DVD/VCD VIDEO OPERATION NOTE: When properly installed, DVD video cannot be displayed on the main TFT screen unless the parking brake is applied. If you attempt to play a DVD while the vehicle is moving, the TFT screen display a parking brake notice. - Page 25 VM9114 Controlling Playback To access the on-screen controls, touch the bottom 1/3 of the screen while a DVD is playing. Touch the 1/2 button to view a second page of controls AUDIO SUB- TITLE MENU TITLE DISP Stopping Playback Touch the stop button ( ) on the screen to stop DVD play.
- Page 26 Enter the desired chapter/track using the on-screen number pad. Touch the Enter button to tune to the selected station. To exit the screen without changing the station, touch Exit. To clear your entry and start over, touch Clear. Chapter: _ _ Exit Enter Clear VM9114 button to display the...
- Page 27 VM9114 Viewing an Alternate Picture Angle (DVD Only) Some DVDs contain scenes that have been shot simultaneously from different angles. For discs recorded with multiple angles, touch the second page of DVD on-screen controls to toggle available angles of the on- screen image.
- Page 28 Aspect ratios available. “LB” stands for Letter Box and “PS” stands for Pan/Scan. In the example on the left, the 16:9 video can be converted to Letter Box video. Table 4: Disc Properties Table 5: Disc Symbols Meaning VM9114 Max Play Time (MPEG 2 Method) 133 minutes 242 minutes 266 minutes...
- Page 29 VM9114 Symbol Indicates the region code where the disc can be played. • Region 1: USA, Canada, East Pacific Ocean Islands • Region 2: Japan, Western Europe, Northern Europe, Egypt, South Africa, Middle East • Region 3: Taiwan, Hong Kong, South Korea, Thailand, Indonesia, South-East Asia •...
-
Page 30: Dvd/Cd Audio Operation
Instructions for TFT control and Insert/Eject are the same for DVD and CD operation. Please see the DVD/Disc Video Operation section for information about these topics. The VM9114 will play music or other audio files from the following disc media: • CD-DA •... - Page 31 VM9114 : Touch to rewind current track : Touch to activate/deactivate Repeat play mode : Touch to activate/deactivate Random mode : Touch to access the direct entry screen : Touch to view the SETUP menu 16. EQ: Touch for quick access to Equalizer level settings 17.
- Page 32 Enter the desired track using the on-screen number pad. Press the Enter button to tune to the selected station. To exit the screen without changing the station, touch Exit. To clear your entry and start over, touch Clear. button to display the direct Chapter: _ _ Exit Enter Clear VM9114...
-
Page 33: Mp3/Wma Operation
VM9114 MP3/WMA OPERATION Instructions for TFT control and Insert/Eject are the same for DVD and MP3 operation. Please see the DVD/Disc Video Operation section for information about these topics. Media and File Requirements This player allows you to play back MP3 and WMA files recorded onto CD-R/ RWs, DVD+R/RWs, and DVD-R/RWs. - Page 34 For example, a medium with the following folder/file hierarchy is subject to Folder Search, File Search or Folder Select, as shown below. The VM9114 player will only recognize three folder levels and does not display folders containing only other folders. In the example above, the unit will display folders 3, 4, 6, and 8, but not 2 and 7 since they do not contain any tracks directly.
- Page 35 VM9114 To remove the USB device, press the SRC button (10) or use the SOURCE MENU to switch to another mode, and then remove the USB device from the connector. MP3 User Interface The on-screen indicators and touch key areas for MP3 playback are outlined below.
- Page 36 Repeat Playback Touch the button to alter repeat mode according to the following: Repeat Single, Folder Repeat, Repeat Off. NOTE: CD-R and CD-RW will not play unless the recording session is finalized. VM9114...
- Page 37 VM9114 Direct Track Entry Touch the button to access files directly (see “Direct Track Entry” on page 28).
-
Page 38: Troubleshooting
Connect proper speakers Check speaker contact Check wiring and correct Turn TFT Auto Open on Check wiring and correct Stop vehicle in safe place and apply parking brake Change setup to accommodate disc Check wiring and correct VM9114 Corrective Action... - Page 39 VM9114 Problem Prolonged Improper aspect ratio image or setup improper height/width ratio display Monitor stops Moving path is blocked at incorrect position TUNER Weak station Auto antenna is not fully searching extended Auto antenna not properly connected LOCAL function is acti-...
-
Page 40: Error Messages
Cause Clean disc with soft cloth Insert disc with label side up Insert disc Clean disc with soft cloth Insert disc with label side up Press EJECT key for 5 seconds to reset loading mechanism VM9114 Corrective Action Corrective Action... - Page 41 VM9114 6. The CD player may not operate properly in extreme hot or cold. If such conditions occur, allow the interior of the vehicle to reach a normal temperature before using player. 7. When the vehicle warms up during cold weather or under damp conditions, condensation may appear on the TFT panel.
-
Page 42: Specifications
VM9114 SPECIFICATIONS DVD/CD Player Compatible Disc Media: DVD + R / RW (Single and Dual Layer) and CD-R / Compatible Media Formats: CD-DA, MP3, WMA, VCD, SVCD, Xvid, AVI, MPEG 1/2 Signal to Noise Ratio: >95dBA Dynamic Range: >95dB Frequency Response: 20Hz to 20 kHz, -3dB Channel Separation: >... - Page 43 VM9114 Amplifier Remote (Blue/White): 500mA max, current limited protection Operating Temperature: -20C ~ 65C Fuse: 15-amp, mini ATM type DIN chassis dimensions: 7" X 7" X 2" (178mm x 178mm x 50mm) CEA Power Ratings Power Output: 13 Watts RMS x 4 channels into 4-Ohms @ <...
- Page 44 VM9114...
- Page 45 Audiovox Electronics Corporation Hauppauge, NY 11788 Technical Assistance: 1-800-323-4815 www.jensen.com © 2011 Audiovox Ver. 022511 Printed in China...