
Related Manuals for Jensen VM9022HDN


Summary of Contents for Jensen VM9022HDN
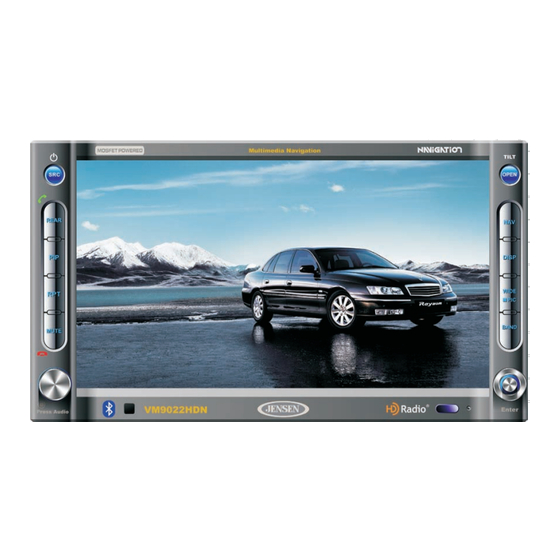
- Page 1 VM9022HDN Installation and Operation Manual video Watts Peak 60w x 4 | 40w x 1...
-
Page 3: Table Of Contents
CONTENTS Thank you for choosing a Jensen product. We hope you will find the instructions in this owner’s manual clear and easy to follow. If you take a few minutes to look through it, you’ll learn how to use all the features of your new Jensen VM9022HDN Mobile Multimedia Receiver for maximum enjoyment. -
Page 5: Vm9022Hdn
Congratulations on your purchase of the Jensen VM9022HDN Mobile Multimedia Receiver. It’s a good idea to read all of the instructions before beginning the installation. We recommend having your Jensen VM9022HDN installed by a reputable installation shop. Features • Aspect Ratio – Cinema and Normal •... -
Page 6: Disconnecting The Battery
To prevent a short circuit, be sure to turn off the ignition and remove the negative (-) battery cable prior to installation. NOTE: If the VM9022HDN is to be installed in a car equipped with an on-board drive, do not disconnect the battery cable. - Page 7 VM9022HDN WIRING DIAGRAM GPS Antenna Cell Phone Cell Phone BATTERY MediaLink Cable / BLACK External MZ7-TFT Touch A/V System Screen (Sold Separately) MZ7-TFT CAMERA Steering Wheel Control (SWC) requires PAC SWI-PS Interface Adapter, Sold Separately * Satellite Receiver Connections Auto Antenna...
- Page 8 MODULE CONNECTIONS Compatible SAT Tuners: 1. XMD1000 (requires XMC or XMDJEN100 Cable Kit) 2. CNP2000UC Requires Gen 5.5 or earlier photo or video iPod. iPhone, iPod Touch, iPod Classic and iPod Nano with video will only play music files. VM9022HDN...
-
Page 9: Installation
VM9022HDN INSTALLATION ISO DIN Installation This unit is designed to fit into a 2.0 DIN dashboard opening, found in many imported cars. The unit has threaded holes in the chassis side panels which may be used with the original factory mounting brackets of some Toyota, Nissan, Mitsubishi, Isuzu, Hyundai and Honda vehicles to mount the radio to the dashboard. - Page 10 VM9022HDN without removing the radio. To install the MediaLink, connect it to the AUX-IN cables on the back of the VM9022HDN (see the Wiring Diagram on page 3), and then install the MediaLink in a location convenient for plugging in auxiliary devices.
-
Page 11: Anti-Theft Feature
VM9022HDN ANTI-THEFT FEATURE The VM9022HDN is equipped with an anti-theft feature requiring the user to enter a password upon initial power on. Enter Password: Entering the Default Password The default user password is 012345 (6 digits). Enter the password using the on-screen keypad and then press the Enter (arrow) button. -
Page 12: Controls And Indicators
Press to silence the receiver. Press again to resume the previous volume level. BT Mode: Answer/dial Bluetooth call. NOTE: The VM9022HDN features Softmute, which will allow the volume to increase or decrease gradually when the MUTE function is activated or deactivated. - Page 13 Press to activate the Picture In Picture function. 21. SD Card Slot Insert SD card for playback of audio files. 22. Disc Slot 23. Disc Loaded Indicator 24. NAV/MAP SD Card Slot Insert Jensen Navigation Map Data 2GB SD card (included).
-
Page 14: Remote Control
REMOTE CONTROL The VM9022HDN Remote controls both the front and rear zones. To switch from front to rear zone, move the F/R switch (32) located on the right side of the controller. NOTE: Your remote control may differ slightly from the one pictured here. - Page 15 VM9022HDN Button Name Ref# MENU Enters the main menu of the Turns on/off PBC when play- disc ing VCD TITLE Enters the title menu of the Plays first ten seconds of each disc chapter/title MUTE Toggles on/off audio output Toggles on/off audio output...
- Page 16 R controls rear zone R controls rear zone Plays all tracks in random order Preview scan Plays the first ten seconds of each track Ejects disc Ejects disc VM9022HDN SATELLITE iPod Selects SAT1, SAT2 or SAT3 band. Displays Brightness/Contrast Displays Brightness/Contrast Controls Controls...
-
Page 17: Using The Tft Monitor
VM9022HDN USING THE TFT MONITOR Open/Close TFT Monitor Open TFT Monitor Press the OPEN button (1) on the front panel or press the ) button (25) on the remote control to slide the monitor panel down to reveal the disc and SD card slots. -
Page 18: Operating Instructions
If the “MUTE” wire is connected, audio output mutes when a telephone call is received by a cell phone. Steering Wheel Control (SWC) The VM9022HDN is compatible with the PAC (Pacific Accessory Corporation) steering wheel control adapter SWI- PS. A 3.5mm female connector (labeled “SWC Interface”) on the back of the head unit allows connectivity to the PAC adapter. -
Page 19: Audio Control Menu
VM9022HDN This menu allows you to select a source for the front or rear zone. Touch FRONT or REAR to choose the zone for which you would like to specify the source. (See “Multi-ZONE Operation” on page 16.) Audio Control Menu... -
Page 20: Multi-Zone Operation
MULTI-ZONE OPERATION Independent sources can be played simultaneously on the VM9022HDN. For example, a video game console can be seen on the front screen while DVD video is available to rear passengers. DVD and SD Card sources cannot be selected for simultaneous Front / Rear operation. -
Page 21: Setup Menu
VM9022HDN SETUP MENU To access system settings, press the SETUP button (31) on the remote control or touch the button on the screen to enter the “SETUP” menu. The “GENERAL” sub-menu appears highlighted in blue. 02:40 SETUP RADIO RADIO General... - Page 22 TFT monitor is retracted inside the unit, the TFT monitor automatically moves into the viewing position and Camera mode is selected upon shifting into REVERSE gear. When shifting into DRIVE gear, the TFT monitor is retracted back inside unit after ten seconds. VM9022HDN Setting Options Function Camera...
-
Page 23: Exiting The System Setup Menu
VM9022HDN Exiting the System Setup Menu To exit setup mode and resume normal playback, press the SETUP button (31) on the remote control or touch the BACK button on the screen. -
Page 24: Tuner Operation
With multicasting, you can receive up to eight additional multicast channels: HD1~HD8. With your VM9022HDN radio, you will receive HD Radio digital broadcasts automatically when tuned to a station that offers HD Radio technology. -
Page 25: Using Preset Stations
VM9022HDN screen without changing the station, touch Exit. To clear your entry and start over, touch Clear. HD Radio Multicast Channels To tune to an HD Radio multicast channel, tune to the main signal and then press the PROG button (20) on page 2/2 . If a... -
Page 26: Satellite Radio Operation
Recalling a Station Select a band (if needed). Touch an on-screen preset button to select the corresponding stored station. VM9022HDN Direct Tuning To enter a radio station directly, touch the button or press the GOTO button (21) on the remote control to display the direct entry menu. - Page 27 VM9022HDN 01:02 SAT1 CH001 XM Preview Preview ######## 001 XM Preview 004 The 40s 005 The 50s 006 The 60s 007 The 70s DIAG Title: www.xmradio.com • While in Search Mode, to switch between Channel and Category search modes, press the CH or CAT buttons on the touch screen.
-
Page 28: Dvd/Vcd Video Operation
Keep pressing and releasing the button to increase the slow forward rate from “2X” to “4X” and “8X” and then begin slow reverse. VM9022HDN Repeat Playback Press the RPT button (19) on the control panel, the RPT button (7) on the remote control, or the... -
Page 29: Moving Through Chapters
VM9022HDN Press the TITLE button (2) on the remote control or on screen to select a different title for playback. Press the Enter (joystick) button to confirm your selection and begin playback. You can also select a title using the touch screen. -
Page 30: General Disc Information
Region 4: Australia, New Zealand, Middle and South America, South Pacific Ocean Islands/ Oceania • Region 5: Russia, Mongolia, India, Middle Asia, Eastern Europe, North Korea, North Africa, North-West Asia • Region 6: Mainland China • ALL: All regions VM9022HDN... -
Page 31: Dvd/Cd Audio Operation
Instructions for TFT control and Insert/Eject are the same for DVD and CD operation. Please see the DVD/Disc Video Operation section for information about these topics. The VM9022HDN will play music or other audio files from the following disc media/formats: •... -
Page 32: Mp3/Wma Operation
VM9022HDN Loading an SD Card NOTE: The VM9022HDN will support up to 4GB SD Cards. SD Cards larger than this (SDHC Cards) will not be recognized. To Insert an SD card, you must first press the OPEN button (1) on the control panel or the OPEN/CLOSE button on the remote control to reveal the SD card slot (21). - Page 33 VM9022HDN Insert the USB device into the USB connector. The unit will read the audio media files on the USB device automatically. To remove the USB device, press the SRC button (6) to switch to another mode and then remove the USB device from the USB connector.
-
Page 34: Ipod Operation
SUB-TITLE button (9) on the remote control to access the iPod PHOTO mode. The VM9022HDN will release control back to the iPod so you can select video media to be displayed on the TFT monitor. - Page 35 VM9022HDN Direct Track/File Entry To select a track/file directly, touch the button on screen control to display the direct entry menu. TRACK: _ _ / ## Exit Clear Enter the desired track/file using the on-screen number pad. Press the Enter (arrow) button to tune to the selected station.
-
Page 36: Bluetooth Operation
Before attempting to use the Bluetooth functions on the VM9022HDN, please make sure your mobile phone supports Bluetooth functions (Headset or Handsfree profiles or both). Adhere to the following guidelines for successful operation. -
Page 37: Managing Incoming Calls
VM9022HDN is “1234”. See “Bluetooth Sub-menu Features” on page 18 for instructions on entering the pairing code. Select “VM9022HDN” from the pairing list on the mobile phone. • If pairing is successful, the TFT will display the paired mobile phone model number or name (as specified in your phone’s Bluetooth Setup menu). -
Page 38: Bluetooth Setup
Touch the area to the right of “Connect” to select “Auto”. Advanced Audio Distribution Profile (A2DP) The VM9022HDN allows you to play back audio files from your phone, PDA or personal music player using a Bluetooth connection. Before using an audio player, it may be necessary to enter a PIN code into the unit. -
Page 39: Troubleshooting
VM9022HDN TROUBLESHOOTING Problem GENERAL Unit will not power on Radio Fuse blown Car battery fuse blown Illegal operation Remote control does not function Battery depleted Battery installed incorrectly No/low audio output Improper audio output connection Volume set too low Improper “MUTE” connection... -
Page 40: Error Messages
Cause Clean disc with soft cloth Insert disc with label side up Insert disc Clean disc with soft cloth Insert disc with label side up Press EJECT key for 5 seconds to reset loading mechanism VM9022HDN Corrective Action Corrective Action... -
Page 41: Care And Maintenance
VM9022HDN Care and Maintenance Use only a clean silicone cloth and neutral detergent to clean the front panel or monitor. A rough cloth and non- neutral detergent (such as alcohol) may result in scratching or discoloration. Do not get water or cleaning fluids on the unit. -
Page 42: Specifications
22 watts RMS X 1 channels into 4-Ohms @ < 1% THD+N Signal to Noise Ratio: 70dBA below reference (reference: 1 watt, 4-Ohms) Frequency Response: 20Hz to 20 kHz, -3dB Reference Supply Voltage: 14.4VDC *Specifications subject to change without notice. VM9022HDN... -
Page 43: Introduction
Tele Atlas map data. The map data covers the continental US, Canada, Alaska, Hawaii and Puerto Rico. Insert the Jensen 2GB SD card into the NAV/MAP SD slot located behind the front panel and gently press the card in against the spring latch until it stops, then release. The card will "lock"... -
Page 44: Safety Information
While every attempt is made to ensure that the database is accurate, roadways, points of interest, and business and service locations may change over time. • Do not use the VM9022HDN to navigate to a police station, hospital, etc. in an emergency. Call 911 for assistance. VM9022HDN Navigation Module •... -
Page 45: Getting Started
While navigating, other sources may be selected and listened to such as AM-FM Tuner, CD, etc. To select a source, press the SRC button on your Jensen head unit and then select a source from the Front Source Menu. Navigation voice prompts will be heard automatically, although the navigation map cannot be seen. -
Page 46: Main Navigation Features
The map knows two basic states, the Tracking and the Browsing mode. VM9022HDN Navigation Module In Tracking mode, the map follows your actual position (GPS position), displaying information about your geographic position, your speed, etc. -
Page 47: Navigation Screen
VM9022HDN Navigation Module NOTE: Pressing an icon on the map opens an overlay window with information about the selected item. • To zoom in or out, press the + or – icons. After pressing one of the icons, the zoom slider will appear, enabling smooth zooming. -
Page 48: Choosing And Finding Locations
Your navigation module offers a convenient interactive look-ahead search function to prevent misspelling. Only keys that lead to a search result can be pressed – all others are greyed out. VM9022HDN Navigation Module • After entering the second character, only letters that can be used to spell an existing destination will be available for selection of the third character, the fourth character, and so on. - Page 49 VM9022HDN Navigation Module Press the “No.” data field to access the “Enter...” screen. Use the on-screen keypad to enter the street Number. Press the OK button to enter the street Number. If the Number you entered is not an existing street Number, “House number not found. Street will be used for destination.”...
-
Page 50: Navigating To A Recent Location
Point the cursor at any location on the map to view location information in a pop-up box. Press the MENU button to view navigation options for the selected destination. Navigating to a Recent Location From the “Main Menu”, select Drive to... VM9022HDN Navigation Module... -
Page 51: Choosing A Location From Your Address Book
VM9022HDN Navigation Module From the “Drive to...” menu, select Recents. A list of recent locations will appear on the screen: Press to select a recent destination from the “Recents” list. (Use the scroll bar on the right side of the screen to see all of the choices.) A screen with navigation options appears. -
Page 52: Navigating
NAVIGATING The powerful navigation capabilities of your VM9022HDN will guide you along the shortest or quickest route from A to B – with voice commands and in 3D (optional). To begin navigation, select a location using the Drive to... feature (see “Choosing and Finding Locations”... -
Page 53: Planning A Route
VM9022HDN Navigation Module PLANNING A ROUTE This section describes the route planning feature. This feature allows you to plan your route in advance, choosing multiple stopovers along your journey. To begin navigation, select a location using the Drive to... feature (see “Choosing and Finding Locations”... -
Page 54: Managing Your Address Book
If no home address has been set, you are prompted to set one. You can choose it by searching for an address through your current GPS position or by choosing a recently visited location.To VM9022HDN Navigation Module set the initial default address for work or home, press Home or Work and then choose one of the following options: •... - Page 55 VM9022HDN Navigation Module Favorites To access your list of favorites, press the Favorites button. The “Favorites” screen appears: NOTE: Use the scroll bar and arrows on the right side of the screen to move up and down the list and view all entries.
-
Page 56: Settings Menu
Press Language to view the “Language” screen. Press the “USA” (English) icon and then select one of the following voice types for voice commands: English_US female (TTS), US English Female, US English Male VM9022HDN Navigation Module • Press Set Time to select the appropriate time zone from the “Time zone” menu (use the up/down arrows and scroll bar to view the entire list). -
Page 57: Route Settings
VM9022HDN Navigation Module • To select which and how many icons are displayed on the map, press Display POI. • Check the boxes of any category you want to have displayed on the map. Uncheck those that should be hidden. Note that this will NOT affect any searches that you perform. - Page 58 In short, Smart Routing does for you what anyone with perfect local knowledge would do – selects a route that best avoids unpleasant traffic tie-ups. VM9022HDN Navigation Module Volume From the “Settings” menu, select Volume to modify the volume of voice commands.
-
Page 59: Navigation Module Troubleshooting
I can’t find an address Address spelled incorrectly I cannot get a good signal Poor antenna placement The VM9022HDN stops responding Unknown Table 1: Navigation Module Troubleshooting Cause Please make sure you have correctly spelled your entry. If you do not know how an address is spelled, sim- ply enter the parts of the address about which you are certain - e.g. - Page 60 VM9022HDN Navigation Module...
-
Page 61: Limited Warranty
Limited Warranty CD or Multimedia Radios/Headunits Audiovox Electronics Corporation (“the Company”) is committed to quality and customer service, and are pleased to offer you this Warranty. Please read it thoroughly and contact the Company at 1-800- 323-4815 with any questions. Who is covered? The Company extends this warranty to the original retail purchaser of products purchased through an authorized Audiovox retailer in the U.S.A., Puerto Rico or... - Page 62 Audiovox Electronics Corporation Hauppauge, NY 11788 Technical Assistance: 1-800-323-4815 www.jensen.com © 2008 Audiovox Ver. 060108 Printed in China...
- Page 64 Terms of Use. eMusic is a registered trademark of eMusic.com Inc. in the U.S.A. and other countries. iPod is a registered trademark of Apple, Inc. Apple is not a partner, sponsor, or owner of eMusic. Offer also available at www.jensen.com and click on the music download icon. • Burn unlimited CDs •...
Need help?
Do you have a question about the VM9022HDN and is the answer not in the manual?
Questions and answers