Table of Contents
Advertisement
Quick Links
Download this manual
See also:
User Manual
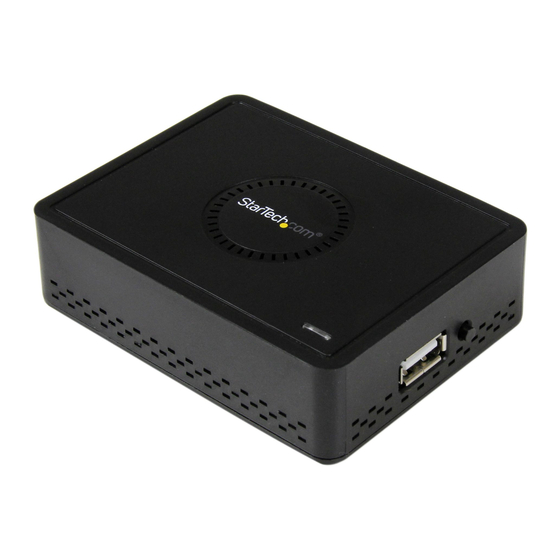
Wireless Display Adapter for Mobile Devices
WIFI2HDMC / WIFI2HDMCGE
*actual product may vary from photos
DE: Bedienungsanleitung - de.startech.com
FR: Guide de l'utilisateur - fr.startech.com
ES: Guía del usuario - es.startech.com
IT: Guida per l'uso - it.startech.com
NL: Gebruiksaanwijzing - nl.startech.com
PT: Guia do usuário - pt.startech.com
For the most up-to-date information, please visit: www.startech.com
Manual Revision: 12/11/2013
Advertisement
Table of Contents

Related Manuals for StarTech.com WIFI2HDMC


Summary of Contents for StarTech.com WIFI2HDMC
- Page 1 DE: Bedienungsanleitung - de.startech.com FR: Guide de l'utilisateur - fr.startech.com ES: Guía del usuario - es.startech.com IT: Guida per l'uso - it.startech.com NL: Gebruiksaanwijzing - nl.startech.com PT: Guia do usuário - pt.startech.com For the most up-to-date information, please visit: www.startech.com Manual Revision: 12/11/2013...
-
Page 2: Fcc Compliance Statement
StarTech.com. Where they occur these references are for illustrative purposes only and do not represent an endorsement of a product or service by StarTech.com, or an endorsement of the product(s) to which this manual applies by the third-party company in question. Regardless of any direct acknowledgement elsewhere in the body of this document, StarTech.com hereby... -
Page 3: Table Of Contents
Table of Contents Product Diagram ..................1 Rear View ..............................1 Side View ..............................1 Introduction ....................2 Packaging Contents ..........................2 System Requirements ..........................2 Preparing Your Site ................2 Initial Setup .....................4 Playing Media from a USB Stick ............6 AirFun Utility ...................7 Installation .............................. - Page 4 Specifications ..................28 Technical Support ..................29 Warranty Information ................29 Instruction Manual...
-
Page 5: Product Diagram
Product Diagram Rear View HDMI Out Power On/Off RJ45 LAN Analog Audio/Video out Jack (For included 4 position A/V cable only) Side View Mode Select Button USB Media Input Instruction Manual... -
Page 6: Introduction
Introduction Packaging Contents • 1x Wireless Display Adapter • 1x Universal Power Adapter (NA/UK/EU) • 1x USB Cable to Power Adapter Port (optional for USB Power source) • 1x 4 position A/V cable • 1x Software Installation Disc • 1x Quick Installation Guide System Requirements •... - Page 7 4. (Optional) If you intend to use the device for Screen sharing over a wired LAN Network, connect an Ethernet cable from the RJ45 LAN port on the Rear of the WIFI2HDMC, to an available LAN port on your local network gateway device (router/hub).
-
Page 8: Initial Setup
Initial Setup Once the WIFI2HDMC device is connected to your TV and powered on, the following screen will show on the display. 1. Connect your Smartphone / Tablet or Notebook to the SSID of the device. By default the SSID for the device is “WIFI2HDMC xxx” with no security key. - Page 9 WIFI2HDMC SSID. Virtual AP Bridge: Select one of the following options. a. Bridge to Wireless – This will bridge the WIFI2HDMC network with your wireless LAN so that you can access the internet or LAN devices through the WIFI2HDMC.
-
Page 10: Playing Media From A Usb Stick
Setup (remote) page using a web browser. 2. Plug your USB stick into the port located on the side of the WIFI2HDMC device. 3. Navigate the USB stick contents using the web remote to choose the video, music or picture file you would like to view. -
Page 11: Airfun Utility
1. Insert the included software CD into the computer’s CD/DVD drive, or download the latest drivers from http://www.starTech.com. 2. Run the Autorun.exe application from the Autoplay menu. If Autoplay is disabled on your system, browse to your CD/DVD drive and run the application. -
Page 12: Operation
5. Follow the on screen instructions to complete the installation(s). Operation Note: AirFun is one example of a utility that functions with the device; WIFI2HDMC is designed to work with any DLNA/UPnP software (e.g. BubbleUPnP, Windows Media Player 11+, etc.). - Page 13 2. Once found, tap the buttons for either Photo/Music Playback or Video Playback and choose the file you wish to view / play. Instruction Manual...
- Page 14 1. Double-click the AirFun icon from your Desktop or Start Menu. 2. The AIRFUN utility will begin to search for the WIFI2HDMC device. If the device is not found before the timeout period, it will display “No device found”. 3. If successfully connected, you should be able to see your PC screen on the TV.
-
Page 15: Screenshare Mode
5. For photo/music files, please drag files to the left folder marked Photo/Music Playback. ScreenShare Mode Installation 1. Insert the included software CD into the computer’s CD/DVD drive. 2. Run the Autorun.exe application from the Autoplay menu. If Autoplay is disabled on your system, browse to your CD/DVD drive and run the application. - Page 16 3. On your Notebook / PC, search and connect to the WIFI2HDMC’s SSID in list if you intend to connect directly to the device. If the device has been pared with your local WIFI/Wired Network, ensure that your computer has been connected to that specific network gateway. (Contact your network administrator for assistance 4.
-
Page 17: Operation
Operation 1. Switch the WIFI2HDMC device into ScreenShare mode by pressing the Mode Select Button twice (located next to the USB connector). 2. The following screen will display on the TV, note the Login Code displayed in the top right corner of the screen. - Page 18 4. Double-click the ScreenShare icon from your Desktop or Start Menu. 5. ScreenShare will auto detect the WIFI2HDMC device, please input login code as noted from instruction page (Step 2), then click OK. 6. If login code is correct, application software will appear.
- Page 19 Name Function Description Start / pause presentation. When pausing a progressing presentation, the displayed image will freeze; press play Play button again to resume. Stop Stop a presentation and go back to the instruction page. Mute Mute volume. Volume up/ Volume up/down.
- Page 20 Panel Control Name Function Description Play Star/Pauses presentation Stop Stop presentation HDMI Resolution Instruction Manual...
-
Page 21: Wifi Direct - Miracast Mode
Web Page Information For more information, please check 3-2 Information. Exit Exit from ScreenShare application and go back to the instruction page. Wifi Direct – Miracast mode NOTE: Exact steps regarding Miracast setup will vary from device to device. Please review the documentation included with your SmartPhone or tablet for steps specific instructions. -
Page 22: Android Wireless Display (Android 4.2 Or Higher)
Android Wireless Display (Android 4.2 or higher) 1. Open the Settings menu. 2. Select Display, then Wireless Display 3. Turn Wireless Display ON and select the Available Device from the list. By default the Wireless Video device will be listed as the MAC address shown on the HDMI display. Tap this device to connect. -
Page 23: Allsharecast (Samsung)
AllShareCast (Samsung) 1. Open your mobile Settings page. 2. Select More Settings. 3. Scroll through the list and select AllShare Cast. Instruction Manual... -
Page 24: Intel Widi Application
4. Turn AllShare Cast ON and select the Available Device from the list. By default the Wireless Video device will be listed as the MAC address shown on the HDMI display. Tap this device to connect. The device should connect after a few seconds. Intel WiDi Application 1. -
Page 25: Windows 8.1 Wireless Display
1. Launch the charm window and select Devices (or search for Device Settings from Metro). 2. Select Project, then Add a wireless display (or Add a Device). 3. Select the WIFI2HDMC from the list of devices (the MAC address will be listed). Instruction Manual... -
Page 26: Advanced Setup Menu
Contact your manufacturer for support. Advanced Setup Menu To access the advanced setup menu for WIFI2HDMC, type the address on the TV screen with a web browser of a PC / Notebook / Smartphone or Tablet connected to WIFI2HDMC to enter the virtual remote page, and click the Setup button. - Page 27 Network Wired Connection Item Description Obtain an IP address WIFI2HDMC will obtain an IP address from DHCP server Automatically automatically. Set WIFI2HDMC IP Set WIFI2HDMC IP address manually. Fill the fields below address manually to setup your desired IP address.
- Page 28 WiFi Connection Click WiFi connection button to display a list of available Wireless APs on the screen, and choose the AP you wish to connect to. This will bridge WIFI2HDMC to the Internet via another Wireless AP. Virtual AP Setup...
- Page 29 1. Connect a LAN cable from WIFI2HDMC to the AP router. 2. Change Virtual AP Bridge to “Bridge to Ethernet” and click “Apply”. Then you can bridge WIFI2HDMC to Internet. Note: WIFI2HDMC must connect to an AP router and can’t connect to WAN directly. Instruction Manual...
- Page 30 Audio Adjust advanced audio settings such as Night mode, HDMI Audio output format, SPDIF output format, Surround sound setting and Lip Sync setting from this page. Video Adjust Aspect Ratio, TV out video format, and other video settings from the video setup page.
- Page 31 System Set the OSD Language, reset to Factory Default, check the firmware Version, and perform a firmware upgrade from the system setup page. Instruction Manual...
- Page 32 Specifications Audio Support Cabling Wireless Ethernet Output Signal HDMI Number of Ports 1 - 3.5 mm Mini-Jack (3 Position) Female 1 - HDMI (19 pin) Female Connector(s) 1 - RJ-45 Female 1 - USB 3.0 A (9 pin; SuperSpeed) Female Wireless N (IEEE 802.11n) Maximum Digital Resolutions 1920x1080 / 1080p...
-
Page 33: Technical Support
Limitation of Liability In no event shall the liability of StarTech.com Ltd. and StarTech.com USA LLP (or their officers, directors, employees or agents) for any damages (whether direct or indirect, special, punitive, incidental, consequential, or otherwise), loss of profits, loss of business, or any pecuniary loss, arising out of or related to the use of the product exceed the actual price paid for the product. - Page 34 StarTech.com is an ISO 9001 Registered manufacturer of connectivity and technology parts. StarTech.com was founded in 1985 and has operations in the United States, Canada, the United Kingdom and Taiwan servicing a worldwide market.
Need help?
Do you have a question about the WIFI2HDMC and is the answer not in the manual?
Questions and answers