StarTech.com USB32HD2 Product Manual
Usb 3.0 to dual hdmi adapter supports windows only
Hide thumbs
Also See for USB32HD2:
- Quick start manual (2 pages) ,
- Manual (2 pages) ,
- Quick start manual (2 pages)

Related Manuals for StarTech.com USB32HD2


Summary of Contents for StarTech.com USB32HD2
- Page 1 USB 3.0 to Dual HDMI Adapter Supports Windows Only Full-Product Manual USB32HD2 Actual products may vary from photos For the latest information and specifications visit www.StarTech.com/support Manual Revision: 07/21/2023...
-
Page 2: Table Of Contents
Installation ....................4 Hardware Installation ..........................5 Software Installation ..........................6 Operation ....................11 Display Configuration ..........................11 Audio Configuration ..........................29 Troubleshooting ..................31 Compliance Statements ................39 Safety Statements ..................40 To view manuals, videos, drivers, downloads, technical drawings, and more visit www.StarTech.com/support... -
Page 3: Requirements
• Display Device • Package Contents USB Display Adapter x1 • Quick-Start Guide x1 • For the latest drivers/software, technical specifications, and declarations of conformance, please visit: www.StarTech.com/USB32HD2 To view manuals, videos, drivers, downloads, technical drawings, and more visit www.StarTech.com/support... -
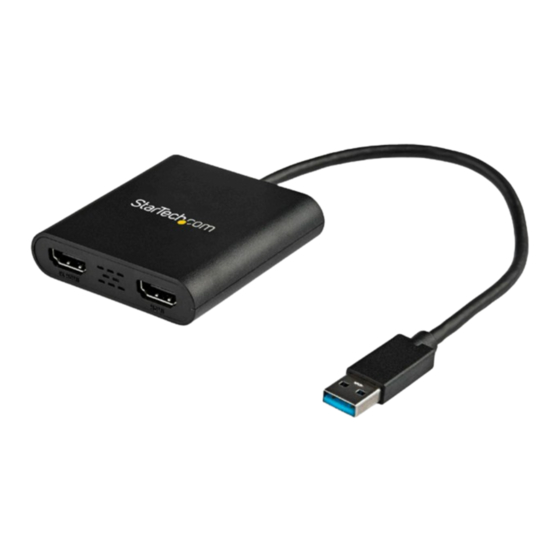
Page 4: Product Diagram
Video Output Port • Connect to an HDMI Display (HDMI) • 1080p (1920x1200) 60Hz Resolution Video Output Port • Connect to an HDMI Display (HDMI) • 4K (3840×2160) 30Hz Resolution To view manuals, videos, drivers, downloads, technical drawings, and more visit www.StarTech.com/support... -
Page 5: Installation
Automatic Driver Installation and Manual Driver Installation. If the Automatic Driver Installation fails please disconnect the USB Display Adapter from the Host Computer, and follow the steps for Manual Driver Installation. To view manuals, videos, drivers, downloads, technical drawings, and more visit www.StarTech.com/support... -
Page 6: Hardware Installation
USB Display Adapter, using the required cables (sold separately). Connect the Built-In USB Cable on the USB Display Adapter to an available USB Port on the Host Computer. To view manuals, videos, drivers, downloads, technical drawings, and more visit www.StarTech.com/support... -
Page 7: Software Installation
Installation may take several seconds to complete. During the installation process the connected Display Device(s) might flicker, this is normal. Once the installation has completed, the Windows desktop will appear on the connected Display Device(s). To view manuals, videos, drivers, downloads, technical drawings, and more visit www.StarTech.com/support... - Page 8 Manual Driver Installation: Disconnect the USB Display Adapter from the Host Computer. Navigate to www.StarTech.com/USB32HD2 and click the Drivers/Downloads tab on the Product Page. To view manuals, videos, drivers, downloads, technical drawings, and more visit www.StarTech.com/support...
- Page 9 Under Driver(s), download the [trigger] usb display adapter.zip driver package. Right-click the zip folder that was downloaded and select Extract All, then follow the on-screen instructions. To view manuals, videos, drivers, downloads, technical drawings, and more visit www.StarTech.com/support...
- Page 10 Please extract the files using the instructions in Step 5. Follow the on-screen prompts to install the device drivers and restart the computer when prompted. To view manuals, videos, drivers, downloads, technical drawings, and more visit www.StarTech.com/support...
- Page 11 Installation may take several seconds to complete. During the installation process the connected Display Device(s) might flicker, this is normal. Once the installation has completed, the Windows desktop will appear on the connected Display Device(s). To view manuals, videos, drivers, downloads, technical drawings, and more visit www.StarTech.com/support...
-
Page 12: Operation
“2, ” “3, ” and so on. These numbers help Windows identify which monitor users are referring to when making changes or adjustments in display settings. To view manuals, videos, drivers, downloads, technical drawings, and more visit www.StarTech.com/support... - Page 13 Below Select a display to change the settings for it, you will see a diagram representing the current monitor arrangement and the Display Number assigned to each monitor. To view manuals, videos, drivers, downloads, technical drawings, and more visit www.StarTech.com/support...
- Page 14 Watch for the numbers to appear on the screens. Each number that appears will correspond to a specific monitor. The number that is associated to each connected Display Device are now identified within Windows. To view manuals, videos, drivers, downloads, technical drawings, and more visit www.StarTech.com/support...
- Page 15 To configure a Display Device as an extended Windows Desktop: Right-Click anywhere on the Windows Desktop and select Display Settings. To view manuals, videos, drivers, downloads, technical drawings, and more visit www.StarTech.com/support...
- Page 16 If the desired Display Number appears within the same monitor block as another number, simply select that monitor block which contains the desired Display Number. To view manuals, videos, drivers, downloads, technical drawings, and more visit www.StarTech.com/support...
- Page 17 Display tab of the Windows Settings app ,to a section called Multiple Displays to access the drop-down menu. However, the remaining steps are the same. To view manuals, videos, drivers, downloads, technical drawings, and more visit www.StarTech.com/support...
- Page 18 To confirm the settings click Keep changes before the timer expires. The Display Device has now been configured as an extended Windows Desktop. To view manuals, videos, drivers, downloads, technical drawings, and more visit www.StarTech.com/support...
- Page 19 To arrange Display Devices in Extended Windows Desktop: Right-Click anywhere on the Windows Desktop and select Display Settings. To view manuals, videos, drivers, downloads, technical drawings, and more visit www.StarTech.com/support...
- Page 20 Note: You can click the Identify button to see which number corresponds to each physical display. See Identifying Display Devices Within Windows Display Settings (p.11) for more information. To view manuals, videos, drivers, downloads, technical drawings, and more visit www.StarTech.com/support...
- Page 21 Click and drag the Numbered Displays (within the Display tab of Windows Settings) so that the diagram matches the physical location of the monitors as they’re setup on the workstation. To view manuals, videos, drivers, downloads, technical drawings, and more visit www.StarTech.com/support...
- Page 22 To confirm the settings click Keep changes before the timer expires. The Display Devices have now been arranged in Windows. To view manuals, videos, drivers, downloads, technical drawings, and more visit www.StarTech.com/support...
- Page 23 Below Select a display to change the settings for it, you will see a diagram representing the current monitor arrangement and the Display Number assigned to each monitor. To view manuals, videos, drivers, downloads, technical drawings, and more visit www.StarTech.com/support...
- Page 24 Extended Configuration. To separate the monitors into an Extended Configuration, follow the steps outlined in Configuring Display Devices for an Extended Windows Desktop (p.14) section of this manual. To view manuals, videos, drivers, downloads, technical drawings, and more visit www.StarTech.com/support...
- Page 25 Display tab of the Windows Settings app ,to a section called Multiple Displays to access the drop down menu. However, the remaining steps are the same. To view manuals, videos, drivers, downloads, technical drawings, and more visit www.StarTech.com/support...
- Page 26 To confirm the settings click Keep changes before the timer expires. The Display Device has now been configured for a Mirror Configuration. To view manuals, videos, drivers, downloads, technical drawings, and more visit www.StarTech.com/support...
- Page 27 Below Select a display to change the settings for it, you will see a diagram representing the current monitor arrangement and the Display Number assigned to each monitor. To view manuals, videos, drivers, downloads, technical drawings, and more visit www.StarTech.com/support...
- Page 28 Note: You can click the Identify button to see which number corresponds to each physical display. See Identifying Display Devices Within Windows Display Settings (p.11) for more information. To view manuals, videos, drivers, downloads, technical drawings, and more visit www.StarTech.com/support...
- Page 29 To confirm the settings click Keep changes before the timer expires. The Display Device has now been configured to the desired resolution. To view manuals, videos, drivers, downloads, technical drawings, and more visit www.StarTech.com/support...
-
Page 30: Audio Configuration
To Select an Audio Controller as a playback device in Windows: Right-click on the Volume icon in the quick settings panel and select Open Volume Mixer. To view manuals, videos, drivers, downloads, technical drawings, and more visit www.StarTech.com/support... - Page 31 Volume mixer tabs. Click the drop menu titled Output Device, and select the desired audio output device. The selected Audio Controller is now set as the active playback device. To view manuals, videos, drivers, downloads, technical drawings, and more visit www.StarTech.com/support...
-
Page 32: Troubleshooting
The guide will present solutions to address common issues. Each solution will be clearly outlined to ensure a straightforward troubleshooting process. To view manuals, videos, drivers, downloads, technical drawings, and more visit www.StarTech.com/support... - Page 33 It’s recommended that all available onboard video output • ports are exhausted before adding a USB Display Adapter. USB32HD2 will not work at 4K if connected to a USB 2.0 port. • To view manuals, videos, drivers, downloads, technical drawings, and more visit www.StarTech.com/support...
- Page 34 Unplug the USB adapter from the computer and reconnect it, using a different USB port. Re-install the driver by following the steps outlined in the Manual Driver Installation (p.6) instructions of this manual. To view manuals, videos, drivers, downloads, technical drawings, and more visit www.StarTech.com/support...
- Page 35 The Host Computer may be at it’s performance capacity. • Testing the USB Display Adapter on a more powerful computer can confirm this. To view manuals, videos, drivers, downloads, technical drawings, and more visit www.StarTech.com/support...
- Page 36 To resolve this issue: It’s recommend that the protected content be viewed on displays connected to the computer’s video card or its onboard video outputs. To view manuals, videos, drivers, downloads, technical drawings, and more visit www.StarTech.com/support...
- Page 37 Host Computer. To resolve this issue: It’s recommended that a direct USB-C Video Adapter be used, such as the StarTech.com 107B-USBC-HDMI, instead of a USB-A Video Adapter. To view manuals, videos, drivers, downloads, technical drawings, and more visit www.StarTech.com/support...
- Page 38 To resolve this issue: Use an Adapter Cable that’s the correct orientation for the video output port on the USB Display Adapter and the video input port of the Display Device. To view manuals, videos, drivers, downloads, technical drawings, and more visit www.StarTech.com/support...
- Page 39 This device provides video output only, and cannot be used to input or capture video to the Host Computer. To resolve this issue: Use a dedicated USB Capture Device such as the StarTech.com USB3HDCAP. To view manuals, videos, drivers, downloads, technical drawings, and more visit www.StarTech.com/support...
-
Page 40: Compliance Statements
This manual may make reference to trademarks, registered trademarks, and other protected names and/or symbols of third-party companies not related in any way to StarTech.com. Where they occur these references are for illustrative purposes only and do not represent an endorsement of a product or service by StarTech.com, or an endorsement of the product(s) to which this manual... -
Page 41: Safety Statements
• 電源が入っている状態の製品または電線の終端処理を行わないでくださ い。 • ケーブル (電源ケーブルと充電ケーブルを含む) は、 適切な配置と引き回し を行い、 電気障害やつまづきの危険性など、 安全上のリスクを回避するよう にしてください。 Misure di sicurezza • I terminiali dei fili elettrici non devono essere realizzate con il prodotto e/o le linee elettriche sotto tensione. • I cavi (inclusi i cavi di alimentazione e di ricarica) devono essere posizionati e stesi in modo da evitare pericoli di inciampo, rischi di scosse elettriche o pericoli per la sicurezza. Säkerhetsåtgärder • Montering av kabelavslutningar får inte göras när produkten och/eller elledningarna är strömförda. • Kablar (inklusive elkablar och laddningskablar) ska dras och placeras på så sätt att risk för snubblingsolyckor och andra olyckor kan undvikas. To view manuals, videos, drivers, downloads, technical drawings, and more visit www.StarTech.com/support... - Page 42 Limitation of Liability In no event shall the liability of StarTech.com Ltd. and StarTech.com USA LLP (or their officers, directors, employees or agents) for any damages (whether direct or indirect, special, punitive, incidental, consequential, or otherwise), loss of profits, loss of business, or any pecuniary loss, arising out of or related to the use of the product exceed the actual price paid for the product.
- Page 43 Brackmills Hoofddorp N5V 5E9 Groveport, Ohio Northampton The Netherlands Canada 43125 NN4 7BW U.S.A. United Kingdom FR: startech.com/fr DE: startech.com/de ES: startech.com/es NL: startech.com/nl IT: startech.com/it JP: startech.com/jp To view manuals, videos, drivers, downloads, technical drawings, and more visit www.StarTech.com/support...
Need help?
Do you have a question about the USB32HD2 and is the answer not in the manual?
Questions and answers