Table of Contents
Advertisement
Advertisement
Table of Contents

Related Manuals for Zacuto 1-EVF-1S


Summary of Contents for Zacuto 1-EVF-1S
-
Page 2: Precautions And Care
Do not use batteries, power cords, or accessories that are not specified for use with this product. Use only canon LP-E6 batteries or equivalent. Check Zacuto.com/zfinderevf for complete list of compatible accessories. When using a power cord, be sure to plug it in completely. Do not handle power plugs when your hands are wet. -
Page 3: Table Of Contents
Table of Contents Precautions and Care ................... 01 Table of Contents..................02 Included Components................... 03 Optional Accessories ..................04 Physical Features ..................05 EVF Controls ..................05 Connecting the EVF to your camera ............. 06 Connecting the EVF to an external monitor .......... 06 Attaching the Hot-Shoe Mount .............. -
Page 4: Included Components
Included Components 18” HDMI to HDMI Mini Cable Zacuto EVF Unit w/ Dust Cover Li-ion Battery Pack Extender Frames HDMI Right Angle Adapter Li-ion Battery Charger 1/4”-20 Hot-Shoe Mount 3 AC Plug Adapters... -
Page 5: Optional Accessories
Optional Accessories Optional accessories may be purchased from the Zacuto web store at www.Zacuto.com or from any Zacuto authorized dealer. External Battery Attachment with D-Tap Zacuto Z-Finder Pro (Standard with Z-Finder EVF Pro) or Zacuto Z-Finder Jr. (Standard with Z-Finder EVF Pro) -
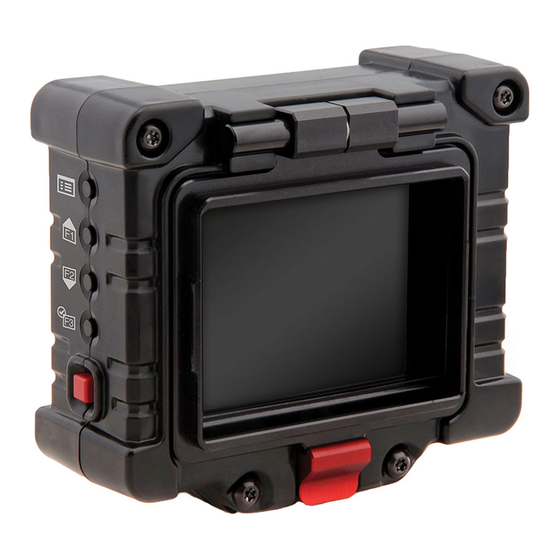
Page 6: Physical Features
EVF Controls Front Right HD LCD Screen HDMI Out HDMI In 1/4”-20 Screw Hole USB Port Battery Function Buttons Bottom Power Button Back Left... -
Page 7: Connecting The Evf To Your Camera
Connections Camera to EVF Plug the included HDMI cable into the input of the EVF unit Plug the mini end of the HDMI cable into your camera EVF to Ext. Monitor (Optional) Plug the optional HDMI cable into the output of the EVF unit Plug the other end of the HDMI cable into your external monitor We recommend using the right... -
Page 8: Attaching The Hot-Shoe Mount
Attaching the Hot-Shoe Mount Screw the Hot-Shoe Mount into the bottom of the EVF unit Slide the mount into your camera’s hot-shoe Tighten the knurled knob to secure the mount in the hot-shoe... -
Page 9: Adjusting The Hot-Shoe Mount
Adjusting the Hot-Shoe Mount Loosen the knob on the Hot-Shoe Mount to free the apparatus Loosen Tighten Position the EVF to your desired position and tighten the knob... -
Page 10: Using A Rechargeable Power Source
Using the Included Battery Insert the battery into the compartment on the back of the EVF and slide it to the right to lock When battery power is depleted, slide the battery into the included charger Note: Only use LP-E6 type batteries with the EVF unit. -
Page 11: Using An External Power Source
Using an External Power Source Optional equipment required - External Battery Attachment with D-Tap - Compatible battery source Insert the male D-Tap end into a compatible power source Slide the battery adapter into the back of the EVF unit... -
Page 12: Attaching A Z-Finder
Attaching a Z-Finder Align the Z-Finder to the EVF unit and snap onto frame If using an EVF Flip, the Z-Finder may be flipped up and out of the way by releasing the red lever near the bottom of the unit See Z-Finder instructions for complete installation and operation. -
Page 13: Operating The Menus
Operating the Menus Current Setting MAIN MENU (Numerical) BRIGHTNESS CONTRAST Current Selection CHROMA (In Red) BLUE ONLY MONOCHROME COLOR BARS BATTERY LEVEL Current Setting SCALING [Preset - 4] Sub-Menu Indicator FRAME LINE [1.66:1 (15x9)] Current Video Display The menu screen reveals itself over the current video display to show real-time updates of changes made. -
Page 14: Brightness
Menus Brightness MAIN MENU Press the select button to BRIGHTNESS CONTRAST reveal the contrast scale CHROMA BLUE ONLY Use the up and down buttons MONOCHROME to modify the current value COLOR BARS BATTERY LEVEL Brightness ranges from -20 to SCALING [Preset - 4] FRAME LINE [None] +11 with a factory default of 0 Contrast... -
Page 15: Blue Only
Menus MAIN MENU Blue Only BRIGHTNESS CONTRAST Press the select button to CHROMA BLUE ONLY toggle this setting ON or OFF MONOCHROME COLOR BARS Use this setting to obtain proper BATTERY LEVEL calibration of your monitor when SCALING [Preset - 4] FRAME LINE [None] using color bars MAIN MENU... -
Page 16: Scaling
Menus Scaling (See tutorial video at Zacuto.com/zfinderevf) AUTO / PLAYBACK allows the EVF to scale and format the image by automatically detecting the cameras output (Default) Choose CAMERA PRESETS to activate an included camera preset MAIN MENU SCALING BRIGHTNESS AUTO / PLAYBACK... -
Page 17: Frame Lines
Menus If your camera outputs a different format during standby and record, ie: Canon 5D (1080i/480p) the scaling must be set and saved to the same preset for both modes. The EVF will detect the input signal and use Your can PREVIEW and SAVE a user setting while in the CREATE USER PRESET menu. -
Page 18: Anamorphic
Menus Anamorphic Choose the correct anamorphic setting for your lens from the list MAIN MENU ANAMORPHIC ANAMORPHIC [Normal] NORMAL ** FOCUS ASSIST (Peaking) 1.33x EXPOSURE ASSIST (Zebra) 1.5x FALSE COLOR IMAGE FLIP PIXEL TO PIXEL (Zoom) MAIN MENU AUDIO METERS FRAME STORE FEATURE LOCATION Uncorrected... -
Page 19: Focus Assist (Red-Line)
MAIN MENU MISCELLANEOUS Menus FALSE COLOR HDMI OUTPUT YUV 422 IMAGE FLIP MAIN MENU PIXEL TO PIXEL (Zoom) AUDIO METERS MISCELLANEOUS Focus Assist (Red-Line) FRAME STORE FEATURE LOCATION Press the select button to enter focus assist menu. FUNCTION BUTTONS UPDATE Toggle ON or OFF by selecting it from the menu. -
Page 20: False Color
False Color Select FALSE COLOR to toggle the setting ON or OFF Use False Color to aid in obtaining the correct exposure of your scene MAIN MENU MAIN MENU ANAMORPHIC [Normal] ANAMORPHIC [Normal] FOCUS ASSIST (Peaking) FOCUS ASSIST (Peaking) EXPOSURE ASSIST (Zebra) EXPOSURE ASSIST (Zebra) FALSE COLOR FALSE COLOR... -
Page 21: Image Flip
MAIN MENU ANAMORPHIC [Normal] FOCUS ASSIST (Peaking) EXPOSURE ASSIST (Zebra) FALSE COLOR IMAGE FLIP PIXEL TO PIXEL (Zoom) AUDIO METERS FRAME STORE FEATURE LOCATION Properly Exposed: Objects will display in PINKS and GREENS MAIN MENU ANAMORPHIC [Normal] FOCUS ASSIST (Peaking) EXPOSURE ASSIST (Zebra) FALSE COLOR IMAGE FLIP... -
Page 22: Pixel To Pixel (Zoom)
PIXEL TO PIXEL (Zoom) IMAGE FLIP AUDIO METERS PIXEL TO PIXEL (Zoom) FRAME STORE AUDIO METERS FEATURE LOCATION FRAME STORE FEATURE LOCATION Menus Pixel To Pixel (Pixel to Pixel not active while in 480p) Press the select button to toggle Pixel To Pixel ON or OFF MAIN MENU ANAMORPHIC [Normal] MAIN MENU... - Page 23 Menus Frame Store Press the select button to enter the Frame Store menu. Select STORE NUMBER and toggle through each number with the selector arrow to select a stored frame memory bank. MAIN MENU FRAME STORE MAIN MENU FRAME STORE ANAMORPHIC [Normal] STORE NUMBER ANAMORPHIC [Normal]...
-
Page 24: Feature Location
Menus Feature Location MAIN MENU FEATURE LOCATION ANAMORPHIC [Normal] AUDIO METERS FOCUS ASSIST (Peaking) BATTERY LEVEL EXPOSURE ASSIST (Zebra) FALSE COLOR MAIN MENU IMAGE FLIP PIXEL TO PIXEL (Zoom) AUDIO METERS FRAME STORE -20dB -12dB FEATURE LOCATION Select the feature you want to place and scroll through the options with the selector arrows. -
Page 25: Update
Menus Update (For more information visit Zacuto.com/zfinderevf) MAIN MENU UPDATE FALSE COLOR USB DRIVE IMAGE FLIP RESTORE FACTORY DEFAULTS PIXEL TO PIXEL (Zoom) AUDIO METERS MAIN MENU FRAME STORE FEATURE LOCATION FUNCTION BUTTONS UPDATE ABOUT Format your USB thumb drive... -
Page 26: Possible Error Messages
Menus Possible Error Messages You may receive these messages if there is a error during the update process. Contact Zacuto customer support If your problem persists after following these recommendations. Problem: Invalid USB Drive UPDATE UPDATE INVALID USB DRIVE INVALID USB DRIVE... - Page 27 Menus Problem: You have attempted to use the Pixel-to-Pixel not available in 480p! MAIN MENU PIXEL-TO-PIXEL (zoom) feature ANAMORPHIC [Normal] FOCUS ASSIST (Peaking) while in 480p standby or record EXPOSURE ASSIST (Zebra) Solution: FALSE COLOR IMAGE FLIP If possible set the output of your PIXEL TO PIXEL (Zoom) camera to a higher format than AUDIO METERS...
-
Page 28: Frequently Asked Questions
Why is anti-fog so important? A: When an EVF or optical viewfinder fogs up, game over. It becomes unusable. Zacuto spent a lot of time coming up with our Zacuto anti- fog formula. Z-Finder version 1 owners complained about fog more than any other issue. - Page 29 Why can’t I get a picture sometimes when I plug-in the HDMI cable while the EVF is on? A: This is not unique to the Zacuto EVF. If the EVF is already on, you must plug in the HDMI cable in one swift movement with no stopping or hesitation.
-
Page 30: Specifications
Specifications Size 3.2” TFT LCD IPS LED Resolution 800x480 Color 16.7 Million Viewing Angle H: 170 Degrees V: 170 Degrees View Area 70.6mm (H) x 42.76mm (V) POWER Battery 7.2v Canon LP-E6 or Equivalent External 12 Volt Power Adapter (Optional) Consumption 2.5W (5.2 Hours w/ 1800mAH Battery) VIDEO INPUT / OUTPUT... -
Page 31: Limited Warranty
Limited Warranty Zacuto USA electronic devices come with a limited one year hardware warranty. The limited hardware warranty covers defects in workmanship and materials of our products for up to one year. This warranty does not cover any damage to this product that results from improper installa-... - Page 32 www.zacuto.com...
Need help?
Do you have a question about the 1-EVF-1S and is the answer not in the manual?
Questions and answers