Subscribe to Our Youtube Channel
Summary of Contents for Ozito OZLT550WA
-
Page 1: Line Trimmer
LINE TRIMMER 550W MODEL NO. OZLT550WA OPERATING INSTRUCTIONS w w w. o z i t o . c o m . a u To view our entire range visit... -
Page 2: Specifications
SPECIFICATIONS - MODEL NO. OZLT550WA Voltage: 230V, 50Hz Power: 550W ≤83 No load speed: 9500/min Sound Power level Lwa (dB(A)): ≤96 Sound pressure level (dB): Soft grip: Cutting diameter: 300mm Cutting line thickness: 1.5mm Cutting line feed: automatic Features: Removable Edging Guide... -
Page 3: Table Of Contents
TABLE OF CONTENTS SPECIFICATIONS ………………………………………… Page 1 TABLE OF CONTENTS………………………………….. Page 2 INTRODUCTION………………………………………... Page 3 SAFETY INSTRUCTIONS……………………………….. Page 3 OPERATION …………………………………………….. Page 8 MAINTENANCE …………….………………………….. Page 12 CONTENTS ……………………………………………... Page 13 WARRANTY……………………………………………… Page 15... -
Page 4: Introduction
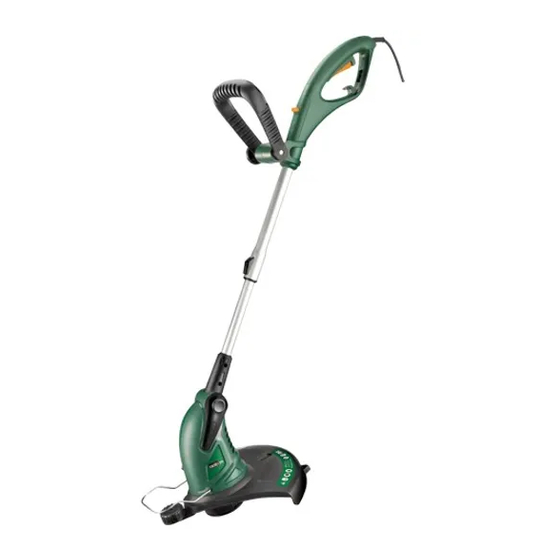
We hope you will enjoy using this combo kit for many years. Your Ozito Line Trimmer OZLT550WA has been designed for trimming lawn edges and grass around shrubs and trees. This product is intended for DIY use only. -
Page 5: General Safety Rules
GENERAL SAFETY RULES Warning! Read all instructions, Failure to follow all instructions listed below may result in electric shock, fire and/or serious injury. The term “Power Tool” in all of the warnings listed below refers to your mains operated (corded) power tool or battery operated (cordless) power tool. - Page 6 GENERAL SAFETY RULES (cont.) e) Do not overreach. Keep proper footing and balance at all times. This enables better control of the power tool in unexpected situations. Dress properly. Do not wear loose clothing or jewellery. Keep your hair, clothing and gloves away from moving parts. Loose clothes, jewellery or long hair can be caught in moving parts.
- Page 7 ADDITIONAL SAFETY INSTRUCTIONS FOR LINE TRIMMERS • Before use check the supply and extension cord for signs of damage or aging. If the cord becomes damaged during use, disconnect the cord from the supply immediately. DO NOT TOUCH THE CORD BEFORE DISCONNECTING THE SUPPLY. Do not use the line trimmer if the cord is damaged or worn.
- Page 8 ASSEMBLY Warning! Before assembly, make sure that the tool is switched off and unplugged. Telescopic handle assembly 1. Line up the two parts of the telescopic handle assembly. 2. Slide the telescopic latch (9) in the direction as shown in Fig. A. Hold while inserting the lower end of telescopic handle (8) into the upper telescopic handle.
-
Page 9: Operation
OPERATION Preparing the trimmer for use Warning! Never attempt to lock the on/off switch in the ''on'' position Hints for use 1. To achieve optimum results only cut dry grass. 2. Hold the tool in the upright position. 3. Gently swing the tool from side to side. 4. - Page 10 OPERATION (cont.) For edging, the cutter head (12) should be in the position shown, if it is not: • Depress the lock button (5) • Rotate the main handle (2) while depressing the lock button (5). • When the main handle (2) is in position, the lock button (5) will lock into place. Note: The main handle (2) will only rotate in one direction.
-
Page 11: Removing & Replacing Spool & Line Assembly
OPERATION (cont.) Removing & replacing spool & line assembly (Fig.H) Fig.H 1. Unplug the line trimmer and turn upside down. 2. Keep the tabs (e) depressed and remove the spool cover (a) from the spool housing (c). 3. Remove the empty spool (b) from the spool housing (c). 4. - Page 12 OPERATION (cont.) You may wind new cutting line onto an empty spool. Cutting line is available from any Bunnings Warehouse. 1. Remove the empty spool from the tool as described above. 2. Remove any remaining cutting line from the spool. 3.
-
Page 13: Maintenance
5. No lubrication is required as bearings are sealed. 6. Store in a cool, dry place after use. Note: Ozito Industries will not be responsible for any damage or injuries caused by the repair of the tool by an unauthorised person or by mishandling of the tool. -
Page 14: Contents
Please recycle packaging where facilities exist. Check with your local council authority for recycling advice. CONTENTS 1 x Line Trimmer OZLT550WA 1 x Spool and Line (fitted) 1 x Safety guard 1 x Operation manual OZITO INDUSTRIES PTY LTD... -
Page 15: Warranty
PURCHASED FROM:__________________________________________________ DATE PURCHASED: __________________________________________________ 2 YEAR REPLACEMENT WARRANTY Your Ozito tool is guaranteed for a period of 24 months from the original date of purchase and is intended for DIY (Do it yourself) use only. WARNING The following actions will result in the warranty being void.


Need help?
Do you have a question about the OZLT550WA and is the answer not in the manual?
Questions and answers