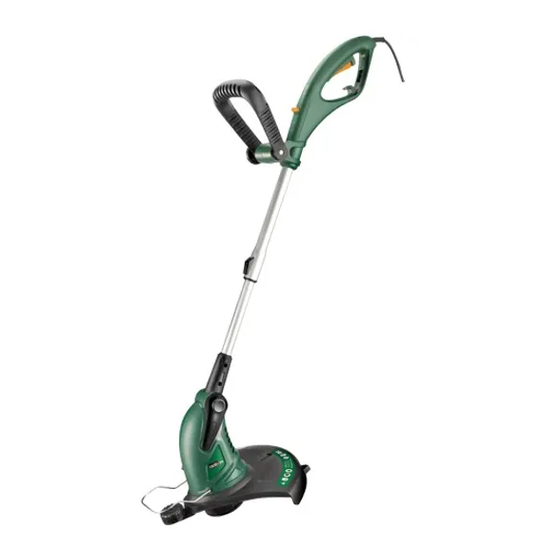
Ozito OZLT550WA Instruction Manual
Line trimmer
Hide thumbs
Also See for OZLT550WA:
- Operating instructions manual (15 pages) ,
- Instruction manual (7 pages)
Table of Contents
Advertisement
Line Trimmer
300mm 550W
Instruction Manual
2 Year Replacement Warranty
OZLT550WA
! !
WARNING! Read all safety warnings and all instructions. Failure to follow the
warnings and instructions may result in electric shock, fire and/or serious injury.
Save all warnings and instructions for future reference.
0212
www.ozito.com.au
To view the full range visit:
Advertisement
Table of Contents

Summary of Contents for Ozito OZLT550WA
-
Page 1: Line Trimmer
300mm 550W Instruction Manual 2 Year Replacement Warranty OZLT550WA WARNING! Read all safety warnings and all instructions. Failure to follow the warnings and instructions may result in electric shock, fire and/or serious injury. Save all warnings and instructions for future reference. -
Page 2: Specifications
SPECIFICATIONS - MODEL NO. OZLT550WA Motor: 550W Input: 230V, 50Hz ≤83 No load speed: 9,600/min Sound Power level Lwa (dB(A)): ≤96 Sound pressure level (dB): Cutting diameter: 300mm Line diameter: 1.6mm Feed type: Automatic KNOW YOUR TOOL 1. Cordset 9. Telescopic Latch 2. -
Page 3: Table Of Contents
TABLE OF CONTENTS SPECIFICATIONS ………………………………………… Page 1 INTRODUCTION…………………………………………. Page 3 ELECTRICAL SAFETY…………………………………… Page 3 GENERAL SAFETY INSTRUCTIONS .………………… Page 4 ADDITIONAL SAFETY INSTRUCTIONS FOR LINE TRIMMERS …………….………………………….. Page 6 ASSEMBLY……………………………………………….. Page 8 OPERATION …………………………………………….. Page 9 MAINTENANCE …………….………………………….. Page 12 DESCRIPTION OF SYMBOLS …………………………. -
Page 4: Introduction
We hope you will enjoy using this line trimmer for many years. Your Ozito Line Trimmer OZLT550WA has been designed for trimming lawn edges and grass around shrubs and trees. This product is intended for DIY use only. -
Page 5: General Safety Instructions
GENERAL POWER TOOL SAFETY WARNINGS Warning! Read all instructions, Failure to follow all instructions listed below may result in electric shock, fire and/or serious injury. The term “Power Tool” in all of the warnings listed below refers to your mains operated (corded) power tool or battery operated (cordless) power tool. - Page 6 GENERAL POWER TOOL SAFETY WARNINGS c) Avoid accidental starting. Ensure the switch is in the off position before plugging in. Carrying power tools with your finger on the switch or plugging in power tools that have the switch on invites accidents. d) Remove any adjusting key or wrench before turning the power tool on.
-
Page 7: Line Trimmers
LINE TRIMMER SAFETY WARNINGS Hold power tool by insulated gripping surfaces, when performing an operation where the cutting accessory may contact hidden wiring or its own cord. Cutting accessory contacting a "live" wire may make exposed metal parts of the power tool "live“... - Page 8 LINE TRIMMER SAFETY WARNINGS (cont.) • Inspect and maintain the line trimmer regularly. Have the line trimmer repaired only by an authorized repairer. • Take care against injury from the blade(s) fitted for trimming the cutting line length. After extending new cutting line, always return the line trimmer to its normal operating position before switching on.
-
Page 9: Assembly
ASSEMBLY Warning! Before assembly, make sure that the line trimmer is switched off and unplugged. Assembling the telescopic handle 1. Line up the two parts of the telescopic handle assembly. 2. Slide the telescopic latch (9) in the direction as shown in Fig. A. Hold while inserting the lower end of telescopic handle (8) into the upper telescopic handle. -
Page 10: Operation
OPERATION Preparing the line trimmer for use Warning! Never attempt to lock the on/off switch in the ''on'' position. Warning! The cutting elements continue to rotate after the motor is switched off. Hints for use 1. To achieve optimum results only cut dry grass. 2. - Page 11 OPERATION (cont.) Edging mode Fig.F For edging, the cutter head (12) should be in the position shown in Fig. F, if it is not: 1. Depress the lock button (5) 2. Rotate the rotatable main handle (2) while depressing the lock button (5). 3.
- Page 12 OPERATION (cont.) Lengthening the line While the line trimmer is operating, the cutting line (h) gets worn down and becomes shorter. This line trimmer is equipped with Automatic Line Advancement which automatically feeds the additional line to the correct length as it wears down.
-
Page 13: Maintenance
MAINTENANCE Removing & replacing the spool & line assembly (Fig.H) Fig.H 1. Unplug the line trimmer and turn it upside down. 2. Keep the tabs (e) depressed and remove the spool cover (a) from the spool housing (c). 3. Remove the empty spool (b) from the spool housing (c). 4. -
Page 14: Description Of Symbols
• No lubrication is required as bearings are sealed. • Store in a cool, dry place after use. Note: Ozito Industries will not be responsible for any damage or injuries caused by the repair of the line trimmer by an unauthorised person or by mishandling of the line trimmer. -
Page 15: Contents
1 x Safety Guard 1 x Bolt (for secondary handle) 1 x Instruction Manual 1 x Knob (for secondary handle) OZITO INDUSTRIES PTY LTD AUSTRALIA (Head Office) 1 - 23 Letcon Drive, Bangholme, Victoria, Australia 3175 Telephone: 1800 069 486 Facsimile: +61 3 9238 5588 Website: www.ozito.com.au... -
Page 16: Warranty
If the tool shows signs of damage or defects caused by or resulting from abuse, accidents or alterations. • Failure to perform maintenance as set out within the instruction manual. • If the tool is disassembled or tampered with in any way. OZITO Australia/New Zealand (Head Office) 1-23 Letcon Drive, Bangholme, Victoria, Australia 3175...


Need help?
Do you have a question about the OZLT550WA and is the answer not in the manual?
Questions and answers