
Related Manuals for AT&T TL7100


Summary of Contents for AT&T TL7100
- Page 1 User’s manual TL7100 Handset lifter for use with AT&T models TL7610/TL7612/TL7810/ TL7812/TL7910/TL7912...
- Page 2 You can also visit our website at www.telephones.att.com 1 (800) 222-3111. or call 1 (866) 288-4268. In Canada, dial Model number: TL7100 Type: Handset lifter Serial number: (found on the bottom of the handset lifter) Purchase date: Place of purchase: Save your sales receipt and original packaging in case it is necessary to return this product for warranty service.
- Page 3 Parts checklist Check to make sure the handset lifter package includes the following items. Save your sales receipt and original packaging in the event warranty service is necessary. User’s manual TL7100 Handset lifter for use with AT&T models TL7610/TL7612TL7810/ TL7812/ TL7910/TL7912...
-
Page 4: Table Of Contents
User’s manual TL7100 Handset lifter for use with AT&T models TL7610/TL7612/TL7810/ TL7812/TL7910/TL7912 Table of contents Getting started Quick reference guide - handset lifter ........... 1 Installation options ................... 3 To install the lifter on your TL7610/TL7612 headset base ..3 To install the lifter on your TL7810/TL7812/TL7910/ TL7912 headset base .................. - Page 5 Make and answer calls ................19 Make and answer a call with the handset lifter and cordless headset..................19 Make and answer a call with a multi-line telephone and the handset lifter..................20 Appendix Troubleshooting ....................21 Maintenance...................... 25 Important safety information ..............26 Safety information..................
-
Page 6: Getting Started
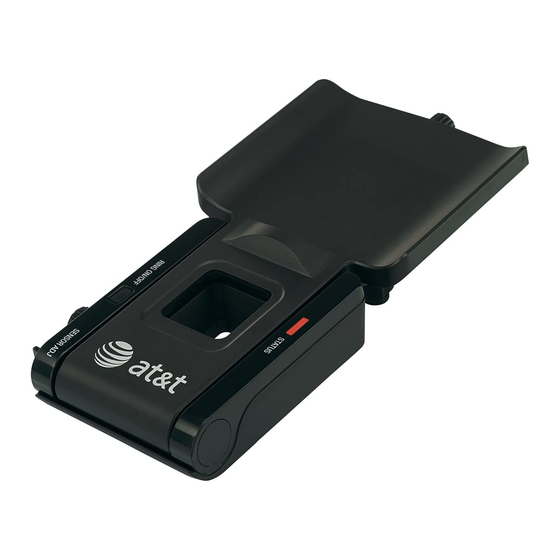
Getting started Quick reference guide - handset lifter SENSOR ADJ knob Adjusts the sensitivity of the ring detector (page 17). ADJUST LIFTER knob Adjusts the height of the lifter arm (page 13). Lifter arm Holds the corded telephone handset. Switch hook presser ON/OFF Press (TL7610/TL7612) or... - Page 7 Getting started Quick reference guide - handset lifter RING ON/OFF Press to turn the ring detector on or off. When the ring detector is off, the cordless headset does not ring (page 17). Switch hook presser adjustment knob Adjusts the position of the switch hook presser (page 13).
-
Page 8: Installation Options
To install the lifter on your TL7610/TL7612 headset base See pages 4-5 to connect the TL7100 lifter to a TL7610/TL7612 headset base using the TL7610/TL7612 base adapter provided in the package. You can use the headset to remotely control the lifter for answering or hanging up a call. -
Page 9: Headset Base Installation - Tl7610/Tl7612
Getting started Headset base installation - TL7610/TL7612 TL7610/TL7612 headset base installation Before installing the headset base, remove the rear bottom piece of the headset base by pushing it away from the base. Unplug the curly handset cord from the telephone and plug it into the CURLY CORD jack (light blue dot) on the headset base. - Page 10 Getting started Headset base installation - TL7610/TL7612 TL7610/TL7612 headset base installation (cont.) Plug one end of the telephone line cord (provided with the headset base) into the base handset jack on the telephone where the curly handset cord was plugged in. Plug the other end of the line cord into the BASE JACK (orange dot) on the headset base.
-
Page 11: Adjust The Corded Handset Audio
Getting started Headset base installation - TL7610/TL7612 Adjust the corded handset audio 1. Make sure that LIFTER MODE light on the headset base is on. Press the MODE button on the headset base to change the mode. 2. Lift the corded handset to release the switch hook. -
Page 12: Headset Base Installation - Tl7810/Tl7812/Tl7910/Tl7912
Getting started Headset base installation - TL7810/TL7812/ TL7910/TL7912 TL7810/TL7812/TL7910/TL7912 headset base installation Option 1: Connect the headset to a corded phone Plug one end of the corded phone connection cable into the CORDED PHONE CONNECTION jack (blue dot) at the back of the headset base. - Page 13 Getting started Headset base installation - TL7810/TL7812/ TL7910/TL7912 TL7810/TL7812/TL7910/TL7912 headset base installation (cont.) Plug the large end of the headset base power adapter into a power outlet not controlled by a wall switch. Plug the end of the lifter control cable into the LIFTER jack at the back of the headset base.
- Page 14 Getting started Headset base installation - TL7810/TL7812/ TL7910/TL7912 TL7810/TL7812/TL7910/TL7912 headset base installation (cont.) Option 2: Connect the headset to a corded phone and computer Plug one end of the corded phone connection cable into the CORDED PHONE CONNECTION jack (blue dot) at the back of the headset base.
- Page 15 Getting started Headset base installation - TL7810/TL7812/ TL7910/TL7912 TL7810/TL7812/YL7910/TL7912 headset base installation (cont.) Plug the small end of the USB cable into the USB port labeled on the right side of the headset base. Plug the large end of the USB cable into a USB port on your computer.
-
Page 16: Adjust The Corded Handset Audio
Getting started Headset base installation - TL7810/TL7812/ TL7910/TL7912 Adjust the corded handset audio After you have connected the headset base to your corded phone, you may need to adjust the corded handset audio switch at the bottom of the headset base for optimal sound quality. -
Page 17: Handset Lifter Installation
Getting started Handset lifter installation Attach the lifter 1. To choose where to install the lifter on your telephone, look at the space underneath the corded handset. If there is a speaker, the lifter should be centered over the speaker. If there is no speaker, the lifter should be centered within the space. -
Page 18: Adjust The Switch Hook Presser Position
Getting started Handset lifter installation Adjust the switch hook presser position Turn the knob to move the switch hook presser until it is lined up with your telephone switch hook. Adjust the height of the lifter arm Turn the ADJUST LIFTER knob to change the height of the lifter arm. -
Page 19: Lifter Adjustments And Testing
Getting started Handset lifter installation Lifter adjustments and testing 1. Make sure that LIFTER MODE light on the TL7610/TL7612 headset base is on, or the CORDED HANDSET CONNECTED switch is turned to YES on the TL7810/TL7812/ TL7910/TL7912 headset base. Make sure the LIFTER AUDIO ADJUST setting is correct. -
Page 20: Installation Of Large Lifter Pad (Optional)
Getting started Handset lifter installation Installation of large lifter pad (optional) If the small lifter pad cannot hold the corded handset steadily, you can attach a large lifter pad (provided) to enlarge the contact area. 1. Hold the large lifter pad in front of the small lifter pad as shown below. -
Page 21: About Internal And Auxiliary Ring Detectors
The internal or auxiliary ring detector detects the telephone ringer and sends a ring tone to the headset earpiece. If you installed the TL7100 lifter over the top of the corded phone speaker, the internal ring detector will recognize when the phone rings. -
Page 22: Ring Detector On/Off
Getting started About internal and auxiliary ring detectors Ring detector on/off When the ring detector detects an incoming call, it sends a ring tone to the headset earpiece. • Press the RING ON/OFF button on the lifter to turn the ring detector on or off. -
Page 23: Status Light
Getting started About internal and auxiliary ring detectors STATUS light • On when the headset is not in use and the ring detector is turned off. • Flashes slowly when the headset is in use and the ring detector is turned off. Blue •... -
Page 24: Make And Answer Calls
Handset lifter operation Make and answer calls Make and answer a call with the handset lifter and cordless headset You can use the cordless headset to make, answer and end calls without using the corded handset. Make a call: 1. Press ON/ (TL7610/TL7612) or (TL7810/TL7812/TL7910/TL7912) on the headset. -
Page 25: Make And Answer A Call With A Multi-Line Telephone And The Handset Lifter
Handset lifter operation Make and answer calls Make and answer a call with a multi-line telephone and the handset lifter Make a call: Press ON/ (TL7610/TL7612) or (TL7810/TL7812/ TL7910/TL7912) on the headset. You hear a dial tone in the headset earpiece. To change to a different telephone line, you need to select the line on your telephone. -
Page 26: Appendix
Appendix Troubleshooting If you have difficulty with your handset lifter, please try the suggestions below. For customer service, visit our website at www.telephones.att.com 1 (800) 222–3111 , or call 1 (866) 288-4268 In Canada, dial The switch hook presser doesn’t rise at all. •... - Page 27 Appendix Troubleshooting When I press ON/ (TL7610/TL7612) or (TL7810/TL7812/ TL7910/TL7912) on the headset, the handset lifter rises, but the call is not connected or I do not hear a dial tone. • Try all the suggestions above. • When using the handset lifter, make sure that TL7610/ TL7612 headset base is set to LIFTER MODE, or the CORDED HANDSET CONNECTED switch is turned to YES on the TL7810/TL7812/TL7910/TL7912 headset base.
- Page 28 Appendix Troubleshooting My corded phone is ringing, but my headset is not ringing. • Make sure that Make sure that LIFTER MODE light on the TL7610/TL7612 headset base is on, or the CORDED HANDSET CONNECTED switch is turned to YES on the TL7810/TL7812/TL7910/TL7912 headset base.
- Page 29 Appendix Troubleshooting Nothing happens when I move the LIFTER AUDIO ADJUST switch. • When the handset lifter is in use, make sure that make sure that LIFTER MODE light on the TL7610/TL7612 headset base is on, or the CORDED HANDSET CONNECTED switch is turned to YES on the TL7810/ TL7812/TL7910/TL7912 headset base.
-
Page 30: Maintenance
Appendix Maintenance Taking care of your handset lifter • Your lifter contains sophisticated electronic parts, so it must be treated with care. • Avoid rough treatment. • Place the lifter down gently. Save the original packing materials to protect your lifter if you ever need to ship them. Avoid water •... -
Page 31: Important Safety Information
Appendix Important safety information This symbol is to alert you to important operating or servicing instructions that may appear in this user’s manual. Always follow basic safety precautions when using this product to reduce the risk of injury, fire, or electric shock. Safety information •... -
Page 32: Fcc Part 15
Appendix FCC Part 15 This equipment has been tested and found to comply with the limits for a Class B digital device, pursuant to part 15 of the FCC Rules. These limits are designed to provide reasonable protection against harmful interference in a residential installation. -
Page 33: Limited Warranty
Appendix Limited warranty The AT&T brand is used under license - any repair, replacement or war- ranty service, and all questions about this product should be directed to: In the United States of America, visit www.telephones.att.com 1 (800) 222-3111 or call 1 (866) 288-4268 In Canada, call 1. - Page 34 Appendix Limited warranty 3. How long is the limited warranty period? The limited warranty period for the PRODUCT extends for ONE (1) YEAR from the date of purchase. If the manufacturer repairs or replaces a materially defective PRODUCT under the terms of this limited warranty, this limited warranty also applies to repaired or replacement PRODUCT for a period of either (a) 90 days from the date the repaired or replacement PRODUCT is shipped to you or,...
- Page 35 Appendix Limited warranty 5. How do you get warranty service? To obtain warranty service in the United States of America, visit www.telephones.att.com or call 1 (800) 222-3111. In Canada, call 1 (866) 288-4268. NOTE: Before calling for service, please review the user’s manual; a check of the PRODUCT's controls and features may save you a service call.
- Page 36 Appendix Limited warranty 7. Other limitations This warranty is the complete and exclusive agreement between you and the manufacturer of this AT&T branded PRODUCT. It supersedes all other written or oral communications related to this PRODUCT. The manufacturer provides no other warranties for this PRODUCT. The warranty exclusively describes all of the manufacturer’s responsibilities regarding the PRODUCT.
-
Page 37: Index
Index Index AC adapter 4, 8, 9 Headset base 4, 7, 9 Adjust corded handset audio 6, 11 height of the lifter arm 13 Install sensitivity level 17 auxiliary ring detector 16 switch hook presser headset base 3–11 position 13 Internal ring detector 16 Answer a call 19, 20 Anti-slip pad 15... - Page 38 www.telephones.att.com © 2010-2013 Advanced American Telephones. All Rights Reserved. AT&T and the AT&T logo are trademarks of AT&T Intellectual Property licensed to Advanced American Telephones, San Antonio, TX 78219. Printed in China. Issue 10 AT&T 01/13.
Need help?
Do you have a question about the TL7100 and is the answer not in the manual?
Questions and answers