
Related Manuals for Fusion MS-IP700i


Summary of Contents for Fusion MS-IP700i
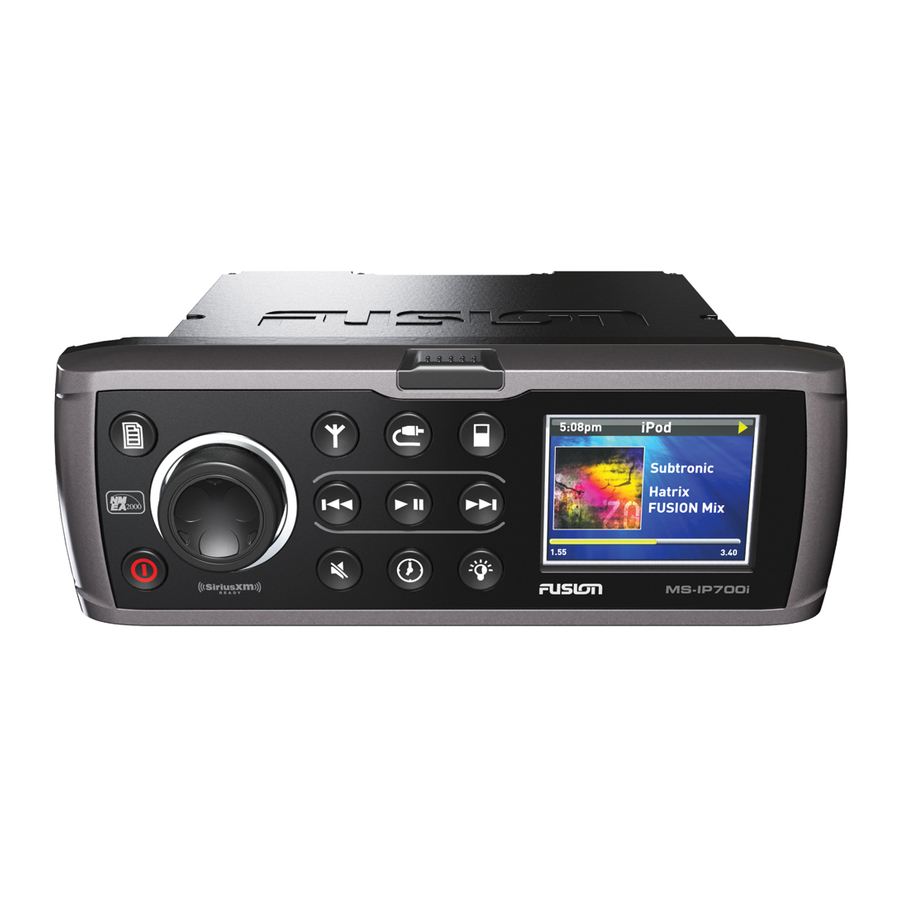
- Page 1 700 Series Manual MARINE ENTERTAINMENT SYSTEM MS-IP700i True Marine Entertainment System for iPod MS-AV700i True Marine DVD Entertainment System...
- Page 2 Care and Maintenance RECORD YOUR PRODUCT DETAILS HERE: As with all products exposed to the harsh marine environment, a little care will help preserve the finish. FUSION recommends that you clean any salt water and/ or salt SERIAL NUMBER DATE OF PURCHASE residue from the stereo with a damp cloth soaked in fresh water.
-
Page 3: Table Of Contents
FUSION MS-NRX200I Remote Control ........ -
Page 4: User Interface And Controls
USER INTERFACE AND CONTROLS ROTARY ENCODER AND MENU KEY CONTROL PANEL LAYOUT Although the controls of the 700 Series are designed to be intuitive to use, we recommend that you familiarize yourself with the operation of the Encoder and Menu key before using the unit. ROTARY ENCODER OPERATION The Encoder can be used in three ways to control the operation of the 700 Series: Rotary Encoder turn Encoder press Encoder press and hold down for at least one second MENU KEY OPERATION You can use the Menu key to open or to exit from menus: BUTTON DESCRIPTION PRIMARY SOURCE Press the Menu key to open a menu. MS-AV700i Menu key In an open menu you can use the Menu key at any time to save... -
Page 5: Rotary Encoder And Menu Key
• When the unit is on, momentarily press the Power key to power off the unit. Power Press Menu key Turn Encoder to scroll Menu exit. See “Menu the highlight. Key Operation” on page INPUT SOURCE SCREENS Press Encoder to select Highlight The 700 Series supports a wide range of input source types, Settings menu. depending on model: • MS-IP700i AM/FM/VHF/SiriusXM; iPod/iPhone via internal dock; USB and iPod/iPhone via external dock or cable; auxiliary. • MS-AV700i AM/FM/VHF/SiriusXM; CD/DVD; USB and iPod/iPhone via external dock or cable; auxiliary. -
Page 6: Input Source Screens
To adjust the volume level: Both models are also SiriusXM-Ready (USA only) requires optional SiriusXM Connect Vehicle Tuner. For further details of setting up SiriusXM options see “SiriusXM 1. Turn the Encoder. Satellite Radio” on page 49. • The Volume screen is displayed with the Current Zone Selection Highlighted (remembered from previous use). When you select one of these sources, the 700 Series displays a source screen, • The volume is adjusted in the highlighted Zone (or Zones) only. similar to the AM source screen shown in Figure 1 below. The title bar always shows the current time and source name. -
Page 7: Displaying The Clock
ADJUSTING SUB-WOOFER LEVEL AND TONE 4. Turn the Encoder to left or right to adjust the Bass level, if required. 5. Press the Encoder to highlight each tone control, and adjust as required. When Use the Sub level and Tone screens to set the sub-woofer levels and tone. Sub-woofer level can be adjusted for each Zone individually, but tone you press the Encoder on the Treble tone control, the Sub level screen is displayed again. adjustments affect all Zones. 6. -
Page 8: Setting And Clearing The Alarm
SETTING AND CLEARING THE ALARM ADJUSTING SCREEN BRIGHTNESS Use alarm mode to turn on the 700 Series at a pre-defined time. Note: LCD and button backlight brightness can be linked to the ambient When the alarm is activated, your 700 Series will play the last selected input source lighting level. For further details, see “Installing the 700 Series” on page at the volume level in use when the unit was turned off. Menu key Encoder Brightness... - Page 9 SiriusXM TUNER An example of the SiriusXM input source screen is shown in Figure 3 below. LISTENING TO THE TUNER Figure 3 – Example SiriusXM input source screen To select one of the available tuner bands: • Press the Tuner key to select input from each of the following in turn: AM, FM, VHF or SiriusXM-Ready (USA only) requires optional SiriusXM Connect Vehicle Tuner.
- Page 10 ADDING AND REMOVING PRESETS Tuning Method Applies to… When tuning with this method… The 700 Series allows you to set up your favorite AM/FM stations, VHF or SiriusXM Manual All bands • Press the Forward or Backward key to step through the channels as presets for easy recall. range of frequencies or channels one at a time. • Press and hold down the key for rapid scanning of Note: Up to 15 presets can be stored for each radio band. frequencies or channels.
- Page 11 To set the squelch level: 1. Press the Menu key. To listen to input from your iPod: 2. Turn and then press the Encoder to select Squelch. 3. Turn the Encoder to adjust the squelch level: MS-IP700i • Press the iPod key. The iPod input source screen is dis- • Increase the squelch level until the background noise is muted. played. The most recently selected track starts playing at the current play point.
- Page 12 Controlling Playback CONTROLLING iPod PLAYBACK Selecting tracks from a playlist You can control iPod playback with the Play / Pause, Forward and Rewind keys. The selected track starts playing automatically. There can be thousands of tracks stored on an iPod, so you need to select the tracks you wish to play from one of the groupings available (such as Playlists, Artists, Albums). For example, to select tracks by artist: If you want to: Use:...
- Page 13 Turn and then press the Rotary Encoder to select one of the following on page 43. settings to change. Then: To listen to music from your USB flash drive: • Turn and then press the Rotary Encoder to select the required setting Repeat • Off. Repeat mode is turned off • One. Repeat the current song MS-IP700i • Press the Auxiliary key. The USB input source Storage screen is displayed. • All. Repeat all songs in the current playlist MS-AV700i • Press the Auxiliary key. Keep pressing the key until the USB source screen is displayed. Auxiliary Shuffle • Off. Random play shuffle is turned off...
- Page 14 Controlling playback USB SOURCE SCREEN An example of a typical USB flash drive input source screen is shown in You can control playback with the Play / Pause, Forward and Rewind keys. Figure 5 below. The selected track starts playing automatically. Figure 5 – Example USB flash drive source screen If you want to: Use: Notes: Play / Pause a • Press the key to pause the current track. The...
- Page 15 • Press the Auxiliary key: or Shuffle. described below. page 6. • On the first press: MS-IP700i: the USB input source Storage screen is displayed. MS-AV700i: the iPod input source screen is displayed. To change a highlighted setting in the USB settings menu: • On the second press: Auxiliary 1. Press the Encoder to toggle the value on or off.
-
Page 16: Total Audio Control Via Nmea2000
Connect an All-In-One-DHCP Wireless Ethernet Router to the 700 Series entertainment system and Apple® devices like the iPad, iPhone and iPod touch® You can control one or more FUSION-Link capable stereo units from a single location can wirelessly control the audio around the boat. Apps are available for purchase on the boat with the touch of a button. -
Page 17: Infrared (Ir) Remote
The following keys work for the SiriusXM source Skip channels Forward /Back INFRARED (IR) REMOTE MS-AV700i model only You can use the IR remote to navigate through most functions in all sources Press to select Manual or Preset tuning methods. Press to display the SiriusXM menu that provides access to control options. Press Menu key to exit current menu screen. Use the arrow keys to navigate through menus. Press select (SEL) to choose the highlighted menu item. -
Page 18: Installing The 700 Series
INSTALLING THE 700 Series Dimensions are in millimetres (mm) and inches (”). Not to scale. Figure 7 – Dimensions - top view Figure 9 – Dimensions - front view CONTENT OF BOX 1 x MS-AV700i or MS-IP700i Stereo 4 x Mounting Screws 1 x Protective Dust Cover 2 x Mounting Brackets 1 x FUSION Drop Cable CAB000851. 1 x Mounting Gasket See note below. -
Page 19: Connections
Connect an AM/FM marine antenna. Purple / Black = Speaker Right Negative Note: Do Not Connect to a VHF splitter Note: Speaker connection (2 Ohm Stereo minimum). 2 pairs of 4 Ohm speakers per channel AUX INPUT can be connected in parallel to achieve 2 Ohm configuration Connect an Auxiliary source to the left and right RCA (White = L, Red = R). Zone 1 Line Out (Red wire) Low level output (For connection to external amplifier) VIDEO CONNECTION White RCA = Left Output Red RCA = Right Output (MS-IP700i iPod/iPhone video only, MS-AV700i DVD video only) Brown RCA = Subwoofer Output Connect the composite video output (Yellow = Video) to a TV / LCD monitor (MS-IP700i iPod/iPhone video is only available if device is inserted in internal dock). Zone 2 Line Out (White wire) L ow level output (For connection to external amplifier) USB CONNECTION White RCA = Left Output Red RCA = Right Output Connect an Apple sync cable (not included), or USB Flash Drive (not included) or connect the Brown RCA = Subwoofer Output MS-DKIPUSB Portable Media Device Dock (not included) -
Page 20: Installation
INSTALLA TION REMOTE CONTROL (NMEA2000) USB CONNECTION USB CONNECTION (iPod, iPhone, USB storage (MS-AV700 ONLY) device or FUSION dock) (USB storage device or FUSION dock) SiriusXM ETHERNET CONNECTION ANTENNA L (white) ZONE 1 R (RED) SUB (ORANGE) L (white) WHITE... -
Page 21: 700 Series Connection Example
Enabled Zones 2–4 can be disabled if required. This is useful, for example, if only two Zones have been set up, as disabled Zones are not displayed in any screens when setting levels. To enable or disable the selected Zone: a. Select the Enabled menu item. b. Press the Encoder to enable ( ) or disable ( ) the selected Zone. c. Press any key to exit MS-IP700i or MS-AV700i... -
Page 22: Zones
Important: If a Zone is disabled, you cannot change any of the following settings Balance for that Zone. To specify the balance for the selected Zone: a. Select the Balance menu item. Disable Internal Amplifiers b. Turn the Encoder to the left or right to adjust the Balance for the selected Zone. Disable the internal amplifiers for Zones 1 and 2. For example, if external amplifiers c. - Page 23 Supported devices may be either inserted into the internal dock or connected to the external USB connector. The MS-IP700i Stereo does NOT support multiple iPod or iPhone devices connected simultaneously. Correct operation is only guaranteed with a single b. If required, press the Forward (or Backward) key to highlight the character iPod/iPhone device connected.
- Page 24 3. Close the control panel door firmly. 4. Select input from the device, as required. MS-AV700i and MS-IP700i Models The 700 Series stereos provide an external USB connector (rear cable assembly) for connection to external iPods, iPhones, USB storage devices or FUSION MS- DKIPUSB dock. To connect your iPod, you will need: • Portable media device dock (MS-DKIPUSB), or Portable media device dock • Apple Sync Cable.
-
Page 25: Preparing For Auxiliary Input
Supported iPod sleeves Recommended settings are listed below: Full details of included iPod sleeves are printed on a separate card included in the box with the 700 Series. AUX Device AUX gain setting (dB) PREPARING FOR AUXILIARY INPUT Portable media player with headphone output -9dB to -6dB CD/DVD player with line output -6dB... -
Page 26: Siriusxm Satellite Radio
You must activate the SiriusXM tuner before you can begin to receive the SiriusXM Radio Service. 3. Do one of the following: In order to activate your radio subscription, you will need the SiriusXM ID (SXID) which • To select a channel from the list of all channels, press the Encoder to select uniquely identifies your tuner. The 8 digit SXID is displayed on the LCD on initialization. All channels. MS-IP700i and MS-AV700i will display the SXID on Channel 0. • To select a channel in a specific category, turn and then press the Encoder to select a category name (Pop, for example). Power on your system and make sure that you are receiving good signal, you are able to hear audio on the 4. Turn and press the Encoder again to select the channel you wish to play. SiriusXM Preview channel (Channel 1) 5. - Page 27 Padlock icon • To disable the Category tuning method, press the Encoder to select All chan- nels. The SiriusXM Source Screen is displayed with the Tuning mode indicated set to ‘Manual’. • The padlock icon means the channel is locked or considered 4. Press the Menu key to exit the current menu or press and hold the Menu key to mature content. If you select this channel you will be asked to unlock close the menu completely.
-
Page 28: Advanced Settings
To lock or unlock a channel: 1. Press the Menu key. 2. (if required) turn and then press the Encoder to select Parental > Unlock. Enter your access code. 3. Select the Lock/Unlock menu item. 4. Turn the Encoder to highlight a channel then press the Encoder to lock ( ) or unlock ( ) the channel, as required. 3. Enter the old (current) access code by turning the Encoder to change the 5. Press the Menu key (or leave to time out) to exit. highlighted digit, then press the Encoder to select the next digit. When you have entered all four digits correctly, you will be prompted to enter the new access code. - Page 29 To change the sub filter setting: Tel mute 1. Press the Menu key. 2. Turn and then press the Rotary Encoder to select Settings > Sub filter. Use this option to control which action is taken when the 700 Series is connected to 3. Turn the Rotary Encoder to select the required filter frequency. a cellphone hands-free kit. 4. Press the Rotary Encoder to save the setting and exit. To change the Tel mute setting: 5. Press any key to exit 1.
-
Page 30: Appendices
As with all products exposed to the harsh marine environment, a little care will way to prevent help to preserve the finish. FUSION recommends that you clean any salt water corrosion on and/or salt residue from the front panel with a damp cloth soaked in fresh... - Page 31 Problem Solution • Ensure that you have the latest version of operating software iPod installed in your iPod/iPhone and the latest iTunes version. To do Why does my FUSION If you are experiencing software lock-ups or your unit freezes: this, connect your iPod/iPhone to iTunes and it will check and, if Head unit keep locking • Reset the Head unit by pressing the reset button inside necessary, prompt you to download the latest version.
-
Page 32: Specifications
Tuning range registered in the US and Association, Inc. other countries. Europe and Australasia FM radio frequency range 87.5–108 FM radio frequency range 87.5–107.9 SUPPORT, SALES AND SERVICE MHz. MHz. FUSION Electronics in New Zealand + 64 9 369 2900 Frequency step 100 kHz Frequency step 200 kHz AM radio frequency range 522– AM radio frequency range 530–1710 FUSION Electronics Australia + 61 1300 736 012 1620 MHz. MHz. FUSION Electronics Europe +31 76 572 3632 Frequency step 9 kHz Frequency step 10 kHz FUSION Electronics USA +1 623 580 9000 Website: www.fusionelectronics.com... - Page 33 ..............................19 ethernet support on 700 Series .......................... 30 settings FAST menu search feature on iPod ........................23 AM/VHF sources, enabling/disabling ...................... 57 FUSION-Link control system ............................29 clock time, setting ..............................48 gain value, adjusting for auxiliary input ........................ 47 key sound (beep) enable/disable ........................55 infrared (IR) remote control ............................31 language for menu display, changing ........................
- Page 34 sub filter, setting ................................. 54 selecting audio tracks .............................. 25 tel mute setting ................................56 settings, changing .............................. 27 tuner region, setting ..............................56 background noise, minimizing ..........................19 VHF region, setting ..............................56 VHF, setting up................................19 region, setting ................................56 shuffle setting on iPod, changing ..........................23 scan mode, turning on .............................
- Page 35 NOTES NOTES .................................................................................................................................................................................................................................................................................................................................................................................................................................................................................................................................................................................................................................................................................................................................................................................................................................................................................................................................................................................................................................................................................................................................................................................................................................................................................................................................................................................................................................................................................................................................................................................................................
- Page 36 ................................................................................................................................................................© Copyright 2012 by FUSION Electronics Limited. All rights reserved. Product specifications, design and prices are subject to change without notice. Product availability may vary between sales regions. “Made for iPod,” “Made for iPhone,” ........................................mean that an electronic accessory has been designed to connect specifically to iPod, iPhone, respectively, and has been certified by the developer to meet Apple performance standards. Apple is not responsible for the operation of this device ........................................
- Page 37 Specifications and design are subject to change without notice MAN000001F...
Need help?
Do you have a question about the MS-IP700i and is the answer not in the manual?
Questions and answers
Stereo will not play any volume?
No sound from unit Radio locked on to local station