
Related Manuals for Franke bremer VIVA au lait


Summary of Contents for Franke bremer VIVA au lait
-
Page 1: Operating Instructions
VIVA au lait Operating Instructions Automatic Coffee/ Cappuccino/ Espresso Machine Franke Coffee Systems... - Page 2 Dear customer, before putting your coffee machine into operation, please read the operating instructions carefully. In this way, you protect yourself and you avoid damages to the device. They contain important information on the correct use of your machine and will enable you to use the coffee machine with the necessary handling.
-
Page 3: Table Of Contents
Contents Page Notes on operating safety ......Familiarise yourself with the bremer VIVA KM au lait . - Page 4 Contents Page Switch off / End of operation ......Adjustment, programming ......Overview of the adjustment possibilities .
-
Page 5: Notes On Operating Safety
Extended operating pauses or shut−down of the unit D Before extended shut−down periods, the cleaning program has to be carried out. D In order to avoid frost damages or in case of risk of freezing, the Franke customer service has to empty the unit. -
Page 6: Familiarise Yourself With The Bremer Viva Km Au Lait
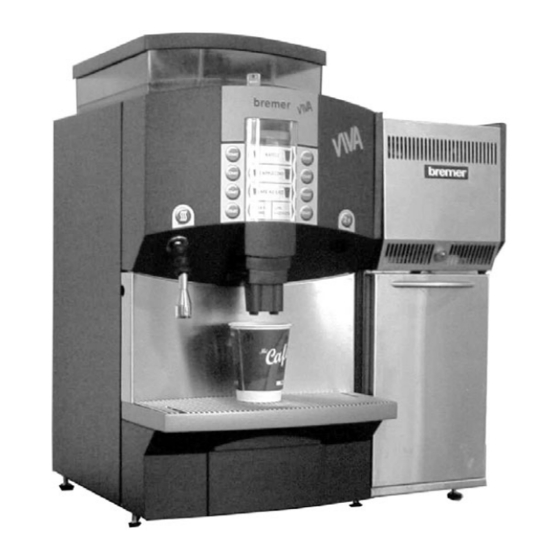
2. Familiarise yourself with the bremer VIVA KM au lait Cover for manual ground Cover, bean container coffee metering and clea- *lockable) ning agent metering *Bean container, left Bean container, right Bean container, centre Keybad cover (lockable) *Toggle for variable milk Milk suction hose dosage *Toggle for 4 different... -
Page 7: Set The Language For The Menue
2.1 Set the language for the menue − before switching on − in STANDBY Mode !!! STANDBY !!! − at the machine Example: set the language to German . Press the upper article key on the left hand side continuously, press at the same time START till the requested country START... -
Page 8: Switch On The Unit
Switch on the unit . Open the water valve. . Switch on the electrical mains switch. !!! STANDBY !!! D !!! STANDBY !!! appears in the display panel. . Unlock and open keypad cover with key. . Switch on the coffee machine by pressing the on−off switch. - Page 9 Top up coffee beans Cover, beans container Lock (option) . Unlock the hopper cover with the key and open it. . Fill the empty hopper with the required type of coffee beans. D If the appliance is equipped with 2 grinders, it will be possible to use two different sorts of coffee beans.
-
Page 10: Provide Milk
3.2 Provide milk Food poisoning by bad milk! If off milk is used, there will be the risk of food poisoning. For hygienic reasons, the milk has to be replaced in time. Off milk has a foul smell and must not be used. CAUTION Observe the hygienic instructions and use only pre−cooled long−life milk. - Page 11 Display at bremer VIVA with Milk Fridge and level sensor detection (add. feature) D The sensors transmit a signal, after the Number of possible example: minimum supply level is fallen below in the milk dosages milk container. In the display appears the Ready message.
-
Page 12: Prepare And Take Coffee
3.3 Prepare and take coffee Risk of scalding by hot coffee ! After completion of the brewing process, the machine automatically serves hot coffee. CAUTION Deposit and leave the cup during the process. Do not handle below the coffee outlet. NOTE During coffee production do not pull out the coffee ground tank or the coffee outlet (outlet head), as otherwise malfunction might... -
Page 13: Set The Number Of Portions − Multiple Selection
3.3.2Set the number of portions − Multiple Selection D The standard factory setting of the coffee machine is the preparing of single portions, see page 12. D The customer service may adjust the bremer VIVA coffee machine by starting up, so you can set the number of portions, like following example. -
Page 14: Manual Ground Coffee Metering
3.4 Manual ground coffee metering D This is for preparing single portions only. . Place the cup under the coffee dispenser. . Unlock and open the cover for ground coffee Press here to open Cover for ground chute (1)and keypad (2). coffee chute (1) Lock (option) Keypad cover (2) -
Page 15: Manually Add Milk Or Milk Froth
3.5 Manually add milk or milk froth (bremer VIVA with milk frother) . Open keypad cover. D The coffee maker is ready for operation when the green indicator lamps on the buttons light up. Manual metering: − Key for milk froth −... -
Page 16: Emptying The Grounds Container
After the set number of portions is reached, the display signals that the grounds container must be emptied. The number of portions can be changed by the Franke bremer Customer Service representative (factory setting 80 to 100 portions). If "Empty grounds container" appears in the display panel, −... -
Page 17: Adjusting The Milk Dosage
3.7 Adjusting the milk dosage VIVA KM au lait with adjustable milk dosage Milk contai- Milk contai- D With the switch on the left side you can ad- ner 2 ner 1 just the milk dosage as required. 3,5% fat 0,5% fat D Examples: −... -
Page 18: Switching To The Second Product Level
Shift level Only with unsettled bremer VIVA KM au lait botton no. Normal level The Franke bremer customer service may set the shift function in the service menu if it is neces- sary. D On level SHIFT (second product level) −... -
Page 19: Take Hot Water (Additional Feature)
Take hot water (additional Feature) Risk of scalding by hot water! After pressing the hot water button, the machine automatically dispenses hot water. CAUTION Proceed with care. Place cup under Hot water dispenser wait until operation is finished. Do not handle below the hot water outlet. Hold the hot water outlet pipe at the protective handle (add. -
Page 20: Dispensing Different Quantities Of Hot Water
4.1 Dispensing different quantities of hot water bremer VIVA KM au lait with selector switch D After standard attitude the dispensing of hot water is possible only in position 1 (100 units correspond approx. 140 ml). D Dispensing of hot water see Page 19. -
Page 21: Take Steam (Additional Feature)
NOTE Depending on the adjustment in the service menu (to be adjusted by the Franke bremer customer service): Steam is distributed as long as you keep the steam button pressed (factory setting) or steam is distributed until steam distribution is disabled by pressing the steam button repeatedly. -
Page 22: Cleaning And Care
Cleaning tablets for coffee machines Cleaning tablets for automatic cleaning of the brewing unit Special Cleaner VIVA KM with milk frother: for cleaning the milk system (add. feature) You can obtain cleaning agents from your Franke Customer Service agent. -
Page 23: Cleaning The Milk System
6.1 Cleaning the milk system NOTE Clean the milk system − for hygiene reasons − at least two times a day − with Special cleaner and hot water − especially prior to longer pauses between milk drawings − to avoid disturbances in milk dosage. Clean the milk suction hose with a damp lint−free cloth. - Page 24 . Place the vessel into the milk fridge. . Insert the suction pipe to the vessel. suction hose . Close the door of the milk fridge. D For rinsing the pipe, prepare a clean vessel with approx. 0,6 Liter cold clear water. Go on with cleaning the brewing unit", see page 25 Rinsing the milk pipe".
-
Page 25: Cleaning The Brewing Unit
6.2 Cleaning the brewing unit D The brewing unit is cleaned by the automatic cleaning program (duration approx. 10 minutes). D The command to execute milk cleaning is also displayed by the additional feature Milk frother". Use a special cleaner to rinse the milk system (duration approx. - Page 26 . After this message press key Press + To Rinse 2 Tube a second time. Instruction for second cleaning cycle (rinsing cycle) D Rinsing runs from approx. 1 minute. An Rinsing Tube instruction appears in the message field. Please wait After the rinsing the milk system is cleaned.
-
Page 27: Cleaning The Coffee Dispenser
6.3 Cleaning the coffee dispenser − for hygiene reasons − with a cleaning brush − bremer VIVA with milk frother: clean the coffee dispenser several times a day with a special cleaner for milk systems. Pull out the coffee dispenser Risk of scalding! The dispenser block may be hot. - Page 28 Insert all removed parts in a cleaning bath − only bremer VIVA with milk foamer − several times a day − approx. 20 minutes Cover . Proportion cleaning agent special cleaner in a container, push the dispenser 5 times and add approx.
- Page 29 Assemble the coffee dispenser and connect it to the coffee machine Cover . Press the cover into the dispenser block until Dispenser block the stopper is reached (bremer VIVA with milk froth). D If the cover is not closed completely the milk will be heated up too much.
- Page 30 6.4 Deliming and cleaning the hot water / steam outlet (add. feature) − only in case of lime deposits and furring Risk of scalding in case of unintentional hot water outlet! Before decalcifying the hot water outlet, switch off the VIVA KM via the on−off switch CAUTION Screw off the cone and nozzle only if the machine is switched off and...
-
Page 31: Clean Coffee Bean Container And Housing
6.5 Clean coffee bean container and housing . Switch off the VIVA coffee machine − before cleaning − so that the grinder or brewing unit cannot start automatically (avoid risk of crushed fingers) − via the main switch Clean the coffee bean container Note When cleaning the container, ensure that impurities do not enter the coffee bean container or grinder. -
Page 32: Switch Off / End Of Operation
D To prevent calcification of the coffee machines, Britta Waterfilters are placed into the water supply of the coffee machines. D Call the Franke customer service if you get a message in the display panel to change the water filter. -
Page 33: Adjustment, Programming
Adjustment, programming 8.1 Overview of the adjustment possibilities Ready NOTE: The setting is possible only, if the main menu is not blocked by a secret code. Access to the main menu / Enter a secret code number, see page 40. Access to the submenu Summing counter Coffee cup... -
Page 34: Display Or Delete The Summing Counter
8.2 Display or delete the summing counter All output articles are counted in the summing counter. These totals can be displayed or deleted. Ready Summing counter Coffee cup Total:0000000012 Select the required article by pressing the corresponding article key. Exit menu E. -
Page 35: Assigning Bean Container To The Article Key
8.3 Assigning bean container to the article key Ready Select grinder Coffee cup Grinder: centre Select the required article by pressing the correspon- ding article key Exit menu The article "Cup of coffee", related to this key, is used for neutralization after automatic cleaning. -
Page 36: Adjusting Metering Quantities For Article
8.4 Adjusting metering quantities for article Ready Coffee cup Ground coff.:245 Select required article by pressing the corresponding article key Adjust dosage quantity E. g. 1 Espresso selected Ground coffee quantity − grinder 1 espresso running time Ground Cof.: 290 Adjustment range: 0 to 999 in 1/100 sec. -
Page 37: Adjusting The Metering Quantity Hot Water
8.5 Adjusting the metering quantity hot water" This setting is only effective if the "metered hot water dispensing" is activated. Adjustment to "metered/unmetered hot water dispensing" can be performed by Customer Service. "Metered hot water dispensing" is activated at the factory. Ready Adjust dosage Coffee cup... -
Page 38: Assigning Article Names To The Article Key Or Blocking A Key
8.6 Assigning article names to the article key or blocking a key Ready Article Key: 1 designation Coffee cup Select required article by pressing the corresponding article key Key 1 Key 2 Key 4 Key 3 Key 5 Key 6 Exit menu Key 7 Key 8... -
Page 39: Adjusting Article Control (Multiple Selection)
8.7 Adjusting article control (multiple selection) The possibility for multiple selection can be switched off and on. If you have switched on multiple selection, you can preselect up to 9 portions during one brewing operation, e.g. for brewing in a pot. The article keys can be assigned to an external billing system. -
Page 40: Enter A Secret Code (Pin) To Change Settings
8.8 Enter a secret code (PIN) to change settings You can block the message- and entry field against unwanted operation by entering a secret code / PIN = personal identification number . The factory setting is 5 zeros. When this code (5 zeros) is entered, themessage- and entry field are not blocked. -
Page 41: Setting The Dispensing Sequence
8.9 Setting the dispensing sequence VIVA KM with milk frother, VIVA KM au lait and VIVA 24: By means of the dispensing sequence you can for instance decide whethermilk foam or the brewing cycle starts first. Both of these can also run simultaneously. Ready Coffee cup brewing: 1... -
Page 42: Faults And Remedies
The temperature sensor or Switch off the unit. boiler is higher than 135°C. It switched off pressure switch is defect. Call the Franke customer service. itself for safety reasons. 41 LON communication interfered no apb" is indicated − The Franke customer service will only VIVA KM with load the apb−file. - Page 43 Faults with indication text Example: Insert grounds container Indication of failt Possible cause Remedy Insert grounds container It is not inserted into Clean and insert it into the the machine. machine. Dispenser block is missing It is not inserted into the Insert a clean dispenser block into machine.
- Page 44 . Close the water valve. . Call the Franke customer service and quote the error message, unit type, machine no. and the year of construction, see page.
-
Page 45: Technical Data
10. Technical data Professional coffee machine bremer VIVA KM au lait Type 810 . . . with milk refrigerator, 1 milk container, level sensor, milk dosage Type 813 . . . with milk refrigerator, 2 milk containers, level sensors, adjustable milk dosage Number/capacity, bean container 1 to 3 bean containers, depending on configuration left and right approx. -
Page 46: Setting Up And Connecting (Customer Service)
11. Setting up and connecting (Customer Service) D Setting up, installation, putting into operation for the first time and instruction are performed by the Franke bremer Customer Service. D On the building site, the connections must be up to 1 m to the installation location. - Page 47 Setting up the bremer VIVA KM /−au lait with Milk Fridge (add. feature) Table opening for supply lines water outlet / waste water supply mains cable connection for equipotenitial bonding system setting up on the left or the right side impactable door 1055 on the left or...
-
Page 48: Remove Protection / Inserting Beans Container
11.2 Remove protection / Inserting beans container D The beans container may be inserted by authorized servicemen only! Keypad cover Lock . Unlock keypad cover with key and open. . Remove 2 screws. . Pull front panel forth to the limit stop (approx. -
Page 49: Connecting The Water Supply
11.3 Connecting the water supply D Observe the national guidelines for the water connection. D For a water hardness of over 5° dkH (carbonate hardness), we recommend that you have to install a water softener in the water inlet line. Observe the instructions on installing and using the water softener. -
Page 50: Connecting The Mains Cable
11.5 Connecting the mains cable D An approved electrician must make the electrical connections − with the applicable national regulations − and in accordance with the regulations of the responsible electricity supply company. D The mobile mains connection line must be at least a rubber hose line in accordance with national standards H05 RN-F / 227 IEC 53 or in accordance with national regulations. -
Page 51: Rating Plate Data / Maintenance
− after every 60.000 products − at least once per year − by an authorized Franke bremer Customer Service. D According to the pressure vessel regulations 97/23/EG and to the regulations for operating safety the operator is responsible for the careful maintenance and for the inspection of the safety equipment in regular intervals. -
Page 52: Maintenance Notes
12.1 Maintenance notes date name of the customer service remarks... - Page 53 date name of the customer service remarks...
-
Page 54: Dismantling, Disposal
− Remove remaining coffee beans from the bean hopper. − Remove coffee grounds from the grounds drawer and clean the drawer. D For safety reasons, the following steps should be carried out by a Franke customer service engineer before disposing of the old machine: −... -
Page 55: Eu Conformity Declaration
Telefon +49 7931 992 0 Franke Coffee Systems Telefax +49 7931 517 00 www.franke−cs.com Franke bremer GmbH Lindenweg 36-42 D-97999 Igersheim EU Conformity Déclaration de confor- EWG-Konformitäts- erklärung declaration mité européenne We hereby declare that the design of Hiermit erklären wir, daß die nachfol- Nous déclarons, par la présente,... - Page 56 Franke Kaffeemaschinen AG Franke−Strasse 9 CH−4663 Aarburg Operating Instructions Switzerland bremer VIVA au lait Phone +41 62 787 37 37 Rev. 07.07−E Fax +41 62 787 30 10 Print. 2007−7−10 www.franke−cs.com Art.no. 815322...
Need help?
Do you have a question about the bremer VIVA au lait and is the answer not in the manual?
Questions and answers