Advertisement
Quick Links
Advertisement

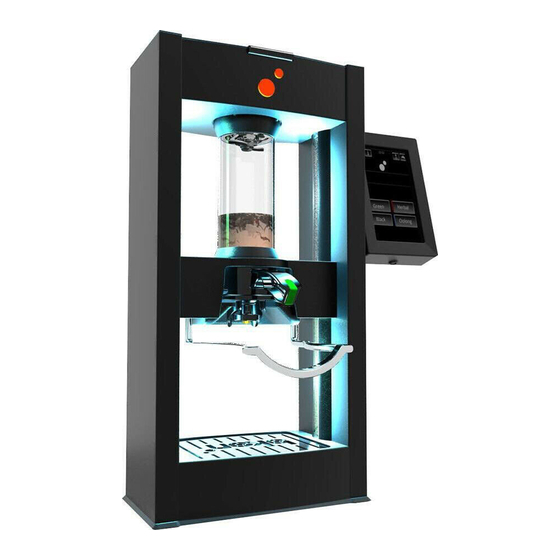
Summary of Contents for Franke Bkon Craft Brewer
- Page 1 INSTALLATION MANUAL...
-
Page 2: Table Of Contents
TABLE OF CONTENTS Safety General Pre-Installation / Delivery Specifi cations Installation Appendix: Installation Checklist of 16... -
Page 3: Safety
Observe the following dangers, warnings, cautions and - Keep hands away from the outlet (purge valve) while notices when installing the BKON Craft Brewer: in operation. - The glass cylinder may be HOT to the touch. EXPLANATION OF SAFETY SYMBOLS - Do not disconnect “Hot Water”... -
Page 4: General
PRE-INSTALLATION / DELIVERY PRE-INSTALLATION 4. Remove Packing & Loose Components The BKON Craft Brewer unit consists of a brew 1. Water Pressure is very important. tower and a supply center that are all secured Ensure sure incoming water pressure is between so they will not open or shift during shipping. - Page 5 Pre-Installation / Delivery A list of items shipped with the BKON Craft Brewer (NOTE: Items are not necessarily shown to scale with one another) ™ Qty 1 - Brew Cylinder Qty 1 - Tower Base Gasket Qty 1 - USB Thumb Drive Qty 1 - Brew Tower (operator side shown) Qty 1 - Drain Pan Cover Qty 1 - Drain Pan...
-
Page 6: Specifications
SPECIFICATIONS SPECIFICATIONS FRONT VIEW TOP VIEW Voltage / Frequency / 208V-220/230V 50/60Hz, 30A Amps NEMA Plug L6-30 17”[432mm] (Main Unit) Water Supply ⅜” NPT and ⅜” Push Fit Fitting Line Drain Line ¾” GHT Width 17” 432mm Tower Depth 9½” 241mm 13½”[343mm] Height... -
Page 7: Installation
INSTALLATION Ensure hole has been cut in counter prior to installation - Tilt the craft brewer on to its back - - The hole should be cut in the counter/table by a - Gently lay the craft brewer on its back qualifi... - Page 8 Installation Insert the (4) support bolts - - Choose the proper length bolts for installation, either 3” or 6” - Ensure the bolt heads are seated in the recesses, to prevent bolts from turning during tightening Raise the tower into place - washer lock washer wing nut...
- Page 9 Installation Risk of burning or scalding to person(s) in the vicinity of the unit WA R N I NG during cool down or calibration cycle if the dranin lines are not secured properly during installation. Hot water and steam are released under pressure during the cleaning cycle. Ensure drain lines are securely anchored in per local, state, and national building and plumbing codes.
- Page 10 Installation Connect primary drain - Connect air and secondary drain - - Install drain hose to the drain pan adapter - Air line connects to WVSC (shown in step 21) - Turn hose connector clockwise to tighten - Drain line connects to store drain Note - Drain lines are single runs to store drain to prevent possible back up issues (Refer to the ‘Connecton Diagram’...
- Page 11 Installation Install drain pan - - Secure drain pan in bottom of tower with (4) screws Install Water Vacuum Supply Center (WVSC) in cabinet - - Place WVSC in cabinet with connections facing forward Install drain pan fi lter-sieve - - Drain pan fi...
- Page 12 Installation Connect tower air and water lines to WVSC - Raise cylinder locking handle - - Connect lines to WVSC according to their labels - Raise cylinder locking handle - Drain line connects to store drain Sieve Bsp Thread Adapter Stem Elbow (shown) Striaght Stem Adapter Raise locking handle -...
- Page 13 Installation Angle and insert cylinder - Insert a brew basket and handle - - Carefully insert glass cylinder in place from the - Combine handle and basket, insert under cylinder customer side of brew tower Lower locking handle - Lower locking handle to seal lower cylinder in Raise cylinder - - Raise cylinder in place to ensure a tight seal on place...
- Page 14 Installation Lower cylinder locking handle - - Lower cylinder locking handle to complete installation Power - Start Up NO TI CE When turning on machine, it is necessary to have the Brew Basket and Brew Handle out of the machine until the User Interface is ready and menus are available.
- Page 15 Installation Software Installation Install new User Interface Software Turn OFF START Insert Select Turn OFF Wait 20 Seconds Turn ON Select Remove Wait approx. 20 seconds Install new Mainboard Software Insert Enter Update MB Passcode Firmware 4576 Press & hold 5 seconds Select file Turn OFF...
-
Page 16: Appendix: Installation Checklist
O Take picture of UI screen after all testing is O Make sure the Tower drain line and WVSC drain line completed and send to Franke are not connected together (in a loop). Both should drain into the store drain. - Page 17 Date: Service Provider Signature: © 2014 Franke Foodservice Systems, Inc. This media is the confidential property of Franke Foodservice Systems, Inc. and shall not be For Warranty or Customer Support: reproduced in any form of media without the express written permission of Franke. BKON, BKON Craft Brewer, RAIN, Reverse Tel +1-855-353-7378 Atmospheric Infusion, and the red dot logo are trademarks of Bkon LLC.
- Page 18 (19006964 Rev. C, September, 2015) © 2015 Franke Foodservice Systems, Inc. This media is the confi dential property of Franke Foodservice Systems, Inc. and shall not be reproduced in any form of media without the express written permission of Franke. BKON, BKON Craft Brewer, RAIN, Reverse Atmospheric Infusion, and the red dot logo are trademarks of Bkon LLC.


Need help?
Do you have a question about the Bkon Craft Brewer and is the answer not in the manual?
Questions and answers