ClearOne Max IP Administrator's Manual
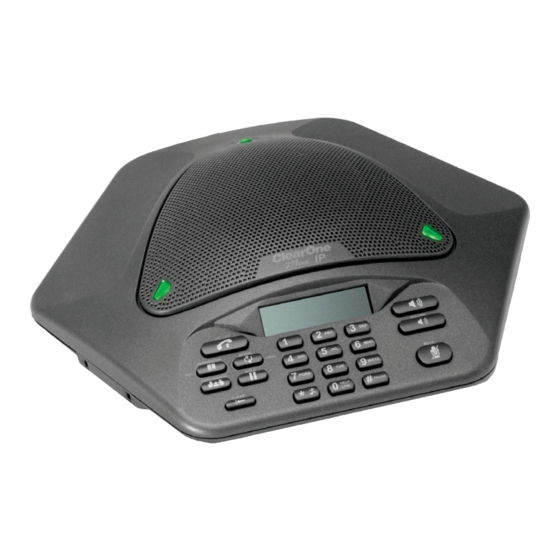
Conferencing phone
Hide thumbs
Also See for Max IP:
- Administrator's manual (39 pages) ,
- User manual (7 pages) ,
- Interoperability manual (4 pages)
Table of Contents
Advertisement
Quick Links
Download this manual
See also:
User Manual
Advertisement
Table of Contents

Related Manuals for ClearOne Max IP


Summary of Contents for ClearOne Max IP
- Page 1 MAX™ IP Conferencing Phone ADMINISTRATOR’S GUIDE...
- Page 2 ClearOne Communications. Printed in the United States of America. ClearOne reserves specific privileges. Inforfrmation in this document is subject to change with-...
-
Page 3: Table Of Contents
Product Overview ....... 1 Caring for Your MAX IP ......35 Service and Support . -
Page 5: Chapter 1: Introduction
EASY TO USE. SERVICE AND SUPPORT If you need additional information on how to set up or operate your MAX IP conferencing phone, please contact us. We welcome and encourage your comments so we can continue to improve our products and better meet your needs. -
Page 6: Important Safety Information
IMPORTANT SAFETY INFORMATION Read the safety instructions before first use of this product. This conferencing phone is not designed for making emergency telephone calls when the power fails. Make alternative arrangements for access to emergency services. • Read and understand all instructions and follow all warnings marked on the product. •... -
Page 7: Unpacking
Power Cord MAX IP parts FIGURE 1.1 Note: ClearOne is not responsible for product damage incurred during shipment. You must make claims > directly with the carrier. Inspect your shipment carefully for obvious signs of damage. If the shipment appears damaged, retain the original boxes and packing material for inspection by the carrier. Contact your carrier immediately. - Page 8 Technical Services: 800.283.5936...
-
Page 9: Chapter 2: Getting Started
To Link In 25' Connection cable To Link Out on Base Unit Connecting additional units FIGURE 2.2 Continue linking up to three additional MAX IP phones in the same fashion. A total of four units may be connected. Chapter 2: Getting Started... -
Page 10: Provisioning Your Max Ip Phone
The Gateway IP address is defined by DHCP option 3. The TFTP server is defined first by DHCP option 66. If this is undefined, then the MAX IP examines the siaddr parameter in the DHCP ACK packet. If this is not defined, then the hostname parameter in the DHCP ACK packet is used. -
Page 11: Manually Assigning An Ip Address
LCD screen (see figure 2.3). REDIAL/PROG MAX IP LCD Program icon FIGURE 2.3 Note: If a key is not pressed within 30 seconds of entering program mode, the MAX IP phone will beep > and return to operation mode. 2. Press the key. -
Page 12: Web Portal Screens
MAC address. The MAC address is a unique address in hexadecial format that can also be found on the label attached to the back of your MAX IP base unit. This screen (and all other screens) also includes a link to the Registration page in order to register your MAX IP phone with ClearOne. -
Page 13: Configuration: General Settings Screen
FIGURE 2.5 CONFIGURATION: GENERAL SETTINGS SCREEN Use the Configuration: General Settings screen (see figure 2.6) to set up security, provisioning, the MAX IP extension and help line phone numbers, and when a reboot of the phone is allowed. Configuration: General Settings screen FIGURE 2.6... -
Page 14: Configuration: User Preferences Screen
Click the button to activate the changes. Apply Phone N N umbers:To change or set the phone numbers for the MAX IP phone and help line, enter the phone • number for the MAX IP phone into the field and the phone number for the help line into... -
Page 15: Configuration: Dial Plan Screen
Use the Configuration: Dial Plan (see figure 2.8) screen to view your current dial plan and to choose how you want the dial plan for your MAX IP phone loaded. You can choose to have it loaded from a file containing all of the settings you desire or you can select the settings you wish for your MAX IP phone manually through this screen. - Page 16 This method ensures that each phone in the group uses the same dial plan settings. (Although the name of your dial plan file can be any name you wish, it is stored in the MAX IP phone in a file named C1MAX1AVDIAL.txt.) Your dial plan file can be located in different directories in order to provide for...
-
Page 17: Configuration: Network Settings Screen
Configuration: Network Settings screen FIGURE 2.10 • Hostname: This is the name of the host (or the MAX IP’s device name on the network) and is the same as the system name found on the Device Information screen. • Enable D D HCP: Click this check box to enable DHCP on the MAX IP phone. When enabled, the settings for domain name, static IP address, subnet mask, default gateway, primary DNS IP address, and secondary DNS IP address are all grayed out as they are obtained automatically from the DHCP server. -
Page 18: Configuration: Sip Configuration Screen
• QoS ( ( Quality o o f S S ervice): QoS is implemented on the MAX IP using DSCP (differentiated service code point). The DSCP is a selector for a router’s per-hop behaviors. Each group of DSCPs (or class) has the same precedence value, from 0 to 7, with the default precedence value for MAX IP being 5. - Page 19 • Enable A A uthentication: Click this check box to enable authentication or uncheck it to disable authentication. (Authentication is required if the proxy requires it.) Authentication verifies the username and password as entered in the fields. These fields are active only Authorization u u ser Authorization p p assword when authentication is enabled and can thus be modified.
-
Page 20: Configuration: Audio Settings Screen
CONFIGURATION: AUDIO SETTINGS SCREEN Use the Configuration: Audio Settings screen (see figure 2.12) to configure the voice activation detection settings and to prioritize your preferred audio codecs. Configuration: Audio Settings screen FIGURE 2.12 • Enable V V AD: Click the check box to enable VAD (voice activity detection) or uncheck the box to disable it (VAD is enabled by default). -
Page 21: Configuration: Trace/Logging Settings Screen
SIP subsystems, as well as system logs and trace flags. Configuration: Trace/Logging Settings screen FIGURE 2.13 Note: This screen is only used to diagnose problems you might be experiencing on your MAX IP > phone. Before enabling any of these logs, please call customer service to receive instructions on which logs to enable. -
Page 22: Phonebook: Add, Edit, & Delete Number Screen
Download button. The log shows the last 8 KB of log data. Click the Update button to get the most recent 8 KB of data. Click the Clear button to clear the log. Note: This screen is only used to diagnose problems you might be experiencing on your MAX IP >... -
Page 23: Tools Diagnostics: Voip Statistics Screen
View Log: Device Log File screen FIGURE 2.15 TOOLS: DIAGNOSTICS - VOIP STATISTICS SCREEN Use the Tools: Diagnostics - VoIP Statistics screen (see figure 2.16) to check the phone state, update firmware, reboot the phone, and restore default settings. View Log: Device Log File screen FIGURE 2.16 Chapter 2: Getting Started... -
Page 24: Automatically Provisioning Your Max Ip Phone
Reboot D D evice: Click this button to reboot your MAX IP phone. • Restore D D efault S S ettings: Click this button to restore the default settings of your MAX IP phone. AUTOMATICALLY PROVISIONING YOUR MAX IP PHONE As mentioned previously, if you have multiple units that you want to provision with the same settings, the quickest and most seamless way of accomplishing this is through automatic provisioning. - Page 25 The following parameters are the parameters available for configuring the phone settings and phone-specific files. <username> The username for logging into the web portal. (See Manually Provisioning Your MAX IP Phone on page 7 for the login procedure.) Default value: admin <password>...
- Page 26 <localnum> The localnum parameter describes the identifier by which the phone will be known. For example, if localnum is set to 1234 and the phone is registered to ClearOneProxy.com, then the phone's SIP URI will be sip:1234@ClearOneProxy.com. (See Configuration: General Settings Screen on page 9 for information on how to set this parameter through the web portal.) Default value: 1111111 Allowable characters: [0-9]...
- Page 27 <timezone> The time zone in which the phone resides. (See Configuration: User Preferences Screen on page 10 for information on how to set this parameter through the web portal.) Default value: 5 Allowable parameters: 0 - GMT-12:00 (International Date Line West) 1 - GMT-11:00 (Midway Island, Samoa) 2 - GMT-10:00 (Hawaii) 3 - GMT-09:00 (Alaska)
- Page 28 <adjust_dst> Adjust for daylight savings time. (See Configuration: User Preferences Screen on page 10 for information on how to set this parameter through the web portal.) Default value: 1 Allowable values: 0 - disable 1 - enable <SNTP_server_1> SNTP 1 server IP address. (See Configuration: Network Settings Screen on page 13 for information on how to set this parameter through the web portal.) Default value: 0.0.0.0 Allowable values: 0.0.0.0 (disabled) or valid IP address.
- Page 29 <sip_password> The password with which the phone will authenticate with the SIP proxy if <use_sipauth> is enabled and <sip_username> is defined. (See Configuraton: SIP Configuration Screen on page 14 for informa- tion on how to set this parameter through the web portal.) Default value: none Allowable string length: 14 <sip_proxy_enable>...
- Page 30 <outbound_proxy_port> The default port with which to communicate to the outbound SIP proxy. (See Configuraton: SIP Configuration Screen on page 14 for information on how to set this parameter through the web portal.) Default value: 5060 Allowable port range: 1 - 65535 <sip_register_timetout>...
- Page 31 <dtmf_relay_payload> The DTMF relay RTP packet payload. (See Configuraton: SIP Configuration Screen on page 14 for informa- tion on how to set this parameter through the web portal.) Default value: 97 Allowable range: 96 - 127 <vad_enable> Enable Voice Activity Detection. (See Configuraton: Audio Settings Screen on page 16 for information on how to set this parameter through the web portal.) Default value: 1 Allowable range:...
- Page 32 <g729ab_priority> The G.729A/B audio codec priority. (See Configuraton: Audio Settings Screen on page 16 for information on how to select this codec priority through the web portal.) Default value: 250 Allowable range: 1 (lowest) to 255 (highest) <g7231_63_priority> The G.723.1 low rate audio codec priority. (See Configuraton: Audio Settings Screen on page 16 for infor- mation on how to select this codec priority through the web portal.) Default value: 245 Allowable range: 1 (lowest) to 255 (highest)
- Page 33 <alc_enable> Automatic level control enable. (See Configuraton: User Preferences Screen on page 10 for information on how to set this parameter through the web portal.) Default value: 0 Allowable range: 0 - Disable 1 - Enable <qos_precedence> Quality of service precedence. (See Configuraton: Network Settings Screen on page 13 for information on how to set this parameter through the web portal.) Default value: 5 Allowable range:...
-
Page 34: Dial Plan Configuration File
DIAL PLAN CONFIGURATION FILE The dial plan configuration file defines rules for gathering digits when dialing a phone number and also defines the mapping of the gathered digits to a specific target. A sample dial plan is shown in figure 2.18. <C1DIALPLAN>... -
Page 35: Chapter 3: User Options
1. Press and hold the key until the Program icon appears on the LCD screen (see figure 3.1). REDIAL/PROG MAX IP LCD Program icon FIGURE 3.1 2. Press to enter the DHCP menu. There are two options: 1 - enable DHCP; and 0 - disable DHCP . -
Page 36: To Program Default Gateway Ip Address
TO CHANGE SUBNET MASK 1. Press and hold the key until the Program icon appears on the LCD screen (see figure 3.1). REDIAL/PROG Note: DHCP must be disabled in order to change the subnet mask manually. > 2. Press to enter the Change Subnet Mask menu. The current subnet mask is displayed. -
Page 37: To Program Agc And Alc Settings
REDIAL/PROG 4. Enter a new setting number using the table shown in figure 3.2. Setting Speaker Microphone MAX IP automatic gain control table FIGURE 3.2 5. Press to save the selection; a confirmation tone plays. Press to exit programming. REDIAL/PROG... - Page 38 Technical Services: 800.283.5936...
-
Page 39: Chapter 4: Maintenance
TROUBLESHOOTING If you are having trouble with your MAX IP , it might be improperly set up or other equipment might be malfunctioning. To begin, check for the following (or consult the chart in figure 4.1): •... - Page 40 Technical Services: 800.283.5936...
-
Page 41: Chapter 5: Appendix
CHAPTER 5: APPENDIX ERROR CODES General Errors (1 - 100) Provisioning Errors (151 - 200) (continued) 1 - Memory allocation error 188 - Invalid G-723.1 5.3 kbps priority 2 - Error reading Flash memory 189 - Invalid G-723.1 6.3 kbps priority 3 - Error opening Flash memory 190 - Invalid SNTP address 4 - Error writing to Flash memory... -
Page 42: Specifications
FCC Part 68 Storage humidity: 10 to 90% UL Certified POWER MODELS Base unit: MAX IP* Auto-adjusting power module; MAX IP Expansion Kit* 100–240VAC; 50/60 Hz NETWORK *Call your sales representative for part numbers 10/100 Ethernet RJ-45 KEYPAD Alphanumeric standard keypad... -
Page 43: Compliance
Operation is subject to the following two conditions: (1) This device may not cause interference, and (2) This device must accept any interference including interference that may cause undesired operation of the device. Changes or modifications not expressly approved by ClearOne Communications could void the user's authority to operate the equipment. - Page 44 Technical Services: 800.283.5936...
Need help?
Do you have a question about the Max IP and is the answer not in the manual?
Questions and answers