Table of Contents
Advertisement
Quick Links
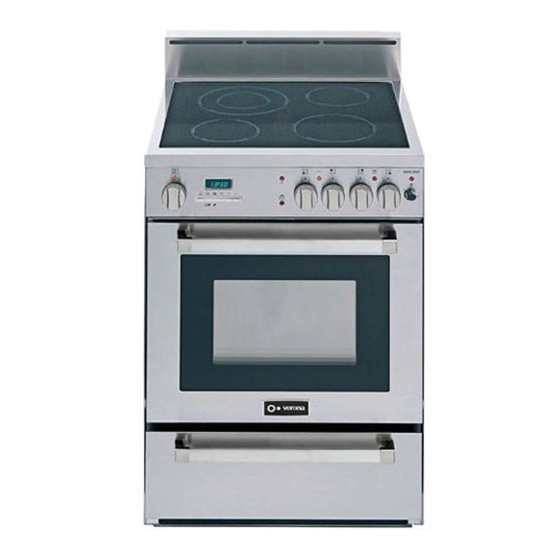
ELECTRIC RANGE
for residential use only
VEFSEE 244 P..
Model:
• USERS OPERATING INSTRUCTIONS
IMPORTANT - PLEASE READ AND FOLLOW
IMPORTANT - PLEASE READ AND FOLLOW
✓ Before beginning, please read these instructions completely and carefully.
✓ Do not remove permanently affixed labels, warnings, or plates from the product. This
may void the warranty.
✓ Please observe all local and national codes and ordinances.
✓ Please ensure that this product is properly grounded.
✓ The installer should leave these instructions with the consumer who should retain
for local inspector's use and for future reference.
Electrical installation must be in accordance with the National Electrical Code, ANSI/
NFPA70 - latest edition and/or local codes.
IN CANADA: Electrical installation must be in accordance with the current CSA C22.1
Canadian Electrical Codes Part 1 and/or local codes.
This range is supplied with a protective film on
This film must be removed before installing/using the appliance.
THIS RANGE IS FOR RESIDENTIAL USE ONLY
steel and aluminium parts.
Advertisement
Table of Contents

Related Manuals for Verona VEFSEE 244 P Series


Summary of Contents for Verona VEFSEE 244 P Series
- Page 1 ELECTRIC RANGE for residential use only VEFSEE 244 P.. Model: • USERS OPERATING INSTRUCTIONS IMPORTANT - PLEASE READ AND FOLLOW IMPORTANT - PLEASE READ AND FOLLOW ✓ Before beginning, please read these instructions completely and carefully. ✓ Do not remove permanently affixed labels, warnings, or plates from the product. This may void the warranty.
- Page 2 WARNING • ALL RANGES CAN TIP • INJURY TO PERSON COULD RESULT • INSTALL ANTI-TIP DEVICE PACKED WITH RANGE • SEE INSTALLATION INSTRUCTIONS...
- Page 3 Dear Customer, Thank you for having purchased and given your preference to our product. The safety precautions and recommendations reported below are for your own safety and that of others. They will also provide a means by which to make full use of the features offered by your appliance. Please preserve this booklet carefully.
-
Page 4: General Information
USER INSTRUCTIONS GENERAL INFORMATION WARNING!! WARNING!! ELECTRICAL GROUNDING INSTRUCTIONS 1. This appliance shall not be used for space heating. This information is based on safety considerations. The range must be electrically grounded in accordance with local codes or, in the absence of local codes, with the National Electrical Code, ANSI/NFPA No. -
Page 5: Important Precautions And Recommendations
IMPORTANT PRECAUTIONS AND RECOMMENDATIONS After having unpacked the appliance, check to ensure that it is not damaged. In case of doubt, do not use it and consult your supplier or a professionally qualified techni- cian. Packing elements (i.e. plastic bags, polystyrene foam, nails, packing straps, etc.) should not be left around within easy reach of children, as these may cause serious injuries. -
Page 6: Control Panel
features VITROCERAMIC COOKING HOB 1. Cooking zone Ø 145 (5” ) - 1200 W 23/32 2. Double cooking zone Ø 205/110 (8” / 4” ) - 2100/700 W 1/16 21/64 3. Cooking zone Ø 145 (5” ) - 1200 W 23/32 4. -
Page 7: How To Use The Vitroceramic Hob
how to use the vitroceramic hob VITROCERAMIC HOB The ceramic surface of the hob allows a fast transmission of heat in the vertical direc- tion, from the heating elements underneath the ceramic glass to the pans set on it. The heat does not spread in a horizontal direction, so that the glass stays “cool”... - Page 8 COOKING ZONES POWER INDICATOR LIGHT (fig. 2.6) When the ceramic hob is working, the “TOP” pilot light in the control panel will be on (fig. 2.6). COOKING ZONES RESIDUAL HEAT INDICATOR IMPORTANT When the hob temperature is above 140 °F (60 °C), the “HOT SURFACE” warning light in the control panel (fig.
-
Page 9: General Features
how to use the warmer drawer GENERAL FEATURES The warming drawer is fitted with an heating element (500 W) placed on the top. The heating can be regulated from 86 °F (30 °C) [ position] to 248 °F (120 °C) [ position]. -
Page 10: Temperature Selector
TEMPERATURE SELECTOR Knob position °F °C The setting can be anywhere between LO and HI position. between LO and HI from 87 to 247 from 31 to 119 WARNING LIGHT The signal light is located above the control knob and turns “ON’ when the warming is set. -
Page 11: Using The Oven For The First Time
how to use the self cleaning oven GENERAL FEATURES Attention: the oven door becomes The oven has special operating features. very hot during operation. Keep children away. Five different functions can be used to satisfy all cooking needs; it also has a self clean- ing function which can clean the oven cavity at high temperature, a defrost function and an oven light function. -
Page 12: Selecting The Functions
SELECTING THE FUNCTIONS (fig. 4.1) The cooking function is selected by turning the function selector knob and matching the mark with the symbol printed on the print. Important: In all cooking functions the oven must always be used with the DOOR CLOSED. - Page 13 TRADITIONAL CONVECTION COOKING The upper and lower heating elements switch on. The heat is diffused by natural convection and the temperature must be set between 120-°F (50 °C) and 480 °F (250 °C). On selecting this function the electronic program- mer starts cooking with a pre-heating temperature set at 350 °F (200 °C).
-
Page 14: Self-Cleaning Function
SELF CLEANING FUNCTION (this is not a cooking function) IMPORTANT NOTES: This is not a cooking function but is only used to clean the oven. Before starting the self cleaning cycle: - Take all the accessories out of the oven (drip tray and shelves). - Page 15 SELECTING °F/°C ON THE DISPLAY Turn the oven selector knob to a cooking function (i.e. BAKE). Press key 5 on the programmer to reduce the temperature until you reach the minimum value (120 °F/50 °C). With °F/°C flashing on the display press key 5 again (if °F/°C is not flashing press ➀...
- Page 16 HOW TO START THE SELF CLEANING CYCLE Important: the self cleaning cycle must only be performed with the oven empty; so, before starting the cycle take all the accessories (shelves, drip tray, ...) out of the oven cavity and dry any traces of overflowed liquid. Do not use any degreasing products (e.g.
- Page 17 PROBLEMS ON STARTING AND DURING THE SELF CLEANING CYCLE door Steady The function selector has been turned to the self cleaning position with the oven door open or not perfectly closed. Or the door has been opened before the cycle has been started with confirmation from key 3 What to do: Close the door and repeat previous cycle.
- Page 18 HOW TO STOP THE SELF CLEANING CYCLE Turn the function selector to (oven OFF) If the oven cavity temperature is higher than 570 °F (300 °C) 1a. The time of day appears steadily on the programmer display. 1b. When the oven cavity temperature drops below 570 °F (300 °C): appears on the programmer display again - the door locked pilot light goes out ➀...
- Page 19 ABNORMAL SITUATIONS AND/OR OPERATION PROBLEMS during cooking or the self cleaning cycle. 30 F0 30 F1 appear during the cooking or self cleaning cycle Oven temperature sensor broken or not working properly. The cooling fan stays on and if the self cleaning cycle is in progress the door remains locked. What to do: 1.
-
Page 20: Cooking Advice
COOKING ADVICE STERILIZATION WARNING!! Sterilization of foods to be conserved, in full and hermetically sealed jars, is done in the KEEP ATTENTION following way: MOST IMPORTANT a. Turn the switch to position b. Set the thermostat knob to position 350 °F (175 °C) and preheat the oven. It is advisable to han- c. - Page 21 ° STEP ° STEP ° STEP ° STEP Fig. 4.2 BROILING Very important: the broil element must always be used with the oven door closed. – Position the shelf on the first or second level from the top (fig. 4.2). –...
-
Page 22: Setting The Time
how to use the electronic programmer The electronic programmer is a device which groups together the following functions: – 12 hours clock with illuminated display (P on the display for PM time indication). – Timer (up to 23 hours and 59 minutes). –... -
Page 23: Semi-Automatic Cooking
TIMER The timer function is only used to count the time and does not influence oven operation or any programmes which are in progress or set. Press pushbutton 1. The bell symbol will start to flash. Press keys 5 or 6 to set the time required. The countdown starts immediately. -
Page 24: Automatic Cooking
AUTOMATIC COOKING Start cooking at the programmed time and switch the oven off automatically after the programmed cooking time. Setting Set the cooking function by turning the oven selector to the function required. The cooking temperature appears on the display. To change it proceed as described in the Setting the cooking chapter. - Page 25 CANCELLING A SET PROGRAMME To cancel any programme just turn the function selector to (oven OFF). Note: if during a set programme the function selector is turned to (oven OFF), SELF CLEANING or oven lighting, the programme is cancelled. EXAMPLES OF PROGRAMMING AUTOMATIC COOKING ➂...
-
Page 26: Cleaning And Maintenance
cleaning and maintenance GENERAL RECOMANDATION WARNING VERY IMPORTANT ✓ Important: Before any operation of cleaning and maintenance disconnect the appliance from the electrical supply. Before any operation of maintenance ✓ It is advisable to clean when the appliance is cold and especially for cleaning the disconnect the appliance from the enamelled parts. -
Page 27: Replacing The Oven Light
VITROCERAMIC SURFACE Before cleaning the top, make sure that it is switched off. Remove any encrustation using a special scraper which can be bought (fig. 6.1). Remove dust using a damp cloth. Detergents can be used as long as they are not abrasive or corrosive. All residues of detergent must be eliminated with a damp cloth. -
Page 28: Removing The Warmer Drawer
REMOVING THE WARMER DRAWER (fig. 6.4) WARNING: 1. Open the drawer completely (fig. 6.4) • Do not remove drawer while hot. 2. Move down the lever of left guide (fig. 6.5) and up the lever of right guide (fig. 6.6). •... -
Page 29: Removing The Oven Door
REMOVING THE OVEN DOOR The oven door can easily be removed as follows: – Open the door to the full extent (fig. 6.8a). – Open the lever “A” completely on the left and right hinges (fig. 6.8b). – Hold the door as shown in fig. 6.8. –... -
Page 30: Do's And Do Not's
DO’S AND DO NOT’S • Do always use the oven with the door closed. • Do read the user instructions carefully before using the range for first time. • Do allow the oven to heat for about two hours, before using for the first time, in order to expel any smell from the new oven insulation, without the introduction of food. - Page 32 The manufacturer cannot be held re spon sible for possible inaccuracies due to printing or transcription errors in the present booklet. The manufacturer re serves the right to make all modifications to its products deemed necessary for manufacture or commercial reasons at any moment and without prior notice, without jeopardising the es sential functional and safety characteristics of the appliances.
Need help?
Do you have a question about the VEFSEE 244 P Series and is the answer not in the manual?
Questions and answers