Advertisement
Table of Contents
- 1 Table of Contents
- 2 Safety Rules 1
- 3 Unpacking Your Fan
- 4 Installing Your Fan 3
- 5 Hanging Your Fan
- 6 Making the Electrical Connections 5
- 7 Finishing the Installation
- 8 Attaching the Fan Blades
- 9 Installing the Light Kit
- 10 Installing Without the Light Kit
- 11 Operating Your Transmitter
- 12 Care of Your Fan 11
- 13 Troubleshooting
- 14 Specifications 13
- Download this manual
Advertisement
Table of Contents

Related Manuals for HAMPTON BAY Bryant


Summary of Contents for HAMPTON BAY Bryant
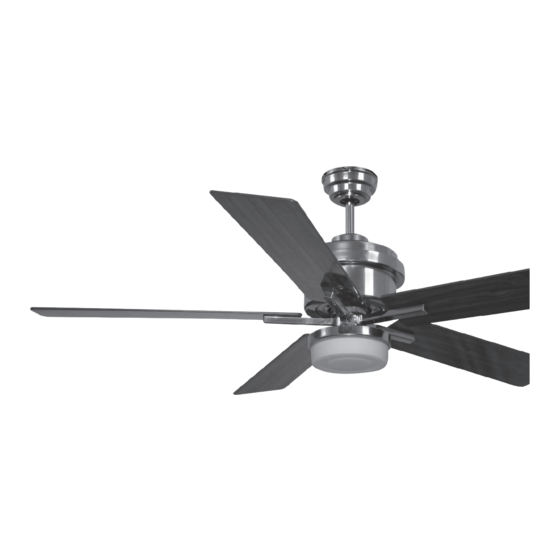
- Page 1 823 338 Bryant in Ceiling Fan Owner’s Manual Bryant Ventilador de Techo de 1.17m Manual del Propietario...
- Page 3 Hampton Bay Lifetime Limited Warranty The retailer warrants the fan motor to be free from defects in workmanship and Date purchased material present at time of shipment from the factory for a lifetime after the date of purchase by the original purchaser. The retailer also warrants that all other fan...
-
Page 4: Table Of Contents
Safety Rules Unpacking Your Fan Installing Your Fan Hanging Your Fan Making the Electrical Connections Finishing the Installation Attching the Fan Blades Installing the Light Kit Installing without the Light Kit Operating Your Transmitter Care of Your Fan Troubleshooting Specifications Table of Contents... -
Page 5: Safety Rules 1
1. To reduce the risk of electric shock, ensure electricity has been turned off 7. Do not operate reversing switch while fan blades are in motion. Fan must be turned off and blades stopped before reversing blade at the circuit breaker or fuse box before beginning. direction. -
Page 6: Unpacking Your Fan
Unpack your fan and check the contents. You should have the following items: Set of blades (5) (MDF blades) 9. Switch cup (1) 16. Loose parts bag containing: 2. Hanger bracket (1) 10. Light kit (1) a . Blade attachment hardware (16 screws 3. -
Page 7: Installing Your Fan 3
Figure 2 Figure 4 To hang your fan where there is an existing fixture but no ceiling joist, you may need an installation hanger bar as shown in Figure 4 (available at your Hampton Bay Retailer). Installing Your Fan 3. -
Page 8: Hanging Your Fan
Hanging the Fan Step 7. Place the downrod ball into the hanger bracket Pin in locked socket. position IF YOU WANT TO CHANGE THE DOWNROD to turn off the power. Follow the steps REMEMBER below to hang your fan properly: NOTE: Your fan comes with a 4.5"... -
Page 9: Making The Electrical Connections 5
Making the Electrical Connect the white wire from the fan to thewhite wire marked "TO MOTOR N" from the receiver. Connect the blue wire from the Connections fan to the blue wire marked "For Light" from Code switch the receiver. Secure the wire connections with the plastic wire nuts provided. -
Page 10: Finishing The Installation
Finishing the Installation SUPPLY CIRCUIT Outlet box Step 1. Tuck connections neatly into ceiling outlet box. Ground Mounting Conductor bracket Step 2. Remove one screw from the hanger bracket BLACK and loosen the other screw approximately 1/4″. Outlet Box Screw Green Step 3. -
Page 11: Attaching The Fan Blades
Attaching the Fan Blades The following procedure should correct most fan wobble issues. Check after each step. Step 1. Attach the blades to the blade brackets Step 1. Check that all blades and blade bracket using the screws provided as shown in Figure 11. Blade Bracket screws are secure. -
Page 12: Installing The Light Kit
Step 3. Twist the Glass onto Light Kit Fitter securely. (Figure 15) REMEMBER to disconnect the power. The fan blades must already be attached to the fan. Your fan and light kit though pre-wired have been disassembled at the factory to ease in shipping. Please follow these steps to complete the installation of your fan and light. -
Page 13: Installing Without The Light Kit
Step 2. Position the switch cup on the switch box (Included in REMEMBER to disconnect the power. The fan blades must the fan motor assembly) and attach securely using previouly already be attached to the fan. remove screws. ( Figure 18) Your fan and light kit though pre-wired have been disassembled at the factory to ease in shipping. -
Page 14: Operating Your Transmitter
Restore power to ceiling fan and test for Speed settings for warm or cool weather proper operation. depend on factors such as the room size, ceiling height, number of fans, etc. 1. " LOW, MED, HI" buttons: These three buttons are used to set the fan The Reverse switch is located on top of the speed as follows: motor assembly. -
Page 15: Care Of Your Fan 11
Installing the battery: Here are some suggestions to help you maintain your fan 1. Because of the fan's natural movement, some connections may become loose. Check the support connections, brackets, and blade attachments twice a year. Make sure they are Install 9 volt battery (not included), to secure. -
Page 16: Troubleshooting
Problem Solution Fan will not start. 1. Check circuit fuses or breakers. 2. Check line wire connections to the fan and switch wire connections in the switch housing. CAUTION: Make sure main power is off. 3. Check to make sure the dip switches from the transmitter and receiver are set to the same frequency. Fan sounds noisy. -
Page 17: Specifications 13
1670.26 15.6 0.304 2457.28 7.28 1.50 0.389 30.8 3311.34 High 0.443 51.8 Specifications 13.
Need help?
Do you have a question about the Bryant and is the answer not in the manual?
Questions and answers