Table of Contents
Advertisement
www.freemotionfitness.com
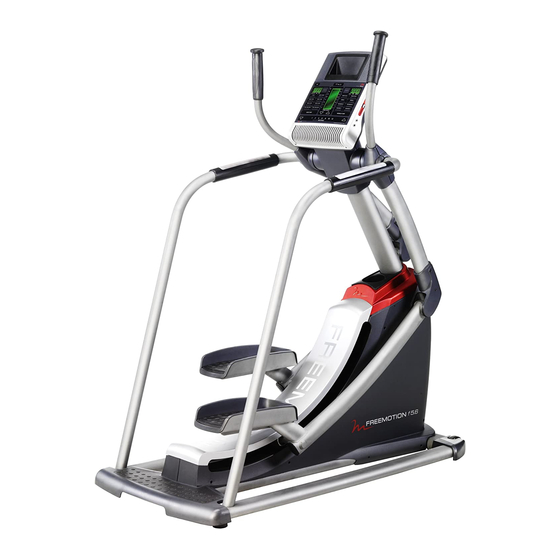
Model No. SFSR81908.0
Serial No.
Write the serial number in the space
above for reference.
QUESTIONS?
If you have questions, or if parts
are damaged or missing, CONTACT
THE STORE WHERE YOU PUR-
CHASED THIS PRODUCT.
If you are unable to contact the
store, see HOW TO CONTACT
CUSTOMER CARE on the back
cover of this manual.
CAUTION
Read all precautions and instruc-
tions in this manual before using
this equipment. Keep this manual
for future reference.
Serial
Number
Decal
USERʼS MANUAL
Advertisement
Table of Contents

Related Manuals for Freemotion SFSR81908.0


Summary of Contents for Freemotion SFSR81908.0
- Page 1 USERʼS MANUAL Model No. SFSR81908.0 Serial No. Write the serial number in the space above for reference. Serial Number Decal QUESTIONS? If you have questions, or if parts are damaged or missing, CONTACT THE STORE WHERE YOU PUR- CHASED THIS PRODUCT.
-
Page 2: Table Of Contents
TABLE OF CONTENTS WARNING DECAL PLACEMENT ............. .2 IMPORTANT PRECAUTIONS . -
Page 3: Important Precautions
To reduce the risk of serious injury, read all important precautions and instructions in this manual and all warnings on your elliptical strider before using your elliptical strider. FreeMotion Fitness assumes no responsibility for personal injury or property damage sus- tained by or through the use of this product. -
Page 4: Before You Begin
BEFORE YOU BEGIN Thank you for selecting the revolutionary model number and serial number before contacting FREEMOTION F 5.6 elliptical strider. The F 5.6 ellipti- us. The model number and the location of the serial ® cal strider provides a wide array of features designed number decal are shown on the front cover of this to make your workouts more effective and enjoyable. -
Page 5: Assembly
ASSEMBLY Assembly requires two persons. Place all parts of the elliptical strider in a cleared area and remove the pack- ing materials. Do not dispose of the packing materials until assembly is completed. In addition to the included tool(s), assembly requires a Phillips screwdriver As you assemble the elliptical strider, use the drawings below to identify small parts. - Page 6 To make assembly easier, read the Wire information on page 5 before you begin. Ties IMPORTANT: Do not remove the foam block (not shown) located under the pedals until you have completed step 2. Identify the Shield Cap (5) and the Upright (26) and orient them as shown.
- Page 7 3. Slide the Shield Cap (5) downward over the Right and Left Shields (6, 7). Attach the Shield Cap (5) with a #8 x 35mm Screw (125) and two #8 x 3/4" Screws (86). Tip: Start all the Screws before tightening any of them.
- Page 8 5. Identify the Right Handrail (69), which is marked with a “Right” sticker. While another person holds the Right Handrail (69) near the Upright (26), connect the right Pulse Wire (78) to the right Sensor Wire (79). Insert the excess wire into the Right Handrail (69).
- Page 9 7. While another person holds the Console (4) near the Upright (26), connect the console wires to the Wire Harness (77), the Power Cable (81), and the Ground Wire (82). Then, connect the Console console pulse wires to the Pulse Wires (78). Wires Insert the excess wire downward into the Upright (26).
- Page 10 9. Identify the Right Upper and Lower Covers (14, 15), which are marked with “Right” stickers, and orient them as shown. Attach the Right Upper and Lower Covers (14, 15) around the Right Handlebar (20) with two #8 x 3/4" Screws (86). Repeat this step for the Left Handlebar (21).
-
Page 11: How To Use The Chest Pulse Sensor
HOW TO USE THE CHEST PULSE SENSOR HOW TO PUT ON THE CHEST PULSE SENSOR • Store the chest pulse sensor in a warm, dry place. Do not store the chest pulse sensor in a plastic bag The chest pulse sensor has two components: a chest or other container that may trap moisture. -
Page 12: How To Use The Elliptical Strider
HOW TO USE THE ELLIPTICAL STRIDER HOW TO PLUG IN THE AC POWER ADAPTER AND The green-colored rigid ear, lug, or the like extending THE POWER CORD from the adapter must be connected to a permanent ground such as a properly grounded outlet box cover. This product Whenever the adapter is used, it must be held in must be... - Page 13 HOW TO EXERCISE ON THE ELLIPTICAL STRIDER HOW TO LEVEL THE ELLIPTICAL STRIDER To mount the elliptical strider, hold the handlebars or If the elliptical strider rocks slightly on your floor during the handrails and step onto the pedals. Push the ped- use, turn one or both of the leveling feet beneath the als until they begin to move forward and backward rear of the frame until the rocking motion is eliminated.
- Page 14 CONSOLE DIAGRAM FEATURES OF THE CONSOLE The console features the iFit Interactive Workout System, which enables the console to accept iFit The advanced console offers an array of features cards containing workouts designed to help you designed to make your workouts more effective and achieve specific fitness goals.
- Page 15 HOW TO ACTIVATE THE CONSOLE 4. Set a target stride length as desired. The included AC power adapter and the power cord The stride length meter in the center display must be used to operate the elliptical strider. See allows you to set a target stride length. HOW TO PLUG IN THE AC POWER ADAPTER AND THE POWER CORD on page 12.
- Page 16 Center display–This display shows the stride To adjust the volume level length meter. The stride length meter compares of the console, press the your actual stride length to the target stride length. VOL increase and decrease buttons. The target bar in Target 6.
- Page 17 HOW TO USE A PRESET WORKOUT As you exercise, keep your stride length near the target A preset workout automatically changes the resistance stride length for the current of the pedals and prompts you to maintain a target segment, which is shown in stride length.
- Page 18 HOW TO USE AN IFIT WORKOUT HOW TO USE THE SOUND SYSTEM iFit cards are available separately. To purchase iFit To play music or audio books through the consoleʼs cards, go to www.iFit.com or see the back cover of sound system while you exercise, plug the included this manual.
- Page 19 HOW TO USE THE MAINTENANCE MODE 3. View and reset the usage information if desired. The console features a maintenance mode that allows you to access usage information and to view and The first section of the center display will show the change console settings.
-
Page 20: Maintenance And Troubleshooting
MAINTENANCE AND TROUBLESHOOTING If you have questions about maintenance or trou- HOW TO LEVEL THE ELLIPTICAL STRIDER bleshooting, see the back cover of this manual. If the elliptical strider rocks slightly on your floor during Inspect and tighten all parts of the elliptical strider regu- use, see HOW TO LEVEL THE ELLIPTICAL larly. -
Page 21: Exercise Guidelines
EXERCISE GUIDELINES WARNING: Burning Fat—To burn fat effectively, you must exer- cise at a low intensity level for a sustained period of Before beginning time. During the first few minutes of exercise, your this or any exercise program, consult your body uses carbohydrate calories for energy. - Page 22 SUGGESTED STRETCHES The correct form for several basic stretches is shown at the right. Move slowly as you stretch—never bounce. 1. Toe Touch Stretch Stand with your knees bent slightly and slowly bend forward from your hips. Allow your back and shoulders to relax as you reach down toward your toes as far as possible.
-
Page 23: Part List
PART LIST—Model No. SFSR81908.0 R1208A Key No. Qty. Description Key No. Qty. Description Frame Magnet Ring Track Small Pulley Shield Bracket Drive Belt Pulley Console Cable Spool Shield Cap Spool Hub Right Shield Spool Bearing Left Shield Magnet Ring Sensor... - Page 24 Key No. Qty. Description Key No. Qty. Description 1/4" x 9.5mm Screw 1" Snap Ring M8 x 86mm Bolt 3/4" Snap Ring 3/8" x 80mm Bolt #6 x 10mm Screw 5/16" x 63.5mm Bolt 3/8" x 3/4" Screw 1/4" x 22mm Screw 3/4"...
-
Page 25: Exploded Drawing
EXPLODED DRAWING A—SFSR81908.0 R1208A... - Page 26 EXPLODED DRAWING B—SFSR81908.0 R1208A...
- Page 27 EXPLODED DRAWING C—SFSR81908.0 R1208A...
-
Page 28: How To Contact Customer Care
No other warranty beyond that specifically set forth above is authorized by FreeMotion Fitness. FreeMotion Fitness is not responsible or liable for indirect, special, or consequential damages arising out of or in con- nection with the use or performance of the product; damages with respect to any economic loss, loss of property, loss of revenues or profits, loss of enjoyment or use, or costs of removal or installation;...
Need help?
Do you have a question about the SFSR81908.0 and is the answer not in the manual?
Questions and answers