Table of Contents
Advertisement
Quick Links
Advertisement
Table of Contents

Related Manuals for SoundMax SM-CCR3036


Summary of Contents for SoundMax SM-CCR3036
- Page 1 SM-CCR3036 USB/SD/MMC MEDIA PLAYER Instruction manual USB/SD/MMC-...
-
Page 2: Table Of Contents
Dear customer! Thank you for purchasing our product. For safety, it is strongly recommended to read this manual carefully before connecting, operating and/or adjusting the product and keep the manual for reference in the future. Table of contents Table of contents ....................2 Important safeguards .................. -
Page 3: Important Safeguards
Important safeguards Read carefully through this manual to familiarize yourself with this high-quality sound system. The beginning of operation is the moment of the unit installation. Before use the device in winter it is recommended to heat up the passenger compartment during 20 seconds or to the operation temperature. -
Page 4: Accessories
Accessories 1. Receiver 1 pc 2. Front panel 1 pc 3. Protective case for the front panel 1 pc 4. ISO connector 1 pc 5. Mounting parts: Screw M5x5 mm 4 pcs Release key 2 pcs Mounting collar 1 pc Trim frame 1 pc 6. -
Page 5: Installation/Connection
Installation/connection General notes Choose the mounting location where the unit will not interfere with the normal driving function of the driver. Before finally installing the unit, connect the wiring and make sure that the unit works properly. Consult with your nearest dealer if installation requires the drilling of holes or other modifications of the vehicle. - Page 6 Trim frame installation To install the trim frame, press it to the unit body and push it to fix it in place. This should be done before installing the front panel; otherwise you are not able to install the trim frame. When the trim frame being installed, the side with the groove should face down and fixed first.
- Page 7 Installing the front panel Install the fastening hole on the right side of the front panel on the right fastening of the unit. Then insert the left fastening on the panel into the fixing hole on the left part of the unit. Press on the upper right part of the panel until a click.
- Page 8 Connection diagram Using the ISO Connector 1. If your car is equipped with the ISO connector, then connect the ISO connectors as illustrated. 2. For connections without the ISO connectors, check the wiring in the vehicle carefully before connecting, incorrect connection may cause serious damage to this unit.
- Page 9 Location Function Connector A Connector B Rear right (+) – Blue Rear right (-) - Blue/White Front right (+) - Grey Front right (-) - Grey/White Battery +12V/Yellow Front left (+) - Green Power Antenna - Orange Front left (-) - Green/White Rear left (+) - Brown Ignition/Red Rear left (-) –...
-
Page 10: Control Elements
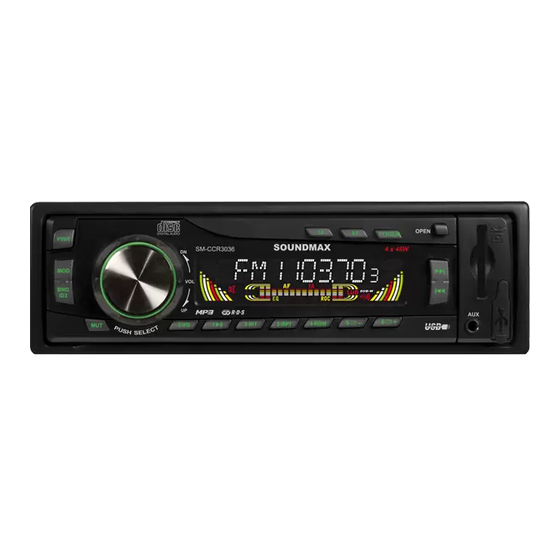
Control elements Front panel 1. PWR button 2. MOD button 3. Display 4. TA button 5. AF button 6. PTY/CLK button 7. PREVIOUS/NEXT buttons 8. OPEN button 9. SD/MMC memory card slot 10. BND/ID3 button 11. MUT button 12. VOL knob/SEL button 13. -
Page 11: Lcd Outline
LCD outline 1. MP3 playback 2. Album name on 3. WMA playback 4. Stereo reception indicator 5. Digit display 6. Repeat playback 7. Intro playback 8. Random playback 9. Disc loading indicator (not active) 10. Playback graphic indicator 11. Song name on 12. -
Page 12: General Operations
General operations Turning the unit on/off Press PWR button to turn the unit on. Press the button again to turn the unit off. Mode select Press MOD button repeatedly to select between Radio, auxiliary input, USB or Memory Card modes. Modes of operation are indicated on the display. - Page 13 Preset EQ modes Press SEL button repeatedly until EQ OFF is displayed. Rotate VOL knob to select between FLAT/CLASS/ROCK/POP and OFF equalizer modes. Beep function Press SEL button repeatedly until BEEP ON (OFF) is displayed. Rotate VOL knob to select between ON (beep sound is heard when a button is pressed) and OFF (no sound is heard when a button is pressed).
-
Page 14: Radio Operations
Radio operations Band select In Radio mode press BND/ID3 button to select a radio band: FM1, FM2, FM3 and AM1, AM2. 6 stations can be saved in each band. Manual/automatic tuning Press and hold PREVIOUS/NEXT buttons to display MANUAL. Now you can press these buttons repeatedly to adjust the needed frequency manually. - Page 15 RDS function RDS (Radio Data System) service availability varies with areas. Please understand if RDS service is not available in you area, the following service is not available, either. AF (Alternative Frequencies) function Press AF button on the panel to turn the AF function on or off. When the radio signal strength is poor, enabling the AF function will allow the unit to automatically search another station with the same PI (Program Identification) as the current station but with a stronger signal, so that you do not have to retune the stations when driving between different transmitter coverage areas.
- Page 16 Button Music group Speech group Pop, Rock News, Affairs, Info Easy, Light Sport, Educate, Drama Classics Culture, Science, Varied Jazz, Country Weather, Finance, Children Nation, Oldies Social, Religion, Phone IN Folk Travel, Leisure, Document When PTY is selected, the radio starts to search corresponding PTY information, and stops if the corresponding PTY information is detected.
-
Page 17: Usb/Sd/Mmc Operations
USB/SD/MMC operations Connecting a USB-device/Memory card Insert a USB device into the USB port of this unit. Or insert an SD/MMC memory card until a click into the memory card slot. To remove the card, press it until a click, then pull to remove. Note: USB/SD/MMC supported capacity: up to 16 Gb. - Page 18 Intro playback Press 2/INT button to play first 10 seconds of each track consequently. Press again to cancel. Repeat Press 3/RPT button to continuously repeat the current track. Press again to cancel. Random Press 4/RDM button to play all the tracks in the current folder in random order. Press again to cancel. ID3-tags If an MP3 file contains ID3 information, such information will be displayed during the file playback.
-
Page 19: Troubleshooting Guide
Troubleshooting guide Below is a table describing simple measures that can help you eliminate most problems likely to emerge when this unit is in use. If below measures do not help, turn to a service center or to the nearest dealer. Symptom Cause Solution... -
Page 20: Specification
Specification General Maximum power output: 4 x 45 W Dimensions/weight: 170 x 115 x 50 mm/1.8 kg Suitable speaker impedance: 4-8 Ohm Fuse: Storage support: USB/SD/MMC up to 16 Gb Temperature range C - +60 FM Stereo Radio Frequency range: 87.5 –... - Page 21 ....................21 ...................22 ..................23 ...................24 ..................30 ..................31 .....................32 ....................34 USB- ............38 ............40 ................40...
- Page 23 4. ISO (5X5...
- Page 24 « » (...
- Page 25 « » (...
- Page 26 – – – OPEN.
- Page 27 OPEN,...
- Page 28 ISO,...
- Page 29 (+) – (-) - (+) – (-) – (+) – (-) - (+) – (-) –...
- Page 30 PTY/CLK PREVIOUS/NEXT OPEN SD/MMC BND/ID3 VOL/ F/PS 1/PLAY/PAUSE 2/INT 3/RPT 4/RDM 5/FOLDER- 6/FOLDER+ 21. USB-...
- Page 31 CLASS FLAT ROCK...
- Page 32 PWR, MOD, , AUX, USB » «USB» VOL. MUT, LOUD ON (OFF). VOL, (ON) (OFF) : VOL ( ) => BAS (bass - => TRE (treble - ) => BAL (balance - ) => FAD (fader - VOL, Bass/Treble: Balance: L10 ( R10 ( Fader:...
- Page 33 EQ OFF. : FLAT, CLASS, ROCK POP. Beep BEEP ON (OFF). ON ( OFF ( PTY/CLK NEXT, PREVIOUS, PTY/CLK SEL, P-VOL. VOL, MP3-...
- Page 34 BND/ID3, : FM1, FM2, FM3, AM1 AM2. PREVIOUS NEXT PREVIOUS NEXT MANUAL. F/PS F/PS SEL, STEREO MONO. VOL, (STEREO) (MONO)
- Page 35 RDS ( AF ( RDS. TA ( PTY ( RDS, PTY/CLK, 1-6,...
- Page 36 PTY/CLK 1-6, Pop, Rock News, Affairs, Info Easy, Sport, Educate, Light Drama Classics Culture, Science, Varied Jazz, Weather, Country Finance, Children Nation, Social, Religion, Oldies Phone IN Folk Travel, Leisure, Document SEL, VOL,...
- Page 37 TA SEEK/TA ALARM TA SEEK TA ALARM: PI SOUND/MUTE PI sound: PI mute: MASK DPI/MASK ALL AF ( MASK DPI. MASK DPI MASK ALL RDS. RETUNE L/RETUNE S: «RETUNE» . «S» ; «L» Retune TA SEEK.
- Page 38 USB- USB- USB- USB- SD/MMC USB/SD/MMC- USB- USB- MP3/WMA “USB” “SD”. NEXT, PREVIOUS, F/PS; 5/FOLDER-, 6/FOLDER+, PREVIOUS NEXT...
- Page 39 1/PLAY/PAUSE 2/INT 3/RPT 4/RDM ID3- ID3, ID3- BND/ID3. ID3-...
- Page 40 “ ”. 4 x 45 170 x 115 x 50 /1,8...
- Page 41 USB/SD/MMC C - +60 87,5 – 108,0 - 1710 2010 – 2019) (2011) R31982101-01792...
Need help?
Do you have a question about the SM-CCR3036 and is the answer not in the manual?
Questions and answers