TTI Freequency TCB-770 Instruction Manual
4w mobile cb transceiver
Hide thumbs
Also See for Freequency TCB-770:
- Service manual (40 pages) ,
- Instruction manual (16 pages)
Table of Contents
Advertisement
Quick Links
Advertisement
Table of Contents

Related Manuals for TTI Freequency TCB-770


Summary of Contents for TTI Freequency TCB-770
-
Page 1: Instruction Manual
4W MOBILE CB TRANSCEIVER INSTRUCTION MANUAL www.ttikorea.co.kr... -
Page 2: Table Of Contents
CONTENTS Introduction Supplied Accessories Installation Transceiver Controls and Functions Microphone Jack LCD Display Emergency Button Scan/Lock Button AM/FM and LCR Button Quick Up Button Quick Down Button Microphone Gain Knob RF Gain Knob Squelch Control knob Volume and Power On/Off Knob Channel Selector Antenna Connector S-Meter... -
Page 3: Introduction
The transceiver should normally be mounted horizontally, but may be mounted vertically. The bracket supplied can be fitted above or below the case allowing the TCB-770 to be cradled by the bracket or suspended from it. - Page 4 Consider that this location of the transceiver should not interfere with the driver and passengers. Choose a spot where the microphone and all controls are easily accessible. 1) Put the mounting bracket on the proper location where you are going to install. 2) Drill holes and fix mounting bracket on the location.
- Page 5 Installing An Antenna It is very important to select a good quality high efficiency 27MHz antenna. A poor quality antenna or one not designed for the 27MHz band will give very poor performance and could cause damage to the transceiver. 1) Place the antenna as high as possible.
-
Page 6: Transceiver Controls And Functions
4. Transceiver Controls and Functions 9 10 11 12 1) Microphone Jack Insert the microphone into this jack. Use the guide for easy connection. 2) LCD Display Most of the operational information is displayed. Please see item no. 5 for the details of information. -
Page 7: Scan/Lock Button
4) Scan/Lock Button Scan : Press this button momentarily to start scanning upward to catch any channels that are occupied by others. To activate/deactivate the channel scan, press the Scan button briefly. The Scan icon will appear when the channel scan is active. -
Page 8: Quick Up Button
6) Quick Up Button Press this button briefly to increase the channels by 10 steps. 7) Quick Down Button Press this button briefly to reduce the channels by 10 steps. 8) Microphone Gain Knob Turn this knob clockwise and counter-clock until you get better microphone gain while you move the microphone to the optimum distance from your mouth. -
Page 9: Antenna Connector
13) Antenna Connector Insert the mail connector of the antenna cable into this female antenna connector. 14) S-Meter Connect an external S-Meter (This is not supplied.) to this port. 15) Power 13.2V DC Connect the power supply cable to this port. 16) EXT Jack Connecting a loud speaker to this port makes the built-in speaker turned off. -
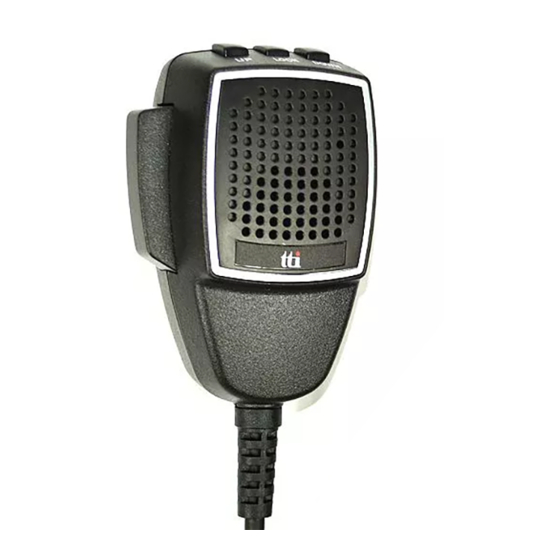
Page 10: Microphone
6. Microphone Up Button : Use this button to change the channels upward. Down Button : Use this button to change the channels downward. Lock Button : This locks the up button and down button of the microphone. Also, this lock works same as the lock button on the transceiver front panel. -
Page 11: How To Operate The Transceiver
Note : 1. Use Channel Selector to selecte the main menu features such as Beep Tone, Time-out Timer, Scan Receive Timer, Scan Delay Timer, Backlight Dimmer and Backlight Timer. 2. Use AM/FM button to enter value setting level. 3. Use Channel Selector to select or change any value that you like to have while the values are blinking. -
Page 12: Band Selection
9. Band Selection Pressing AM/FM button and Scan button at the same time, turn on the transceiver. Using the channel selector, select the band that you are going to select. The LCD display offers you the band information. The band chart for each area is as follows. Press AM/FM button while the band information is blinking or wait for 5 seconds to complete the selection and go to the transmit and receive mode. -
Page 13: Trouble Shooting
10. Trouble Shooting If you experience problems with your TCB-770 transceiver, first check the power supply source. Poor connection of the power supply source can cause problems such as no transmission, no reception or poor reception, and weak or no sound. Ensure that the microphone and antenna are also well connected. -
Page 14: Specification
14. Specification Channel 40 (See the frequency band chart) Frequency Range 26.965 MHz ~ 27.405 MHz Operating mode F3E (FM), A3E (AM) Frequency Control PLL Synthersizer Frequency Tolerance 0.002% Operating Temperature Range -10 to + 55 C Microphone Plug-in Type Input Voltage 13.8V DC ±... -
Page 15: Restrictions On The Use
15. Restrictions on the use COUNTRY Settings Use restrictions and other comments BELGIUM 40 Ch - 4W FM - Individual licence is required EU F SWITSERLAND 40 Ch - 1W AM - Individual licence is required DENMARK,NORWAY 40 Ch - 4W FM - Free use LUXEMBOURG FINLAND,PORTUGAL 40 Ch - 4W FM - Free use... -
Page 16: Freequency Table
16. Freequency Table EU/E/F/ UK(CEPT) (ENG.) 26.965 26.965 26.965 26.965 26.965 26.965 26.965 26.960 27.60125 26.975 26.975 26.975 26.975 26.975 26.975 26.975 26.970 27.61125 26.985 26.985 26.985 26.985 26.985 26.985 26.985 26.980 27.62125 27.005 27.005 27.005 27.005 27.005 27.005 27.005 27.000 27.63125 27.015...
Need help?
Do you have a question about the Freequency TCB-770 and is the answer not in the manual?
Questions and answers