
Related Manuals for GE Monogram ZDIS150WSS


Summary of Contents for GE Monogram ZDIS150WSS
- Page 1 GE Appliances & Lighting Technical Service Guide March 2010 Monogram Under-the-Counter Icemaker ZDIS150WSS ZDIS150WBB ZDIS150WWW 31-9196 GE Appliances General Electric Company Louisville, Kentucky 40225...
- Page 2 If grounding wires, screws, straps, clips, nuts, or washers used to complete a path to ground are removed for service, they must be returned to their original position and properly fastened. GE Appliances & Lighting Technical Service Guide Copyright © 2010 All rights reserved.
-
Page 3: Table Of Contents
Table of Contents Bin Light Bulb ..................................18 Bin Thermistor ..................................19 Care and Cleaning .................................13 Component Locator ................................16 Components ..................................18 Component Testing................................32 Compressor ..................................27 Condenser ....................................29 Condenser Fan Motor ..............................24 Control Board Diagnostics ............................35 Control Features ................................12 Cutter Grid ....................................19 Door and Gasket ................................18 Electronic Control Housing Components ......................21 Evaporator ...................................29 Evaporator Thermistor ..............................20... -
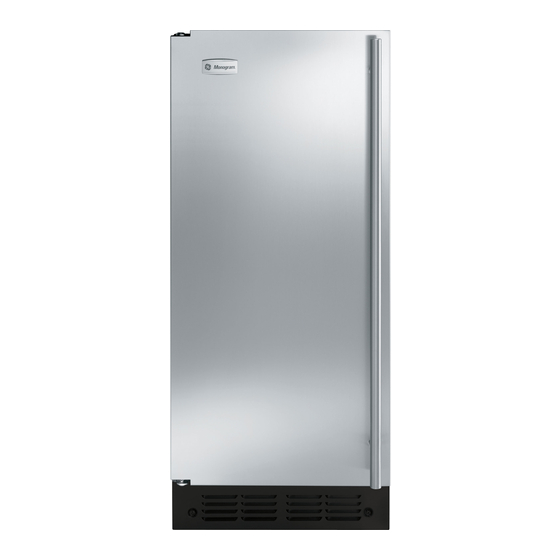
Page 4: Nomenclature
Nomenclature Model Number Z D I S 150 W S S Monogram SS - Stainless Steel BB - Black Ice Machine WW - White Model Year - 2009 Built-In Stainless Capacity - 50 lbs Serial Number The fi rst two characters of the serial number identify the month and year of manufacture. -
Page 5: Features And Benefi Ts
Specifi cations AC Power Supply ....97 to 127 VAC (rated 115 VAC), 60 Hz Amperage ......... . . 6.5 Amps (max) Minimum Circuit Capacity . -
Page 6: Theory Of Operation
Theory of Operation Operating Systems Electrical System There are 3 operating systems in the icemaker: The icemaker’s electrical system provides power for the refrigeration and water systems and controls • Electrical System the operation of each component. • Refrigeration System •... - Page 7 hot gas valve allows high pressure Refrigeration System refrigerant gas to bypass the condenser and The refrigeration system is very similar to the fl ow through the condenser accumulator tube. system used in other refrigeration appliances. The Hot gas pushes liquid refrigerant through refrigerant used in this unit is R134a.
- Page 8 Water System solution is circulated to clean the system of minerals and contaminates. The water system provides: The hardness of the water supplied to the icemaker • Fresh water for ice production will affect the quality of the ice that is produced. It •...
- Page 9 Operational Modes During the later stages of the freeze mode, an ice slab forms on the evaporator freezing plate. This There are 4 main operational modes for the ice slab causes some of the refrigerant passing icemaker: through the evaporator to not evaporate into a gas, but remain a liquid.
- Page 10 Harvest Mode Water System: The reservoir drain pump is activated (on for 20 sec., off 20 sec., back on for 20 Electrical System: When the water level in the sec.) to fully drain the reservoir. When fully drained, reservoir drops below the water level sensor, it the electronic control board sends a signal to the signals the electronic control to terminate power to water valve.
- Page 11 Electrical System: The electronic control board operates the various components and systems during the clean mode. The clean mode may only be selected while the icemaker is turned off (OFF button held 3 sec.) at the user interface. When the clean mode begins, the clean light fl ashes 1 sec.
-
Page 12: Control Features
Control Features User Controls When the desired thickness is reached, the ice sheet is released and slides onto a cutter grid. To start the normal ice making cycle, select The grid divides the sheet into individual cubes. To stop icemaker operation, press and hold OFF. -
Page 13: Care And Cleaning
Unscrew the drain cap from the bottom of the Nu-Calgon, available at most appliance repair shops water reservoir located inside the storage bin as or through GE Parts and Accessories. Order part shown. Allow the water to drain completely. number WX08X42870. In the U.S.A., call 1-800-626- 2002 or visit Monogram.com. - Page 14 Note: Severe scale buildup may require repeated Reverse-Osmosis System cleaning with a fresh quantity of cleaning solution. IMPORTANT: The performance of the icemaker may Press the ON button for 3 sec. to resume ice be affected when connected to a reverse-osmosis production.
- Page 15 Problem Solving Chart PROBLEM POSSIBLE CAUSE CLEAN INDICATOR • It will soon be time to clean the icemaker. You will need WX08X42870 Nickel Safe LIGHT ON CONTROL Ice Machine Cleaner to clean the icemaker. PANEL IS YELLOW See Care and Cleaning–Care for your Icemaker. CLEAN INDICATOR •...
-
Page 16: Component Locator
Component Locator Electronic Control Board Light Switch Push-button Dual Transformer Switch Evaporator* Cutter Grid Bin Thermistor Water Level Sensor Water Recirculation Pump Compressor Reservoir Drain Pump Condenser Fan Motor Hot Gas Valve & Solenoid (Behind Condenser) Condenser Measured F1 Water Valve Condenser Accumulator Tube * The evaporator thermistor is located on tubing below the evaporator. - Page 17 Water System Component Locations Water Distributor Evaporator Water Level Sensor Water Return Tube Water Recirculation Pump Reservoir Pan Manual Drain Reservoir Drain Pan Drain Overfl ow Bin Drain Water Valve Outlet Tube Measured Fill Water Inlet Valve From Water Supply –...
-
Page 18: Components
Components Door and Gasket Bin Light Bulb Note: If unit has a handle attached to the top of the Remove two 1/4-in. hex-head screws from the door it must be removed to access the hinge screw. bottom of the cutter grid cover and pull the cover from the ice machine. -
Page 19: Cutter Grid
Bin Thermistor Cutter Grid To remove the bin thermistor: To remove the cutter grid: Remove two 1/4-in. hex-head screws from the Remove two 1/4-in. hex-head screws from the bottom of the cutter grid cover and pull the cover bottom of the cutter grid cover and pull the from the ice machine. -
Page 20: Evaporator Thermistor
Unsnap the 2 ice guides, if necessary, from Evaporator Thermistor the cutter grid tabs. (There should be a slight outward tilt after the guides are installed.) To remove the evaporator thermistor: Remove the cutter grid. (See Cutter Grid Disconnect the evaporator thermistor from the bottom of the control housing. -
Page 21: Electronic Control Housing Components
To Remove the Dual Transformer Electronic Control Housing Components Disconnect the 6-pin wire connector from the Note: The control housing components consist of: harness. • Electronic control board Remove the 2 mounting screws from the transformer bracket. • Dual transformer Disconnect the green ground wire from its •... - Page 22 Disconnect the Molex plug from switch Water Recirculation Pump assembly. Remove the ice from the storage bin prior to removing the recirculation pump. Note: Pump operates on 12 VAC and has a resistance of 3.8Ω. To remove the water recirculation pump: Unscrew the drain cap from the reservoir, drain the water, and replace the cap tightly.
-
Page 23: Water Level Sensor
Remove the 2 thumbscrews from the reservoir Water Level Sensor and remove the reservoir from the icemaker. Remove the ice from the storage bin prior to removing the recirculation pump. To remove the water level sensor: Remove the hex-head screw from the water recirculation pump shield and remove the shield. -
Page 24: Condenser
Reservoir Drain Pump Condenser Fan Motor Remove the ice from the storage bin prior to To remove the condenser fan motor: removing the recirculation pump. Disconnect the water and drain lines from Note: Pump operates on 12VAC and has a the icemaker and remove the unit from its resistance of 3.8Ω. - Page 25 From the back of the unit, remove the 4 hex- Tilt the front of the cabinet back until you can head screws from the unit compartment cover access the 2 side screws on the condenser fan and remove the cover. motor shroud, and secure the cabinet so that it cannot tip forward or backward.
-
Page 26: Hot Gas Solenoid
Measured Fill Water Valve Hot Gas Solenoid To remove the measured fi ll water valve: To remove the hot gas solenoid: Turn the water supply off to the icemaker. Tip the cabinet back and securely prop it up to access the hot gas valve solenoid. Remove the 4 hex-head screws from the front panel and remove the panel. -
Page 27: Hot Gas Valve
Sealed System Hot Gas Valve Compressor To remove the hot gas valve: To remove the compressor: Remove the solenoid from the hot gas valve. Unplug icemaker or disconnect power. (See Hot Gas Solenoid Open the icemaker door. Access the sealed system and discharge the Remove the ice from the storage bin. - Page 28 Remove the wires from the ground terminal, Pull the clips off the compressor mounting studs. the overload protector terminal, and the relay Lift the compressor off the 4 mounting studs terminal. and remove it from the unit. Pull the overload protector and relay from the Remove the 4 metal spacers and rubber compressor pins.
-
Page 29: Evaporator
Condenser Evaporator To remove the condenser: To remove the condenser: Unplug ice maker or disconnect power. Unplug the ice maker or disconnect the power. Tip the front of the cabinet back and prop it up. Note: If unit has handle attached to top of door it must be removed to access hinge screw. - Page 30 Lift the cabinet top and position it forward on Lift the cabinet top off the unit and stand it on top of the unit, and then remove the permagum the fl oor near the rear of the unit. from around the electrical throughput. Remove the hex-head screw from the water recirculation pump shield and remove the shield.
- Page 31 Lift the evaporator and its connecting tubing high enough from the unit to access the tubing underneath. Hot Gas Joint Valve Access the sealed system and discharge the refrigerant into an approved recovery system. Unbraze (or cut) the evaporator from the tubing at the following locations: •...
-
Page 32: Reservoir Drain Pump
Component Testing Before testing any of the components, perform the Water Recirculation Pump and following checks: Reservoir Drain Pump Leads are 3.6 Ω at 12 VAC. • Control failure can be the result of corrosion on connectors. Therefore, disconnecting and Condenser Fan Motor reconnecting wires will be necessary throughout test procedures. - Page 33 Board Connectors See Page 40 See Page 32 See Page 32 See Page 32 See Page 40 See Page 32 See Page 40 (Continued next page) – 33 –...
- Page 34 Component Connectors See Page 32 See Page 32 See Page 40 See Page 40 See Page 40 – 34 –...
-
Page 35: Control Board Diagnostics
Control Board Diagnostics Harvest Mode Flush Mode: (Start-up Cycle) (6 minutes maximum) The Flush Mode begins: The time in this mode will be 2 to 17 minutes, dependent on the condition of the evaporator • Every time the user plugs the icemaker in. thermistor. - Page 36 Harvest Failure Mode: If while in Harvest Mode, the evaporator thermistor is less than 52°F and more than 16 minutes have passed, Harvest Failure Mode will occur and the OFF LED will fl ash 3 blinks. This mode will continue until the failure is corrected.
-
Page 37: Troubleshooting
Troubleshooting (Continued next page) – 37 –... - Page 38 Problem Probable Cause Test Procedure - Action Clean evaporator plate; See Slab will not release during harvest due to scale buildup procedure on 4-21 Will not make ice. Water reservoir is empty. Evaporator Defective or disconnected hot Test and repair or replace is cold with 3/4 inch thick or gas valve larger ice slab.
- Page 39 Problem Probable Cause Test Procedure - Action Too much ice in bin Defective bin thermistor Replace The slab dropping off the plate and ice dropping from the cutter Banging sound grid into an empty bin are normal sounds The reservoir is empty. Look for a partially released slab, Noisy Grinding, cavitating sound...
-
Page 40: Service Test Mode (Diagnostic Mode)
Service Test Mode (Diagnostic Mode) Note: Drain the reservoir before entering service diagnostics, press the ON pad. test mode. Note: If no pad is pressed within 5 sec., the product Turn the icemaker goes into the automatic diagnostic mode used at the assembly plant. - Page 41 Thermistor Error Displays Models with Internal Drain Pumps (ZPK1) (OFF LED 2 or 3 Blinks During Normal Operation) The power cord on the internal drain pump is When the OFF LED blinks 2 or 3 times, an error is connected to a 120 VAC wall outlet. The icemaker indicated.
-
Page 42: Schematics And Strip Circuits
Schematics and Strip Circuits Refer to the mini-manual attached to the unit. (Continued next page) – 42 –... -
Page 43: Water Recirculation Pump
Clean Mode Strip Circuit Electronic Control Timing Water Recirculation Pump Time = 20 Min Rd/Bk Hot Gas Solenoid Transformer Overload Compressor Relay Flush Mode Strip Circuit Timing Fill Reservoir Electronic Smart Valve Time = 2 Min Water Valve Electronic Time = 1 Min Control Transformer Rd/Bk... -
Page 44: Warranty
GE Authorized Servicer is not available, you may be responsible for a trip charge or you may be required to bring the product to an Authorized GE Service location for service. In Alaska the warranty is the same except that it is LIMITED because you must pay to ship the product to the service shop or for the service technician’s travel costs to your home.