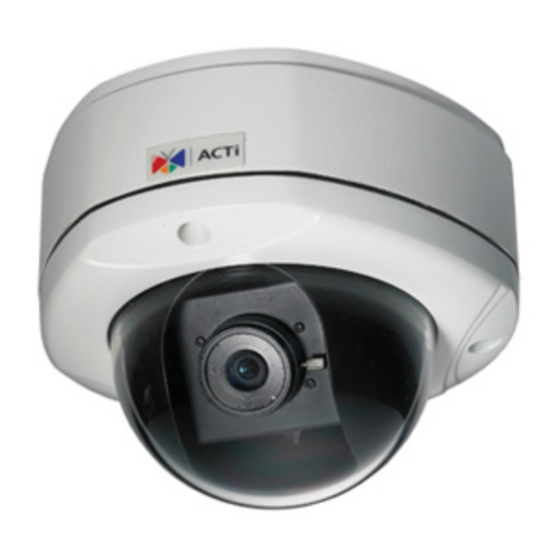
Summary of Contents for ACTi KCM-7211
- Page 1 KCM-7211 3.6x Zoom H.264 4-Megapixel IP D/N Vandal Proof PoE Rugged Dome Camera (DC 12V / PoE) Ver. 2011/3/24...
-
Page 2: Table Of Contents
KCM-7211 Hardware User’s Manual Table of Contents Precautions Introduction Package Contents ................4 Features and Benefits ............... 5 Safety Instructions ................6 Physical description ................8 Product Specification ..............11 Installation Procedure Connecting the IP Outdoor Rugged Dome ........13 Remove the cover ............... -
Page 3: Precautions
KCM-7211 Hardware User’s Manual 0. Precautions Read these instructions You should read all the safety and operating instructions before using this product. Heed all warnings You must adhere to all the warnings on the product and in the instruction manual. Failure to follow the safety instruction given may directly endanger people, cause damage to the system or to other equipment. -
Page 4: Introduction
KCM-7211 Hardware User’s Manual 1. Introduction Package Contents KCM-7211 Power Adaptor Product CD Terminal Blocks for Power DI/O and Audio Accessories Warranty Card Drill Template www.acti.com... -
Page 5: Features And Benefits
KCM-7211 Hardware User’s Manual Features and Benefits This is a cutting edge network video surveillance camera. It can capture, compress and transmit real time video in excellent quality (8 FPS 4Megapixel, 2032 x 1920). This camera is your best choice to build an intelligent IP surveillance system. -
Page 6: Safety Instructions
KCM-7211 Hardware User’s Manual Software Development Kit Support This IP Box Camera can be integrated or controlled by applications from third party software developers. Software developers can save considerable efforts by using our Streaming Library or ActiveX control. Safety Instructions Don’t use the power supply with other voltages... - Page 7 KCM-7211 Hardware User’s Manual qualified service personnel under the following conditions. 1) When the power-supply cord or plug is damaged 2) If liquid has been spilled, or objects have fallen into the video product. 3) If the video product has been directly exposed to rain or water.
-
Page 8: Physical Description
KCM-7211 Hardware User’s Manual Physical description 1) Power Button Press the Power Button and then camera will reboot automatically. 2) Ethernet Port The IP device connects to the Ethernet via a standard RJ45 connector. Supporting NWAY, this IP device can auto detect the speed of local network segment (10Base-T/100Base-TX Ethernet). - Page 9 KCM-7211 Hardware User’s Manual reset button. This length of time fluctuates slightly with the environment. The Power LED light will come back on and stay on after a few more seconds. The unit will start up with factory default settings automatically.
- Page 10 KCM-7211 Hardware User’s Manual 6) DC 12V Power Input Connect DC power source to the terminal block. The wire with white dashed lines is the live wire, which should connect to the 12V pin. NAME DESCRIPTION AC Power Input E-Ground of power...
-
Page 11: Product Specification
KCM-7211 Hardware User’s Manual Product Specification KCM-7211 • Device Device Type Fixed Dome Camera Image Sensor BSI Progressive Scan CMOS 1/3.2 “ (4.5 x 3.4 mm) Sensor Size Horizontal Resolution 1373 TVL Day / Night Minimum Illumination Color: 0.1 lux at F1.4 (30 IRE, 2400°K); B/W: 0.05 lux at F1.4 (30 IRE, 2400°K) - Page 12 Privacy Mask 4 configurable regions Text Overlay User defined text on video Image Orientation Image flip and mirror KCM-7211 Hardware User’s Manual • Audio Audio Compression 8 kHz, Mono, PCM, 16 bit encoding Audio-In Terminal Block Audio-Out Terminal Block • Network TCP, UDP, HTTP, HTTPS, DHCP, PPPoE, RTP, RTSP, IPv6, DNS, DDNS, NTP, Protocol &...
-
Page 13: Installation Procedure
KCM-7211 Hardware User’s Manual 2. Installation Procedure Connecting the IP Outdoor Rugged Dome 1) Remove the cover Remove the dome cover with special hex wrench in the accessory kit. 2) Insert the cable There are two conduit holes on this rugged dome. One is at the bottom, while the other is at the side and covered with a plug. -
Page 14: Connect Cables To Connectors
KCM-7211 Hardware User’s Manual 3) Connect cables to connectors Please follow the instructions in the Physical Description section for how to connect to each connector. 3. Accessing Camera If you have DHCP server / router in your network: Many network server / routers are able to automatically provide IP addresses through DHCP. If you are using such a network, just plug in your computer and IP Box Cam into the network and your IP device will acquire network address by itself. - Page 15 KCM-7211 Hardware User’s Manual Please set the settings as below. IP address: 192.168. 0.xxx Subnet mask: 255.255.255. (NOTE: xxx should be a number from 1 to 254 except 100, which is used by the IP device. Please also...
- Page 16 KCM-7211 Hardware User’s Manual If you are using a single camera, this is enough to access the device. If you are using multiple devices, you need to change the current device to another unused IP address, so that when the next device is connected to the network, no two devices use the same IP.
- Page 17 KCM-7211 Hardware User’s Manual 10. Click “Apply” 11. Please go to Maintain -> Save & Reboot, and click ”Apply”. Internet Explorer will close after a few seconds. This is normal. 12. Wait for 30 seconds, and open IE again to connect to the IP.


Need help?
Do you have a question about the KCM-7211 and is the answer not in the manual?
Questions and answers