
Related Manuals for RBH Sound IN-CEILING SPEAKERS


Summary of Contents for RBH Sound IN-CEILING SPEAKERS
- Page 1 IN-CEILING SPEAKERS I n s t a l l a t i o n a n d I n s t r u c t i o n M a n u a l...
-
Page 3: Break-In Period
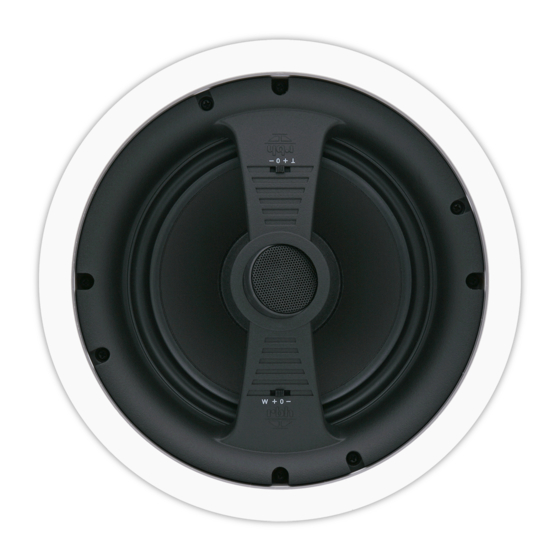
Features All RBH Sound in-ceiling speakers feature a swing out dog leg mounting system with pre-started screws for fast and easy installation. Most RBH Sound in-ceiling speakers feature directional swivel tweeters to direct the sound to the main listening area. - Page 4 Room Setup Suggestions With nearly endless placement options, careful consideration for placement of the in-ceiling speakers needs to be considered, as installation requires cutting a hole in your wall or ceiling! When using speakers in home theater applications follow the guidelines illustrated below.
-
Page 5: Speaker Installation
Upon opening the speaker boxes you will notice that the screws are pre-started into the dog legs. The basic idea behind in-ceiling speakers is the speaker is held in place by sandwiching the speaker and the drywall. A frame around the speaker conceals the cutout in the drywall and presses against the front of the ceiling. -
Page 6: Finishing The Installation
Speaker Installation (continued) NOTE: The frame will overlap the cutting edge by about a 1/2-inch which will mask any minor cutting inaccuracies. 5. Confirm the speaker easily fits into the hole, without any gaps. Connecting the Speaker: 6. Pull the speaker wire out of the hole and connect the speaker. -
Page 7: Speaker Accessories
Speaker Accessories Back Cans Back Cans (BC’s) attach neatly and directly to the back of in-ceiling speakers to prevent sound from being transferred into adjacent floors or rooms. Back cans on in-ceiling speakers are needed to meet building code requirements in select areas. -
Page 8: Specifications
Specifications Model: A-605 A-605/70 A-615 Series: Architectural Architectural Architectural System Type: In-ceiling 2-way Speaker In-ceiling 2-way Speaker In-ceiling 2-way Speaker (8 Ohms 70/100 Volt Ready) Frequency Response: 50Hz-20kHz ±3dB 88Hz-20kHz ±3dB 55Hz-20kHz ±3dB Sensitivity: 90dB (2.83V @ 1 Meter) 88dB (2.83V @ 1 Meter) 90dB (2.83V @ 1 Meter) Recommended/Rated Power: 2-80 Watts... - Page 9 Specifications (continued) A-615L A-815 Model: A-615DS Series: Architectural Architectural Architectural System Type: In-ceiling 2-way Speaker In-ceiling 2-way Dual In-ceiling 15-degree Fixed Channel Speaker Offset LCR Speaker Frequency Response: 55Hz-20kHz ±3dB 55Hz-20kHz ±3dB 50Hz-20kHz ±3dB Sensitivity: 90dB (2.83V @ 1 Meter) 90dB (2.83V @ 1 Meter) 90dB (2.83V @ 1 Meter) Recommended/Rated Power:...
- Page 10 Specifications (continued) A-815L MC-615L MC-615 Model: Architectural Series: In-ceiling 15-degree Fixed In-ceiling 2-way Speaker In-ceiling 15-degree Fixed System Type: Offset LCR Speaker Offset LCR Speaker 50Hz-20kHz ±3dB 50Hz-20kHz ±3dB 50Hz-20kHz ±3dB Frequency Response: 90dB (2.83V @ 1 Meter) 88dB (2.83V @ 1 Meter) 88dB (2.83V @ 1 Meter) Sensitivity: 10-100 Watts...
- Page 11 Specifications (continued) MC-815 MC-815L TK-615 Model: Series: In-ceiling 2-way Speaker In-ceiling 15-degree Fixed In-ceiling 2-way Speaker System Type: Offset LCR Speaker 45Hz-20kHz ±3dB 50Hz-20kHz ±3dB 45Hz-20kHz ±3dB Frequency Response: 90dB (2.83V @ 1 Meter) 92dB (2.83V @ 1 Meter) 91dB (2.83V @ 1 Meter) Sensitivity: 15-150 Watts 15-150 Watts...
- Page 12 Specifications (continued) VA-615L Model: VA-615 VA-615DS Series: Architectural Visage Visage System Type: In-ceiling 2-way Speaker In-ceiling 2-way Dual In-ceiling 15-degree Fixed Channel Speaker Offset LCR Speaker Frequency Response: 55Hz-20kHz ±3dB 55Hz-20kHz ±3dB 55Hz-20kHz ±3dB Sensitivity 90dB (2.83V @ 1 Meter) 90dB (2.83V @ 1 Meter) 90dB (2.83V @ 1 Meter) Recommended/Rated Power:...
- Page 13 Specifications (continued) Model: VF-615 VM-615 VM-615L Series: Visage Visage Visage System Type: In-ceiling 2-way Speaker In-ceiling 2-way Speaker In-ceiling 15-degree Fixed Offset LCR Speaker Frequency Response: 50Hz-20kHz ±3dB 50Hz-20kHz ±3dB 50Hz-20kHz ±3dB Sensitivity 90dB (2.83V @ 1 Meter) 88dB (2.83V @ 1 Meter) 88dB (2.83V @ 1 Meter) Recommended/Rated Power: 15-100 Watts...
- Page 14 Specifications (continued) Model: VA-815 VM-815L Series: Visage Visage System Type: In-ceiling 2-way Speaker In-ceiling 15-degree Fixed Offset LCR Speaker Frequency Response: 50Hz-20kHz ±3dB 45Hz-20kHz ±3dB Sensitivity 91dB (2.83V @ 1 Meter) 92dB (2.83V @ 1 Meter) Recommended/Rated Power: 10-100 Watts 15-150 Watts Woofer:(s) (1) 8”...
- Page 15 Discontinued Product–Specifications Model: A-504D A-505R A-506 Series: Architectural Architectural Architectural System Type: In-ceiling Dual In-ceiling 2-way Speaker In-ceiling 2-way Channel Speaker Synchronous Speaker Frequency Response: 60Hz-20kHz ±3dB 60Hz-20kHz ±3dB 60Hz-20kHz ±3dB Sensitivity: 88dB (2.83V @ 1 Meter) 88dB (2.83V @ 1 Meter) 88dB (2.83V @ 1 Meter) Recommended/Rated Power: 10-75 Watts...
- Page 16 Discontinued Product–Specifications (continued) Model: A-815D A-615D A-615/70 Series: Architectural Architectural Architectural System Type: In-ceiling 2-way In-ceiling 2-way Speaker In-ceiling 2-way Dual Channel (8 Ohms / 70 Volt Ready) Speaker Frequency Response: 50Hz-20kHz ±3dB 50Hz-20kHz (±3dB) 55Hz-20kHz ±3dB Sensitivity: 90dB (2.83V @ 1 Meter) 90dB (2.83V @ 1 Meter) 90dB (2.83V @ 1 Meter) Recommended/Rated Power:...
- Page 17 Discontinued Product–Specifications (continued) MC-615/70 TK-815 Model: Series: System Type: In-ceiling 2-way In-ceiling 2-way Speaker (8 Ohms / 70 Volt Ready) Frequency Response: 50Hz-20kHz ±3dB 50Hz-20kHz ±3dB Sensitivity: 88dB (2.83V @ 1 Meter) 91dB (2.83V @ 1 Meter) Recommended/Rated Power: 15-120 Watts 15-150 Watts Woofer:(s) (1) 5¼”...
-
Page 18: Troubleshooting
Warranty Your RBH Sound in-ceiling speaker is covered by a limited warranty against defects in materials and workmanship for a period of 25 years. This warranty is provided by the authorized RBH Sound dealer where the speaker was purchased. Warranty repair will be performed only when your purchase receipt is presented as proof of ownership and date of purchase. - Page 20 382 Marshall Way, Layton, Utah • USA • 84041 Toll Free: (800) 543-2205 • Fax: (801) 543-3300 www.rbhsound.com It is RBH Sound policy to continuously incorporate improvements into our products; all specifications are subject to change without notice. © Copyright...
Need help?
Do you have a question about the IN-CEILING SPEAKERS and is the answer not in the manual?
Questions and answers