Table of Contents
Advertisement
Advertisement
Table of Contents

Related Manuals for Wen 6501


Summary of Contents for Wen 6501
-
Page 2: Table Of Contents
Electrical information……………………………………………………………….. Know your belt/disc sander…………………………………………………………. Assembly and adjustments…………………………………………………………. . Operation……………………………………………………………………………. Maintenance…………………………………………………………………………. Exploded view…………….………………………………………………………… Parts list……………………………………………………………………………... Warranty……………………………………………………………………………... Technical data WEN 4” x 6” Belt/Disc Sander Model: 6501 Motor: 120 V, 60 Hz, 3.5 A Speed: Disc: 1780 RPM Belt: 1150 FPM Belt size: 4"... -
Page 3: General Safety Rules
11. AVOID ACCIDENTAL START-UPS. Make sure the power switch is in the OFF position before plugging in the power cord. 12. REMOVE ADJUSTMENT TOOLS. Always make sure all adjustment tools are removed from the sander before turning it on. Model: 6501 wenproducts.com... - Page 4 ANSI Z87.1. Normal safety glasses only have impact resistant lenses and are not designed for safety. Wear a face or dust mask when working in a dusty environment. Use ear protection, such as plugs or muffs, during extended periods of operation. Model: 6501 wenproducts.com...
-
Page 5: Specific Safety Rules For Belt/Disc Sanders
10. 10. Always maintain a minimum clearance of 1/16 inch (1.6 mm) or less between the table or backstop and the sanding belt or disc. 11. 11. Do not sand pieces of material that are too small to be safely supported. 12. 12. When sanding a large workpiece, provide additional support at table height. Model: 6501 wenproducts.com... - Page 6 Replace missing, damaged, or failed parts before resuming operation. 18. Never pull the power cord out of the receptacle. Keep cords away from heat, oil, and sharp edges. 19. Have an electrician replace or repair damaged or worn cords immediately. Model: 6501 wenproducts.com...
-
Page 7: Electrical Information
Fig. A. Repair or replace a damaged or worn cord immediately. CAUTION: In all cases, make certain the outlet in question is properly grounded. If you are not sure if it is, have a licensed electrician check the outlet. Model: 6501 wenproducts.com... - Page 8 OFF position and the electric current is rated the same as the current stamped on the motor nameplate. Running at a lower voltage will damage the motor. WARNING: This tool must be grounded while in use to protect the operator from electrical shock. Model: 6501 wenproducts.com...
-
Page 9: Know Your Belt/Disc Sander
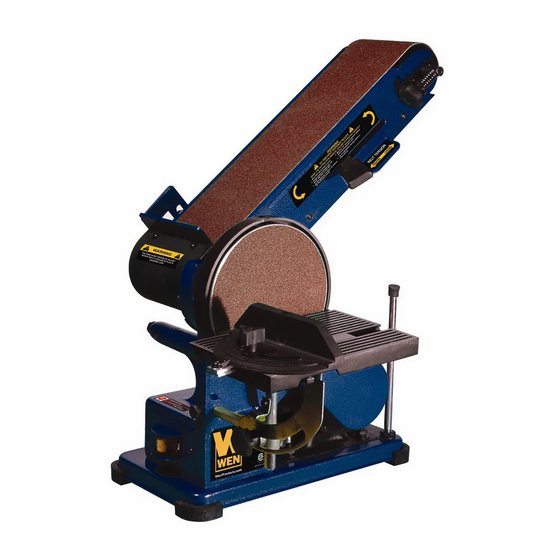
4 Stop plate 7 Miter gauge 2 Table 5 Front cover 8 Aluminum disc 3 Disc cover 6 Rubber pad(4) 9 Allen wrench 10 Wrench Not shown: 1-6” Sanding Disc 1-4” x 36” Sanding Belt (assembled on machine) Model: 6501 wenproducts.com... -
Page 10: Assembly And Adjustments
3. Place the Aluminum Disc on the drive shaft. Align the flat face of the drive shaft with the set screw in the hub of the Aluminum Disc. Fasten set screw with the Allen Wrench provided through the hole on the top of the Disc cover. (Figure 4) Model: 6501 wenproducts.com... - Page 11 5. Use a screwdriver to loosen the 4 screws on the bottom of disc cover. (Figure 5) 6. Align the 4 holes on the disc guard with the 4 holes on the front cover, and fasten them together by 4 screws. (Figure 6) Model: 6501 wenproducts.com...
- Page 12 (75), adjust the table, tighten the handle and recheck with the square. WARNING: To avoid trapping the workpiece or fingers between the table and the sanding disc, the table edge should be adjusted to a maximum of 1/16 inch from the sanding disc. Model: 6501 wenproducts.com...
- Page 13 Housing (52). When it is vertical, tighten both Nuts (22) very tight to prevent the Belt Support Housing (52) from slipping. (See Figures 9 & 10) 3. Insert Support Shaft (76) into the hole facing the belts and tighten Bolt (32) against flat side of Support Shaft (76). (See Figures (9 & 10) Model: 6501 wenproducts.com...
-
Page 14: Mounting Stop Plate
4. Tighten the stop plate locking bolt (32). WARNING: To avoid trapping the workpiece or fingers between the sanding belt and the stop plate, the stop plate edge should be adjusted to a maximum of 1/16 inch from the sanding belt. Model: 6501 wenproducts.com... -
Page 15: Install The Sanding Belt
NOTE: If you are using the sanding disc for the first time. Before attaching the disc, wipe down the Aluminum Disc (5) with denatured alcohol (shellac thinner). This will clean the surface, leave no residue and assure a secure bond. Model: 6501 wenproducts.com... -
Page 16: Operation
Hold the workpiece firmly with both hands. Keep fingers away from sanding belt. Keep the workpiece end against the backstop and move it slowly across the sanding belt. Apply enough pressure to remove material; excessive pressure will reduce sanding efficiency. Model: 6501 wenproducts.com... - Page 17 CAUTION: When finished with Belt/Disc Sander, to prevent accidents, turn off and disconnect its power supply after use. Remove the safety Key from the Switch (31). Wipe down and store the Sander indoors out of children’s reach. Model: 6501 wenproducts.com...
-
Page 18: Maintenance
Nuts (22). 4. Place a straight edge on the faces of the two pulleys to ascertain alignment. Contact surfaces of the pulleys and the straight edge shall fully touch. Fully tighten the Nuts (22). Model: 6501 wenproducts.com... -
Page 19: Exploded View
Exploded view Model: 6501 wenproducts.com... -
Page 20: Parts List
Hex Bolt M8 X 10 6501-034 Rubber Cap 6501-072 Table Bar 6501-035 Steel Plate 6501-073 Angle Pointer 6501-036 Holding Plate 6501-074 Bar Holder 6501-037 Cable Fixing Plate 6501-075 Adjusting Knob 6501-038 Hold Plate Bolt 6501-076 Supporting Shaft Model: 6501 wenproducts.com... -
Page 21: Warranty
To take advantage of this warranty, please contact us at 1-888-315-3080 or write to us at WEN. PO Box 1110, Dundee, IL 60118. You will need proof of purchase and may be asked to ship the tool back to us freight prepaid.
Need help?
Do you have a question about the 6501 and is the answer not in the manual?
Questions and answers