HIKVISION Digital Video Recorder Quick Operation Manual
Hide thumbs
Also See for Digital Video Recorder:
- User manual (198 pages) ,
- Quick operation manual (39 pages) ,
- Quick start manual (37 pages)
Table of Contents
Advertisement
Quick Links
Advertisement
Table of Contents

Related Manuals for HIKVISION Digital Video Recorder


Summary of Contents for HIKVISION Digital Video Recorder
-
Page 1: Digital Video Recorder
Digital Video Recorder Quick Operation Guide UD.6L0202B0063A01... -
Page 2: Dvr Pre-Installation
Quick Operation Guide of Digital Video Recorder Thank you for purchasing our product. If there is any question or request, please do not hesitate to contact dealer. This manual is applicable to DS-7204HFHI-ST, DS-7208HFHI-ST, DS-7204HFHI-SE and DS-7208HFHI-SE DVR. DVR Pre-Installation The DS-7200HFHI-ST&SE DVR is highly advanced surveillance equipment that should be installed carefully. - Page 3 Quick Operation Guide of Digital Video Recorder Connect the power cable to the HDD. Place the HDD on the bottom of the device and then fasten the screws on the bottom to fix the HDD. Re-install the cover of the DVR and fasten screws.
-
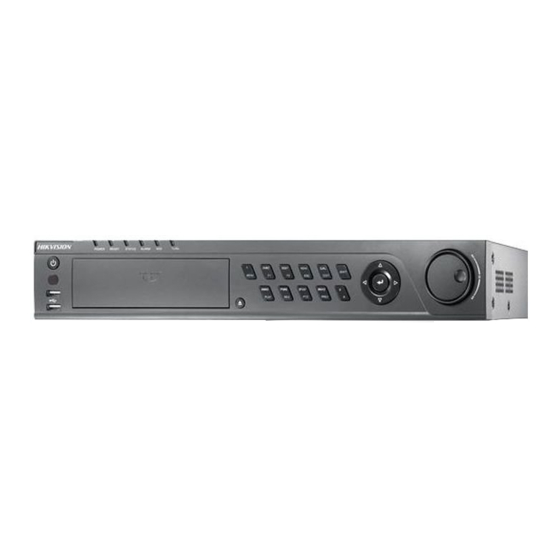
Page 4: Front Panels
Quick Operation Guide of Digital Video Recorder Front Panels Front Panel of DS-7200HFHI-ST Description of Control Panel Buttons Name Function Description POWER Power indicator turns yellow once the power switch turns on. READY Ready indicator turns yellow when system is running. - Page 5 Quick Operation Guide of Digital Video Recorder Enter numeral “7”; Enter letters “PQRS”; 7/PQRS/REC Open the manual record interface. Enter numeral “8”; Enter letters “TUV”; 8/TUV/PTZ Access PTZ control interface. Enter numeral “9”; Enter letters “WXYZ”; 9/WXYZ/PREV Multi-channel display in live view.
-
Page 6: Rear Panels
Quick Operation Guide of Digital Video Recorder Rear Panels DS-7204HFHI-SE DS-7204HFHI-ST DS-7208HFHI-ST&SE Item Description VIDEO IN HD-SDI interface for video input. AUDIO IN RCA connector AUDIO OUT RCA connector DB9 connector for VGA output. Display local video output and menu. -
Page 7: Peripheral Connections
Quick Operation Guide of Digital Video Recorder Peripheral Connections RS-485 Connection Rear Panel of DS-7204HFHI-SE To connect RS-485 devices to the DVR: Disconnect pluggable block from the RS-485 terminal block. Press and hold the orange part of the pluggable block; insert signal cables into slots and release the orange part. -
Page 8: Specifications
Quick Operation Guide of Digital Video Recorder Specifications Table 1 Specification for DS-7204HFHI-ST Model DS-7204HFHI-ST DS-7208HFHI-ST H.264 Video compression 4-ch 8-ch HD-SDI video HD-SDI interface (800 mVp-p, 75 Ω) input Supported 1080I60, 1080I50, 1080P30, 1080P25, 720P60, 720P50, HD-SDI camera 720P30, 720P25... - Page 9 Quick Operation Guide of Digital Video Recorder 2 × USB2.0 USB port 4 / 1 (optional) Alarm in / out Power supply 12V DC Consumption (without hard Max. 15 W Max. 20 W disks) Working -10 º C ~ +55 º C (14 º F ~ 131 º F)
- Page 10 Quick Operation Guide of Digital Video Recorder 4-ch 8-ch Synchronous (up to 2-ch 720P real time) (up to 2-ch 720P real time) playback Playback 1080P / 720P / VGA / 4CIF / CIF / QVGA / QCIF resolution 128Mbps Output bandwidth...
-
Page 11: Hdd Storage Calculation Chart
Quick Operation Guide of Digital Video Recorder HDD Storage Calculation Chart The following chart shows an estimation of storage space used based on recording at one channel for an hour at a fixed bit rate. Bit Rate Storage Used 128K... -
Page 12: Accessing By Web Browser
Quick Operation Guide of Digital Video Recorder Accessing by Web Browser Logging In You can get access to the device via web browser. Open web browser, input the IP address of the device and then press Enter. The login interface appears. - Page 13 Quick Operation Guide of Digital Video Recorder In the live view window, select a playing window by clicking the mouse. Double click a camera from the device list to start the live view. You can click the button on the toolbar to start the live view of all cameras on the device list.
- Page 14 Quick Operation Guide of Digital Video Recorder Choose the day in a week to configure scheduled recording. Click Edit to edit record schedule. Configure All Day or Segment Record: If you want to configure the all-day recording, please check the All Day checkbox.
- Page 15 Quick Operation Guide of Digital Video Recorder Click Save to validate the above settings. Playback Interface Introduction ① Channel List: Displays the list of channels and the playing status of each channel. ② Playback Window: Displays the image of channel.
- Page 16 Quick Operation Guide of Digital Video Recorder You can view and export the log files at any time, including operation, alarm, exception and information of device. Before you start The Log function can be realized only when the device is connected with HDD or network disk. And make sure the HDD or network disk has been initialized for the first time to use.
-
Page 17: Menu Operation
Quick Operation Guide of Digital Video Recorder Menu Operation Menu Structure The menu structure of the DVR is shown below: Startup and Shutdown Proper startup and shutdown procedures are crucial to expand the service time of the DVR. To start the DVR: Check the power supply is plugged into an electrical outlet. -
Page 18: Record Settings
Quick Operation Guide of Digital Video Recorder After the device starting up, the wizard will guide you through the initial settings, including modifying password, date and time settings, network settings, HDD initializing, and recording. Live View Some icons are provided on screen in Live View mode to indicate different camera status. These icons include:... -
Page 19: All-Day Record
Quick Operation Guide of Digital Video Recorder • Option 2: Steps: Enter the Manual settings interface. Menu> Manual Enable manual record. Click the status icon before camera number to change it to Or click the status icon of Analog to enable manual record of all channels. -
Page 20: Instant Playback By Channel
Quick Operation Guide of Digital Video Recorder And click the Yes button in the popup Attention message box to confirm the settings. Playback Play back the record files of a specific channel in the live view menu. Instant playback by channel Choose a channel under live view using the mouse and click the button in the shortcut operation menu. - Page 21 Quick Operation Guide of Digital Video Recorder The channel and time selection menu will display by moving the mouse to the right of the playback interface. Just tick the channel or channels if you want to switch playback to another channel or execute simultaneous playback of multiple channels.
- Page 22 Quick Operation Guide of Digital Video Recorder 3. Check backup result. Choose the record file in Export interface and click button to check it. 0202021030315...
- Page 23 Quick Operation Guide of Digital Video Recorder...
Need help?
Do you have a question about the Digital Video Recorder and is the answer not in the manual?
Questions and answers