Table of Contents

Related Manuals for AMX Enova AVX-400


Summary of Contents for AMX Enova AVX-400
- Page 1 Enova AVX-400 Cat5 Presentation Switcher Operation/Reference Guide Operation/Reference Guide Enova AVX-400 Cat5 Presentation Switcher C a t 5 P r e s e n t a t i o n S w i t c h e r s I n i t i a l R e l e a s e : 1 1 / 1 7 / 2 0 0 9...
- Page 2 AMX is not responsible for products returned without a valid RMA number. AMX is not liable for any damages caused by its products or for the failure of its products to perform. This includes any lost profits, lost savings, incidental damages, or consequential damages.
- Page 3 LICENSE GRANT. AMX grants to Licensee the non-exclusive right to use the AMX Software in the manner described in this License. The AMX Software is licensed, not sold. This license does not grant Licensee the right to create derivative works of the AMX Software.
-
Page 5: Table Of Contents
Adding a Device to the Device Library................20 Modifying Devices in the Device Library ............... 21 Importing a Device Library.................... 21 Renaming a Device......................22 Updating Firmware ....................23 Programming ....................25 AxLink Channels...................... 25 AxLink Levels ......................25 Enova AVX-400 Cat5 Presentation Switcher Operation/Reference Guide... - Page 6 Table of Contents AxLink Commands ....................26 Serial Commands ....................27 Enova AVX-400 Cat5 Presentation Switcher Operation/Reference Guide...
-
Page 7: Overview
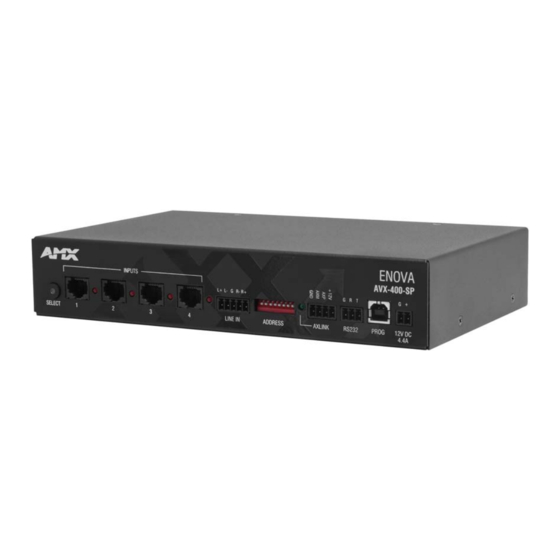
Overview Overview The Enova AVX-400 Cat5 Presentation Switcher (FG1350-01) is a four input, multi-format active presentation switcher with auxiliary line level audio input. The AVX-400 (FIG. 1) is a Cat5 switcher with basic projector/display control via RS-232, but with external control of the switcher via RS-232 or AxLink. This... - Page 8 • 2 2-pin 5 mm Phoenix connectors, for speakers (41-0158-SA) • 1 RS-232 3-pin 3.5mm Phoenix connector (41-0338) • 1 PSN4.4, Power Supply, 4.4A, 3.5mm Phoenix, 13.5VDCA5 (FG423-45) • Enova AVX-400 Presentation Switcher Installation Guide (93-1350-01) • 1 Suppression Ferrite (04-0018-SA) Optional Accessories: •...
-
Page 9: Wiring And Device Connections
FIG. 3 displays the components on the rear panel of the AVX-400. HD-15 Line Level HD-15 Composite Component Audio Output RGB/VGA Output Connector Display Control Connector Audio Amplifier Output FIG. 3 AVX-400 rear panel components Enova AVX-400 Cat5 Presentation Switcher Operation/Reference Guide... -
Page 10: Front Panel Components
3 --------- 3 3 --------- 6 Green-White 4 --------- 4 Blue 5 --------- 5 4 --------- 5 Blue-White 6 --------- 6 Green 7 --------- 7 7 --------- 8 Brown-White 8 --------- 8 Brown Enova AVX-400 Cat5 Presentation Switcher Operation/Reference Guide... -
Page 11: Line In
The center terminal on the switcher accepts a grounding wire. For unbalanced sources, you can use the R+, L+, and Ground connections (FIG. 9). You can connect a microphone to this input using a preamplifier. Enova AVX-400 Cat5 Presentation Switcher Operation/Reference Guide... - Page 12 FIG. 10 provides details for wiring from an audio input to a non-5 terminal audio source or destination, such as an RCA connector. Positive and ground wires connect to the source or destination connector. AVX-400 source device FIG. 10 Non 5-terminal audio source and destination wiring Enova AVX-400 Cat5 Presentation Switcher Operation/Reference Guide...
-
Page 13: Axlink
Make sure to connect only the GND wire on the AxLink/PWR connector when using a separate 12 VDC power supply. Do not connect the PWR wire to the AxLink connector’s PWR (+) opening. Enova AVX-400 Cat5 Presentation Switcher Operation/Reference Guide... -
Page 14: Device Dip Switches
Switch to Input 3 Switch to Input 4 Increase volume Decrease volume Hold for 3 seconds to turn on the programmed projector, and hold 3 seconds again to turn it off. Mute all (video and sound) Enova AVX-400 Cat5 Presentation Switcher Operation/Reference Guide... -
Page 15: Configuration Port (Prog)
The AVX-400 contains one low-speed type-B USB connection located on the front of the unit. Use a standard USB cable to establish a connection between the device and your PC's USB port. This connection enables you to program the switcher by using AMX DCS software. See the AMX DCS Software section on page 15 for more information. -
Page 16: Preparing Captive Wires
Ferrite around the Power cable (no tools required). 1. Release the latch to open 2. Insert the power cable 3. Installation complete. and close the enclosure. the plastic enclosure. FIG. 19 Installing the Suppression Ferrite Enova AVX-400 Cat5 Presentation Switcher Operation/Reference Guide... -
Page 17: Rear Panel Components
The table below provides information about the connector pins, signal types, and signal functions. This table’s wiring specifications are applicable to the rear DISPLAY CONTROL connector on the switcher. RS-232 Display Control Wiring Specifications Signal Function RS-232 Receive data Transmit data Signal ground Enova AVX-400 Cat5 Presentation Switcher Operation/Reference Guide... -
Page 18: Speaker
Destination devices require either balanced (differential) or unbalanced (single-ended) connections. FIG. 24 illustrates options for wiring between output connectors and the destinations. destination device AVX-400 Balanced wiring Unbalanced wiring FIG. 24 Stereo 5-terminal wiring Enova AVX-400 Cat5 Presentation Switcher Operation/Reference Guide... -
Page 19: Composite Output (Video)
RGND Red analog ground GGND Green analog ground 7 8 9 10 11 12 13 14 15 BGND Blue analog ground SGND Synchronization analog ground HSYNC Horizontal synchronization signal VSYNC Vertical synchronization signal Enova AVX-400 Cat5 Presentation Switcher Operation/Reference Guide... -
Page 20: Mounting The Presentation Switcher
FIG. 27 displays the mounting brackets set to attach to the underside of a table. To surface-mount the unit, attach the mounting brackets with the flat side toward the bottom of the unit. FIG. 27 AVX-400 presentation switcher with optional mounting brackets. Enova AVX-400 Cat5 Presentation Switcher Operation/Reference Guide... -
Page 21: Configuration
AMX DCS Software You can configure the AVX-400 and its functionality by using AMX DCS software (FIG. 28). The top of the window displays the device image of the front panel of the Enova AVX-400, and displays which inputs are valid by highlighting the source input. - Page 22 Press this button to reset all Amplifier Out settings to 0dB. The Display tab (FIG. 30) enables you to select a display output and establish input display settings. FIG. 30 Device Setup - Display tab Enova AVX-400 Cat5 Presentation Switcher Operation/Reference Guide...
-
Page 23: Enabling Display Control
19 for information on adding your specific device to the device library. Perform these steps to enable display control: Click the Display tab on the AMX DCS window. Click the Enabled check box to enable display control. Select a Make, Type, and Model display from their respective fields. -
Page 24: Priority Switching
You can use the DCS software to set an amount of time for a display to be inactive before it shuts down to save power. Perform these steps to set the inactive display power down: Click the Display tab on the AMX DCS window. Enable display control. See the Enabling Display Control section on page 17 for more information. -
Page 25: Device Library Manager
.xml format. This feature allows you to share devices with others. Once exported you can import the definition and add it to the library (assuming it does not already exist). Enova AVX-400 Cat5 Presentation Switcher Operation/Reference Guide... -
Page 26: Adding A Device To The Device Library
From the File menu, select Device Manager Library. The Device Library Manager window opens. In the Device Selection area, click the Add button. The Add Device dialog box opens (FIG. 32). FIG. 32 Add Device dialog box Enova AVX-400 Cat5 Presentation Switcher Operation/Reference Guide... -
Page 27: Modifying Devices In The Device Library
See the Renaming a Device section on page 22 for more information. Click OK to confirm the libraries have been imported. The devices now appear in the Device Selection list. Enova AVX-400 Cat5 Presentation Switcher Operation/Reference Guide... -
Page 28: Renaming A Device
(FIG. 34). FIG. 34 Rename Device Libraries dialog box Enter the appropriate information in the undefined fields. Click Rename. The Rename Device Libraries dialog box closes, and you can now import the device library. Enova AVX-400 Cat5 Presentation Switcher Operation/Reference Guide... -
Page 29: Updating Firmware
AMX DCS software provides a simple interface for updating your AVX-400 with the latest available version of firmware. You must use a .bin file to upgrade the firmware through AMX DCS software. The latest firmware files can be found at the Tech Center at www.amx.com. - Page 30 The following options appear on this window: Enova Firmware Update Window Options Go to AMX.com Click to open a browser and navigate to AMX.com. At AMX.com, you can download the latest firmware for the device. Current Firmware Version Displays the current firmware version for the device. This information is view-only.
-
Page 31: Programming
The AxLink Levels for the AVX-400-SP are defined in the table below. AxLink Levels Level Description Amplifier volume Balanced volume Input 1 attenuation Input 2 attenuation Input 3 attenuation Input 4 attenuation Auxiliary input attenuation Enova AVX-400 Cat5 Presentation Switcher Operation/Reference Guide... -
Page 32: Axlink Commands
Pressing the source select button activates the next valid source input. This command simulates a single pressing of the source select button on the presentation switcher. Simulates pressing the Syntax: select switch. SEND_COMMAND "’SSW’" Enova AVX-400 Cat5 Presentation Switcher Operation/Reference Guide... -
Page 33: Serial Commands
= the blue gain level setting between 0 and 100 Example: BGN2=50 Sets the blue gain level on source input 2 to 50%. Syntax: Toggle the balanced mute Syntax: Turns on the balanced mute Syntax: Turns off the balanced mute Enova AVX-400 Cat5 Presentation Switcher Operation/Reference Guide... - Page 34 Set the current Syntax: source input INP<input> Variable: input = source input (1-4) Example: INP1 Activates source input 1. INP? Returns the current source input. Queries the Syntax: current active INP? source input Enova AVX-400 Cat5 Presentation Switcher Operation/Reference Guide...
- Page 35 The specified tone band increases by 0.5dB. Increase the tone Syntax: band by 0.5dB TON<band>+ Variable: band = tone band (1-7): (1=100Hz, 2=250Hz, 3=500Hz, 4=1KHz, 5=2.5 KHz, 6=5KHz, 7=10KHz) Example: TON3+ Increases the 500Hz tone band by 0.5dB. Enova AVX-400 Cat5 Presentation Switcher Operation/Reference Guide...
- Page 36 = the amp volume level setting between -100 and 24dB Example: VLA=20 Sets the balance out volume level to 20dB. VLA+ Syntax: Increase amp VLA+ volume by 0.5dB VLA- Syntax: Decrease amp VLA- volume by 0.5dB Enova AVX-400 Cat5 Presentation Switcher Operation/Reference Guide...
- Page 37 Sample Output: volume levels. A=20dB B=11dB VOL+ Syntax: Increases the VOL+ volume by 0.5dB VOL- Syntax: Decreases the VOL- volume by 0.5dB Syntax: Turns on the video mute Syntax: Turns off the video mute Enova AVX-400 Cat5 Presentation Switcher Operation/Reference Guide...
- Page 38 Programming Enova AVX-400 Cat5 Presentation Switcher Operation/Reference Guide...
- Page 39 Programming Enova AVX-400 Cat5 Presentation Switcher Operation/Reference Guide...
- Page 40 It’s Your World - Take Control™ 3000 RESEARCH DRIVE, RICHARDSON, TX 75082 USA • 800.222.0193 • 469.624.8000 • 469-624-7153 fax • 800.932.6993 technical support • www.amx.com...
Need help?
Do you have a question about the Enova AVX-400 and is the answer not in the manual?
Questions and answers