Table of Contents
Advertisement
Quick Links
2190 Boul. Dagenais West
LAVAL (QUEBEC)
CANADA
H7L 5X9
W W W. B U R C A M . C O M
TEL: 514.337.4415
FAX: 514.337.4029
info@burcam.com
Your pump has been carefully
packaged at the factory to
prevent damage during shipping.
However, occasional damage
may
occur
handling.Carefully inspect your
pump for damages that could
cause failures.
damage to your carrier or
your point of purchase.
INSTALLATION
INSTRUCTIONS
due
to
rough
Report
any
© 2008 BUR-CAM Printed in Canada 410019
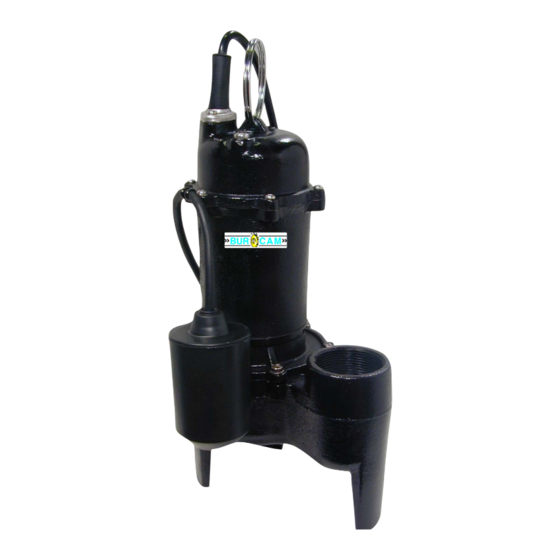
MODEL
400505H
SEWAGE
PUMP
Please read these
instructions
carefully. Failure
to comply to
instructions and
designed
operation of
this system,
may void the
warranty.
Advertisement
Table of Contents

Related Manuals for Burcam 400505H


Summary of Contents for Burcam 400505H
- Page 1 INSTRUCTIONS W W W. B U R C A M . C O M MODEL 2190 Boul. Dagenais West TEL: 514.337.4415 LAVAL (QUEBEC) FAX: 514.337.4029 CANADA 400505H H7L 5X9 info@burcam.com SEWAGE PUMP Please read these instructions carefully. Failure to comply to...
-
Page 2: Safety Instructions
SAFETY INSTRUCTIONS: This fine pump that you have just purchased is designed from the latest in material and workmanship. Before installation and operation, we recommend the following procedures: CHECK WITH YOUR LOCAL ELECTRICAL AND PLUMBING CODES TO ENSURE YOU COMPLY WITH THE REGULATIONS. THESE CODES HAVE BEEN DESIGNED WITH YOUR SAFETY IN MIND. - Page 3 APPLICATIONS FEATURES Vortex designed impeller made from noryl, Designed for a permanent installation for homes will not corrode. and cottages application. Rugged cast iron pump body. To pumping where the total head requirements do not exceed 15 feet, including pipe friction Stainless steel mechanical rotary type motor losses.
- Page 4 Screw the pipe with the male adaptor into the 2” discharge opening in the pump. Lower pump STEP 5 with piping attached into the sewage basin. Make sure that the pump is as close as possible to the centre of the basin. Adjusting the pump in centre of basin will keep mechanical float switch from rubbing on side of basin.
-
Page 5: Repair Parts
STEP 9 Fill with water and STEP 2 test operation Install sewage basin 400505H STEP 4 Drill a 1/4” hole STEP 3 Cement 2” adaptor to pipe REPAIR PARTS # REF DESCRIPTION... - Page 6 TROUBLE SHOOTING GUIDE CHECKLIST NEVER MAKE ADJUSTMENTS TO ANY ELECTRICAL APPLIANCE OR PRODUCT WITH THE POWER CONNECTED. DON’T JUST UNSCREW THE FUSE OR TRIP THE BREAKER, REMOVE THE POWER FROM THE RECEPTACLE. TROUBLE PROBABLE CAUSE ACTION Turn switch to on position Motor does not Switch is off position Replace...
Need help?
Do you have a question about the 400505H and is the answer not in the manual?
Questions and answers