Getac S400 User Manual
Rugged computer
Hide thumbs
Also See for S400:
- User manual (148 pages) ,
- Operation manual (47 pages) ,
- Specifications (2 pages)
Table of Contents
Advertisement
Quick Links
Advertisement
Table of Contents

Related Manuals for Getac S400


Summary of Contents for Getac S400
- Page 1 S400 USER’S MANUAL Rugged Mobile Computing Solutions...
- Page 2 Most screens and operating instructions in this manual are based on Windows 7. If you’re using a different version of Windows, the screens and related operations may not be the same.For the latest version of the manual, please visit the Getac website at www.getac.com.
- Page 3 ® Please reference ENERGY STAR related information from www.energystar.gov. ® As an ENERGY STAR Partner, Getac Technology Corporation has ® determined that this product meets the ENERGY STAR guidelines for energy efficiency. ® An ENERGY STAR qualified computer uses 70 % less electricity than computers without enabled power management features.
- Page 4 ® Over its lifetime, ENERGY STAR qualified equipment in a single home office (e.g., computer, monitor, printer, and fax) can save enough electricity to light an entire home for more than 4 years. Power management (“sleep settings”) on computers and monitors can result in much savings annually.
-
Page 5: Table Of Contents
Table of Contents Chapter 1 Getting Started ..............1-1 Getting the Computer Running ..........1-2 Unpacking ................1-2 Using the Tether (Optional) ..........1-3 Connecting to AC Power ............ 1-4 Turning On and Off the Computer ........1-5 ... - Page 6 Using the DVD Drive ............. 2-16 Inserting and Removing a Disc ........2-17 Using the Network Features ..........2-18 Using the Modem (Optional) ........... 2-18 Using the LAN ..............2-19 Using the Wireless LAN ............ 2-19 ...
- Page 7 Using ExpressCards ..............4-11 Using Storage Cards .............. 4-13 System Memory Upgrade ............. 4-15 Chapter 5 Using BIOS Setup and System Recovery ......5-1 BIOS Setup ................5-2 When and How to Use ............5-2 ...
- Page 8 When Traveling ............... 7-8 Chapter 8 Troubleshooting ..............8-1 Preliminary Checklist ............... 8-2 Solving Common Problems ............ 8-3 Battery Problems ..............8-3 Bluetooth Wireless Transmission Problems ...... 8-3 Display Problems ..............8-4 DVD Drive Problems ............
-
Page 9: Chapter 1 Getting Started
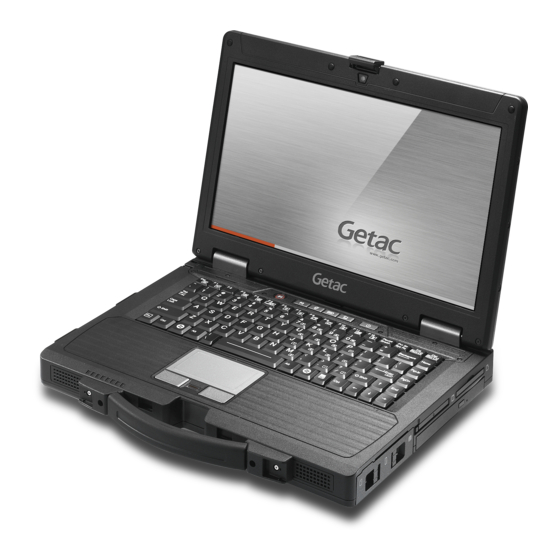
Chapter 1 Getting Started Congratulations on purchasing this rugged computer. This chapter first tells you step by step how to get the computer up and running. Then, you will find a section briefly introducing the external components of the computer. Operating Your Computer... -
Page 10: Getting The Computer Running
Getting the Computer Running This section guides you through the procedures for getting the computer ready for operation. Unpacking After unpacking the shipping carton, you should find these standard items: Rugged computer Accessories: − AC adapter − AC power cord −... -
Page 11: Using The Tether (Optional)
Using the Tether (Optional) A tether is provided for attaching the stylus to your computer. 1. Insert one of the tether’s loop ends through the hole of the stylus (as indicated by below). Then, insert the other end through the first loop (as indicated by below) and pull it tight. -
Page 12: Connecting To Ac Power
Connecting to AC Power The computer operates either on the external AC power or internal battery power. It is suggested that you use AC power when you start up the computer for the very first time. CAUTION: Use only the AC adapter included with your computer. Using other AC adapters may damage the computer. -
Page 13: Turning On And Off The Computer
When unplugging the connector, always hold the plug head. Never pull on the cord. NOTE: When the AC adapter is connected, it also charges the battery pack. For information on using battery power, see Chapter 3. Turning On and Off the Computer Turning On 1. - Page 14 2. Press the power button ( 3. Each time the computer is turned on, it performs a Power-On Self Test (POST), and the operating system such as Windows should start. Turning Off When you finish a working session, you can stop the system by turning off the power or leaving it in Sleep or Hibernation mode: To...
-
Page 15: Taking A Look At The Computer
Taking a Look at the Computer NOTE: Depending on the model you purchased, the appearance of your computer may not be exactly the same as those shown in this manual. CAUTION: You need to open the protective covers to access the connectors. When not using a connector, make sure to close the cover completely for water- and dust-proof integrity. -
Page 16: Rear Components
Rear Components Component Description See Also Power Connects the AC adapter. P. 1-3 Connector USB Port Connects a USB device, such as a USB P. 4-4 flash disk, printer, digital camera, joystick, and more. RS232 Serial Connects a serial mouse or serial P. -
Page 17: Right-Side Components
Right-Side Components Component Description See Also SIM Card Slot Accepts a 3G SIM card for models having P. 2-29 the 3G module. NOTE: The slot still exists but cannot be used for models without the 3G module. Smart Card Accepts a smart card for additional P. -
Page 18: Left-Side Components
Left-Side Components Component Description See Also Tether Hole Stylus tethered to this hole. P. 1-3 Stylus Serves as the input device by tapping on P. 2-9 the touchscreen to make selections and enter information. Audio Output Connects a set of headphones or P. - Page 19 Component Description See Also Storage Card Accepts a MultiMediaCard (MMC), P. 4-13 Reader Secure Digital (SD), Memory Stick (MS) or Memory Stick PRO (MS PRO) card for removable storage media. USB Port Connects a USB device, such as a USB P.
-
Page 20: Top-Open Components
Top-open Components Component Description See Also Camera Lens Allows you to use the camera function. (optional) LCD Screen Displays the output of the computer. May P. 2-9 include the optional touchscreen feature. Power Button Turns the power on or off (Sleep mode by P. - Page 21 Component Description See Also Microphone Receives sound and voice for the computer. Quick Buttons P. 2-14 Starts G-Manager by default. Starts Microsoft Internet Explorer by default. Toggles Blackout mode on or off. Brings up the ECO menu for selecting a power profile when using battery power.
- Page 22 Component Description See Also Both indicators blink green at the same P. 5-5 time when the optional hard disk drive heater is on. CAUTION: The “HDD Preheat” feature works with low temperature 9-cell battery packs only. Do not use other battery types.
-
Page 23: Bottom Components
Bottom Components Component Description See Also Docking Connects to the Office Dock (purchased Connector separately). GPS Pass-through Connects to the external antenna for Connector GPS receiver. (optional) NOTE: Must be connected via docking. 3G Pass-through Connects to the external antenna for Connector 3G transmission. -
Page 25: Operating Your Computer
Chapter 2 Operating Your Computer This chapter provides information about the use of the computer. If you are new to computers, reading this chapter will help you learn the operating basics. If you are already a computer user, you may choose to read only the parts containing information unique to your computer. -
Page 26: Using The Keyboard
Using the Keyboard Your keyboard has all the standard functions of a full-sized computer keyboard plus an Fn key added for specific functions. The standard functions of the keyboard can be further divided into four major categories: Typewriter keys Cursor-control keys Numeric keys Function keys Typewriter Keys... -
Page 27: Numeric Keypad
Numeric Keypad A 15-key numeric keypad is embedded in the typewriter keys as shown next: Numeric keys facilitate entering of numbers and calculations. When Num Lock is on, the numeric keys are activated; meaning you can use these keys to enter numerals. NOTE: When the numeric keypad is activated and you need to type the English letter in the keypad area, you can turn Num Lock off or you can press Fn... -
Page 28: Function Keys
Function Keys On the top row of the keys are the function keys: F1 to F12. Function keys are multi-purpose keys that perform functions defined by individual programs. Fn Key The Fn key, at the lower left corner of the keyboard, is used with another key to perform the alternative function of a key. -
Page 29: Windows Keys
Description Switches the display output when external devices are connected. Decreases the LCD brightness. Increases the LCD brightness. Switches the touchscreen off or on. * Switches the touchpad off or on. Switches the system sound output off (mute) or on. Switches LCD backlight off or on. -
Page 30: Using The Touchpad
Using the Touchpad CAUTION: Do not use a sharp object such as a pen on the touchpad. Doing so may damage the touchpad surface. NOTE: Press Fn+F9 to toggle the touchpad on or off. For optimal performance of the touchpad, keep your fingers and the pads clean and dry. - Page 31 Work surface within the inner rectangle The touchpad consists of a rectangular pad (work surface) and a left and right buttons. To use the touchpad, place your forefinger or thumb on the pad. The rectangular pad acts like a miniature duplicate of your display. As you slide your fingertip across the pad, the pointer (also called cursor) on the screen moves accordingly.
-
Page 32: Configuring The Touchpad
Term Action Drag and Press and hold the left button, then move your finger drop until you reach your destination (drag). Finally, release the button (drop) when you finish dragging your selection to the destination. The object will drop into the new location. -
Page 33: Using The Touchscreen (Optional)
Using the Touchscreen (Optional) NOTE: Press Fn+F8 to toggle the touchscreen on or off. CAUTION: Do not use a sharp object such as a ballpoint pen or pencil on the touchscreen. Doing so may damage the touchscreen surface. Use your finger or the included stylus. -
Page 34: Using Multi-Touch Gestures (Optional)
Term Action Drag and Press lightly on the touchscreen and move your finger drop until you reach your destination (drag). Finally, release your finger (drop) when you finish dragging your selection to the destination. The object will drop into the new location. Using Multi-touch Gestures (Optional) If your computer model comes with multi-touch-capable screen and Windows 7, you can interact with your computer by placing two fingers on... - Page 35 Gestures Actions Descriptions = finger down; = finger up) Rotate Use rotating to move a picture or other item on the screen in a circular direction (clockwise or counter- clockwise). The gesture Move two fingers in opposing works in applications directions.
- Page 36 Gestures Actions Descriptions = finger down; = finger up) Flicks Flick left or right to navigate back and forward in a browser and other applications. The gesture works in most Make quick drag gestures in the applications that desired direction. support back and forward.
-
Page 37: Using The Input Panel
Using the Input Panel Use the Input Panel to enter text and perform various keyboard functions. There are two types of Input Panels for you to use in Windows 7: Touch Keyboard allows you to enter text by tapping the keys with your stylus, like pressing the keys on a standard keyboard. -
Page 38: Using The Quick Buttons
Using the Quick Buttons The Quick Buttons allow you to quickly start a program or activate a function. The quick buttons are: Button Description Starts G-Manager by default. You can re-define the function of the button. (See “Quick Button Definition Utility” in Chapter 6 for information.) Can also serve as “Emergency”... - Page 39 Button Description Brings up the ECO menu as shown below: ECO Menu Quick Mode Power Saving Work Mode Select a mode before the ECO menu disappears. You can select a mode by pressing the arrow key. Whenever you press the ECO button, the setting always defaults to Off.
-
Page 40: Using The Dvd Drive
Using the DVD Drive Your computer comes with a Super Multi drive. The drive can read from and write to CD, DVD+, DVD- and DVD-RAM media. CAUTION: When inserting a disc, do not use force. Make sure that the disc is correctly inserted into the tray, and then close the tray. -
Page 41: Inserting And Removing A Disc
Inserting and Removing a Disc Follow this procedure to insert or remove a disc: 1. Turn on the computer. 2. Press the eject button and the DVD tray will slide out partially. Gently pull on it until it is fully extended. 3. -
Page 42: Using The Network Features
Using the Network Features Using the Modem (Optional) The internal 56 K fax/data modem allows you to use the telephone line to communicate with others by fax, email, or connect to an online service or bulletin board. To connect the telephone line to the modem, connect one end of the modem cable to the RJ-11 connector on the computer and the other end to the phone line. -
Page 43: Using The Lan
Using the LAN The internal 10/100/1000Base-T LAN (Local Area Network) module allows you to connect your computer to a network. It supports data transfer rate up to 1000 Mbps. To connect the network cable to the LAN module, connect one end of the LAN cable to the RJ-45 connector on the computer and the other end to the network hub. - Page 44 Stated Data Rates Technology Maximum (Mbps) Band Modulation Throughput (GHz) Technology (Mbps) 802.11a 54, 48, 36, 5.15 ~ OFDM (Orthogonal 24, 18, 12, 5.35 Frequency Division 9, 6 Multiplexing) 802.11b 11, 5.5, 2, 1 2.412 ~ DSSS (Direct 2.462 Sequence Spread Spectrum) 802.11g 54, 36, 18, 9 2.4...
-
Page 45: Connecting To A Wireless Network
When the WLAN radio is on, the WLAN indicator ( glows in green. NOTE: The Quick Bar appears on Windows desktop by default. If it is not open, you can right-click the Getac Utility icon ( ) located on Windows taskbar and select Quick Bar to open it. - Page 46 4. Some networks require a network security key or passphrase. To connect to one of those networks, ask your network administrator or Internet service provider (ISP) for the security key or passphrase. For more information on setting a wireless network connection, refer to Windows online help.
-
Page 47: Using The Bluetooth Feature (Optional)
Using the Bluetooth Feature (Optional) Depending on your model, your computer may incorporate the Bluetooth capability for short-range (about 10 meters) wireless communications between devices without requiring a cable connection. With Bluetooth wireless technology, data can be transmitted through walls, pockets and briefcases as long as two devices are within range. -
Page 48: Connecting To Another Bluetooth Device
) glows in green. NOTE: The Quick Bar appears on Windows desktop by default. If it is not open, you can right-click the Getac Utility icon ( ) located on Windows taskbar and select Quick Bar to open it. 3. The Bluetooth function is enabled by default, as indicated by the Bluetooth icon on the Windows taskbar. - Page 49 3. Start the Bluetooth utility by double-clicking the Bluetooth icon the taskbar and click New Connection. 4. The Add New Connection Wizard window appears. Select Express Mode (Recommended), and then click Next. 2-25 Operating Your Computer...
- Page 50 5. Select the device to connect to and click Next. 6. Depending on the type of Bluetooth device that you want to connect to, you will need to enter the pertinent information. For detailed information on using the Bluetooth Utility, see the Bluetooth Utility Help.
-
Page 51: Using The Fingerprint Sensor
Using the Fingerprint Sensor The fingerprint sensor provides a strong authentication mechanism based on fingerprint recognition. You can log on to your computer or sign in to a web site with your fingerprint instead of a password. NOTE: You can register a fingerprint only after creating a password for the Windows user account. - Page 52 You can then use the Fingerprint Software to set up how the fingerprint authentication works. For detailed information, click Start All Programs Fingerprint Software Help. 2-28 Operating Your Computer...
-
Page 53: Using The 3G Feature (Optional)
Using the 3G Feature (Optional) 3G is the third generation of mobile phone standards and technology after 2G. Services include wide-area wireless voice telephony and broadband wireless data, all in a mobile environment. Unlike IEEE 802.11 networks, 3G networks are “wide area cellular telephone networks”... -
Page 54: Turning On/Off The 3G Radio
3G radio is on, the 3G indicator ( ) glows in green. NOTE: The Quick Bar appears on Windows desktop by default. If it is not open, you can right-click the Getac Utility icon ( ) located on Windows taskbar and select Quick Bar to open it. -
Page 55: Setting Up A 3G Connection
Setting up a 3G Connection To set up a 3G connection for the first time, follow these steps: 1. Make sure that the SIM card is inserted and the 3G function is enabled (as described above). 2. On Windows desktop, double click the OneClick Internet shortcut on Windows desktop. -
Page 56: Using The 3G Application
6. Enter the required information. Contact your network operator for the correct information. Using the 3G Application Once a new profile has been created, it will appear in the dropdown menu Profiles. You can then select it by clicking Set Profile to use it. You can manage the mobile Internet communication: Internet Connection and Email download SMS Manager... -
Page 57: Chapter 3 Managing Power
Chapter 3 Managing Power Your computer operates either on external AC power or on internal battery power. This chapter tells you how you can effectively manage power. To maintain optimal battery performance, it is important that you use the battery in the proper way. -
Page 58: Ac Adapter
AC Adapter CAUTION: The AC adapter is designed for use with your computer only. Connecting the AC adapter to another device can damage the adapter. The AC power cord supplied with your computer is for use in the country where you purchased your computer. If you plan to go overseas with the computer, consult your dealer for the appropriate power cord. -
Page 59: Battery Pack
Battery Pack The battery pack is the internal power source for the computer. It is rechargeable using the AC adapter. The operating time of a fully charged battery pack depends on how you are using the computer. When your applications often access peripherals, you will experience a shorter operating time. -
Page 60: Initializing The Battery Pack
The charging times are as follows: Charging Time Battery Type Computer is Off Computer is On and in Video Playback State 6-cell (4 A) 2.5~3 hours 3~3.5 hours 9-cell (4 A) 3.5~4 hours 3.5~4 hours CAUTION: After the computer has been fully recharged, do not immediately disconnect and reconnect the AC adapter to charge it again. -
Page 61: Checking The Battery Level
Checking the Battery Level NOTE: Any battery level indication is an estimated result. The actual operating time can be different from the estimated time, depending on how you are using the computer. By Operating System You can check the approximate battery level using the battery meter function of the operating system. -
Page 62: Replacing The Battery Pack
Replacing the Battery Pack CAUTION: There is danger of explosion if the battery is incorrectly replaced. Replace the battery only with the computer manufacturer’s optional battery packs. Discard used batteries according to the dealer’s instructions. Do not attempt to disassemble the battery pack. If you often rely on battery power for a long period of time while traveling, you may consider the purchase of an additional battery pack from your dealer and keep it with you in a fully charged state as a backup. -
Page 63: Battery Low Signals And Actions
Battery Low Signals and Actions The battery icon changes appearance to display the current state of the battery. Battery Battery Level Description Icon Discharging The icon shows the charge remaining in 10-percent increments until the charge reaches the low-battery level. The battery charge has reached the low-battery level (10% by default). -
Page 64: Power Management
Power Management Your computer supports ACPI (Advanced Configuration and Power Interface) for power management. The power management feature allows you to reduce the power consumption for energy saving. With an ACPI-compliant operating system such as Windows, power supply to different computer components is controlled on an as-needed basis. This allows maximum power conservation and performance at the same time. -
Page 65: Hibernation
Hibernation Hibernation is a very useful feature. People frequently open many applications when they use computers. It takes some time to get all these applications open and running, and normally they all have to be closed before the computer can be turned off. When you use the hibernation feature, you do not have to close the applications. -
Page 66: Power-Saving Tips
Power-Saving Tips Aside from enabling your computer’s power saving mode (see previous section), you can do your part to maximize the battery’s operating time by following these suggestions. Press the power saving quick button ( ) to enter into power saving mode when using battery power. -
Page 67: Expanding Your Computer
Chapter 4 Expanding Your Computer You can expand the capabilities of your computer by connecting other peripheral devices. When using a device, be sure to read the instructions accompanying the device together with the relevant section in this chapter. Expanding Your Computer... -
Page 68: Connecting An External Monitor
Connecting an External Monitor If you want the benefits of a larger display screen with higher resolution, you can connect an external display monitor to your computer. Follow this procedure to connect an external monitor: 1. Turn off the computer. 2. -
Page 69: Connecting A Serial Device
Connecting a Serial Device Your computer has one or two serial port (depending on model) for connecting a serial device such as a serial mouse or serial communication device (modem). Follow this procedure to connect a serial device: 1. Turn off the computer. 2. -
Page 70: Connecting A Usb Device
Connecting a USB Device Your computer has three USB ports for connecting USB devices, such as a digital camera, scanner, printer, modem, and mouse. NOTE: The eSATA/USB Combo port can also function as a USB port. The USB ports support transfer rates up to 12 MB/s for USB 1.1 devices and 480 MB/s for USB 2.0 devices. -
Page 71: Connecting An Esata Device
Connecting an eSATA Device Your computer has an eSATA/USB combo port for connecting eSATA devices (such as an external hard drive and external optical drive) / USB devices (see previous section). The port supports SATA II with transfer rate up o 3.0Gbit/s. It can provide 5V power if a certified USB-eSata combo cable is used. -
Page 72: Connecting An Ieee 1394 Device
Connecting an IEEE 1394 Device Your computer has a mini IEEE 1394 port for connecting IEEE 1394 devices that include not only computer peripheral devices such as scanner, printer and high-quality CCD, but also consumer electronic equipment such as DVCAM and VCR. To connect an IEEE 1394 device, prepare an IEEE 1394 cable. -
Page 73: Connecting Audio Devices
Connecting Audio Devices For higher audio quality, you can send or receive sound through external audio devices. Audio Output Connector (green) can be connected to speakers, headphones, or earphone set. Microphone Connector (pink) can be connected to an external microphone for recording voice or sound. NOTE: After connecting an external audio device, make sure that you specify the use of the correct audio device in Windows. -
Page 74: Using Smart Cards
Using Smart Cards Your computer has a smart card slot. With an embedded microcontroller, smart cards have the unique ability to store large amounts of data, carry out their own on-card functions (e.g., encryption and mutual authentication), and interact intelligently with a smart card reader. -
Page 75: Using Pc Cards
Using PC Cards NOTE: Some PC cards require additional system resources. Before using such PC card, you may have to free other system resources for the PC card. Although some PC cards can be inserted and removed without turning off the computer, you cannot remove or install PC cards during Sleep mode. - Page 76 To remove a PC card: 1. Double-click on the Safely Remove Hardware icon found on the Windows taskbar and the Safely Remove Hardware window appears on screen. 2. Select (highlight) the PC card from the list to disable the card. 3.
-
Page 77: Using Expresscards
Using ExpressCards Your computer has an ExpressCard slot. ExpressCard supports the PCI Express and USB 2.0 serial data interfaces (supporting speeds of up to 2.5 Gbps and 480 Mbps respectively), improving speed in data transfer while conserving power usage. The ExpressCard slot can accommodate a 54 mm (ExpressCard/54) or 34 mm (ExpressCard/34) wide ExpressCard. - Page 78 To insert an ExpressCard: 1. Locate the ExpressCard slot on the right side of the computer. 2. Slightly push the dummy card to release and then pull it out of the slot. 3. Slide the ExpressCard, with its label facing up, all the way into the slot until the rear connectors click into place.
-
Page 79: Using Storage Cards
Using Storage Cards NOTE: If your hard disk is divided into several drives, make sure that all drives have been formatted before using the Card Reader. Otherwise, you may encounter problems when using the Card Reader. You can use only storage cards. Your Card Reader does not support cards with I/O (input/output) functions such as a wireless network card or Bluetooth card. - Page 80 To insert a storage card: 1. Locate the card reader on the left side of the computer and open the cover. 2. Align the card with its connector pointing to the slot and its label facing up. Slide the card into the slot until it reaches the end. 3.
-
Page 81: System Memory Upgrade
System Memory Upgrade You can upgrade your computer by changing system memory to a maximum of 8 GB on the two 1066/1333 MHz DDR3 SO-DIMM slots. CAUTION: RAM modules are extremely sensitive to static electricity. There are cases where static electricity generated by the human body has adversely affected such modules. - Page 82 4. To install the RAM module, match the module's notched part with the socket's projected part and firmly insert the module into the socket at a 20-degree angle ( ). Then push down until the retaining clips lock the module into position ( ). CAUTION: If the RAM module is difficult to insert or difficult to push down, do not force it.
-
Page 83: Using Bios Setup And System Recovery
Chapter 5 Using BIOS Setup and System Recovery BIOS Setup Utility is a program for configuring the BIOS (Basic Input/ Output System) settings of the computer. BIOS is a layer of software, called firmware, that translates instructions from other layers of software into instructions that the computer hardware can understand. -
Page 84: Bios Setup
You must press F2 quickly. The BIOS Setup Utility main screen appears as shown next. Information Main Advanced Security Boot Exit Model S400 Serial NO: RA7XXS0019 Processor Info: Intel(R) Core(TM) i5 CPU M520@2.40GHz Installed System Memory: 4096MB SATA HDD: [SAMSUNG HM321HI] 320GB... -
Page 85: Information Menu
The Information menu contains the basic configuration information of the system. There are no user-definable items in this menu. Information Main Advanced Security Boot Exit Model S400 Serial NO: RA7XXS0019 Processor Info: Intel(R) Core(TM) i5 CPU M520@2.40GHz Installed System Memory: 4096MB SATA HDD: [SAMSUNG HM321HI] 320GB... -
Page 86: Main Menu
Main Menu The Main menu contains the various system settings. Information Main Advanced Security Boot Exit Item Specific Help System Time: :33:08] System Date: [09/08/2010] <Tab>, <Shift-Tab>, or <Enter> selects field. Legacy USB Support: [Enabled] Wireless LAN: [Last State] Bluetooth: [Last State] Help Select Item... -
Page 87: Advanced Menu
Advanced Menu The Advanced menu contains the advanced settings. Information Main Advanced Security Boot Exit Item Specific Help USB Power Anytime: Disabled Wake Up Capability: Allow the system to AC Initiation [Disabled] charge an external USB SATA Mode [AHCI] device when the system Intel AMT Setup Prompt: is shutdown or in Virtualization Technology Setup:... - Page 88 Information Main Advanced Security Boot Exit Wake Up Capability: Item Specific Help Allow any key to wake up the system from S3 Any-key Wake Up From S3: [Disabled] Disabled (Sleep) state. Ring Wake-Up From S3 [Disabled] USB Wake-Up From S3 [Disabled] Help Select Item...
- Page 89 Information Main Advanced Security Boot Exit Virtualization Technology Setup: Item Specific Help Intel(R) VT (Intel Virtualization Intel(R) Virtualization Technology [Disabled] Disabled Technology) provides Vt-d Technology [Disabled] hardware support for processor virtualization. When enabled, a VMM (Virtual Machine Monitor) can utilize the additional hardware virtualization capabilities...
- Page 90 Information Main Advanced Security Boot Exit Button Setup: Item Specific Help Define P1 button as Blackout ON/OFF , P1 Function: [Disable d] Quick Btn Quick launch button or Emergency button. Help Select Item Change Values Setup Defaults ↑↓ Exit Select Menu Enter Select Sub-Menu...
-
Page 91: Security Menu
Security Menu The Security menu contains the security settings, which safeguard your system against unauthorized use. Information Main Advanced Security Boot Exit Item Specific Help Supervisor Password Is: Clear User Password Is: Clear Supervisor Password controls access to the Enter Set Supervisor Password: [Enter] Setup utility. - Page 92 typing it again and pressing Enter. You can set the supervisor/user password to be required for starting up the system and/or entering BIOS Setup. Password on Boot allows you to enable or disable the entering of password for booting up your system. Once the password is successfully set and this item is enabled, it is required for booting up the system.
-
Page 93: Boot Menu
Boot Menu The Boot menu sets the sequence of the devices to be searched for the operating system. Information Main Advanced Security Boot Exit Item Specific Help Boot priority order: 1: USB FDC: Keys used to view or 2: SATA ODD: Optiarc DVD RW AD-7580S configure devices: 3: SATA HDD: SAMSUNG HM321HI Up and Down arrows select... -
Page 94: Exit Menu
Function Shift+1 Deactivates/activates the highlighted boot device on the “Boot priority order” list. When a device has been deactivated, an “!” (exclamation) symbol appears beside the item and system will bypass it when detecting boot device during POST. Exit Menu The Exit menu provides ways of exiting BIOS Setup. -
Page 95: System Recovery
System Recovery Use System Recovery when: The Windows operating system does not start at all. You want to restore the system to the factory state. WARNING: Using this feature will reinstall Windows to your system and configure it to the system’s factory default settings. All data on the hard disk drive will be lost. - Page 96 3. A message appears asking if you want to start. Type Y to start. 4. A warning message appears asking if you accept the terms as shown on the screen. Type Y to continue. 5. Type Y again when the next message appears asking for confirmation. 6.
- Page 97 10. When completed, the system restarts and displays Windows desktop. 5-15 Using BIOS Setup and System Recovery...
-
Page 99: Using Special Utilities
Chapter 6 Using Special Utilities Special utilities are provided for enhanced capabilities and management. This chapter describes how to use these utilities. Using Special Utilities... -
Page 100: Using G-Manager
Starting G-Manager You can start up G-Manager by any of the following methods: Click Start All Programs Getac Utility G-Manager, or Click and hold the icon located on the taskbar until a ring appears. From the small menu that pops up, click G-Manager. -
Page 101: System Tab
System Tab The System tab provides system information. To view specific information, select the component from the list on the left side of the screen. The information of the selected component will be displayed on the right side of the screen. Using Special Utilities... -
Page 102: Battery Tab
Battery Tab The Battery tab allows you to check the battery status and configure the battery. At most two batteries may be supported. Click Battery 1 or Battery 2 to view the information of each battery (if your model has a second battery). NOTE: When the percentage % Left is less than 10% then the value will be displayed in red. - Page 103 Charging Mode The lower left portion of the screen allows you to select the charging mode. Normal Mode – The battery will be fully charged. When remaining charge reaches below 95%, then charging will start until it is fully charged. Economy Mode –...
-
Page 104: Eco Tab
4. Wait till the process is completed. Click Exit when finished. ECO Tab The ECO tab allows you to configure ECO modes (or called power profiles). To put the system into an ECO mode, use the ECO button. (See “Using the Quick Buttons”... -
Page 105: Eco Information
ECO Information The left portion of the screen lists the available power profiles (Quick, Power Saving, and Work). Each profile is a combination of power settings that results in different power consumptions. To change the settings of a profile, select (highlight) the profile name in the list. Profile Settings The right portion of the screen displays the settings of the current selected profile. -
Page 106: Antenna Tab
Antenna Tab The Antenna tab allows you to set if your system will automatically use the external GPS or 3G antenna when connected. Select the checkbox(es) accordingly. Click Apply or OK to save the changes. Using Special Utilities... -
Page 107: Monitoring Tab
Monitoring Tab The Monitoring tab allows you to configure the monitoring function of G-Manager. Items to Monitor The left portion of the screen lists the items. Click the checkbox before an item to include it as a monitored component. Click Apply or OK to save the changes. - Page 108 Monitoring Interval – sets the frequency of updates on the monitoring window (1/3/5/10/30 seconds or 1/5/30 minutes). Click Apply or OK to save the changes. Starting and Stopping the Monitoring To start monitoring, click START Monitor. The monitoring window similar to the one below appears displaying requested information at specified intervals.
-
Page 109: Gps Status Tab
GPS Status Tab The GPS Status tab shows the GPS status for models having the GPS module. To start GPS positioning, click Start GPS. The screen displays: Ongoing raw data strings in the Message Log section Overhead satellite positions in the Satellite Map section Signal strength of the satellites in the Signal Indicator section When GPS positioning is completed, the Data Summary section shows the GPS information of the current location. -
Page 110: Quick Button Definition Utility
NOTE: If you want to re-define P1, make sure the P1 Function item in the BIOS Setup Utility is set to Quick Btn (default setting). (See “Advanced Menu” in Chapter 5 for information.) 1. Right-click the Getac utility icon ( ) on the Windows taskbar and select Quick Buttons Definition. - Page 111 3. In the Open dialog box, browse to the destination folder and select the desired program file. Then, click Open to complete. 4. A matching program icon will appear in the settings window. NOTE: You can restore the quick buttons to the default settings by clicking Get Default.
-
Page 113: Caring For The Computer
Chapter 7 Caring for the Computer Taking good care of your computer will ensure a trouble-free operation and reduce the risk of damage to your computer. This chapter gives you guidelines covering areas such as protecting, storing, cleaning, and traveling. Caring for the Computer... -
Page 114: Protecting The Computer
Protecting the Computer To safeguard the integrity of your computer data as well as the computer itself, you can protect the computer in several ways as described in this section. Using an Anti-Virus Strategy You can install a virus-detecting program to monitor potential viruses that could damage your files. -
Page 115: Using The Cable Lock
Using the Cable Lock You can use a Kensington-type cable lock to protect your computer against theft. The cable lock is available in most computer stores. To use the lock, loop the lock cable around a stationary object such as a table. -
Page 116: Taking Care Of The Computer
Taking Care of the Computer Location Guidelines For optimal performance, use the computer where the recommended temperature is between 0 °C (32 °F) and 45 °C (113 °F). Select models support -15 °C (5 °F) low temperature. Avoid placing the computer in a location subject to high humidity, extreme temperatures, mechanical vibration, direct sunlight, or heavy dust. -
Page 117: Cleaning Guidelines
a screen saver or other software that prevents the power management from working. Cleaning Guidelines Never clean the computer with its power on. Use a soft cloth moistened with water or a non-alkaline detergent to wipe the exterior of the computer. Gently wipe the display with a soft, lint-free cloth. -
Page 118: Touchscreen Guidelines
It is recommended that you do not charge the battery pack more than once a day. It is recommended that you charge the battery pack with the computer’s power off. To maintain the battery pack’s operating efficiency, store it in a cool dark place removed from the computer and with 30 % ~ 40 % charge remaining. - Page 119 To remove hard to remove dirt, blow some steam on the particular area and gently wipe away using a soft cloth. Turn off the computer power when cleaning the display. Cleaning the display with the power on may cause improper operation. Use the touchscreen within the intended area only.
-
Page 120: When Traveling
When Traveling Before traveling with your computer, make a backup of your hard disk data into flash disks or other storage devices. As an added precaution, bring along an extra copy of your important data. Make sure that the battery pack is fully charged. Make sure that the computer is turned off and the top cover is securely closed. -
Page 121: Chapter 8 Troubleshooting
Chapter 8 Troubleshooting Computer problems can be caused by hardware, software, or both. When you encounter any problem, it might be a typical problem that can easily be solved. This chapter tells you what actions to take when solving common computer problems. -
Page 122: Preliminary Checklist
Preliminary Checklist Here are helpful hints to follow before you take further actions when you encounter any problem: Try to isolate which part of the computer is causing the problem. Make sure that you turn on all peripheral devices before turning on the computer. -
Page 123: Solving Common Problems
Solving Common Problems Battery Problems The battery does not charge (Battery Charge indicator does not light amber). Make sure that the AC adapter is properly connected. Make sure that the battery is not too hot or cold. Allow time for the battery pack to return to room temperature. -
Page 124: Display Problems
Make sure that the distance between the two devices are not over 10 meters or that there are no walls or other obstructions between the devices. Make sure that the other device is not in “Hidden” mode. Make sure that both devices are compatible. Display Problems Nothing appears on the screen. -
Page 125: Dvd Drive Problems
Press the Fn+F5 hot key to toggle through the display options or change the Display Settings Properties in Windows. DVD Drive Problems The DVD drive cannot read a disc. Make sure that the disc is correctly seated in the tray, with the label facing up. -
Page 126: Hardware Device Problems
The ExpressCard stops communicating properly. The application may have been reset when the computer is turned off or in Sleep mode. Exit and restart the application. Hardware Device Problems The computer does not recognize a newly installed device. The device may not be correctly configured in the BIOS Setup program. Run the BIOS Setup program to identify the new type. -
Page 127: Keyboard, Mouse, And Touchpad Problems
Keyboard, Mouse, and Touchpad Problems The keyboard does not respond. Try connecting an external keyboard. If it works, contact an authorized dealer, as the internal keyboard cable might be loose. Water or liquid is spilt into the keyboard. Immediately turn off the computer and unplug the AC adapter. Then turn the keyboard upside down to drain the liquid out of the keyboard. -
Page 128: Modem Problems
Modem Problems The modem does not work. Make sure that the telephone line is properly connected. Make sure that the COM port in the communication software is correctly set. Turn off power management. PC Card Problems The PC card does not work. Make sure that the PC card is correctly seated. -
Page 129: Software Problems
The computer does not resume from Sleep or Hibernation mode. The computer automatically enters Sleep or Hibernation mode when the battery pack is empty. Do any one of the following: − Connect the AC adapter to the computer. − Replace the empty battery pack with a fully charged one. The computer does not enter Hibernation mode with the Fn+F12 hot keys. -
Page 130: Startup Problems
Distorted sound is produced. Make sure that the volume control is not set too high or too low. In most cases, a high setting can cause the audio electronics to distort the sound. The sound system does not record. Adjust the playback or recording sound levels. The external microphone or audio device does not work. -
Page 131: Wlan Problems
When you turn on the computer, it stops after POST. Restart your computer. WLAN Problems I cannot use the WLAN feature. Make sure that the mini PCI-E WLAN card is correctly installed. Make sure that the WLAN feature is turned on. Transmission quality is poor. -
Page 132: Other Problems
I cannot communicate with the computer in the network when Infrastructure mode is configured. Make sure that the Access Point your computer is associated with is powered on and all the LEDs are working properly. If the operating radio channel is in poor quality, change the Access Point and all the wireless station(s) within the BSSID to another radio channel. -
Page 133: Resetting The Computer
Resetting the Computer You may have to reset (reboot) your computer on some occasions when an error occurs and the program you are using hangs up. If the computer operation seems to hang up, first wait. It is possible that the computer is processing data. -
Page 135: Appendix A Specifications
Appendix A Specifications NOTE: Specifications are subject to change without any prior notice. Parts Specifications Intel® Core™ i3 / i5 series, Turbo Boost Technology Chipset Mobile Intel® QM57 Express Chipset BIOS ACPI, Computrace compatible, Intel® vPro (option) Up to 8GB DDR3 SDRAM, 2 slots, 1066/1333MHz Display Panel 14-inch (16:9) wide TFT LCD, resolution up to 1366×768 WXGA,... - Page 136 Parts Specifications I/O ports USB port × 4 (3 standard USB 2.0 and 1 for eSATA USB combo), serial port (RS-232), eSATA/ USB port, RJ-45 port, RJ-11 port (option), mini IEEE 1394a port, docking connector Modem (option) Internal modem Intel® 82577LM Gigabit Network Connection Wireless LAN Intel®...
-
Page 137: Appendix B Regulatory Information
Appendix B Regulatory Information This appendix provides regulatory statements and safety notices on your computer. NOTE: Marking labels located on the exterior of your computer indicate the regulations that your model complies with. Please check the marking labels and refer to the corresponding statements in this appendix. Some notices apply to specific models only. -
Page 138: On The Use Of The System
On the Use of the System Class B Regulations Federal Communications Commission Radio Frequency Interference Statement NOTE: This equipment has been tested and found to comply with the limits for a Class B digital device pursuant to Part 15 of the FCC Rules. These limits are designed to provide reasonable protection against harmful interference in a residential installation. -
Page 139: Safety Notices
Canada Canadian Department of Communications Radio Interference Regulations Class B Compliance Notice This Class B digital apparatus meets all requirements of the Canada Interference-Causing equipment regulations. Cet appareil numérique de Classe B respecte toutes les exigences du Règlement Canadien sur le matériel brouileur. This digital apparatus does not exceed the Class B limits for radio noise emissions from digital apparatus set out in the Radio Interference Regulations of the Canadian Department of Communications. - Page 140 FINNISH VAROITUS: Paristo voi räjähtää, jos se on virheellisesti asennettu. Vaihda paristo ainoastaan valmistajan suosittelemaan tyyppiin. Hävitä käytetty paristo valmistajan ohjeiden mukaisesti. ENGLISH CAUTION: Danger of explosion if battery is incorrectly replaced. Replace only with the same or equivalent type recommended by the equipment manufacturer.
-
Page 141: About The Modem
paper or other objects that will reduce cooling. Do not use the AC adapter while it is inside a carrying case. Connect the adapter to a proper power source. The voltage requirements are found on the product case and/or packaging. Do not use the adapter if the cord becomes damaged. -
Page 142: On The Use Of The Rf Device
On the Use of the RF Device NOTE: The information in this section applies to models with the wireless LAN module. USA and Canada Safety Requirements and Notices IMPORTANT NOTE: To comply with FCC RF exposure compliance requirements, the antenna used for this transmitter must be installed to provide a separation distance of at least 20 cm from all persons and must not be co-located or operating in conjunction with any other antenna or transmitter. - Page 143 The use of wireless devices on airplanes is governed by the Federal Aviation Administration (FAA). The use of wireless devices in hospitals is restricted to the limits set forth by each hospital. Antenna use: In order to comply with FCC RF exposure limits, low gain integrated antennas should be located at a minimum distance of 20 cm (8 inches) or more from the body of all persons.
- Page 144 EMC Requirements This device uses, generates and radiates radio frequency energy. The radio frequency energy produced by this device is well below the maximum exposure allowed by the Federal Communications Commission (FCC). This device complies with the limits for a Class B digital device pursuant to Part 15 subpart C of the FCC Rules and Regulations.
-
Page 145: European Union Ce Marking And Compliance Notices
Canada Radio Frequency Interference Requirements To prevent radio interference to the licensed service, this device is intended to be operated indoors and away from windows to provide maximum shielding. Equipment (or its transmit antenna) that is installed outdoors is subject to licensing. Pour empêcher que cet appareil cause du brouillage au service faisant l'objet d'une licence, il doit être utilisé... - Page 146 Greek To προϊόν αυτό πληροί τις προβλέψεις της Ευρωπαϊκής Οδηγίας 1999/5/EC. Icelandic Þessi vara stenst reglugerð Evrópska Efnahags Bandalagsins númer 1999/5/EC. Italian Questo prodotto è conforme alla Direttiva Europea 1999/5/EC. Norwegian Dette produktet er i henhold til bestemmelsene i det europeiske direktivet 1999/5/EC.
- Page 147 General European standards dictate maximum radiated transmit power of 100 mW Effective Isotropic Radiated Power (EIRP) and the frequency range 2400 – 2483.5 MHz. Belgium and the Netherlands In Belgium and the Netherlands, the product may not be used outdoors. See the instructions next under the heading “Turning Off the Wireless LAN Radio.”...
- Page 148 Departments in Which the Wireless LAN Module’s Maximum EIRP Not Shown in the Previous Table Frequency Ranges (MHz) Indoors Outdoors 2400 – 2446.5 10 mW Not permitted 2446.5 – 2483.5 100 mW 100 mW on private property with Ministry of Defense approval Turning Off the Wireless LAN Radio NOTE: Turning the wireless LAN radio off is not the same as disabling the wireless LAN card.
Need help?
Do you have a question about the S400 and is the answer not in the manual?
Questions and answers