Table of Contents
Advertisement
Quick Links
Advertisement
Table of Contents

Related Manuals for TRENDnet TV-IP450P


Summary of Contents for TRENDnet TV-IP450P
- Page 1 Cover Page TRENDnet User’s Guide ...
-
Page 2: Table Of Contents
Table of Contents TRENDnet User’s Guide Live View Settings .......................... 2 2 Contents Maintenance ............................ 2 3 Product Overview ................... 3 Network Settings ...................... 24 Package Contents ...................... 3 TCP/IP .............................. 2 4 Features ......................... 3 Port .............................. 2 5 ... - Page 3 Table of Contents TRENDnet User’s Guide Pan/Tilt/Zoom (PTZ) Settings .................. 45 Basic .............................. 45 Limit .............................. 46 Initial Position .......................... 46 Park Action ............................ 47 Private Mask ............................ 47 Schedule Tasks .......................... 48 Clear Config ............................. 49 Troubleshooting ................... 50 ...
-
Page 4: Product Overview
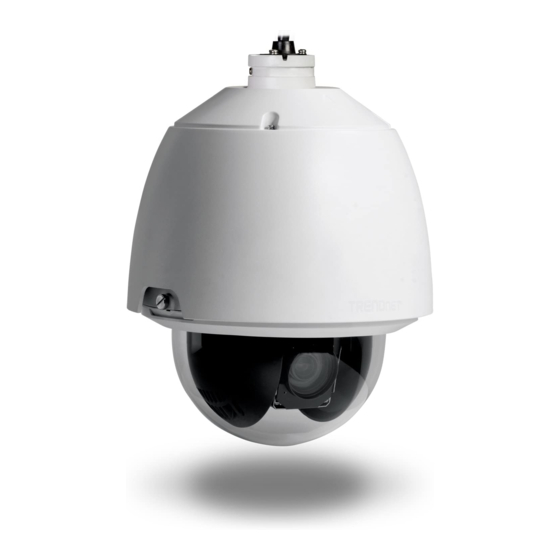
TV‐IP450P TRENDnet User’s Guide Features Product Overview TV‐IP450P TRENDnet’s Outdoor 1.3 MP HD PoE+ Speed Dome Network Camera, model TV‐IP450P, offers powerful 20x optical zoom, low light sensor, an IP66 weather rating, and continuous 360 degree PTZ functionality. Record 1.3 Megapixel HD video (1280 x 960) at 30 fps in a space saving H.264 compression format. Manage up to 32 TRENDnet cameras with included complimentary software and mobile apps. A separate mounting bracket is required—install with TRENDnet’s TV‐HC400, TV‐HW400, TV‐HP400, or TV‐HN400. 1.3 Megapixel HD Record 1280 x 960 at 30 fps in the space saving H.264 compression format Multi‐Language Interface ... -
Page 5: Cables
TV‐IP450P TRENDnet User’s Guide Tamper Detection Cables Receive tamper detection snapshots via email, ftp, or save to Samba client or Micro SD card Connectors for AC power adapter D‐WDR (Not required when PoE Improved image quality and autofocus in high contrast lighting environments with injector is included) Digital Wide Dynamic Range technology Audio Line in, line out, Motion Detection and grounding wires Create motion detection windows with separate sensitivity settings and event triggers Recording Schedule Network cable connection Define a weekly recording schedule ... -
Page 6: Warnings
TV‐IP450P TRENDnet User’s Guide Warnings: Remove the protective tape and ring form It is recommended to use the PoE+ injector that comes with the camera or an IEEE 802.3at compliant PoE+ switch. If the product does not work properly, please contact your dealer or the nearest service center. Never attempt to disassemble the camera yourself. ... -
Page 7: Plan For Installation
TV‐IP450P TRENDnet User’s Guide Sunlight: Avoid direct sun light exposure. Direct sun light will damage the Plan for Installation image sensor. If sunlight is necessary for your viewing purposes, provide protection for the image sensor. ... -
Page 8: Setup Camera With Cd
TV‐IP450P TRENDnet User’s Guide Setup Camera with CD 3. Remove the protection materials. 1. Insert the Installation CD‐ROM into your computer’s CD‐ROM drive to initiate the Auto‐Run program. Choose your preferred language and then click the Install Camera. (mounting accessories are not included) ... -
Page 9: X 2
TV‐IP450P TRENDnet User’s Guide 5. Wait while the utility is searches for the camera. 10. Click here to access to the camera’s web page or click Next for mobile app installation. 6. The installation wizard will list cameras found on your network. If only one camera is found, it will be selected by default. If you have more than one ... -
Page 10: Access Camera Through The Web Browser
TV‐IP450P TRENDnet User’s Guide Logging‐in to the Camera Access Camera through the Web Browser 1. Open the web browser on your computer. In the address bar, enter the IP System Management and Default Settings address you setup through the setup CD or 192.168.10.30. (If you have a DHCP server on your network, the IP address will be assigned dynamically. For It is recommended that you install your camera with the CD that comes with the example, if you have a home gateway on your network and you plug‐in the ... - Page 11 TV‐IP450P TRENDnet User’s Guide 3. The camera management page will detect if you installed the camera video 4. Click Next to install the plug‐in. streaming plug‐in or not. Click the link to download the plug‐in from the camera. 5. Click Finish to finish the installation. Permission request depends on the Internet security settings of your computer. Click Run to install the plug‐in. Note: for Mac systems, the plug‐in file is stored on the CD or you can download the latest version from http://www.trendnet.com/downloads/camera/mac/WebComponents.zip ...
-
Page 12: Basic Settings
TV‐IP450P TRENDnet User’s Guide 6. Open the browser and login again. Allow the plug‐in from TRENDnet if Multi‐Language Change your preferred language anytime prompted. The Live View page will show and begin streaming video. Snapshot Click this icon to take a video snapshot Click once to enable zoom. Then, click and drag the area on the picture to zoom in. Click once on picture for 100% Zoom zoom. Click the icon again to disable zoom. The zoom function works in full screen mode as well Click once to start recording. Click it again to stop Recording recording. The status bar will indicate if it is in recording state or not The camera has two video streams: H.264 and MJPEG. Video Stream ... -
Page 13: Presets
TV‐IP450P TRENDnet User’s Guide enabled the zoom, recording video, and successfully taking a snapshot The icon expands the PTZ control panel Pan / Tilt / Zoom control panel Zoom in / out Focus close / far Iris open / close 2. Use the PTZ control buttons to move the lens to the desired position. Speed of pan/tile movement • Pan the speed dome to the right or left. Presets • Tilt the speed dome up or down. Use the presets panel to move to previously saved • Zoom in or out. locations • Refocus the lens. ... - Page 14 TV‐IP450P TRENDnet User’s Guide Calling a Preset position 42 Call pattern 2 103 Call patrol 6 In the PTZ control panel, select a defined preset from the list and click to call the 43 Call pattern 3 104 Call patrol 7 preset. 44 Call pattern 4 105 Call patrol 8 45 One‐touch patrol 92 Start to set limit stops ...
-
Page 15: Patrols
TV‐IP450P TRENDnet User’s Guide 5. Repeat the steps from 3 to 5 to add more presets. Patrols 6. Click to save all the patrol settings. A patrol is a memorized series of preset functions. It can be configured and called on the patrol settings interface. There are up to 8 patrol available for customization. A patrol can be configured with 32 presets. Calling a Patrol route Configure a Patrol route In the PTZ control panel, select a defined patrol from and click to call the patrol. 1. In the PTZ control panel, click to enter the patrol settings interface. 2. Select a patrol number from . Click to add a preset to a patrol path. ... -
Page 16: Pattern
TV‐IP450P TRENDnet User’s Guide Pattern 5. Click to save the pattern settings. A pattern is a memorized series of pan, tilt, zoom, and preset functions. A pattern can Buttons on the Patterns interface: be called in the pattern settings interface. There are up to 4 patterns available for customization. Buttons Description Start recording a pattern. Configure a Pattern Stop recording a pattern. 1. In the PTZ control panel, click to enter the pattern settings interface. Call the current pattern. 2. Select a pattern number from the list as shown in Error! Reference source not ... -
Page 17: Playback
TV‐IP450P TRENDnet User’s Guide Playback Time line You can playback the video recording on the network storage and download the video There is a playback head in the center of the time line represented by a yellow vertical clip and snapshots to your local computer. line. To look for a specific video recording, move the time line by clicking and dragging it. If the recording is short, zoom in by clicking button. Click to zoom out the time scale. If you know the exact time of the day you are looking for, click then enter the time you want to playback. Different types of recordings are identified differently. The scheduled recordings are marked in blue, and the recordings triggered by motion detection are marked in red. Click and drag the time line to move your time manually Click this button to zoom in the scale Click this button to zoom out of the scale Click this button to specify a specific time of the day. ... - Page 18 TV‐IP450P TRENDnet User’s Guide Play video Click this button to take a snapshot of current playback . Use playback controls to play back the video recordings Click this button to start clipping a video from playback Click this button to stop clipping a video from playback Click this button to play the video Click this button to pause video playback Click this button to stop playback Download sections of a video Click this button to increase playback speed* To save complete video sections or snapshots, you can download the files directly. Click this button to decrease playback speed* ...
- Page 19 TV‐IP450P TRENDnet User’s Guide Log Download snapshots The log of the TV‐IP450P will be saved on the network storage. You can search the relevant records and save to your local computer. snapshots Click this button to download Search for logs Select the type of event that triggered the snapshots. Choose the Start Time and End ...
-
Page 20: System
TV‐IP450P TRENDnet User’s Guide System Advanced Settings System Information page shows the camera basic information. Click System then click System Info to show the page. System Device Settings Setup your camera name and location for easy identification. This camera name will also be recognized by other network camera software as the name of this camera. OSD, On Screen Display, the camera name is setting up here as well. Basic Information Device Name: User defined device name Firmware Version: Firmware Version MAC Address: MAC address of the camera System Time: Display the system time Network Information ... -
Page 21: User Accounts
TV‐IP450P TRENDnet User’s Guide camera’s model name: User Accounts You can setup up to 16 user accounts to access the camera’s video stream with a web browser or real time video stream (RTSP). Only one administrator account can be setup Location: Label where you installed this camera to configure the camera and cannot be deleted. Authentication RTSP: Camera’s video stream can be accessed with RTSP, Real Time Streaming Protocol. Only the administrator and users can view this video stream. Un‐checking this box will allow everyone access to this video stream without authentication. Default: checked. HTTP: Camera can be accessed via password protected web management interface. Un‐checking this box will allow anyone to access this camera and change its settings. User Accounts ... -
Page 22: Time Settings
TV‐IP450P TRENDnet User’s Guide Time Settings Check the Sync. with computer time to copy the time from your computer. The accuracy of the system clock is important for scheduling and accurate logging. You can synchronize the system time with your computer, or automatically check the time Click Save to save the changes accuracy with a network time server (NTP server). Daylight Savings Setup daylight settings for the camera. Daylight Saving Enable DST: Check this box if your time zone has daylight savings Automatic Update Start Time: Enter the date that daylight savings starts NTP Server: Specify a time server (NTP server) to synchronize End Time: Enter the date that daylight savings ends with. (e.g. pool.ntp.org) ... -
Page 23: Live View Settings 2
TV‐IP450P TRENDnet User’s Guide Live View Settings Record File Size: This size of live view video recording. You can choose 256MB, 512MB, or 1GB a file. Smaller file size is good Setup daylight settings for system time. for many short recordings. Save Record Files to: By default, files will be saved under your user name, and under the TRENDnet/RecordFiles. Click Browse and choose a new destination if you want to save the file somewhere else. Save Download Files to: By default, files will be saved under your user name, and under the TRENDnet/DownloadFiles. Click Browse and choose a new destination if you want to save the file somewhere else. Picture and Clip Settings By default, files will be saved under your user name, Save Snapshots in live view and under the TRENDnet/CaptureFiles. Click Browse to: and choose a new destination if you want to save the file somewhere else. By default, files will be saved under your user name, Save snapshots when playback to: and under the TRENDnet/PlaybackPics. Click Browse ... -
Page 24: Maintenance 2
Status: Shows the status in firmware upgrade. Click Save to save the changes * TRENDnet may periodically release firmware upgrades that might add features or fix problems associated with your TRENDnet model and version. To find out if there is a firmware upgrade available for your device, please check your TRENDnet model and version using the link. http://www.trendnet.com/downloads/ ... -
Page 25: Network Settings
TV‐IP450P TRENDnet User’s Guide Network Settings Network interface MAC Address: Click this button to reboot this camera. TCP/IP Duplex and Speed: Choose one of the Ethernet duplex and speed to Setup your basic IPv4 and IPv6 network settings on this page. match your network. Default: auto. MTU: Maximum transmission unit. The maximum byte size Ethernet data field. Primary DNS: Enter your first IPv4 or IPv6 DNS server address Secondary DNS: Enter your second IPv4 or IPv6 DNS server address IPv4 DHCP: Check this box if the IP address is assigned by DHCP server. IPv4 Address: Load complete factory default to the camera. Subnet Mask: Network range of the subnet Default Gateway: The default route going further from camera IPv4 ... -
Page 26: Port 2
TV‐IP450P TRENDnet User’s Guide Port DDNS You can change the service ports number of the camera or disable RTSP Dynamic Domain Name Service, DDNS, allows you to find your camera from the Internet with an easy to remember domain name. or HTTPS services. Port Numbers DDNS HTTP Port: The default web access port. You can change the port Enable DDNS: Check this box to enable DDNS Service. number. However, you cannot disable the web DDNS Type: Select a DDNS service provider. service. The default port number is 80. Server Address: Enter the DDNS server address. RTSP Port: The Real‐Time Streaming Protocol port for video Domain: Enter your registered domain name on selected DDNS ... -
Page 27: Pppoe 2
TV‐IP450P TRENDnet User’s Guide PPPoE Setup PPPoE (ADSL) connection to connect your camera with your ISP, Internet Service Provider. PPPoE (ADSL) Enable PPPoE: Check this box to enable PPPoE connection. Dynamic IP: The IP address provided by ISP User Name: Enter the account name. Password: Enter the password. Confirm: Enter the password again. Click Save to save the changes SNMP SNMP Settings allows you to assign the contact details, location, community name and trap settings for SNMP. This is a networking management protocol used to monitor ... - Page 28 TV‐IP450P TRENDnet User’s Guide Private‐key Algorithm: Choose the privacy key to encrypt SNMP messages: SNMP V1/V2 DES or AES. Enable SNMPv1: Check this box to enable SNMP v1 management. Private‐key Password: Specify the privacy key between 8 to 32 letters. Enable SNMPv2c: Check this box to enable SNMP v2c management. SNMP Other Settings Read SNMP Community: Specify the password for access the SNMP community for read only access SNMP Port: SNMP service port number. Write SNMP Community: Specify the password for access to the SNMP Click Save to save the changes community with read/write access Trap Address: Specify the IP address for the SNMP trap community Trap Port: Specify the port number for the SNMP trap ...
- Page 29 TV‐IP450P TRENDnet User’s Guide 802.1X IP Address Filter Setup 802.1X for remote authentication service. Set up a list of clients allow only the clients on the list to access this camera or to reject clients on the list from access this camera. IP Address Filter 802.1X Authentication Enable IP Address Filter: Check this box to enable IP address filtering service. Enable IEEE 802.1X: Check this box to enable 802.1X authentication IP Address Filter Type: Choose Forbidden to ban the listed IP addresses or service. Allowed to allow listed host to access this camera. EAPOL version: Extensible Authentication Protocol (EAP) over LAN Add: Click Add to add a user account (EAPoL). Choose version 1 or 2. This version number ...
- Page 30 TV‐IP450P TRENDnet User’s Guide QoS, Quality of Service UPnP Setup traffic prioritization to help smooth out the video stream. You can set the Universal Plug‐and‐Play is a device discovery protocol set. It allows your camera to easily Differentiated Services Code Point be found, for example, on a Windows operation system. (DSCP) bits on outgoing data streams. The QoS ...
-
Page 31: Video Settings
TV‐IP450P TRENDnet User’s Guide Video Settings Video Format Adjust the format of video. Frame Rate: Choose the capturing frame rate. The default value is 30 frames per second. Reduce the frame rate to reduce the capture file size. Max. Bitrate: Choose the maximum video sampling bit rate. Default: 4096 Video Format Frame Interval An I Frame is a frame that records a complete picture. Frames Video Encoding: Choose the video stream you want to modify. H.264 and MJPEG between I frames, (P frame or B frame) only records the image videos are always streaming and can be configured separately. differences between two frames. Choose the I Frame Interval Resolution: H.264 MJPEG here. The default is 60. ... -
Page 32: Audio
TV‐IP450P TRENDnet User’s Guide Audio Display Settings Adjust the audio settings for the camera. Adjust video image quality, lightness, and color settings here. Audio Audio Encoding: G.711ulaw, G.711alaw, MP2L2 and G.726 selectable. Audio Input: Select LineIn or MicIn to adjust volume. Input Volume: Slid the bar to turn up/down the volume. The value ranges from 0 to 100. Click Save to save the changes Display Settings Brightness: Use the slider or enter a number (0‐100) to adjust the image brightness. Default: 50 Contrast: Use the slider or enter a number (0‐100) to adjust the image contrast. Default: 50 ... - Page 33 TV‐IP450P TRENDnet User’s Guide Display Settings Focus Mode: Auto focus: allows the camera to focus automatically at any time. Manual: use the icon in the live view page to control focus manually. Semi‐auto: cameras focuses only once after pan/tilt/zoom. Minimum Focusing: This function is used to limit the minimum focus distance. The value can be set to 1.5m, 3m, 6m, ...
- Page 34 TV‐IP450P TRENDnet User’s Guide Shutter Speed switch automatically according to the light condition of environment. Mirror: Select from OFF or ON option to set the correct direction of the camera view. Slow Shutter: This function can be used in underexposure ...
- Page 35 TV‐IP450P TRENDnet User’s Guide Fluorescent Lamp: On Screen Display (OSD) Settings You can display the camera name and the time the video is shooting on the screen. You can select this mode when there are fluorescent lamps installed near the speed dome. Sodium Lamp: You can select this mode when there are sodium lamps installed near the speed dome. Auto‐Track: White balance is continuously being adjusted in real‐ time according to the color temperature of the ...
-
Page 36: Video Recording
TV‐IP450P TRENDnet User’s Guide Text Overlay Video Recording Display extra information on the screen over the image. Text Overlay Check Box: Check this box to enable text overlay. Text Field: Enter the text you want to display. You can enter your Video Recording local language if you want. The text field allows Pre‐record: Recording time before event. maximum 44 English letters or 20 non‐English Post‐record: Recording time after event. characters. Overwrite: Select Yes to allow older recordings to be Click Save to save the changes overwritten. Enable Record Schedule: Check this box and then click Save to enable video ... -
Page 37: Events
TV‐IP450P TRENDnet User’s Guide Events Motion Detection Set up how the motion detection event will be triggered and what actions will be triggered. 1. Select day of the week you want to edit the schedule. 2. Select All Day or Customized schedule of the day. 3. Set the time period and the event you want to trigger the video recording continuous (always recording) or motion detection. 4. Click Copy to Week if you want the same ... - Page 38 TV‐IP450P TRENDnet User’s Guide status of motion detection. The motion tracking is displayed by a green grid. The grid area represents that the camera detects motion in this area. Click Save to save the choices. Draw Area: Click Draw Area button to start drawing. Click and drag on the area you want to set up the motion detection. You can draw up to 8 different areas. Click Stop Drawing to stop drawing motion detection areas. The red grids represent the detection area. Sensitivity: Move the slider to adjust detection sensitivity. Clear All: Click this button to clear all the set up areas. Arming Schedule Edit: Click Edit to define when you want the motion detection works. © Copyright 2014 TRENDnet. All Rights Reserved. ...
-
Page 39: Video Tamper
TV‐IP450P TRENDnet User’s Guide Network Storage: Check this box to record video to network storage when motion is detected. Go to Storage / Network Storage to setup storage information. Click Save to save the changes Video Tamper This is to detect if the camera has been tampered with and surveillance is compromised. You can set up tamper proof notifications to alert the system manager to check the camera. ... - Page 40 TV‐IP450P TRENDnet User’s Guide Video Tamper Enable Tamper Detection: Check this box to enable tamper detection. Click Save to save the settings. Draw Area: Click Draw Area button to start drawing. Click and drag on the area you want to set up the tamper detection. You can setup only one area for tamper ...
-
Page 41: Exception
TV‐IP450P TRENDnet User’s Guide Exception Provides notifications for other system events, set up your notifications here. 1. Select the day of the week you want to edit the schedule. 2. Set the time period you want to enable tamper detection. (Default is 0‐24 hours, all day). 3. Click Copy to Week if you want the same ... -
Page 42: Snapshot
TV‐IP450P TRENDnet User’s Guide Snapshot You can set up your camera to continuously take snapshots or take snapshots when an event happens. Event Triggered Enable: Check this box to take snapshots when an event is occurred. Format: Save snapshots in JPEG format Resolution: Uses the same resolution set in Video Format for the snapshot resolution. Quality: Choose a compression quality for snapshot. Interval: State the time interval between this series of ... -
Page 43: Email
TV‐IP450P TRENDnet User’s Guide Email Check this box if your service provider requires a SSL Enable SSL: secured connection. Set up email accounts for notifications. Attach Image/Interval: Check Attach Image if you want to send a snapshot image with the email notification and select the interval of snapshots in seconds. Authentication: Check this box if your server requires a password in order to send email. Most email servers require authentication when sending an email. User name: Enter the user name of outgoing email account Password: Enter the password Confirm: Enter the password again to confirm that the password was entered correctly. Click Save to save the changes Receiver Receiver 1: The first receiver’s name. Receiver 1’s Address: The first receiver’s email address. -
Page 44: Storage
TV‐IP450P TRENDnet User’s Guide first one is full. Click on the entry to change the settings and click Save to save the Storage settings. Storage Management * Micro SD card or Network storage device must be setup / formatted before it can be managed / stored. Camera will save to SD card only when there is no additional NAS device setup. ... -
Page 45: Ftp Server
TV‐IP450P TRENDnet User’s Guide User Name: Enter the user name if the network storage requires FTP authentication. Leave it blank if no authentication is Enable Snapshot to FTP: Check this box if you want to store snapshots on the required. FTP. Password: Enter the password to access the network storage. Server Address: Enter the FTP server IP address. Tip: To create network storage on your Windows® Port: Enter the service port number of the FTP server. based system, create a shared folder and then test ... -
Page 46: Pan/Tilt/Zoom (Ptz) Settings
TV‐IP450P TRENDnet User’s Guide Pan/Tilt/Zoom (PTZ) Settings the tilt direction is adjustable. The values range from (0‐90) to (‐5‐90) Auto Flip: You can enable/disable the auto flip function Basic PTZ OSD Zoom Status: Set the OSD duration of zooming status as 2 seconds to 10 seconds, always on or off. PT Status: Set the angle display duration white panning and tilting as 2 seconds to 10 seconds, always on or off. Preset Status: Set the preset name display duration as 2 seconds to 10 seconds, always on or off. POWER OFF MEMORY Set Resume Time Point: The camera can resume its previous PTZ status or actions after it is restarted from a power‐off. You can set the time point of which the camera resumes its PTZ status from 30 seconds up to 600 seconds before ... -
Page 47: Limit
TV‐IP450P TRENDnet User’s Guide Limit Initial Position The camera can be programmed to move within the configured stops. (left, right, up or down) Set the camera initial position, you can also call a preset for the position. Click Set to save the limits and Clear to clear the limits. Steps 1. Check the Enable Limit box and select Manual Stops or Scan Stops from the Limit Type list. When manual limit stops are set, you can operate the PTZ control panel manually only in the limited area. b. When scan limit stops are set, all the scan actions are performed only in the limited area. 2. Click the PTL control buttons to find the left/right/up/down stop limits, you can also call the presets and set them as the limits for the camera. 3. Click Set to save the limits and Clear to clear the limits. ... -
Page 48: Park Action
TV‐IP450P TRENDnet User’s Guide Park Action Private Mask The feature allows the camera to start at a predefined park action. (scan, preset, pattern) Create masking area to keep your privacy. You can create up to four independent automatically after a period of inactivity (park time). masking areas by clicking and dragging on the screen. Scheduled Tasks function has higher priority over Park Action function therefore when two functions are set at the same time, Scheduled Tasks function takes effect. Private Mask Enable Privacy Mask: Check this box to enable privacy masking. Draw Area: Click this button to start drawing. -
Page 49: Schedule Tasks
TV‐IP450P TRENDnet User’s Guide Schedule Tasks You can configure the camera to perform a certain action automatically in a user‐ defined time period. 1. Choose the day you would like to set the task schedule 2. Click All Day or Customize to enter the Start Time and End Time for each task. 3. Choose the task type from the drop down list. 4. Click OK to save the settings. Note: The time for each task cannot be overlapped, up to 10 tasks can be configured for Enable the Scheduled Task, define the Park Time and Edit the Tasks that you would like each day. to perform at certain time. © Copyright 2014 TRENDnet. All Rights Reserved. 48 ... -
Page 50: Clear Config
TV‐IP450P TRENDnet User’s Guide Clear Config You can clear PTZ configurations all at once in this section, select the desire function and click Save to clear. © Copyright 2014 TRENDnet. All Rights Reserved. 49 ... -
Page 51: Troubleshooting
TV‐IP450P TRENDnet User’s Guide shaded area immediately as prolonged exposure to bright lights will damage Troubleshooting the CMOS sensor. 1. The camera can’t be accessed or access is slow 4. The camera images are ‘noisy’ There might be a problem with the network cable. To confirm that the cables Often if the camera is in a low‐light environment, the images can contain a lot are working, ping the address of a known device on the network. If the cabling of noise. Try enabling Night mode and see if that improves the image quality. is OK and your network is reachable, you should receive a reply similar to the Otherwise, try to use the camera in a location where there is a bit more light following (…bytes = 32 time = 2 ms). source. ... - Page 52 TV‐IP450P TRENDnet User’s Guide Federal Communication Commission Interference Statement EN 60950‐1:2006+A11:2009+A1:2010+A12:2011 This equipment has been tested and found to comply with the limits for a Class B digital Safety of Information Technology Equipment device, pursuant to Part 15 of the FCC Rules. These limits are designed to provide EN 62311: 2008 reasonable protection against harmful interference in a residential installation. This ...
- Page 53 TV‐IP450P TRENDnet User’s Guide This device is designed to provide uninterrupted monitoring and/or recording. This device does not off power management functionality such as Off mode or Standby mode. IMPORTANT NOTE: NCC AND FCC Warning Statement Note: This country code selection is for non‐US models only and is not available to all US models. Per FCC regulation, all WiFi products marketed in the US must be fixed to US operation channels only. 以下警語適用台灣地區 經型式認證合格之低功率射頻電機,非經許可,公司、商號或使用者均不得 擅自變更頻率、加大功率或變更原設計之特性及功能。 低功率射頻電機之使用不得影響飛航安全及干擾合法通信;經發現有干擾現象時, 應立即停用,並改善至無干擾時方得繼續使用。前項合法通信,指依電信法規定作 業之無線電通信。低功率射頻電機須忍受合法通信或工業、科學及醫療用電波輻射 性電機設備之干擾 © Copyright 2014 TRENDnet. All Rights Reserved. 52 ...
- Page 54 TV‐IP450P TRENDnet User’s Guide noteikumiem. Česky TRENDnet tímto prohlašuje, že tento TV‐IP450P je ve shodě se [Czech] základními požadavky a dalšími příslušnými ustanoveními Lietuvių Šiuo TRENDnet deklaruoja, kad šis TV‐IP450P atitinka esminius směrnice 1999/5/ES. [Lithuanian] reikalavimus ir kitas 1999/5/EB Direktyvos nuostatas. Dansk Undertegnede TRENDnet erklærer herved, at følgende udstyr TV‐ Hierbij verklaart TRENDnet dat het toestel TV‐IP450P in [Danish] TV‐IP450P overholder de væsentlige krav og øvrige relevante krav Nederlands overeenstemming is met de essentiële eisen en de andere i direktiv 1999/5/EF. [Dutch] relevante bepalingen van richtlijn 1999/5/EG. Deutsch Hiermit erklärt TRENDnet, dass sich das Gerät TV‐IP450P in Malti Hawnhekk, TRENDnet, jiddikjara li dan TV‐IP450P jikkonforma [German] Übereinstimmung mit den grundlegenden Anforderungen und [Maltese] ...
- Page 55 General Public License ("LGPL"). shipping from outside of the USA are responsible for custom charges, including but not Go to http://www.trendnet.com/gpl or http://www.trendnet.com Download section limited to, duty, tax, and other fees. and look for the desired TRENDnet product to access to the GPL Code or LGPL Code. These codes are distributed WITHOUT WARRANTY and are subject to the copyrights of WARRANTIES EXCLUSIVE: IF THE TRENDNET PRODUCT DOES NOT OPERATE AS the developers. TRENDnet does not provide technical support for these codes. Please go ...
- Page 56 ...
Need help?
Do you have a question about the TV-IP450P and is the answer not in the manual?
Questions and answers