Table of Contents
Advertisement
Quick Links
Advertisement
Table of Contents

Related Manuals for TRENDnet TV-IP460PI


Summary of Contents for TRENDnet TV-IP460PI
- Page 1 a ...
-
Page 2: Table Of Contents
TRENDnet User’s Guide TV‐IP460PI Log ........................ 19 Contents Search for logs .................. 20 ......................a System Information .................... 20 Product Overview ................ 1 Logout ........................ 21 Features ........................1 System Configuration .............. 22 Specifications ......................1 Device Settings ..................... 22 Package Contents ....................3 Maintenance ........ E rror! Bookmark not defined. Front View .......................3 Live View Settings .................... 23 Hardware Reset Button ...................3 Maintenance ...................... 25 Warnings ........................4 User Accounts ....................... 26 Cautions ... - Page 3 TRENDnet User’s Guide TV‐IP460PI OSD Settings ...................... 42 Limited Warranty ................ 67 Text Overlay ...................... 43 Privacy Mask ...................... 44 Video Recording .................... 44 Event .................... 4 6 Motion Detection .................... 46 Intrusion Detection .................... 48 Line Crossing Detection .................. 50 Video Tampering .................... 52 Audio Exception Detection ................... 54 Notification ...................... 56 Email ........................ 57 Storage ................... 5 8 Storage Management ................... 58 Network Storage .................... 59 PTZ (Pan/Tilt/Zoom) ............... 6 0 Basic Settings ...
-
Page 4: Product Overview
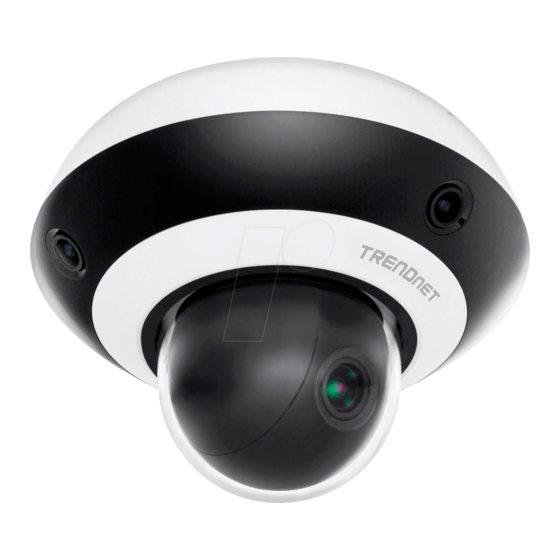
TRENDnet User’s Guide TV‐IP460PI Specifications Product Overview Multi‐Sensor Camera This multi‐sensor HD surveillance camera features one 2MP PTZ lens with 4x optical zoom and three 2MP fixed lenses, surrounding the camera base to provide 360° of video coverage. Optical Zoom PTZ The built‐in 4x optical zoom PTZ lens allows you to adjust the field of view from 120° – 56.6 ° to achieve the ideal viewing field for your installation. Power over Ethernet (PoE+) PoE+ offers cost savings and the flexibility to install this IR network camera up to 100m (328 ft.) from the PoE+ source equipment. Multi‐Sensor HD Surveillance Camera This multi‐sensor HD surveillance camera features one 2MP PTZ lens with 4x optical zoom and three 2MP fixed lenses, surrounding the camera base to provide 360° of video coverage Features Optical Zoom Lens Built‐in 4x optical zoom PTZ lens allows you to adjust the field of view from 120° – TRENDnet’s Multi‐Sensor H.265 1080p PoE+ PTZ Camera, model TV‐IP460PI, provides 56.6 ° day and night surveillance with a night vision range of up to 10m (33 ft.). This multi‐... - Page 5 TRENDnet User’s Guide TV‐IP460PI PoE+ Complimentary Apps ® ™ Save installation costs with Power over Ethernet (PoE+) Stream live video to a mobile device with free iOS and Android apps Storage Record video to a network storage device or to a Micro SD card (up to 256GB, not included) Advanced Playback Multi‐sensor‐HD surveillance camera features advanced in‐camera archived video playback functionality Event Triggers Create custom motion detection, intrusion detection, and crossing line detection zones to record video and send email notifications when an event is triggered Digital Wide Dynamic Range (DWDR) Adjustable DWDR setting improves image quality when a camera is exposed to high contrast lighting environments by enhancing the dark areas of the image to make them more visible ...
-
Page 6: Package Contents
TRENDnet User’s Guide TV‐IP460PI Package Contents Front View TV‐IP460PI package includes: TV‐IP460PI Quick installation guide Camera mounting hardware Drilling Template Mounting Screws 10 1. Ethernet Cable If any package content is missing or damaged, please contact the retail store, online 2. Ceiling retailer, or reseller/distributor from which the product was purchased. 3. Mounting Screw Base 4. Mounting Base 5. Mounting Screw 6. Hardware Rest Button ... -
Page 7: Hardware Reset Button
TRENDnet User’s Guide TV‐IP460PI Hardware Reset Button Warnings The hardware reset button is located next to the Micro‐SD card slot. To reset Serious injury or death may be caused if any of these warnings are neglected. the camera to factory default settings using the hardware reset button: Follow these safety guards to prevent serious injury or death. 1. Disconnect the camera from its power source. • If using the power adapter, please choose the power adapter that 2. Press and hold the reset button BEFORE you connect the camera to meets the safety extra low voltage (SELV) standard or IEC60950‐1 and its power source. Limited Power Source standard. 3. Continue to hold the reset button for at‐least 15seconds. • If the product does not work properly, please contact your dealer or 4. Your camera should now be reset to factory settings. the nearest service center. Never attempt to disassemble the camera yourself. Disassembling the product will void the warranty and may ... -
Page 8: Cautions
TRENDnet User’s Guide TV‐IP460PI Cautions Plan for installation location Injury or equipment damage may be caused if any of these cautions are Viewing angle neglected. Follow these precautions to prevent potential injury or material damage. The TV‐IP460PI is a Multi Sensor Camera. The main sensor is a PTZ (Pan‐Tilt‐ Zoom) camera with an adjustable viewing angle (56.6‐120) that provides • Make sure the power supply voltage is correct before using the Camera. non‐distorted and detailed images. The 3x surrounding multi sensors with a • Do not drop the camera or subject to physical shock. fixed viewing angle (128.5 each) together provide a panoramic 360 image. Choose a location that has good vantage point for shooting the surrounding • Do not touch sensor modules with fingers. If cleaning is necessary, use ... -
Page 9: Hardware Installation
TRENDnet User’s Guide TV‐IP460PI Hardware Installation Setup Your Camera with Camera Utility 1. Please download the utility at Cabling http://www.trendnet.com/camerautility It’s recommended that the wiring of the cables in your home or office be done by an installation professional. If you already have the cable deployed, make 2. Extract the downloaded file and double click on the camera utility file sure the cable and the connectors meet the category 5 Ethernet cable to install standards. At least 2 pairs of twisted lines are required for power and data. Poor cable quality may cause unexpected problems. Testing your cable or running a new cable is suggested for new camera installation. ... - Page 10 TRENDnet User’s Guide TV‐IP460PI 4. This will also require you to Install WinPcap program if you don’t have this installed before, please follow the on screen Instructions to 6. After the computer has restarted, double click on the Camera Utility icon Install It. to launch the program. 7. Find the camera you would like to access and configure then double click on the IP address. 5. Restart the computer after the Installation. 8. Continue to the next section Access your Camera with the Web Browser for detail configurations of the camera. © Copyright 2019 TRENDnet. All Rights Reserved. 7 ...
-
Page 11: Logging-In To The Camera For The First Time (Windows)
TRENDnet User’s Guide TV‐IP460PI Logging‐in to the Camera for the First Time (Windows) 3. The camera management page will detect if you installed the camera video streaming plug‐in or not. . Click the link to download the plug‐in 1. Find the camera from the Utility and double click on the IP address to from the camera. (For Internet Explorer and Safari only) Google and open the browser. (Example in image may not be your specific model) Firefox users, skip to step 9. 2. Activate the admin User Account by entering your desired password, and ... - Page 12 TRENDnet User’s Guide TV‐IP460PI 5. Permission request may show up depends on the Internet security 7. Click Finish to finish the installation. settings on your computer. Click Yes to install the plug‐ in. 8. Open the browser and login again, enter the user name admin and new password again to start secured session. 6. Click Next to install the plug‐in. © Copyright 2019 TRENDnet. All Rights Reserved. 9 ...
-
Page 13: Logging-In To The Camera For The First Time (Os X)
TRENDnet User’s Guide TV‐IP460PI 9. Refresh the browser and the Live View page will show up and begin Logging‐in to the Camera for the First Time (OS X) streaming video 1. Open the web browser on your computer. In the address bar, enter the default IP address of the camera 192.168.10.30. If the camera is connected to a router/network with a DHCP server it may have a different IP address than its default, please use a windows machine to setup the camera with Camera Utility or identify the camera’s IP address through your DHCP sever. 2. Enter the user name, admin, and the default password, admin, and then ... - Page 14 TRENDnet User’s Guide TV‐IP460PI 3. The camera management page will detect if you installed the camera 5. Go to the Finder and navigate to the Download folder. Command‐Click webcomponent plug‐in or not. Click the link to download the plug‐in from the WebComponents.pkg and then click Open. (If you are install the plug‐ the camera. in from the CD when you don’t have internet connection, just browse to /Mac folder and double click the WebComponents.pkg file.) Note: Internet connection is required to download the plug‐in. If you do not have Internet access, you can find the plug‐in on the CD comes with the package under /Mac folder. 6. Click Open with Installer to start installation. 4. Quit your browser completely by command‐Click on the browser icon ...
- Page 15 TRENDnet User’s Guide TV‐IP460PI 7. Click Continue to install the plug‐in. 9. Use the default location and click Install. 10. Enter your password and click Install Software 8. Select a destination to install the plug‐in. Then click Continue. © Copyright 2019 TRENDnet. All Rights Reserved. 12 ...
- Page 16 TRENDnet User’s Guide TV‐IP460PI 11. Installation will process automatically. 13. Open the browser and login again with the default IP 192.168.10.30 or the IP that was dynamically assigned by your router. Enter the user name, admin, and the default password, admin, and then click OK. 14. The Live View page shows up and the video starts to stream. 12. Click Close to exit the installation. © Copyright 2019 TRENDnet. All Rights Reserved. 13 ...
-
Page 17: Basic
TRENDnet User’s Guide TV‐IP460PI Basic Start/Stop All Click to start/stop all live views Live View Snapshot Click this icon to take a video snapshot After you log‐in into the camera management page, you’ll see the Live View Click once to start recording. Click it page. again to stop recording. The status bar Recording will indicate if it is in recording state or not Click once to enable zoom. Then, click and drag the area on the picture to zoom in. Click once on picture for 100% Zoom zoom. Click the icon again to disable ... -
Page 18: Presets
TRENDnet User’s Guide TV‐IP460PI on your keyboard to exit full screen Presets mode Configure a Preset position A preset is a predefined image position. For the defined preset, you can click Expand PTZ (on right) The icon expands the PTZ control panel the Call button to quickly view the desired image position. Pan/Tilt/Zoom: Pan / Tilt / Zoom control panel 1. In the PTZ control panel, select a preset number from the preset list. >>Zoom in / out >>Focus close / far >>Iris open / close >>Speed of pan/tile movement Functions for external accessories >>3D Zoom Use the presets panel to move to Presets ... - Page 19 TRENDnet User’s Guide TV‐IP460PI Calling a Preset position In the PTZ control panel, select a defined preset from the list and click to call the preset. The following presets are predefined with special commands. You can only call them but not configure them. For instance, preset 94 is “Remote reboot”. If you call preset 94, the camera will powercycle. Preset Function Preset Function 34 Back to origin 92 Set manual limits 39 Day mode 93 Set manual limits 40 Night mode 94 Remote reboot © Copyright 2019 TRENDnet. All Rights Reserved. 16 ...
-
Page 20: Playback
TRENDnet User’s Guide TV‐IP460PI Playback Time Line There is a play back head in the center of the time line represented in a yellow You can playback the video recording on the network storage and download vertical line. To look for a specific video recording, move the time line by the video clip and snapshots to your local computer. clicking and dragging it. If the recording is short, zoom in by clicking button. Click to zoom out the time scale. Different types of recordings are identified differently. The scheduled recordings are marked in blue, the recordings triggered by motion detection are marked in red, recordings triggered by commands in green, and manual recordings in amber. Click and drag the time line to move your time manually. ... -
Page 21: Playback
TRENDnet User’s Guide TV‐IP460PI Playback Slice images from video playback Use playback controls to play back the video recording. You can take snapshots from playback video or make new video clips from the video you are playing back. Click this button to play/pause the video. Click this button to start/stop all recordings. Click this button to stop playback. Click this button to take a snapshot of current playback. Click this button increase playback speed*. Click this button to clip a video from playback. Click this button decrease playback speed*. Click this button to enable zoom. Then click and drag on the video to define the area you want to zoom in. Click Click to playback video frame by frame. Click again for again to get back to 100% zoom. the next frame� Double click to show video in full screen and press ESC on keyboard to exit full screen mode. Use this to adjust the volume of the live view feed * Note: There are 5 steps of playback speed you can choose from: 1/4, 1/2, 1, 2, and 4 times of original speed. Click this to download the footage Click this button to full‐screen the playback ... -
Page 22: Download Snapshots
TRENDnet User’s Guide TV‐IP460PI Download snapshots Log The log of the TV‐IP460PI will be saved on the network storage. You can Click button to list snapshots to download search the relevant records and save to your local computer. (See © Copyright 2019 TRENDnet. All Rights Reserved. 19 ... -
Page 23: Search For Logs
TRENDnet User’s Guide TV‐IP460PI Storage on page 58 to setup the storage.) System Information System Information page shows the camera’s basic information. Search for logs Click the type of log and then the Start Time and End Time. Click Search to start searching. Click First Page , Prev Page , Next Page , and Last Page to show the logs. Click Save Log to save the logs to your computer. Basic Information Device Name: Human readable device name for easy identification. Firmware Version: Firmware version MAC Address: The MAC address of Ethernet Interface Device Time: The system time setup in the camera. Keeping this time correct is important for recording, scheduled control and logging accurately. © Copyright 2019 TRENDnet. All Rights Reserved. 20 ... -
Page 24: Logout
TRENDnet User’s Guide TV‐IP460PI Network Information IP Address: IP address of the TV‐IP460PI Subnet Mask: Network range of IP address Default Gateway: The default route going from the TV‐IP460PI subnet. Primary DNS: Primary DNS server address Secondary DNS: Secondary DNS server address Logout Logging out of the camera configuration page © Copyright 2019 TRENDnet. All Rights Reserved. 21 ... -
Page 25: System Configuration
TRENDnet User’s Guide TV‐IP460PI software and OSD, On Screen Display. The default System Configuration camera name is the model number: TV‐IP460PI Location: Label where you installed this camera for reference Device Settings Device Number The number you assigned to the device Model Model of the device Setup your camera name and location for easy identification. This camera Serial No. Serial Number of this device name will also be recognized by other network camera software as the name Firmware Version The version of the FW currently applied to the camera of this camera. OSD, On Screen Display, camera name is referring to this ... - Page 26 TRENDnet User’s Guide TV‐IP460PI Time Settings Daylight Savings The accuracy of the system clock is important for scheduling and accurate Setup daylight savings. logging. You can synchronize the system time with your computer, or automatically check the time accuracy with a network time server (NTP ...
-
Page 27: Live View Settings
TRENDnet User’s Guide TV‐IP460PI Live View Settings Record File Settings Setup the live view video quality, file size and file saving directories. Record file size: This size of live view video recording. You can choose 256MB, 512MB, or 1GB a file. Smaller file size is good for many short recordings. Save record files Click Browse and then choose a new destination if you want to save the file somewhere else. Save downloaded Click Browse and then choose a new destination if files to: you want to save the file somewhere else. Picture and Clip Settings Save snapshots in Click Browse and then choose a new destination if live view to: you want to save the file somewhere else. ... -
Page 28: Maintenance
Upgrade. Status: Shows the status in firmware upgrade. TRENDnet may periodically release firmware upgrades that might add features or fix problems associated with your camera. To find out if there is a firmware upgrade available for your device, please check your TRENDnet model and version using the link. http://www.trendnet.com/downloads/ Reboot 1. If a firmware upgrade is available, download the firmware to your ... -
Page 29: User Accounts
TRENDnet User’s Guide TV‐IP460PI User Accounts You can setup up to 16 user accounts to access the camera’s video stream with a web browser or real time video stream (RTSP). Only one administrator account can be setup to configure the TV‐IP460PI and cannot be deleted. User Accounts Add: Click Add button to add one user or operator account. Modify: To change an account’s name and password or permissions, highlight the account by clicking on it. Then, click Modify button. You can change the account’s name and password. You can also change the administrator’s password here. But, the administrator’s name is fixed, you cannot change that. Add/Modify user User Name: Enter the Username you would like to assign Level: Select User to limit control of the camera, Operator to allow more privileges to the account © Copyright 2019 TRENDnet. All Rights Reserved. 26 ... - Page 30 TRENDnet User’s Guide TV‐IP460PI Password Enter the Password you would like to set. Valid Remote: Allows this account to access the serial port password range [8‐16]. You can use a combination of Serial Port numbers, lowercase, uppercase and special character for Control your password with at least two kinds of them contained. Remote: Live Allows this account to access the live view stream Confirm Reenter your password to confirm the password View Remote: Allows this account to configure camera parameters. Remote: Allows this account to manually record Parameters Manual Settings Record Remote: Log Enables this account’s access to the Logs Remote: PTZ Allows this account to adjust the PTZ Search / Control Interrogate Remote: Allows this account to view the camera’s playback Working Playback Status Remote: Allows this account to upgrade or restore this cameras ...
-
Page 31: Authentication
TRENDnet User’s Guide TV‐IP460PI Authentication Security Service You can adjust the RTSP/WEB Authentication here. You can enable or disable the IR Light and the Face Detection functions here. Authentication RTSP Click the dropdown to select digest or digest/basic Security Service Authentication authentication. Enable SSH Select the check box to enable SSH (Secure Shell) Access. WEB Click the dropdown to select digest or digest/basic Enable Illegal Select the check box to enable the lockout feature upon Authentication authentication. Login Lock 6 consecutive failed log‐in attempts. ... -
Page 32: Network Settings
TRENDnet User’s Guide TV‐IP460PI Network Interface Network Settings Duplex and Choose one of the Ethernet duplex and speed to Speed: match your network. Default: auto. TCP/IP DHCP Check this box to enable DHCP auto configuration. IPv4 Address: The IPv4 dynamic or static address. Setup your basic IPv4 and IPv6 network settings on this page. IPv4 Subnet Network range of the subnet. Mask: IPv4 Default The default route going further from TV‐IP460PI IPv4 Gateway: subnet. IPv6 Mode: Choose Manual, DHCP, or Route Advertisement. Click View Route Advertisement to find a route advertisement. ... -
Page 33: Port
TRENDnet User’s Guide TV‐IP460PI Port DDNS You can change the service port numbers of TV‐IP460PI and enable/disable Dynamic Domain Name Service, DDNS, allows you to find your camera from RTSP or HTTPS services. the Internet with an easy to remember domain name. Port Numbers HTTP Port: The default web access port. You can change the port number. However, you cannot disable the web service. The default port number is 80. RTSP Port: The Real‐Time Streaming Protocol port for video DDNS streaming. You can change the port number or Enable DDNS: Check this box to enable DDNS Service. ... -
Page 34: Pppoe (Adsl)
TRENDnet User’s Guide TV‐IP460PI PPPoE (ADSL) SNMP Setup PPPoE (ADSL) connection to connect your camera with your ISP, SNMP Settings allows you to assign the contact details, location, community name and trap settings of SNMP. This is a networking management protocol Internet Service Provider. used to monitor network‐attached devices. SNMP allows messages (called protocol data units) to be sent to various parts of a network. Upon receiving these messages, SNMP compatible devices (called agents) return data stored in their Management Information Bases. PPPoE (ADSL) Enable PPPoE: Check this box to enable PPPoE connection. Dynamic IP: The IP address assigned by ISP User Name: Enter the account name. Password: Enter the password. ... - Page 35 TRENDnet User’s Guide TV‐IP460PI SNMP V1/V2 Security Level: Choose one of the security levels. Enable SNMPv1: Check this box to enable SNMP v1 management. Enable SNMPv2c: Check this box to enable SNMP v2c management. Read SNMP Specify the password to access the SNMP Community: community for read only access. Authentication Choose the authentication method to verify the Write SNMP Specify the password for access to the SNMP Algorithm: source of information: MD5 or SHA. Community: community with read/write access. Authentication Specify the authentication password between 8 to 32 Trap Address: Specify the IP address for the SNMP trap Password: letters. community. Private‐key Choose the privacy key to encrypt SNMP messages: Trap Port: Specify the port number for the SNMP trap ...
-
Page 36: Ip Address Filter
TRENDnet User’s Guide TV‐IP460PI IP Address Filter 802.1X Set up a list of clients allow only the clients on the list to access this camera Setup 802.1X for remote authentication service. or to reject clients on the list from access this camera. IP Address Filter Enable IP Check this box to enable IP address filtering service. 802.1X Authentication Address Filter: Enable: Check this box to enable 802.1X authentication service. IP Address Filter Choose Forbidden to ban the listed IP addresses or Type: Allowed to allow listed host to access this camera. Protocol Select the 802.1X Protocol. Add: Click Add to add a user account Modify: To modify an entry on the list, highlight the entry by EAPOL version: Extensible Authentication Protocol (EAP) over LAN ... -
Page 37: Upnp
TRENDnet User’s Guide TV‐IP460PI UPnP HTTPS Universal Plug‐and‐Play is a device discovery protocol set. It allows your HTTPS is an alternative/more secure method of accessing the management page. camera to easily be found, for example, on a Windows operation system. HTTPS Enable: Check this box to enable HTTPS connection. UPnP Enable UPnP: Check this box to enable UPnP connection. Certificate Details Friendly Name: The name that will be appeared when searched. Installed Displays information regarding the currently Certificate: installed certificate. Press Delete to delete the ... -
Page 38: Quality Of Service (Qos)
TRENDnet User’s Guide TV‐IP460PI Quality of Service (QoS) Setup traffic prioritization tags the video packets to go through network switches and routers with assigned priority. You can set the Differentiated IP Address Filter Services Code Point (DSCP) bits on outgoing data streams. The QoS capable Video/Audio Enter Video/Audio DSCP. Default: 0. network device will forward different data in different priorities. The meaning DSCP: of the value is different in different DiffServ domains. Consult your network Event/Alarm Enter Event/Alarm DSCP. Default: 0. manager for the setup details. DSCP: Management Enter Management DSCP. Default: 0. DSCP: Click Save to save the changes ... -
Page 39: Video Settings
TRENDnet User’s Guide TV‐IP460PI Resolution: Main Stream Second/Sub Stream Video Settings Video Format Bitrate Type: Choose between variable bit rate or constant bit rate for video compression. The default is variable rate. Video Quality: Choose the video quality. The default is medium quality. Frame Rate: Choose the capturing frame rate. The default value is 20 frames per second. Reduce the frame rate to reduce the capture file size. Max. Bitrate: Choose the maximum video sampling bit rate. Default: 4096 Video Encoding: Choose the video stream you want to modify. H.264 and H.265 videos are always streaming and can be configured separately. Profile: Select Main Profile or High Profile. I Frame Interval An I Frame is a frame that records a complete picture. Frames between I frames, (P frame or B frame) only records the image differences between two frames. Choose the I Frame Interval here. The default is 60. SVC: Scalable Video Coding or SVC is an extension of the H.264/AVC standard. Select OFF/ON to Channel No.: Choose the camera channel you would like to ... -
Page 40: Audio
TRENDnet User’s Guide TV‐IP460PI Audio Display Settings Configure the camera’s Audio Adjust video image quality, lightness, and color settings here. Settings here are automatically saved upon selection. **Note: PTZ functions and menu options “Focus” and “Other” only available on Channel No. Camera 1.** Audio Select the format to be used for audio encoding. Encoding: Audio Input: When an intercom is connected to the camera, you need to set this option to LineIn. When a microphone is connected to the camera, you need to set this option to MicIn. Input Volume: Drag the slider to adjust the input volume. Environmental Click the dropdown and select ON to turn on the ... - Page 41 TRENDnet User’s Guide TV‐IP460PI Channel No. Choose the camera channel you would like to configure from the drop down. Camera 1 is the center PTZ camera, and Camera 2,3,4 are the surrounding cameras. Scene: Select if this camera is pointed at an Indoor or Outdoor location. Click this button to save a Snapshot of the currently displayed image. Pan / Tilt / Zoom control panel Pan/Tilt/Zoom: >>Zoom in / out >>Focus close / far >>Iris open / close >>Speed of pan/tilt movement ...
- Page 42 TRENDnet User’s Guide TV‐IP460PI Exposure Setting Manual Exposure Mode: The Exposure Mode can be set to Auto or Manual. In manual mode, you can adjust additional values. Shutter: Adjust the value for exposure time for each picture. You can choose a value between 1/30000 second to 1/30 second. The default value is 1/30 second Exposure Setting Auto exposure time for each picture. Exposure Mode: The Exposure Mode can be set to Auto or Manual. In Gain: Drag the slider to adjust the Gain of the image. manual mode, you can adjust additional values. Limit Gain: Drag the slider to adjust the Limit Gain of the image. Exposure Level: Drag the slider to adjust the exposure level Max. Shutter Adjust the maximum value for exposure time for each Limit: picture. You can choose a value between 1/30000 second to 1/30 second. The default value is 1/30 second exposure time for each picture. Min. Shutter Adjust the minimum value for exposure time for each Limit: picture. You can choose a value between 1/30,000 second to 1/30 second. The default value is 1/30,000 Focus ...
- Page 43 TRENDnet User’s Guide TV‐IP460PI Day/Night Switch Day/Night Switch: Choose whether you want the camera to be set to the Day mode (color video) or Night mode (IR enhanced black/white video). You can manually set it to Day mode or Night mode, adjust by lighting (Auto), or pre‐defined Scheduled‐Switch. Backlight Settings BLC: If there’s a bright backlight, the subject in front of the Auto: Sensitivity: The light sensor sensitivity. backlight may appear silhouetted or dark. Enabling BLC (back light compensation) function can correct Scheduled‐Switch: the exposure of the subject, but the backlight environment will washed out to white. Click the Use quick selection or enter the time down below. dropdown and select the position of the backlight or Click OK to confirm the time you want to set. Start Time: The start time for day mode. select auto. End Time: The start time for day mode. WDR: WDR (Wide Dynamic Range) assists in providing clear images even under backlit environments by balancing Channel 2, 3, and 4 have these additional options: the brightness level of the image. Wide Dynamic Level: The level of ...
- Page 44 TRENDnet User’s Guide TV‐IP460PI White Balance White Balance: Click the drop down to select the white balance mode you would like to use: Auto, MWB, Outdoor, Indoor, Fluorescent Lamp, Sodium Lamp and Auto‐ Image Enhancement tracking. Auto: The camera will automatically color balance according Digital Noise Choose the mode of 3d digital noise reduction. to the current color temperature. Reduction: MWB: Manual White Balance (MWB) allows you to Normal Mode manually set the white balance using the below Noise Reduction Level: Adjust the effect of digital sliders. Default: 50/50 noise reduction. Range: 0‐100%, default : 50% Expert Mode Space DNR Level: Adjust the special digital noise ...
-
Page 45: Osd Settings
TRENDnet User’s Guide TV‐IP460PI OSD Settings On Screen Displays the camera name and the time the video is shooting on the screen. You may separately configure each camera’s OSD settings Video Adjustment Mirror: Setting this option to Center will cause the image to rotate 180 degrees. Video Standard: Video Standard may be set to 50 Hz (PAL) or 60 Hz (NTSC) according to the video system in your country. Default: 60Hz. Capture Mode: If you would like to enable this functions, click the (only channel 1) drop down and select your chosen capture mode. Other Lens Initialization: The lens will move during initialization when you enable Lens Initialization. Zoom Limit: Select the Zoom Limit you would like to apply from the drop down menu. Default: 4 Display Mode: Choose how the text will show on the screen. OSD Size: Select the text size from 16 to 96 or adjusted by ... -
Page 46: Text Overlay
TRENDnet User’s Guide TV‐IP460PI Alignment: Select where you would like the text to be aligned. Text Overlay If using Custom, move the red box to position the text. Display extra information on the screen over the image. You may separately Display Check this box to display the product name that was configure each camera’s Test Overlay settings Name: setup in the device settings Display Date: Check this box to display system date and time. Display Week: Check this box to display time of the week. Camera Name: Displays the name assigned to this camera/channel. Time Format: Select 12 or 24‐hour time format. Date Format: Select the date format Move the red box to position the text. Click Save to save the changes. Check Box: Check this box to enable this text overlay. Text Field: Enter the text you want to display. You can enter your local language if you want. The text field allows ... -
Page 47: Privacy Mask
TRENDnet User’s Guide TV‐IP460PI Privacy Mask Video Recording Create a masking area to keep your privacy. You can create up to four independent masking areas by clicking and dragging on the screen. You may separately configure each camera’s Privacy Mask settings Channel No.: Select the channel you would like to configure. Enable: Check the box to enable recording on this channel. Drop Down: Click the drop down to select the recording conditions, then click and drag on the scheduler below to configure the desired recording schedule. Delete: Delete the selected segment on the scheduler below. Delete All: Delete all configured recording conditions and schedules. Advanced: Click this to configure advanced options. ... - Page 48 TRENDnet User’s Guide TV‐IP460PI Overwrite: Select the check box to allow older recordings to be automatically overwritten. Pre‐record: Recording time before trigger event. Post‐record: Recording time after trigger event. Stream Type: Specify to record from the main stream or sub stream. Click Save to save the changes © Copyright 2019 TRENDnet. All Rights Reserved. 45 ...
-
Page 49: Event
TRENDnet User’s Guide TV‐IP460PI Area Settings Event Motion Detection Set up how the motion detection event will be triggered and what actions will be triggered. Area Settings Configuration: Click the drop down and select Normal or Expert. Configure the corresponding motion detection parameters. Normal Configuration Motion Detection Channel No.: Select the channel you would like to configure. Enable Motion Check this box to enable motion detection. Click Detection: Save to save the choice. Enable Dynamic Check this box to enable dynamic motion analysis Analysis for that shows the current status of motion detection. Motion: The motion tracking is displayed with grids. The grid ... - Page 50 TRENDnet User’s Guide TV‐IP460PI Expert Configuration Sensitivity: Move the slider to adjust sensitivity. The greater the value, the more sensitive. Default: 50 Percentage: Move the slider to adjust the size proportion (schedule on) (expressed as a percentage of the total area) that the moving object must exceed before triggering the motion detection. Click Save to save the changes Arming Schedule Expert Configuration Draw Area/ Click this button to start/stop drawing directly on the Stop Drawing: image. Clear All: Click this button to clear all the masking areas. Scheduled Image From the dropdown menu select OFF, Auto‐Switch Settings: and Scheduled‐Switch. If Scheduled Image Settings is enabled, you may configure the rules for day/night separately. OFF: Disable the day and night switch. Auto‐Switch: Automatically switch between the configured rules for day and night time based on illumination. Scheduled‐Switch: Switch between the configured rules for day and night time based on user configured Arming Schedule time. ...
-
Page 51: Intrusion Detection
TRENDnet User’s Guide TV‐IP460PI Linkage Method Intrusion Detection Set up how the intrusion detection event will be triggered and what actions will be triggered. Intrusion Detection Channel No.: Select the camera you would like to configure. Enable: Check this box to enable the intrusion detection feature. Linkage Method Normal Linkage: Check the box to select everything in this category. Send Email: Check the box to enable email to Area Settings be sent upon motion detection. Notify Surveillance Center: Check the box to send an exception or alarm to the ... - Page 52 TRENDnet User’s Guide TV‐IP460PI Arming Schedule Draw Area/ Click this button to start/stop drawing directly on the Stop Drawing: image. Clear: Click this button to clear all the masking areas. Threshold: Move the slider to adjust detection threshold. Sensitivity: Move the slider to adjust sensitivity. The greater the value, the more sensitive. Default: 50 Click Save to save the changes Arming Schedule Delete/Delete All: Delete the selected segment/all segments on the scheduler below. Click Save to save the changes © Copyright 2019 TRENDnet. All Rights Reserved. 49 ...
-
Page 53: Line Crossing Detection
TRENDnet User’s Guide TV‐IP460PI Linkage Method Line Crossing Detection Set up how the Line Crossing detection event will be triggered and what actions will be triggered. Line Crossing Detection Channel No.: Select the camera you would like to configure. Enable: Check this box to enable the line crossing detection feature. Linkage Method Normal Linkage: Check the box to select everything in this category. ... - Page 54 TRENDnet User’s Guide TV‐IP460PI Arming Schedule Draw Area/ Click this button to start/stop drawing directly on the Stop Drawing: image. Clear: Click this button to clear all the detection areas. Direction: Select the direction for the line crossing detection. Sensitivity: Move the slider to adjust sensitivity. The greater the value, the more sensitive. Default: 50 Click Save to save the changes Arming Schedule Delete/Delete All: Delete the selected segment/all segments on the scheduler below. Click Save to save the changes © Copyright 2019 TRENDnet. All Rights Reserved. 51 ...
-
Page 55: Video Tampering
TRENDnet User’s Guide TV‐IP460PI Linkage Method Video Tampering This is to detect if the camera has been tampered with and potential compromised footage. You can set up tamper proof notifications to alert the system manager to check the camera. Video Tampering Channel No.: Select the camera you would like to configure. Enable: Check this box to enable the video tempering detection feature. Area Settings Linkage Method Normal Linkage: Check the box to select everything in this category. Send Email: Check the box to enable email to be sent upon alarm detection. Notify Surveillance Center: Check the box to send an exception or alarm to the ... - Page 56 TRENDnet User’s Guide TV‐IP460PI Arming Schedule Linkage Method Linkage Method Normal Linkage: Check the box to select everything in this category. Send Email: Check the box to enable email to Arming Schedule be sent upon alarm detection. Delete/Delete All: Delete the selected segment/all segments on the Notify Surveillance Center: Check the box to scheduler below. send an exception or alarm to the management software when an event occurs. Click Save to save the changes Upload to FTP/Memory/NAS: Check the box to capture and upload the image when an alarm is triggered. ...
-
Page 57: Audio Exception Detection
TRENDnet User’s Guide TV‐IP460PI Audio Exception Detection Sensitivity: Drag this slider to adjust sensitivity. The lower the value, the greater the intensity of the sound change would need to be to trigger the detection. Default: 50 Set up how the Audio Exception detection event will be triggered and what Sound Intensity Drag this slider to filter environmental audio. The actions will be triggered. Threshold: louder the environment, the higher the value should be set at. Default: 50 Real‐time Shows a visual chart in real time for the volume of Volume: audio detected. Click Save to save the changes Arming Schedule Audio Exception Detection Audio Loss Check this box to enable the Audio Input Exception Detection: Detection. Sudden Increase Check this box to enable audio detection for a sudden of Sound Intensity increase in sound. ... - Page 58 TRENDnet User’s Guide TV‐IP460PI Linkage Method Linkage Method Normal Linkage: Check the box to select everything in this category. Send Email: Check the box to enable email to be sent upon alarm detection. Notify Surveillance Center: Check the box to send an exception or alarm to the management software when an event occurs. Upload to FTP/Memory/NAS: Check the box to capture and upload the image when an alarm is triggered. Trigger Recording: Check the box to trigger recording to the selected ...
-
Page 59: Notification
TRENDnet User’s Guide TV‐IP460PI Notification Notify Surveillance Center: Check the box to send an exception or alarm to the management software when an event Provide notifications for other system events, set up your notifications here. occurs. Click Save to save the changes Notification Exception Type: First, choose the exception type, and then choose the corresponding action. Normal Linkage: Check the box to select everything in this category. Send Email: Check the box to enable email to be sent upon alarm detection. © Copyright 2019 TRENDnet. All Rights Reserved. -
Page 60: Email
TRENDnet User’s Guide TV‐IP460PI Email Authentication: Check this box if your server requires a password in order to send email. Most email servers require authentication when sending an email. Set up email accounts for notifications. User name: Enter the user name of outgoing email account Password: Enter the password Confirm: Enter the password again to confirm that the password was entered correctly. Receiver Receiver: This row’s receiver’s name. Receiver This row’s receiver’s email address. Address: Test: Click Test to send a test email to the recipient. Click Save to save the changes *Note: Many ISPs does not allow service port 25 going through their network. Other popular ports are 587 and 465. Please consult your email service provider and ISP for detail. Email Account Settings ... -
Page 61: Storage
TRENDnet User’s Guide TV‐IP460PI HDD No.: The sequential numerical identifier for the specified storage Storage device. Capacity: The total capacity this network storage can use. Storage Management Free Space: The free space left for video recording, snapshot and log. Status: The connection status to the network storage. Network Storage must be setup before it can be managed. To setup storage, Type: This specifies the type of storage used. please refer to the corresponding section. Property: This network storage is read only or can be read and write. Progress: The progress of ongoing task. Note: The formatting progress depends on the size of the storage and the network bandwidth. It takes a while if you are formatting a big volume or the network connection is not stable. Storage Management Format: Select a network storage volume and then click Format to format your network storage. This action will format the ... -
Page 62: Network Storage
TRENDnet User’s Guide TV‐IP460PI Network Storage Network Storage HDD No: The sequential number of the network storage. Server Enter the IP address of your network storage. Network Storage must be setup before it can be managed. For storage Address: management, please refer to the previous section. File Path: Enter the shared folder as file path for network storage. You can create a folder under the shared folder and make it a The TV‐IP460PI supports two formats of network storage file systems: NFS network volume here. Just create the folder and enter the and CIFS. NFS, Network File System, is natively supported by Linux computers ... -
Page 63: Ptz (Pan/Tilt/Zoom)
TRENDnet User’s Guide TV‐IP460PI Enable Preset This function enables the live view to switch directly PTZ (Pan/Tilt/Zoom) Freezing: from one scene, defined by a preset to another, without showing the middle areas between these Basic Settings two, to ensure the surveillance efficiency. It can also reduce the use of bandwidth in a digital network Set up basic settings for PTZ controls. system. Preset Speed: You can set the speed of defined preset from 1 to 8. Default: 4 Manual Control Select the manual control speed from the drop down Speed: menu: Compatible, Pedestrian, Non‐motor vehicle, Motor Vehicle, and Auto. Compatible: The control speed is same as the Keyboard Control Speed. Pedestrian: Choose Pedestrian when monitoring pedestrians. Non‐motor Vehicle: Choose the Non‐motor Vehicle when monitoring non‐motor vehicles. Motor Vehicle: Choose the Motor Vehicle when monitoring motor vehicles. Auto: If the viewport of the camera contains many different objects, selecting Auto is recommended. Keyboard Control Define the speed of PTZ control by a keyboard as Low, ... -
Page 64: Limit
TRENDnet User’s Guide TV‐IP460PI Preset Status: Set the preset name display duration as 2 seconds to Limit 10 seconds, NC (Normally Closed) or NO (Normally Open). The camera can be programmed to move within the configured POWER OFF MEMORY stops. (left, right, up or down) Set Resume Time The camera can resume its previous PTZ status or Point: actions after it is restarted from a power‐off. You can set the time point of which the camera resumes its PTZ status from 30 seconds up to 600 seconds or disabled before power‐off. Click Save to save the changes Steps Check the Enable Limit box and select Manual Stops or Scan Stops from the Limit Type list. a. When manual limit stops re set, you can operate the PTZ control panel manually only in the limited area. b. When scan limit stops are set, all the scan actions are performed only in the limited area. Click the PTL control buttons to find the left/right/up/down stop limits, you can also call the presets and set them as the limits for the camera. Click Set to save the limits and Clear to clear the limits. © Copyright 2019 TRENDnet. All Rights Reserved. 61 ... -
Page 65: Initial Position
TRENDnet User’s Guide TV‐IP460PI Initial Position Park Action Set the camera initial position, you can also call a preset for the position. Click The feature allows the camera to start at a predefined park action. set to save the limits and Clear to clear the limits. (scan, preset, pattern) automatically after a period of inactivity (park time). Scheduled Tasks function has higher priority over Park Action function therefore when two functions are set at the same time, Scheduled Tasks function takes effect. ... -
Page 66: Private Mask
TRENDnet User’s Guide TV‐IP460PI Private Mask Schedule Tasks Create masking area to keep your privacy. You can create up to four You can configure the camera to perform a certain action automatically in a independent masking areas by clicking and dragging on the screen. user‐defined time period. Schedule Tasks Enable Scheduled Check this box to enable scheduled Tasks Task: Dropdown: Select the task you would like to schedule from the Privacy Mask drop down. Then draw directly onto the scheduler to ... -
Page 67: Clear Config
TRENDnet User’s Guide TV‐IP460PI Clear Config You can clear PTZ configurations all at once in this section, select the desired function and click Save to clear. © Copyright 2019 TRENDnet. All Rights Reserved. 64 ... -
Page 68: Regulations
TRENDnet User’s Guide TV‐IP460PI Regulations IMPORTANT NOTE: Federal Communication Commission Interference Statement FCC Radiation Exposure Statement: This equipment has been tested and found to comply with the limits for a Class B digital device, pursuant to Part 15 of the FCC Rules. These limits are This equipment complies with FCC radiation exposure limits set forth for an designed to provide reasonable protection against harmful interference in a uncontrolled environment. This equipment should be installed and operated residential installation. This equipment generates uses and can radiate radio with minimum distance 20cm between the radiator & your body. frequency energy and, if not installed and used in accordance with the This transmitter must not be co‐located or operating in conjunction with any instructions, may cause harmful interference to radio communications. other antenna or transmitter. However, there is no guarantee that interference will not occur in a particular ... -
Page 69: Europe - Eu Declaration Of Conformity
TRENDnet User’s Guide TV‐IP460PI Europe – EU Declaration of Conformity Ελληνική [Greek] ΜΕ ΤΗΝ ΠΑΡΟΥΣΑTRENDnet ΔΗΛΩΝΕΙ ΟΤΙ TV‐IP460PI ΣΥΜΜΟΡΦΩΝΕΤΑΙ ΠΡΟΣ ΤΙΣ ΟΥΣΙΩΔΕΙΣ ΑΠΑΙΤΗΣΕΙΣ ΚΑΙ ΤΙΣ ΛΟΙΠΕΣ ΣΧΕΤΙΚΕΣ ΔΙΑΤΑΞΕΙΣ ΤΗΣ ΟΔΗΓΙΑΣ 2004/108/EK, 2006/95/ΕΚ και. This device complies with the essential requirements of the Directive Français [French] Par la présente TRENDnet déclare que l'appareil TV‐IP460PI est conforme aux exigences essentielles et aux autres dispositions 2004/108/EC and 2006/95/EC. The following test methods have been applied pertinentes de la directive 2004/108/CE, 2006/95/CE et. in order to prove presumption of conformity with the essential requirements Italiano[Italian] Con la presente TRENDnet dichiara che questo TV‐IP460PI è of the Directive 2004/108/EC and 2006/95/EC: conforme ai requisiti essenziali ed alle altre disposizioni pertinenti stabilite dalla direttiva 2004/108/CE e 2006/95/CE. Safety /EMC Latviski [Latvian] AršoTRENDnetdeklarē, ka TV‐IP460PI atbilstDirektīvas 2004/108/EK EN 55022:2010 + AC: 2011 Class A un 2006/95/EK būtiskajāmprasībām un citiemar to EN 61000‐3‐2: 2006 + A1: 2009 + A2: 2009 saistītajiemnoteikumiem. EN 61000‐3‐3: 2008 Lietuvių Šiuo TRENDnet deklaruoja, kad šis TV‐IP460PI atitinka esminius EN 50130‐4: 2011 + A1: 2014 ... - Page 70 LIMITATION OF LIABILITY: TO THE FULL EXTENT ALLOWED BY LAW TRENDNET ALSO products that are replaced become the property of TRENDnet. Replacement products EXCLUDES FOR ITSELF AND ITS SUPPLIERS ANY LIABILITY, WHETHER BASED IN may be new or reconditioned. TRENDnet does not issue refunds or credit. Please CONTRACT OR TORT (INCLUDING NEGLIGENCE), FOR INCIDENTAL, CONSEQUENTIAL, contact the point‐of purchase for their return policies. INDIRECT, SPECIAL, OR PUNITIVE DAMAGES OF ANY KIND, OR FOR LOSS OF REVENUE TRENDnet shall not be responsible for any software, firmware, information, or ...
- Page 71 ...
Need help?
Do you have a question about the TV-IP460PI and is the answer not in the manual?
Questions and answers