Advertisement
Table of Contents
- 1 Table of Contents
- 2 How to Contact Customer Care
- 3 Important Precautions
- 4 Warning Decal Placement
- 5 Before You Begin
- 6 Assembly
- 7 Stabilizer
- 8 How to Set up the Upright Bike
- 9 How to Upgrade the Console
- 10 Maintenance and Troubleshooting
- 11 Exercise Guidelines
- 12 Part List
- 13 Exploded Drawing
- Download this manual
Model No. VFMEX2107.0
Serial No.
Write the serial number in the space
above for reference.
QUESTIONS?
At FreeMotion Fitness, we are
committed to providing complete
customer satisfaction. If you have
questions, or if parts are damaged
or missing, PLEASE CONTACT
THE STORE WHERE YOU PUR-
CHASED THIS PRODUCT.
If you are unable to contact the
store, please see HOW TO
CONTACT CUSTOMER CARE on
page 2.
CAUTION
Read all precautions and instruc-
tions in this manual before using
this equipment. Keep this manual
for future reference.
Serial
Number
Decal
USER'S MANUAL
Visit our website at
www.freemotionfitness.com
Advertisement
Table of Contents

Subscribe to Our Youtube Channel
Related Manuals for Freemotion upright bike c7.7


Summary of Contents for Freemotion upright bike c7.7
- Page 1 Write the serial number in the space above for reference. Serial Number Decal QUESTIONS? At FreeMotion Fitness, we are committed to providing complete customer satisfaction. If you have questions, or if parts are damaged or missing, PLEASE CONTACT THE STORE WHERE YOU PUR- CHASED THIS PRODUCT.
-
Page 3: Table Of Contents
TABLE OF CONTENTS How to Contact Customer Care ........... . .2 SECTION 1 Important Precautions . -
Page 4: How To Contact Customer Care
PART LIST and the EXPLODED DRAWING near the end of this manual). Call Toll-free in the US: 1-866-799-8946, Mon.–Fri. 8 a.m.–5 p.m. MST Direct: 1-719-533-2900 International: +1-719-533-2911 Email US: fmfvmcustomerservice@freemotionfitness.com International: intlcustomercare@freemotionfitness.com Write FreeMotion Fitness 1096 Elkton Drive, Suite 600 Colorado Springs, CO 80907... -
Page 5: Important Precautions
To reduce the risk of serious injury, read all important precautions and in- structions in this manual and all warnings on your upright bike before using your upright bike. FreeMotion Fitness assumes no responsibility for personal injury or property damage sustained by or through the use of this product. -
Page 6: Warning Decal Placement
WARNING DECAL PLACEMENT The warning decal shown here has been applied in the location shown. If the decal is missing or illegible, see the front cover of this manual and request a free replacement decal. Apply the decal in the location shown. Note: The decal may not be shown at actual size. -
Page 7: Before You Begin
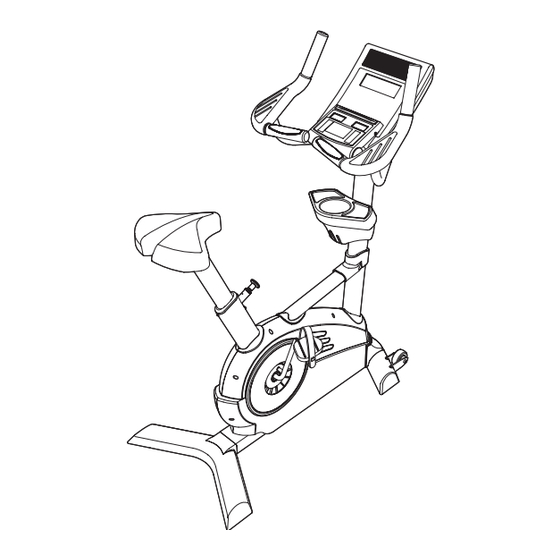
To help us assist you, note the product number and FREEMOTION ® c7.7 upright bike. The c7.7 upright serial number before contacting us. The model number bike provides a wide array of features designed to and the location of the serial number decal are shown make your workouts more effective and enjoyable. -
Page 8: Assembly
ASSEMBLY Assembly requires two persons. Place all parts of the upright bike in a cleared area and remove the packing materials. Do not dispose of the packing materials until assembly is completed. In addition to the included hex keys, assembly requires a Phillips screwdriver , an adjustable wrench and a rubber mallet As you assemble the upright bike, use the drawings below to identify small parts. - Page 9 To make assembly easier, read the information on page 6 before you begin assembling the upright bike. Identify the Rear Stabilizer (14) and orient it as shown. Insert a Stabilizer Plate (17) into the Rear Stabilizer. Tighten the two Leveling Feet (18) into the bot- tom of the Rear Stabilizer (14).
- Page 10 4. Slide the Upright Screw Cover (47) onto the Upright (3). Make sure that the Upright Screw Cover is oriented as shown. Then, slide the Frame Upright Screw Cover upward toward the top of Wires the Upright. Have a second person hold the Upright (3) near the Frame (1).
-
Page 11: How To Set Up The Upright Bike
HOW TO SET UP THE UPRIGHT BIKE HOW TO MOVE AND LEVEL THE UPRIGHT BIKE Before moving the upright bike, make sure that the power cord is unplugged. Note: If a CATV Upright cable is connected to the upright bike, it may be nec- essary to disconnect the cable if the upright bike will be moved far. - Page 12 HOW TO CONNECT A CATV CABLE If your bike has a Workout TV console, a CATV cable must be connected to the bike for cable TV stations to be viewed. Locate the cable jack on the front of the bike. Connect the Jack to External CATV cable to the cable jack.
-
Page 13: How To Upgrade The Console
HOW TO UPGRADE THE CONSOLE Your upright bike has been preconfigured to operate with a Basic console and a Workout TV console (see the drawings below). To learn about the features of the Basic console, see page 12. To learn about the features of the Workout TV console, see the user’s manual included with the Workout TV console. - Page 14 FEATURES OF THE CONSOLE The console also provides two heart rate programs that automatically adjust the resistance of the pedals to The advanced console offers an array of features de- keep your heart rate near a target level during your signed to make your workouts more effective and en- workouts.
- Page 15 HOW TO ACTIVATE THE CONSOLE IMPORTANT: If the upright bike has been exposed to cold temperatures, allow it to warm to room tem- If the upright bike has a Basic console, it can be perature before turning on the console. If you do used with or without the included power cord.
- Page 16 HOW TO USE THE QUICK START MODE If you do not plan to use a program, the quick start mode will allow you to start exercising and adjust the resistance of the pedals manually. 1. Press any button or begin pedaling to activate the console.
- Page 17 5. Measure your heart rate if desired. If your heart rate is not shown, make sure that your hands are positioned as described. Be careful not You can measure your heart rate using either the to move your hands excessively or to squeeze the handgrip pulse sensor or the optional chest pulse metal contacts tightly.
- Page 18 HOW TO USE A MANUAL PROGRAM 4. Enter your weight. A MANUAL program allows you to set a time, distance, Next, the words “ENTER WEIGHT” and a weight or calorie goal for your workout as you control the re- setting of 185 pounds (US) will appear in the main sistance of the pedals.
- Page 19 6. Press the START button or begin pedaling to If you selected the MANUAL TIME program, the start the program. main display will count down the time remaining in the program. If you selected the MANUAL DIS- Each program is divided into several one-minute TANCE program, the main display will count down segments.
- Page 20 HOW TO USE A PRESET PROGRAM 4. Enter your weight. A preset program will automatically change the resis- Next, the words “ENTER WEIGHT” and a weight tance of the pedals and prompt you to maintain a tar- setting of 185 pounds (US) will appear in the main get pace while guiding you through your workout.
- Page 21 If the resistance level for the current segment is too To view the time, the approximate number of calo- high or too low, you can manually override the set- ries you have burned, and the distance you have ting by pressing the RESISTANCE buttons. pedaled, press the DISPLAY button again.
- Page 22 HOW TO CREATE A CUSTOM PROGRAM 4. Program the desired program settings. A custom program allows you to create your own work- Each custom workout is divided into 30 one-minute outs and store them in memory for future use. segments. You can program one resistance level and one target rpm (pace) setting for each seg- 1.
- Page 23 HOW TO USE A CUSTOM PROGRAM 4. Enter your weight. 1. Press any button or begin pedaling to activate Next, the words “ENTER WEIGHT” and a weight the console. setting of 185 pounds (US) will appear in the main display. To enter your weight (1 kilogram = 2.2 See HOW TO ACTIVATE THE CONSOLE on page pounds), press the increase and decrease buttons beside the ENTER button.
- Page 24 If the resistance level for the current segment is too To view the time, your exercise intensity in mets, high or too low, you can manually override the set- and your power output in watts, press the DIS- ting by pressing the RESISTANCE buttons. PLAY button.
- Page 25 HOW TO USE A HEART RATE PROGRAM 4. Press the START button or begin pedaling to start the program. The CONSTANT HEART RATE program will automati- cally control the resistance of the pedals to keep your Each HEART RATE program is divided into 30 heart rate near a target level during your workout.
- Page 26 5. Follow your progress with the displays. 6. Measure your heart rate if desired. During a HEART RATE program, the main display See step 5 on page 15. will show the elapsed time, your exercise intensity in mets, the approximate number of calories you 7.
- Page 27 HOW TO USE THE MAINTENANCE MODE If the pedals on the upright bike do not move for a period of time, a pause timeout will occur and the The console features a maintenance mode that allows console will enter an idle mode. When the console you to access usage information and to view and is in the idle mode, the displays will be reset to change default settings.
- Page 28 HOW TO USE AN IFIT WORKOUT HOW TO USE THE STEREO SOUND SYSTEM 1. Press any button or begin pedaling to activate To play music or audio books through the console’s the console. stereo sound system while you exercise, plug an audio cable (not included) into the MP3 jack on the console See HOW TO ACTIVATE THE CONSOLE on page and into a jack on your MP3 player or CD player;...
-
Page 29: Maintenance And Troubleshooting
MAINTENANCE AND TROUBLESHOOTING If you have questions about maintenance or trou- HOW TO LEVEL THE UPRIGHT BIKE bleshooting, see the front cover of this manual. If the upright bike rocks slightly on your floor during Inspect and tighten all parts of the upright bike regularly. use, see HOW TO MOVE AND LEVEL THE UPRIGHT Replace any worn parts immediately. - Page 30 NOTES...
-
Page 31: Exercise Guidelines
EXERCISE GUIDELINES Burning Fat—To burn fat effectively, you must exer- WARNING: cise at a low intensity level for a sustained period of Before beginning this time. During the first few minutes of exercise, your or any exercise program, consult your physi- body uses carbohydrate calories for energy. - Page 32 SUGGESTED STRETCHES The correct form for several basic stretches is shown at the right. Move slowly as you stretch—never bounce. 1. Toe Touch Stretch Stand with your knees bent slightly and slowly bend forward from your hips. Allow your back and shoulders to relax as you reach down toward your toes as far as possible.
-
Page 33: Part List
PART LIST—Model No. VFMEX2107.0 R0208A Key No. Qty. Description Key No. Qty. Description Frame M10 Flat Washer Front Stabilizer 3/8" x 3/4" Button Screw Upright Upright Screw Cover Console 1/4" x 3/4" Socket Screw Seat Post Tray Insert Accessory Tray Tray Bracket Left Side Shield Keyhole Standoff... -
Page 34: Exploded Drawing
EXPLODED DRAWING A—Model No. VFMEX2107.0 R0208A... - Page 35 EXPLODED DRAWING B—Model No. VFMEX2107.0 R0208A...
- Page 36 FreeMotion Fitness, Inc. • 1096 Elkton Drive, Suite 600 • Colorado Springs, CO 80907 Part No. CC7328 R0208A Printed in USA © 2008 ICON IP, Inc.
Need help?
Do you have a question about the upright bike c7.7 and is the answer not in the manual?
Questions and answers