Table of Contents
Advertisement
Quick Links
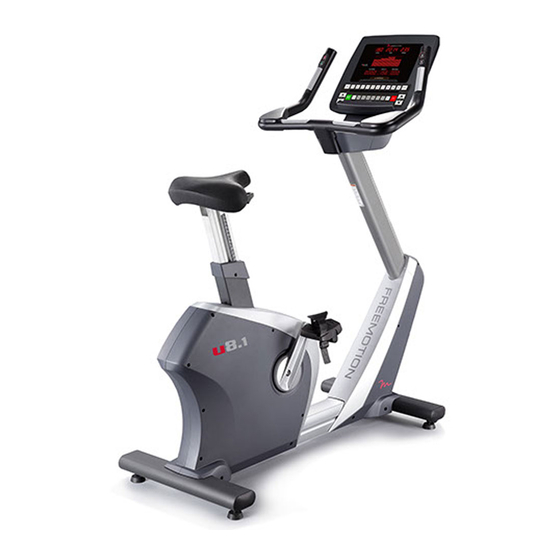
Model No. VMEX81414.1
Serial No.
USER'S MANUAL
Write the serial number in the space
above for reference.
Serial Number
Decal
QUESTIONS?
If you have questions, or if
parts are damaged or missing,
please see HOW TO CONTACT
CUSTOMER CARE on the back
cover of this manual.
CAUTION
Read all precautions and
instructions in this manual before
using this equipment. Keep this
manual for future reference.
www.freemotionfitness.com
Advertisement
Table of Contents

Related Manuals for Freemotion U8.1


Summary of Contents for Freemotion U8.1
- Page 1 Model No. VMEX81414.1 Serial No. USER’S MANUAL Write the serial number in the space above for reference. Serial Number Decal QUESTIONS? If you have questions, or if parts are damaged or missing, please see HOW TO CONTACT CUSTOMER CARE on the back cover of this manual.
-
Page 2: Table Of Contents
Apply the decal in the location shown. Note: The decal(s) may not be shown at actual size. FREEMOTION is a registered trademark of ICON Health & Fitness, Inc. POLAR is a registered trademark of Polar Electro Oy. -
Page 3: Important Precautions
FreeMotion Fitness assumes no responsibility for personal injury or prop- erty damage sustained by or through the use of this product. -
Page 4: Before You Begin
BEFORE YOU BEGIN Thank you for selecting the revolutionary reading this manual, please see the back cover of this FREEMOTION U 8.1 exercise bike. The U 8.1 manual. To help us assist you, note the product model ® exercise bike provides an impressive selection of fea- number and serial number before contacting us. -
Page 5: Part Identification Chart
PART IDENTIFICATION CHART Use the drawings below to identify the small parts needed for assembly. The number in parentheses below each drawing is the key number of the part, from the PART LIST near the end of this manual. The number following the key number is the quantity needed for assembly. -
Page 6: Assembly
ASSEMBLY • Assembly requires two persons. • To identify small parts, see page 5. • Place all parts in a cleared area and remove the • Assembly can be completed using the included packing materials. Do not dispose of the packing tools. - Page 7 2. Tip: Avoid pinching the wires. Attach the Upright (66) to the Frame (1) with four M8 x 20mm Screws (107) and four M8 x 12mm Washers (108); start all the Screws, and then tighten them. Avoid pinching the wires 3.
- Page 8 4. Hold the Left and Right Front Shields (101, 102) together around the Frame (1). Attach the Left and Right Front Shields (101, 102) with ten M5 x 12mm Screws (111); start all the Screws, and then tighten them. 5. Hold the Front Shield Cover (104) and the Front Top Cover (103) together around the Upright (66).
- Page 9 6. Tip: Avoid pinching the wires. Attach the Handlebar (70) to the Upright (66) with three M8 x 30mm Screws (109) and three M8 Washers (110); start all the Screws, and then tighten them. Avoid pinching the wires 7. Route the Left and Right Control Key Wires (81, 82) and the Pulse Sensor Wire (83) in the Handlebar (70) through the Upright (66) as shown.
- Page 10 8. Have a second person hold the Console (106) near the Upright (66). Connect the wires on the Console (106) to the Upper Main Wire (42), the Pulse Sensor Wire (83), the Left and Right Control Key Wires (81, 82), and the Ground Wire (138). Insert the excess wire into the Upright (66).
- Page 11 10. Tip: To avoid pinching the wires, make sure that the wires (C) from the Handlebar (70) are arranged as shown. Attach the Accessory Tray (99) to the Upright (66) with two M5 x 12mm Screws (111); start both Screws, and then tighten them. Avoid pinching the wires 11.
-
Page 12: How To Upgrade The Console
12. Tip: Avoid pinching the wires. Attach the Front Upright Cover (98) to the Rear Upright Cover (100) and to the Upright (66) with six M5 x 12mm Screws (111); start all the Screws, and then tighten them. Avoid pinching the wires 13. -
Page 13: How To Use The Exercise Bike
HOW TO USE THE EXERCISE BIKE HOW TO PLUG IN THE INCLUDED POWER Plug the power ADAPTER adapter for the optional digital TV into the upper The exercise bike can be used with or without the included power adapter. When the exercise bike is digital TV power used without the power adapter, power will be supplied receptacle (B) on... - Page 14 FreeMotion Fitness, Inc. representative. necessary maintenance as outlined in this manual. Any failure or damage caused by unauthorized service;...
- Page 15 CONSOLE DIAGRAM FEATURES OF THE CONSOLE To activate the console, see page 16. To turn off the console, see page 16. To use the charging port, see page 16. The console offers an impressive array of features designed to make your workouts more effective and To use the quick start mode, see page 16.
- Page 16 HOW TO ACTIVATE THE CONSOLE HOW TO USE THE QUICK START MODE If the exercise bike has a basic console, it can be 1. Turn on the console. used with or without the power adapter. See HOW TO ACTIVATE THE CONSOLE at the To use the exercise bike without the power adapter, left.
- Page 17 Speed—This display will show your pedaling IMPORTANT: If you use both heart rate speed in miles or kilometers per hour. monitors at the same time, the console will not display your heart rate accurately. Note: The console can display speed in either miles per hour or kilometers per hour.
- Page 18 6. Pause the workout if desired. Average Speed—This display will show your average pedaling speed in miles per hour (MLH) or To pause the workout, press the Stop button on kilometers per hour (KMH). the console or on the left handlebar. Note: If the Calories Burned—This display will show the pedals are not moved and no buttons are pressed for a short while, the console will exit the quick start...
- Page 19 HOW TO USE AN ONBOARD PROGRAM During the program, the profile in the matrix will show your progress. The flashing segment of the 1. Turn on the console. profile represents the current segment of the pro- gram. The height of the flashing segment indicates See HOW TO ACTIVATE THE CONSOLE on the resistance level for the current segment.
- Page 20 HOW TO USE THE GOAL PROGRAM If you selected a distance goal, the words ENTER DISTANCE will scroll across the lower 1. Turn on the console. displays. Press the numbered buttons to enter your desired distance goal. If necessary, press the Clear See HOW TO ACTIVATE THE CONSOLE on button to cancel your entry.
- Page 21 8. Follow your progress. 10. Pause the workout if desired. If you selected a time goal, the time display will See step 6 on page 18. count down until your time goal is reached. 11. End the workout and view the workout If you selected a distance goal, the distance summary.
- Page 22 HOW TO USE THE HEART RATE CONTROL 5. Enter your age. PROGRAM The words ENTER AGE will scroll across the lower 1. Turn on the console. displays. Press the numbered buttons to enter your age. If necessary, press the Clear button to cancel See HOW TO ACTIVATE THE CONSOLE on your entry.
- Page 23 IMPORTANT: You cannot adjust the resistance 10. End the workout and view the workout of the pedals manually during the heart rate summary. control program. See step 7 on page 18. The program will continue in this way until the last segment ends.
- Page 24 HOW TO USE THE WATTS PROGRAM IMPORTANT: The watts target is intended only to provide motivation. Make sure to exercise at 1. Turn on the console. an intensity that is comfortable for you. See HOW TO ACTIVATE THE CONSOLE on If the resistance level is too high or too low, you page 16.
- Page 25 HOW TO USE THE FITNESS TEST During the fitness test, the console will automati- cally adjust the resistance of the pedals. 1. Turn on the console. IMPORTANT: You cannot adjust the resistance of the pedals manually during the fitness test. See HOW TO ACTIVATE THE CONSOLE on page 16.
- Page 26 FITNESS TEST RESULTS CHARTS Male Test Result Excellent Good Average Fair Poor Female Test Result Excellent Good Average Fair Poor...
- Page 27 HOW TO CHANGE CONSOLE SETTINGS 4. Change settings as desired. 1. Turn on the console. The following settings can be changed: Language—The selected language will appear in See HOW TO ACTIVATE THE CONSOLE on page 16. the displays. The console will display text mes- sages in the selected language.
-
Page 28: Compliance Information
COMPLIANCE INFORMATION UNITED STATES FCC Statement. This equipment has been tested and found to comply with the limits for a Class B digital device, pursuant to Part 15 of the FCC Rules. These limits are designed to provide reasonable protection against harm- ful interference in a residential installation. -
Page 29: Maintenance And Troubleshooting
MAINTENANCE AND TROUBLESHOOTING MAINTENANCE If a replacement power adapter is needed, call the telephone number on the back cover of this man- ual. IMPORTANT: To avoid damaging the console, Regular maintenance is important for optimal performance and to reduce wear. Inspect and properly use only a manufacturer-supplied regulated power tighten all parts each time the exercise bike is used. -
Page 30: Exercise Guidelines
EXERCISE GUIDELINES Burning Fat—To burn fat effectively, you must exer- WARNING: cise at a low intensity level for a sustained period of Before beginning this time. During the first few minutes of exercise, your or any exercise program, consult your physi- body uses carbohydrate calories for energy. - Page 31 NOTES...
-
Page 32: Part List
PART LIST Model No. VMEX81414.1 R0916A Key No. Qty. Description Key No. Qty. Description Frame M5 x 10mm Flat Head Screw Drive Belt Wear Cover Generator M5 x 10mm Nickel Screw M6 x 15mm Flange Screw Left Rear Shield Control Board Right Rear Shield M5 x 10mm Screw M4 x 16mm Screw... - Page 33 Key No. Qty. Description Key No. Qty. Description Left Front Shield Display Right Front Shield Upper Overlay Front Top Cover M3 x 8mm Screw Front Shield Cover M8 x 8mm Machine Screw Front Upright Cover Cap M5 x 8mm Machine Screw Console M8 x 10mm Screw M8 x 20mm Screw...
-
Page 34: Exploded Drawing
EXPLODED DRAWING A Model No. VMEX81414.1 R0916A... - Page 35 EXPLODED DRAWING B Model No. VMEX81414.1 R0916A...
-
Page 36: How To Contact Customer Care
WHAT TO DO IF SERVICE IS REQUIRED WARRANTY PERIODS AND COVERAGE FreeMotion Fitness warranty service may be obtained by FreeMotion Fitness warrants this product to be free from contacting the authorized dealer from which you purchased defects in workmanship and material under normal use and this product.
Need help?
Do you have a question about the U8.1 and is the answer not in the manual?
Questions and answers