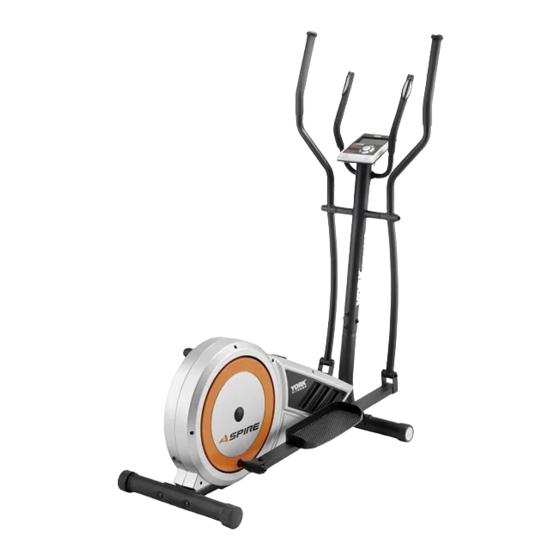
York Fitness Aspire Owner's Manual
Cross trainer
Hide thumbs
Also See for Aspire:
- Owner's manual (32 pages) ,
- Owner's manual (28 pages) ,
- Owner's manual (22 pages)
Table of Contents
Advertisement
Advertisement
Table of Contents

Related Manuals for York Fitness Aspire


Summary of Contents for York Fitness Aspire
- Page 1 Cross Trainer OWNER’S MANUAL 24February2011...
-
Page 2: Step
Congratulations on purchasing a cross trainer from York Fitness. You have chosen a high quality, safe and innovative piece of equipment as your training partner and we are certain it will keep you motivated on the way to achieving your personal fitness goals. -
Page 3: Table Of Contents
contents safety information customer support assembly instructions operational instruction features explained troubleshooting fitness guide warranty exploded drawing part list... -
Page 4: Safety Information
safety information Please read this instruction manual before you begin • If children are allowed to use the equipment, their mental and physical development and above all their temperament assembly. Great care has been taken to design these should be taken into account. They should be controlled and instructions and following them will help you with instructed in the correct use of the equipment. -
Page 5: Customer Support
• Ensure that you inspect the product regularly - at least once a week is recommended. IMPORTANT!! - Please retain your sales receipt, York Fitness Customer Care may request proof of purchase to validate • Ensure that all fixings are tight before use. -
Page 6: Assembly Instructions
assembly instruction Before You Start Prepare your work area It is important you assemble the product in a clean and uncluttered space. Work with a friend We recommend you have someone assist you with the assembly as some of the components are quite heavy. Open the carton Checking any warnings on the carton and make sure you have it the right way up. -
Page 7: Step
STEP 1 94 x 2 49 x 2 81 x 2 91 x 2 47 x 2 Please note the front stabilizer has wheels for transportation. Ensure to install the front stabilizer with the wheels facing downwards. STEP 2 94 x 2 49 x 2 81 x 2 91 x 2... -
Page 8: Step
assembly instruction STEP 3 24 x 4 49 x 4 47 x 4 STEP 4 32 x 4 93 x 4... - Page 9 STEP 5 32 x 4 93 x 4 STEP 6 22 x 2 47 x 2 53 x 2...
-
Page 10: Assembly Instruction
assembly instruction STEP 7 Note: Use two allen keys to tighten both bolts at the same time. 22 x 2 47 x 2 53 x 2 102 x 2 STEP 8 24 x 4 47 x 4 44 x 4... - Page 11 STEP 9 33 x 4 Note: part 33 is located in the back of the computer. STEP 10 23 x 2 44 x 2 47 x 2...
-
Page 12: Operational Instruction
operation instructions Input Power Plug in the adaptor to the equipment then the computer will produce a beep sound and turn on the computer at the Manual mode. -
Page 13: Program Select And Setting Value
Program Select and Setting Value Use the UP or DOWN keys to select program mode and then press ENTER to confirm your exercise mode. In the Manual mode, the computer will use the UP or DOWN keys to set up your exercise TIME, DISTANCE, CALORIES, PULSE. Press the START/STOP key to start exercise. - Page 14 operation instructions Key Function: There are 6 button keys and the functions are as follows: KEYS FUNCTIONS START/STOP • Start / Stop • Press this key to increase the resistance during exercise mode. • When in setting mode, press this key to increase the value of Time, Distance, Calories, Age and select Gender and Program.
-
Page 15: Preset Program
Preset Program: Steps, Hill, Rolling, Valley, Fat Burn, Ramp, Mountain, Intervals, Random, Plateau, Fartlek, Precipice Program PROGRAM 2 to PROGRAM 13 is the preset programs. Users can exercise with different levels of loading in different intervals as the profiles show. Users may exercise in any desired resistance level (Adjusting with UP/DOWN keys during the workout) with a target time, number of calories or distance: Use UP/DOWN keys to select one of the above programs from P2 to P13. - Page 16 operation instructions User Setting Program: User 1, User 2, User 3, User 4 Program 14 to 17 is the user setting program. Users are free to create the values in the order of TIME, DISTANCE, CALORIES and the resistance level in 10 columns. The values and profiles will be stored in the memory after setup. When exercising, the user can also change the loading in each column by using UP/DOWN keys, and they will not change the resistance level stored in the memory: Use UP/DOWN keys to select the USER program from P14 to P17.
- Page 17 Heart Rate Control Program: 55% H.R.C., 65% H.R.C., 75% H.R.C., 85% H.R.C., Target H.R.C. Program 18 to Program 22 is the Heart Rate Control Programs and Program 22 is the Target Heart Rate Control program. » Program 18 is the 55% Max H.R.C. - - Target H.R. = (220 – AGE) x 55% »...
- Page 18 operation instructions Body Fat Program: Body Fat Program 23 is a special program design to calculate users’ body fat ratio and to offer a specific loading profile for users. There are 3 body types divided according to the FAT% calculated. »...
-
Page 19: Monitoring Heart Rate
features explained Monitoring Your Heart Rate Hand Pulse Sensors This exercise cycle is fitted with 2 hand pulse sensors. To obtain a pulse Hand Pulse reading you must have both your left and right hands on the sensors Sensors at the same time. Do not grip the hand sensors too tight and allow the computer a few seconds to display the reading. -
Page 20: Troubleshooting
troubleshooting IF YOU HAVE A PROBLEM WITH YOUR EXERCISE CYCLE, BEFORE YOU DO ANYTHING ELSE PLEASE CHECK THAT ALL THE CABLES HAVE BEEN CONNECTED CORRECTLY. LOOSE CABLES ARE VERY COMMON AND MANY PROBLEMS CAN BE SOLVED BY MAKING SURE THE CABLES ARE PROPERLY CONNECTED. The following table details the most common problems and how to fix them. -
Page 21: Fitness Guide
fitness guide Starting and Finishing Your Workout Begin and end each workout with a Warm Up / Down session - a few minutes of stretching to help prevent strains, pulls and cramps. Correct Crosstraining form To start using the cross trainer, simply stand on the foot pedals with the front of your shoes close to the front edge of the pedal cap. Place your hands at a comfortable position on the handlebars. -
Page 22: Suggested Stretches
fitness guide Suggested Stretches The correct form for several basic stretches is shown at the right. Move slowly as you stretch—never bounce. 1. Hamstring Stretch Sit with one leg extended. Bring the sole of the opposite foot toward you and rest it against the inner thigh of your extended leg. -
Page 23: Conditioning Guidelines
Conditioning Guidelines: How you begin your exercise program depends on your physical condition. If you have been inactive for several years or are out of shape, start slowly and increase your workout graually. Increase your workout intensity gradually by monitoring your heart rate while you exercise. Remember to follow these essentials: •... -
Page 24: Warranty
This warranty does not extend to any product that has been damaged or rendered defective: (a) as a result of accident, misuse, abuse or lack of reasonable care; (b) by the use of parts not manufactured by York Fitness or sold by York Fitness; (c) by modification of the product; (d) as a result of service by anyone else other than York Fitness or an authorized York Fitness warranty service provider. -
Page 25: Exploded Drawing
exploded drawing... - Page 26 exploded drawing...
-
Page 27: Part List
part list Ref. York Reference # Description Qty. Ref. York Reference # Description Qty. 52035-52 M8 WASHER 52035-1 BASE FRAME 52035-53 M8 WASHER 52035-2 UPRIGHT TUBE 52035-54 C17 CLIP 52035-3 FIX HANDLEBAR 52035-55 C12 CLIP 52035-4 UPPER HANDLE BAR(L) 52035-5 UPPER HANDLE BAR( R ) 52035-56 6203ZZ BEARING... - Page 28 notes...
Need help?
Do you have a question about the Aspire and is the answer not in the manual?
Questions and answers
Whilst plugged in the adaptor end that enters the cross trainer took a knock and is damaged but I can't find parts on list. Can you help please
You can find a replacement 6V 1A AC-DC adaptor for the York Fitness Aspire Cross Trainer 52035 on eBay. The listing offers multiple purchasing options, with bulk savings available.
This answer is automatically generated
I have a York fitness cross trainer all plugged in all assembled okay but doesn’t appear to have any resistance on any level or setting. Please advise is this a common fault? How can it be rectified?