Table of Contents
Advertisement
Quick Links
Advertisement
Table of Contents

Related Manuals for York Fitness X510


Summary of Contents for York Fitness X510
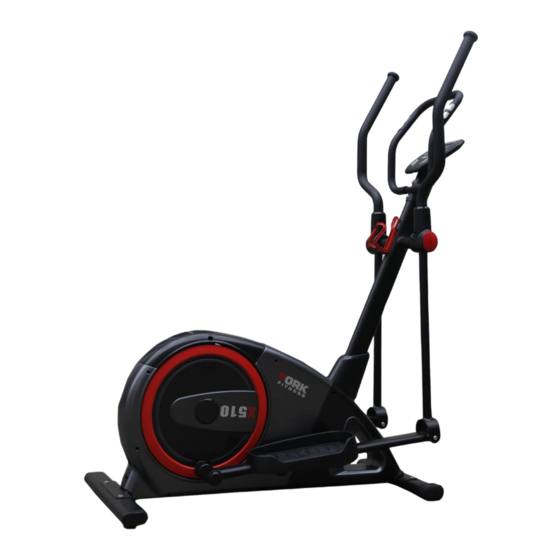
- Page 1 Owner’s Manual X510 Elliptical Item #52076A www.yorkfitness.com.au...
-
Page 2: Safety Information
• Due to our continuous policy of product development, • Use only the adjustment setting as described in the York Fitness reserves the right to change instructions. Always use the correct adjustment specifications without notice. pin / fixing. •... -
Page 3: Customer Support
Use only on a level surface Not suitable for therapeutic purpose Manufacturer: BOYLES FITNESS EQUIPMENT Contact: Unit 13, 160 Hartley Road, Smeaton Grange NSW 2567 Product Name: X510 Elliptical Max User Weight: 150KG Safety Standards: ISO20957-1 & EN957-9, HA Class Electrical Info: Adaptor 9V, 500mA... -
Page 4: Gather Your Tools
Assembling your Cross Trainer PRECAUTIONS: WARNING: This elliptical has been designed and constructed to provide maximum safety. Nevertheless, certain precautions should be taken when using exercise equipment. Read the whole manual before assembling and using the equipment. The following safety precautions should also be observed: 1. -
Page 5: Hardware Kit
Hardware Kit www.yorkfitness.com.au... -
Page 6: Packing Detail
Packing Detail www.yorkfitness.com.au... -
Page 7: Exploded Diagram
Exploded Diagram www.yorkfitness.com.au... - Page 8 www.yorkfitness.com.au...
-
Page 9: Part List
Part list ITEM YORK code DESCRIPTION QTY/ unit Console Screw M5*10 Front handlebar set Front handlebar Foam grip End cap Hand pulse set Hand pulse wire Screw M4*20L Upper handlebar set Upper handlebar left Upper handlebar right Foam grip End cap Handlebar post set Handlebar post Wire... - Page 10 Flywheel set Flywheel Nut 3/8" Flywheel axle Flat washer Bearing 6000RS Bearing 6300RS Bushing of flywheel Nut 3/8" Magnet set Screw M6 Flat washer Spring washer Magent Pedal tube set Pedal tube Bushing Bearing Washer Fixed axle of lower handlebar Left pedal Right pedal End cap of pedal tube...
- Page 11 Flat washer Spring washer Nylon M8 Flat washer O-10 Flat washer O-11 Knob of pedal O-12 Carriage screw M6 O-13 Spring washer O-14 Flat washer O-15 Flat washer Hex. wrench Hex. wrench Bushing wrench Axle set Hex screw M8 Pulley Bushing Axle Disc set...
- Page 12 Assembly Assemble the Left Crank Arm (I-1) to the Main Frame (F) by using 1 Spring Washer (O-7), 1 Flat Washer (O-9), and 1 Cover (I-8) 2. Assemble the Right Crank Arm (I-1) to the Main Frame (F) by using 1 Spring Washer (O-7), 1 Flat Washer (O-9), and 1 Cover (I-8) www.yorkfitness.com.au...
- Page 13 STEP 3 1. Put the Handlebar Cover (F17) and Ring (F-18) onto the Handlebar Post (D), and remove pre-assembled screws (F-20), Flat Washers (F-21), Semi-Circled Washers (F-22) and Spring Washers (F-23) from the Main Frame (F) 2. Connect the Cable Wire (Upper) (D-2) to the Cable Wire (Lower) (F-19) 3.
- Page 14 STEP 4 1. Loosen the Pre-Assembled Screws (D-4) on the Handlebar Post (D) 2. Pass the Axle (D-7) through the Wave Washer (O-10) and keep it in the center. 3. Assemble two Lower Handlebars (E-R/L) with the Flat Washers (O-9) and Nylon Bolt (O-8) on each side.
- Page 15 STEP 5 1. Put Left and Right Pedal (I-6 / I-7) onto the Pedal Arm (I-1 L/R) and tighten it using 2 Knobs (O-11), Flat Washers (O-14), Spring Washer (O-13) and Carriage Screw (O-12 Please note that the left and right pedals need to be placed in identical positions 1.
- Page 16 STEP 7 1. Remove the Pre-Assembled Screws (E-3) on the Lower Handlebars (E-R/L) 2. Assemble the Front and Rear Covers (E-4 / E-5) to the Upper and Lower Handlebars (E-L/R) using Screw (E-3) 3. Remove the Pre-Assembled Screws (D-5) on the Handlebar Post (D), and then assemble the Bottle Holder (D-6) with Screw (D-5) 1.
- Page 17 STEP 9 1. Remove the Screws (A-2) at the rear of Console (A-1) 2. Connect the Cable Wire (Upper) (D-2) and Hand Pulse Wire (B-5) with Console wires (A-1) 3. Attach the Console (A-1) to the bracket on the top of the Handlebar Post 4.
- Page 18 CONSOLE INSTRUCTION MANUAL DISPLAY FUNCTIONS : ITEM DESCRIPTION TIME .Workout time displayed during exercise. .Range 0:00 ~ 99:59 SPEED .Workout speed displayed during exercise. .Range 0.0 ~ 99.9 DISTANCE .Workout distance displayed during exercise. .Range 0.0 ~ 99.9 CALORIES .Burned calories displayed during workout exercise. .Range 0 ~ 9999 PULSE .Pulse bpm displayed during exercise.
- Page 19 OPERATION: POWER ON Plug the power adapter into the wall outlet, once the switch is turned on, the computer will power up displaying all LCD segments for 2 seconds. If the console is left for 4 minutes without pedaling or receiving a pulse input, the console will enter into power saving mode. Pressing any key will wake up the console.
- Page 20 H.R.C. mode Press the UP or DOWN key to select a workout program, choose the H.R.C. program and press MODE to confirm. Press the UP or Down key to select 55%.75%.90% or TAG (TARGET H.R.) (default: 100).and press MODE to confirm Press the UP or DOWN key to preset your workout TIME.
- Page 21 The various components of the Cross Trainer are warranted against defects and workmanship for the time periods specified as follows: YRK52076A – YORK X510 Domestic use Lifetime frame & 1 year on all other parts.
- Page 22 BFE Warranty Policy – November 1 2013 When purchased from an authorised BFE distributor the BFE warranty shall guarantee that all framework and components of your product are free from faulty manufacture. All faulty framework and components will be repaired or replaced as set out in this policy.
- Page 23 (c) Power Surges. The computers, control boards and motors are very sensitive to power fluctuations. You must use a surge protector on all items that plug into your mains power otherwise your electronics will not be covered by this warranty. You can 07 3272 7010 purchase these from numerous retailers or you can call us on to get a...
- Page 24 Additional Warranty If you would like to extend your labour warranty by 1 year ($99), 2 years ($199), 3 years ($299) please contact our office by emailing sales@boylesfitness.com.au (Not available in all areas) Service Department hours: Monday to Friday between 9am and 4pm Service Phone Number: 07 3272 7010 Email: spares@boylesfitness.com.au PLEASE NOTE: that Authorised service technicians do not reside in all areas of this vast country.
Need help?
Do you have a question about the X510 and is the answer not in the manual?
Questions and answers