
Related Manuals for York Fitness 3100 MAG


Summary of Contents for York Fitness 3100 MAG
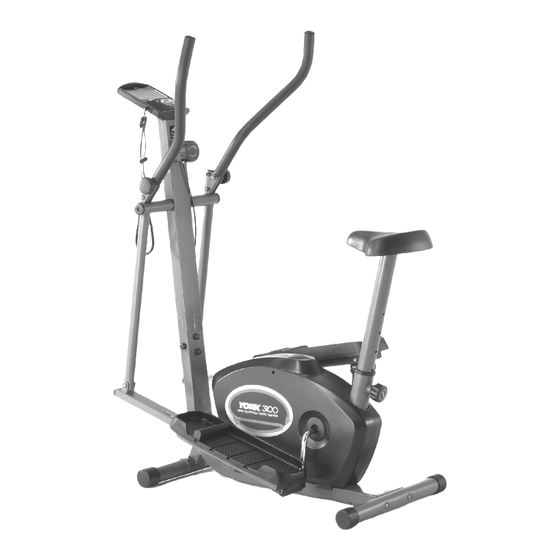
- Page 1 3 1 OO MAG ELLIPTICAL CROSS TRAINER EXERCISES & INSTRUCTION MANUAL 09 / 2002 TWN Product may vary slightly from pictured. COMPLIES WITH EUROPEAN STANDARD EN957 CLASS H...
-
Page 2: Safety Guidelines
Always check the YORK 3100 MAG. ELLIPTICAL CROSS TRAINER before using it, in particular make sure all parts are assembled, and nuts and bolts are tightened. Do not use the YORK 3100 MAG. ELLIPTICAL CROSS TRAINER if the unit is disassembled in any way. -
Page 3: Assembly Instruction
GENERAL REMOVE ALL THE PARTS OF YOUR MAG. ELLIPTICAL CROSS TRAINER 3100 FORM THE CARTON AND PLACE THEM ON THE FLOOR CAREFULLY. ASSEMBLING YOUR MAG. ELLIPTICAL CROSS TRAINER 3100 IS SIMPLE. WE RECOMMEND THAT YOU GET SOMEONE TO HELP YOU WHEN ATTACHING THE CRANK ARMS TO THE MAIN FRAME SHAFT. - Page 4 ATTACH THE FRONT POST FRONT Rest the front post on the main frame carefully as POST CHECK shown. MIDDLE WIRE Connect the sensor wire plug to the middle wire socket. Check middle wire runs up the front post and out the top - later this will connect to the computer.
- Page 5 3. ATTACH THE PEDALS TO THE POSTS Attach the pedals to the pedal posts NOTE: The pedals and crank arms are marked and secure, using the machine screws. R and L ( Right and Left ). The curved edge of each pedal must be fixed on the same side as the shorter pedal post.
- Page 6 ATTACH THE RIGHT PEDAL POST Fix the right pedal post to the right handle bar post and secure, using hex head bolt and locknut as shown. RIGHT #8504-22 #8504-61 HANDLE POST Attach the right crank arm to the right side square shaft as shown.
- Page 7 Tighten the hex head bolt to secure the right crank arm onto the shaft. Gently tap crank arm onto the main shaft using (e.g small hammer) then tighten the hex head bolt. Repeat procedure ensuring a SOLID AND SOLID AND SECURE FIT.
- Page 8 WARNING VERY IMPORTANT INFORMATION: THE CRANK ARM CAN ONLY BE ASSEMBLED ONCE AND MUST BE INSTALLED CORRECTLY AT THE FIRST ATTEMPT. THE LEFT PEDAL POST CRANK ARM MUST BE ATTACHED TO THE AXLE SO IT IS POINTING IN EXACTLY THE OPPOSITE DIRECTION TO THE RIGHT PEDAL POST CRANK ARM.
- Page 9 ATTACH THE LEFT PEDAL POST Fix the left pedal post to the left handle bar LEFT post and secure, using hex head bolt and HANDLE locknut as shown. POST #8504-22 #8504-61 Make sure you have read the WARNING page NOTE: TAKE CARE to ensure the left crank arm is attached to the shaft in the opposite direction from the right crank arm Attach the left crank arm to the left side...
- Page 10 Tighten the hex head bolt to secure the left crank arm onto the main shaft. Gently tap crank arm onto the main shaft using (e.g small hammer) then tighten the hex head bolt. Repeat procedure ensuring a SOLID AND SOLID AND SECURE FIT.
- Page 11 ATTACH THE HANDLE BARS Attach the right handle bar to the right handle bar adjustable bracket in position and secure, using the hex head bolt, metal bush and locknut into the bottom hole of bracket as shown. #8504-33A #8504-61 NOTE: The hex head bolt and metal bush must be threaded from the outside of the bracket towards to the handle bar so...
- Page 12 ATTACH THE COMPUTER Connect the middle wire plug to the socket of the computer as shown. Slide the computer wire into the front post and attach the computer to the front post bracket by using two machine as shown. #8504-36 Connect the ear lobe pulse sensor plug to socket on the side of computer.
- Page 13 ATTACH THE SEAT AND SEAT POST SEAT POST Attach the seat to the seat post using three washers and three locknuts. SEAT The washers and locknuts are located under the seat. Fit the seat post into the seat post mounting tube and secure in position with the seat height SEAT adjusting knob.
- Page 14 DESCRIPTION...
- Page 15 PARTS LIST KEY NO. PART NO. Q'TY(PCS) DESCRIPTION 8504-1 MAIN FRAME 8504-2 FRONT POST 8504-3N PEDAL POST (L&R) 8504-4 HANDLEBAR POST (R) 8504-5 HANDLEBAR POST (L) 8504-6 SEAT POST 8504-7 STABILIZER (F&R) 8504-8 RIGHT HANDLEBAR 8504-9 LEFT HANDLEBAR 8504-10 FOAM GRIP 8504-11 CHAIN COVER (R) 8504-12...
- Page 16 CHECK SET-UP FOR STANDING CROSS TRAINING Check handlebars Check seat set in set in forward lowest position. position. Check footplate slide adjuster is in correct position. SHOULD YOU REQUIRE ANY ASSISTANCE REGARDING THIS PRODUCT PLEASE CONTACT YORK DIRECTLY.
- Page 17 CHECK SET-UP FOR SEATED CROSS TRAINING Check handlebars in rear position. Check seat height. Your knees should not go above horizontal when cross training in a seated position. Adjust seat height accordingly. Check footplate slide adjuster is in correct position. SHOULD YOU REQUIRE ANY ASSISTANCE REGARDING THIS PRODUCT PLEASE CONTACT YORK DIRECTLY.
- Page 18 WARM UP - COOL DOWN STRETCHING Before and after exercising spend a few minutes slowly and EXERCISES gently stretching and warming up. THIGH STRETCH Stand with feet slightly apart (shoulder width). Bend one leg and grasp your ankle, bring it SHOULDER STRETCH CALF STRETCH up as far as you can comfortably: Hold for...
-
Page 19: Exercise Guide
BEFORE EXERCISING CHECK: You have adequate space ie. at least 2ft. (60cm) clearance on EXERCISE each side. Check all bolts and locking pins are secured and GUIDE not protruding. In particular check all the bolts and pins for wear, replace doubtful parts before using the equipment. Always use your elliptical trainer on a flat, level, solid surface. - Page 20 EXERCISE GUIDE cont.i Product may vary slightly from pictured. ALTERNATE FORWARD AND REVERSE MOTION. ROUTINE D: Exercise in the forward motion for 3 to 5 minutes, then slow down to a stop. Change to reverse motion for 1 to 3 minutes. Continue to alternate direction for the duration of your workout - between 5-20 minutes according to exercise intensity and fitness level.
- Page 21 PULSE RATE SENSOR FOR THE BEST RESULTS FOLLOW THESE INSTRUCTIONS: 1.) Remove any earrings etc. 2.) Rub your earlobe around 15 times to increase circulation. 3.) Make sure your ear is dry and keep your hair behind your ear so it dose not interfere. 4.) Clip the sensor to your earlobe as in (Diag.
- Page 22 YORK MAG. ELLIPTICAL CROSS TRAINER 3100 / COMPUTER INSTRUCTION A. INSTRUCTION Your computer is ideal for monitoring your performance and setting yourself targets. By measuring your pulse rate you can ensure exercise safely. At the same time you can monitor closely your improving condition and cardiovascular fitness.
- Page 23 C. SETTING FUNCTIONS Y o u c a n s e t a t a r g e t t i m e o r d i s t a n c e o n y o u r c o m p u t e r . W h e n y o u s t a r t e x e r c i s i n g t h e c o m p u t e r w i l l b e g i n t o c o u n t d o w n f r o m y o u r t a r g e t t o z e r o . W h e n i t r e a c h e s z e r o a n a l a r m w i l l b e e p . SCAN/ Automatically scans all functions in sequence displaying your progress without requiring you to press the mode key.
- Page 24 EXERCISE GUIDE FITNESS Many things contribute to fitness and well being but the most important factor is the condition of your heart and lungs and how efficient they are in delivering oxygen via your blood to your muscles. Your muscles use this oxygen to provide enough energy for daily activity. This is called aerobic activity (with oxygen).
- Page 25 TARGET ZONE PULSE MAXIMUM PULSE RATE RATE 85% OF MAX. EXERCISE SO THAT YOUR PULSE STAYS IN THIS RATE FOR AT LEAST 15-20 MINUTES 70% OF MAX. 55% OF MAX. COOL DOWN LEVEL RESET PULSE TIME WARM UP COOL DOWN THIS IS HOW YOUR PULSE SHOULD BEHAVE DURING GENERAL FITNESS EXERCISE.
- Page 26 HOW TO MONITOR YOUR HEART RATE DURING EXERCISE Now that you know where your training zone is, you ll I have to monitor yourself to be sure you re in it. Here s a simple rule, if you can t hold a conversation without gasping for breath you re probably above your training zone.
- Page 27 HOW LONG TO EXERCISE? To qualify as a true aerobic exercise with all the benefits we're mentioned, you must maintain your heart rate within your training zone for at least 12 uninterrupted minutes. If you exercise longer than 60 minutes the benefits are reduced and the risk of injury is increased. If you're just starting out on a new exercise program we'recommend you stay at the 12 minute minimum for at least a week.
-
Page 28: Limited Warranty
LIMITED WARRANTY WARRANTY YORK BARBELL LTD. warrants this product to be free from defects in workmanship and material, under normal use and conditions, for a period of one year on all steel parts, thirty days on all vinyl and upholstery, and ninety days on all other parts. - Page 29 PARTS ORDER FORM Enclose a check or money order with this form for replacement parts. Date of purchase Name of location where purchased Model number of item purchased Last name, First name Telephone number Address City State Part Description Part No. Q'ty Unit Price Total Total of order $...
Need help?
Do you have a question about the 3100 MAG and is the answer not in the manual?
Questions and answers