Petsafe In-Ground Fence Operating Manual
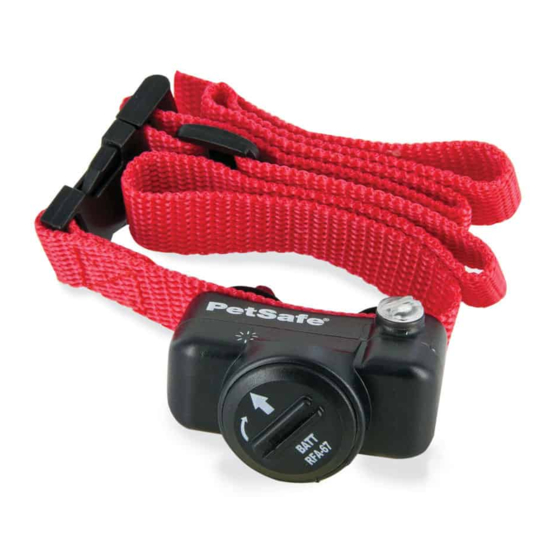
Receiver collar
Hide thumbs
Also See for In-Ground Fence:
- Operating and training manual (116 pages) ,
- Operating manual (56 pages) ,
- Operating and training manual (64 pages)
Advertisement
Table of Contents
- 1 Receiver Collar
- 2 How the System Works
- 3 Prepare the Receiver Collar
- 4 Fit the Receiver Collar
- 5 Taking Your Pet out of the Pet Area
- 6 Troubleshooting
- 7 Additional Information
- 8 Test Light Instructions
- 9 Short Loop Test
- 10 Terms of Use and Limitation of Liability
- 11 Customer Care International
- 12 Perchlorate Battery
- Download this manual
Advertisement
Table of Contents

Related Manuals for Petsafe In-Ground Fence


Summary of Contents for Petsafe In-Ground Fence
-
Page 1: Receiver Collar
PetSafe In-Ground Fence ® ™ Receiver Collar Operating Guide Please read this entire guide before beginning. -
Page 2: How The System Works
To get the most protection out of your warranty, please register your product within 30 days at www.petsafe.net. By registering and keeping your receipt, you will enjoy the product’s full warranty and should you ever need to call the Customer Care Center, we will be able to help you faster. -
Page 3: Prepare The Receiver Collar
fi nger tight. Check the tightness weekly. To Insert and Remove the Battery Note: Do not install the battery while the Receiver Collar is on your pet. This Receiver Collar utilizes a replaceable PetSafe battery ® (RFA-67). This unique battery is designed to make battery replacement easier and increase water protection. -
Page 4: Fit The Receiver Collar
A replacement PetSafe ® battery (RFA-67) can be found at many retailers. Contact the Customer Care Center at 1-800-732-2677 or visit our web site at www.petsafe.net to locate a retailer near you. Over Correction Protection In the unlikely event that your pet “freezes” in the Static Correction Zone, this feature limits the static correction duration to a maximum of 30 seconds. - Page 5 Place the Receiver Collar on your pet so that the “PetSafe” logo is facing your pet’s chin. Center the Contact Points underneath your pet’s neck, touching the skin. Note: It is sometimes necessary to trim the hair around the Contact Points to make sure that contact is consistent.
- Page 6 Important: For comfort, safety and effectiveness of product, please ensure the following: • During the first 2 weeks of training, do not use the training device on your pet without direct supervision. • Check the fit of the Receiver Collar to prevent excessive pressure. You should be able to insert one finger between the Contact Point and your pet’s skin.
- Page 7 To Re-Thread the Collar Slide Buckle The slide buckle prevents the collar from becoming loose around your pet’s neck. Ridges The ridges must be facing up; the collar will slip if it is not properly threaded. www.petsafe.net...
-
Page 8: Taking Your Pet Out Of The Pet Area
Taking Your Pet Out of the Pet Area Important: Remove the Receiver Collar and leave it in the Pet Area. Once your pet learns the Boundary Zone, he will be reluctant to cross it for walks or car rides. Option 1: Replace the Receiver Collar with a regular collar. Put your pet in a car that is within the Pet Area and drive him out of the Pet Area. -
Page 9: Troubleshooting
If using a Double Loop, make sure Boundary Wires are to activate. separated 3 to 5 feet. • If the Receiver Collar still has to be held on top of the Boundary Wire, contact the Customer Care Center at 1-800-732-2677. www.petsafe.net... -
Page 10: Additional Information
This system is not for vicious or aggressive pets. If your pet may pose a threat to others, DO NOT USE THIS SYSTEM. If you are unsure if your dog is aggressive, please consult your veterinarian or a certifi ed trainer. • PetSafe In-Ground Fence is for residential use only. ® ™ •... -
Page 11: Test Light Instructions
Note: The Receiver Collar is waterproof, which can make the beep hard to hear. Save the Test Light for future testing. If the Test Light does not fl ash, refer to the Troubleshooting section, or contact the Customer Care Center Boundary Wire at 1-800-732-2677. www.petsafe.net... -
Page 12: Short Loop Test
Short Loop Test The Short Loop Test is a simple test to determine if each component (Fence Transmitter, Receiver Collar and Boundary Wire) is functioning properly. Disconnect the Boundary Wire. Cut approximately 10 feet of unused Boundary Wire and connect it to the Boundary Wire Terminals. -
Page 13: Terms Of Use And Limitation Of Liability
Product if your pet is less than 5 pounds or if your pet is aggressive. If you are unsure whether this is appropriate for your pet, please consult your veterinarian or certifi ed trainer. Proper use includes reviewing the entire Guide provided with your Product and any specifi c Caution statements. www.petsafe.net... - Page 14 No Unlawful or Prohibited Use This Product is designed for use with pets only. This pet training device is not intended to harm, injure or provoke. Using this Product in a way that is not intended could result in violation of Federal, State or local laws. Limitation of Liability In no event shall Radio Systems Corporation be liable for any direct, indirect,...
- Page 15 Corporation, could result in not meeting compliance with FCC regulations and could void the user’s authority to operate the equipment. Australia This device complies with the applicable EMC requirements specifi ed by the ACMA (Australian Communications and Media Authority). www.petsafe.net...
-
Page 16: Customer Care International
Customer Care International United States / Canada: 1-800-732-2677 Australia: 1800 786 608 New Zealand: 0800 543 054 Caution This System is NOT a solid barrier. The system is designed to act as a deterrent, using Static Correction to condition pets to remain outside of the established barrier area. -
Page 17: Perchlorate Battery
Perchlorate Battery Perchlorate Material – special handling may apply. See www.dtsc.ca.gov/hazardouswaste/perchlorate. www.petsafe.net... - Page 18 1-800-732-2677...
- Page 19 www.petsafe.net...
- Page 20 Radio Systems ® Corporation 10427 Electric Avenue Knoxville, TN 37932 1-800-732-2677 www.petsafe.net Protected by US Patents 6,921,089 and D515,027. Other patents pending. 400-1116/1 ©2004 Radio Systems Corporation ®...
Need help?
Do you have a question about the In-Ground Fence and is the answer not in the manual?
Questions and answers