Petsafe In-Ground Radio Fence Operating And Training Manual
Hide thumbs
Also See for In-Ground Radio Fence:
- Operating and training manual (116 pages) ,
- Operating manual (56 pages) ,
- Operating manual (21 pages)

Related Manuals for Petsafe In-Ground Radio Fence


Summary of Contents for Petsafe In-Ground Radio Fence
-
Page 1: Operating And Training Guide
® PetSafe ™ In-Ground Radio Fence Operating and Training Guide Please read this entire guide before beginning... -
Page 2: Table Of Contents
® Thank you for choosing PetSafe , the #1 selling brand of electronic training solutions in the world. Our mission is to ensure your pet’s safety by providing you the tools and techniques to successfully train your pet. If you have any questions, please contact the Customer Care Center at 1-800-732-2677 or visit our website at www.petsafe.net. -
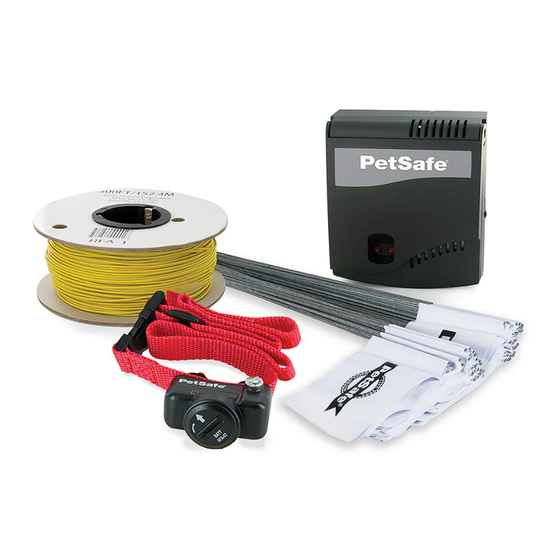
Page 3: Components
• Circular saw with masonry blade • Patching compound • Staple gun • Non-metallic collar and leash Note: For information on professional installation of your new PetSafe In-Ground Radio Fence , contact the Customer Care Center at 1-800-732-2677 or visit our website at www.petsafeprofessional.com. www.petsafe.net... -
Page 4: How The System Works
How the System Works The PetSafe In-Ground Radio Fence has been proven safe, comfortable, and effective for all pets over 8 pounds. The system works by producing a radio signal from the Fence Transmitter through up to 2800 feet of Boundary Wire. The Boundary Wire is buried or attached to a fi... -
Page 5: Operating Guide
Boundary Wire runs along the outside wall of the house. If this occurs, remove your pet’s Receiver Collar before bringing him inside, decrease the range using the Boundary Width Control knob or consider an alternative layout. www.petsafe.net... -
Page 6: Sample Layouts
Sample Layouts Sample 1: Perimeter Loop (Single Loop) The Perimeter Loop is the most common layout. This will allow your pet to freely and safely roam your entire property (2C). It can also protect gardens, pools and Sample 2 (2E): Perimeter Loop Using Existing landscaping (2D). -
Page 7: Position The Boundary Wire
Apply waterproofi ng compound (e.g. silicone caulk) in and around the wire nut or wrap the wires and the wire nuts with electrical tape to prevent moisture from corroding the copper. If your splice pulls loose, the entire system will fail. Make sure your splice is secure. 1/2" 1/2" wists/ft. www.petsafe.net... -
Page 8: Connect The Wires To The Fence Transmitter
Be sure to discard the used battery properly. A replacement PetSafe ® battery (RFA-67) can be found at many retailers. Contact the Customer Care Center at 1-800-732-2677 or visit our web site at www.petsafe.net to locate a retailer near you. 1-800-732-2677... -
Page 9: Set The Boundary Width And Test The Receiver Collar
Boundary Wire. If the Receiver Collar did not beep or the Test Light did not fl ash, see the “Troubleshooting” section. Important: Remove the Test Light before placing the Receiver Collar on your pet. Note: The Boundary Width is broken down into 20% Warning Zone and 80% Static Correction Zone. www.petsafe.net... -
Page 10: Install The Boundary Wire
To Attach the Boundary Wire to an Existing Fence The Boundary Wire of the PetSafe In-Ground Radio Fence™ can be attached to a chain link fence, split rail fence, or a wooden privacy fence. The Boundary Wire can be attached as high as needed. However, make sure the Boundary Width is set at a high enough range for the pet to receive the signal. -
Page 11: Place The Boundary Flags
3. Center the Contact Points underneath your pet’s neck, touching the skin. If your pet has a long or thick coat, use the enclosed long Contact Points to reach through the hair. Note: It is sometimes necessary to trim the hair around the Contact Points to make sure that contact is consistent. www.petsafe.net... - Page 12 4. Check the tightness of the Receiver Collar by inserting one finger between the end of a Contact Point and your pet’s neck. The fit should be snug but not constricting (9B). 5. Allow your pet to wear the collar for several minutes then recheck the fit.
-
Page 13: Training Guide
Training Guide Be Patient With Your Pet Important: Proper training of your pet is essential to the success of the PetSafe In-Ground Radio Fence™. Read this section completely before beginning to train your pet. Remember that the PetSafe In-Ground Radio Fence™ is not a solid barrier. -
Page 14: Days 3 And 4 - Continue Boundary Flag Awareness
Days 3 and 4 - Continue Boundary Flag Awareness Phase Perform three training sessions per day, each lasting 10-15 minutes. Goal: To introduce your pet to the Static Correction and teach where it happens. Setup: • Place the Receiver Collar on your pet’s neck. •... -
Page 15: Days 9 Thru 14 - Unleashed Supervision
You may initially need to convince your pet to leave the Pet Area with a food treat and lots of praise. Note: You may also carry your pet out of the Pet Area. Congratulations! You have now successfully completed the training program. www.petsafe.net... -
Page 16: Accessories
Accessories To purchase additional accessories for your PetSafe In-Ground Radio Fence™, contact the Customer Care Center at 1-800-732-2677 or visit our website at www.petsafe.net to locate a retailer near you. Component Part Number Battery - two pack RFA-67D-11 Power Adapter for the Fence Transmitter... -
Page 17: Short Loop Test
If you are unsure if your dog is aggressive, please consult your veterinarian or a certifi ed trainer. • The PetSafe In-Ground Radio Fence™ is for residential use only. • The Static Correction will get your pet’s attention, but will not cause harm. It is designed to startle, not to punish. -
Page 18: To Locate A Break In The Wire
To Locate a Break in the Boundary Wire Please follow these steps in determining where you have a break in your Boundary Wire: 1. Locate your original splice(s) and verify they have a good, solid connection. 2. Check your yard to determine any possible damage to the Boundary Wire (e.g. recent digging, aerating, rodent burrowing, or any other noticeable disturbance in your yard next to the Boundary Wire). -
Page 19: Fcc
Caution The PetSafe In-Ground Radio Fence™ is NOT a solid barrier. The system is designed to act as a deterrent to remind pets by electric stimulation to remain in the boundary established. It is important that you reinforce training with your pet on a regular basis. -
Page 20: Layout Grid
Layout Grid Mounting Template 3.000" (7.62 cm) Radio Systems Corporation 10427 Electric Avenue Knoxville, TN 37932 1-800-732-2677 www.petsafe.net 400-662 ©Copyright 2004, Radio Systems Corporation...
Need help?
Do you have a question about the In-Ground Radio Fence and is the answer not in the manual?
Questions and answers