Table of Contents
Advertisement
Invisible Fence
®
I n s t a l l - I t - Yo u r s e l f
Pet Containment
S y s t e m
I F - 1 0 0
Operation Guide
Thank you for purchasing the IF-100 Premium
Containment System.
This electronic dog containment system is among the
s a fest, most humane and effe c t i ve training products yo u
can bu y. Once your dog is properly trained, he will enjoy
hours of freedom within his new boundari e s, and you will
e n j oy the comfo rt of knowing that he has learned to stay
s a fely in your ya r d .
Please take a few minutes to read the instruction manu a l
p rior to your first use and retain the manual for future refe r-
e n c e. This instruction manual contains important progra m-
ming and set-up info rmation to help your training proceed
as successfully as possibl e. For best results, fo l l ow these
i m p o rtant ru l e s :
I M P O R TANT SAFEGUARDS
1. Obey all warnings contained in this manual.
2. The electronic dog collar is intended only for use on dogs.
Never attempt to use this product for any purpose not specifi-
cally described in this manual.
3. If you have any reason to believe that your dog may pose a
danger to others, or that it may harm itself if it is not kept from
crossing the IF-100 containment field wire, you should not rely
solely on this product to contain your dog.
4. Do not leave the collar on your dog for more than 12 hours per
day.
5. Never perform set-up procedures when the collar is on your
dog.
6. Never call or pull your dog into the containment field.
7. Keep all system components out of the reach of children.
8. The IF-100 containment system will not contain your dog
unless:
A. You train your pet as prescribed in the IF-100 training plan
(Section 7, pg.15).
B. The transmitter is on, connected to the containment loop
wire, and producing a signal along the loop wire.
C. The IF-100 collar receiver is worn properly by your dog.
D. The IF-100 collar receiver is adjusted so that the probes
are touching your dog's skin.
E. There is an adequate charge on the IF-100 collar receiver
battery. Do not use if you suspect the charge is low.
F. The 24-volt adapter is plugged into the transmitter and is
connected to a 110-volt household outlet.
9. The following precautions should always be taken:
A. Never service or install a system or any equipment during
a thunder or electrical storm.
B. Never install the transmitter where it could be exposed to
the elements, doing so will void the manufacturer's warranty.
C. Monitor the transmitter periodically to ensure that the unit
is operating properly and is producing a signal along the loop
wire.
D. Always remo ve your dog's collar receiver before making
any adjustments to your IF-100 containment system.
E. Use the lowest correction necessary to get the desired
behavior.
F. Allow your dog to get used to the collar before you begin
training. You want your dog to accept the collar as part of a
routine, not to associate the collar with the correction.
10. To prevent the elimination of an adequate safe zone in your
yard, any adjustments to the field width must be tested prior to
using the system with your dog.Once the field width has been
set and tested, turning the knob in a clockwise direction will
increase the correction zone and may eliminate the safe zone,
thus causing correction to be present throughout your entire
yard.If you have any questions, please contact invisible Fence
at 1-800-688-4364, before using the system with your dog.
11. Read all instructions before using this product. If you ha ve
any questions or concerns after reading this information, contact
Invisible Fence at 1-800-688-4364.
IMPORTANT
Realize that because individual dogs have unique tempera-
ments, there is no way of knowing how your dog will react to its
Introduction to this product. For the safety of your dog, initial
training should take place using a six foot or retractable leash to
keep you in control of the situation. Also realize that an aggres-
sive animal could turn against the handler upon receiving the
correction. Therefore, if you feel your dog has an aggressive
temperament and/or he has a history of aggressive behavior,
you should consult a certified animal behaviorist before using
this product. Please refer to the Section 5.B. Setting the
Transmitter Controls, Section 5.C. Important Notes about the
Collar, and Section 6.Tips for Containment Training before pro-
ceeding.
IMPORTANT NOTICE: This equipment has been tested and found to comply with
the limits for a Class B digital device, pursuant to Part 15 of the FCC Rules. These
limits are designed to provide reasonable protection against harmful interference in
a residential installation.This equipment generates, uses and can radiate radio fre-
quency energy and, if not installed and used in accordance with the instructions,
may cause harmful interference to radio communications. However, there is no
guarantee that interference will not occur in a particular installation. If this equip-
ment does cause harmful interference to radio or television reception, which can
be determined by turning the equipment off and on, the user is encouraged to try
to correct the interference by one or more of the following measures:
• Reorient or relocate the receiving antenna.
• Increase the separation between the equipment and receiver.
• Connect the equipment into an outlet on a circuit different from that to which the
receiver is connected.
• Consult the dealer or an experienced radio/TV technician for help.
Caution: Changes or modifications to any component, not expressly approved by
Invisible Fence, Inc., could void the user's authority to operate this equipment.
The term "IC:" before the radio certification number only signifies that Industry of
Canada technical specifications were met.
1.
Advertisement
Table of Contents

Subscribe to Our Youtube Channel
Related Manuals for Petsafe IF-100


Summary of Contents for Petsafe IF-100
- Page 1 However, there is no guarantee that interference will not occur in a particular installation. If this equip- A. You train your pet as prescribed in the IF-100 training plan ment does cause harmful interference to radio or television reception, which can (Section 7, pg.15).
- Page 2 MANUAL PRIOR TO INSTALLATION OR USE OF THIS is also capable of containing multiple dogs simultane- SYSTEM. ously. Although the IF-100 is sold with one collar receiver, additional IF-100 collar receivers can be pur- This Quick Start Guide is provided for people who are chased from Invisible Fence by calling 1-800-688-4364.
- Page 3 ing plate to the wall using the supplied hardware. Boundary wire Making sure the POWER switch on the transmitter is in the OFF position, place 8 AA alkaline backup batteries (optional, but recommended) in the battery compart- Containment Twisted pair to transmitter; field (invisible);...
- Page 4 THE SYSTEM AND ARE SURE IT IS WORKING Containment Field PROPERLY. TAKE CARE NOT TO NICK OR SCRAPE THE WIRE INSULATION DURING INSTALLATION. AN INTERMITTENT SIGNAL OR NO SIGNAL MAY OCCUR. 6. Make the Final Connections (See Section 4.F, pg 10 for details) Safe Zone Determine where the boundary wire will enter the build-...
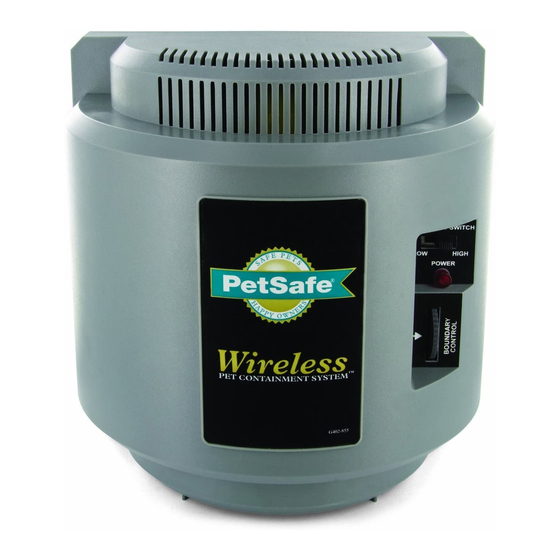
- Page 5 10.Indicator Light and Alarm - The light located on the front face of the transmitter will indicate the following conditions: 4.Charge Reminder - The REMINDER switch allows you to IF-100 TRANSMITTER STATUS INDICATIONS select a reminder interval of 60 (Labeled A) or 30 (Labeled B) STATUS LIGHT ALARM CONDITION days or turn the function OFF.
- Page 6 2. Run-Through Prevention - Special features are incorporated in the IF-100 system so your dog cannot "run-through" the containment field without activating a Your system includes a lightning protection unit, which strong correction.
- Page 7 To prevent your dog from playing in the side yard, keep the I N S TALLING THE IF-100 CONTA I N M E N T S Y S T E M wire a distance equal to the field width less one foot from the house.
- Page 8 Proceed around the back yard until you return to the opening and will provide easy access to an exterior wall where the leading to the wall transmitter. This design will keep the back containment wire can penetrate. When selecting a location, entrances to the house free from corrective signals.
- Page 9 wall stud, drill 3/32-inch diameter pilot holes at the marked receiver toward the end of the charging cradle marked with an locations. arrow and identified on the label. Fasten the mounting plate to the mounting location using the collar receiver light to this end supplied screws.
- Page 10 2. Placing the Wire boundary loop wire to the transmitter . For the system to work properly, the wire must make one con- DO NOT BURY THE WIRE UNTIL YOU HAVE TESTED THE tinuous loop. The signal is transmitted from one terminal of SYSTEM AND ARE SURE IT IS WORKING PROPERLY.
- Page 11 or release the wire. Boundary Wire 5. Plugging in the Power Adapter Splice Make sure the POWER switch on the transmitter is in the OFF position. Plug the power adapter into the power outlet on the right side of the Lightning Protector. Plug the other end of the power adapter into the POWER jack on the transmitter.
- Page 12 SECTION 5. signal coupling;however, you may not be able to completely USING THE IF-100 PREMIUM eliminate the effect. The unwanted signal coupling can be C O N TAINMENT SYSTEM minimized by orienting the boundary wire so that it is perpen- A.Fitting the Collar Receiver to Your Dog...
- Page 13 form this check each time you place the collar receiver collar receiver light to this end on your dog. B.Setting the Transmitter Controls 1. Correction Level Settings Always use the lowest correction level necessary to contain your dog. The goal is for your dog to associate an unpleasant consequence with ignoring the training and straying outside the boundary you have defined.
- Page 14 tery power. When the system is using battery power, a probes. Holding the receiver by the case, NOT by the reduction in the containment field width may occur and probes, walk into the containment field.With the receiv- is dependent on the length of wire being used and the er held at the height of your dog’s neck with the probes containment field width distance setting.
- Page 15 SECTION 7. neck and snug with the probes touching the skin. THE TRAINING PLAN The goal of Invisible Fence ® training is: • To teach your dog to identify and retreat from the boundaries. • To make the training fair--so your dog will understand the consequences of leaving the yard.
- Page 16 dog toward the boundary. Your dog may indicate he off lead training. hears the warning sound by tilting his head or twitching In fact, it's wise to spend more quality time in the yard his ears. The instant the dog hears the warning sound, with your dog.The more your dog stays on the proper- give a tug on the lead and bring him back.
- Page 17 Dog Response Possible Solutions: Problems: 1. Dog appears to not "feel" 1.Collar fit is not tight enough to make good skin contact.See Section the correction. 5.A page 12. 2.Collar probes not long enough to make good skin contact.Use long probes supplied with system. 3.Dog’s hair too long or thick.
- Page 18 Dog Response Problems: Possible Solutions: Section 4.G.4.page 12. 3.Reposition boundary wire away from fixed metal objects such as metal buildings, chain-link fences, large satellite dishes, etc. 4.Move large metal objects such as swing sets and trampolines farther away from the boundary wire. 6.
- Page 19 Transmitter Problems: Possible Solutions: 3.If the green power light on the lightning protector is not illuminat- ed, verify that the outlet is working properly by plugging in a known working item such as a radio. 4.Unplug the lightning protector and plug the power adapter directly into the 110-volt outlet.If the transmitter operates when bypassing the lightning protector, contact Invisible Fence for a war- ranty replacement lightning protector.
- Page 20 1. Remove the existing pre-twisted wire pair from the lation.) The following tests must be performed to locate lightning protector LOOP connector by pressing the red these damaged sections. release levers on the connector and pulling the wires 3. Bend the leads of the RF Choke into the shape free from the unit.
- Page 21 11. If the pulsating static stops, weakens, or changes 8. Place the test light on the collar receiver. With the pitch, mark the spot with a flag or stick. No sound indi- collar strap in hand, back up to be outside the field and cates a complete break in the wire.
- Page 22 R A N T Y, CONTRAC T, NEGLIGENCE OR OT H E R- for details. WISE. Some states do not allow the exclusion of inci- dental or consequential damages, so this limitation may The IF-100 Pet Containment System is also covered by...
- Page 23 not apply in your particular state. This limited warranty WARNING 2: gives you specific legal rights, and you may ha ve other The control panel of the wall transmitter includes visual and rights which vary from state to state. audio signals to warn of a system malfunction, and is there- To the extent permitted by applicable law, THIS LIMIT- fore intended to be installed in a place where such signals ED WARRANTY SPECIFICALLY EXCLUDES ANY...
- Page 24 Lightning Protector Instructions The Lightning Protector is designed to protect electronic pet containment system wall-mounted transmitters against damage from lightning. Lightning Protector contains two protectors. One stops lightning currents from entering through the loop wire; the other stops lightning from enter- ing through the AC power connection.
-
Page 25: Installation Instructions
Lightning Protector Instructions INSTALLATION INSTRUCTIONS The Lightning Protector takes only minutes to install: 1.Turn off your containment system. If your pet is in the containment area, make sure that it is otherwise contained, or bring it inside. 2. Do not begin installation if there is visible lightning in the area or if you hear thunder. - Page 26 holes on the bottom of the Lightning Protector. WARNING: Verify the loop and transmitter wires are connected to the proper Lightning Protector terminals. Damage to the Lightning Protector and transmitter can occur if connections are reversed. 6. Plug the transmitter power AC adapter into an AC outlet on the side of the Lightning Protector (see diagram).The AC adapter cord may be secured to the bottom of the Lightning Protector using the included wire tie.
- Page 27 INVISIBLE FENCE ® STANDARD LIFETIME WARRANTY Invisible Fence warrants to the purchaser of this Lightning Protector, for his or her life, that this Lightning Protector shall be free of defects in design, material, or workmanship and that Invisible Fence will replace any defective unit and repair any unit that has suffered damage from a lightning surge or line overvoltage.
Need help?
Do you have a question about the IF-100 and is the answer not in the manual?
Questions and answers