Table of Contents
Advertisement
Quick Links
Advertisement
Table of Contents

Related Manuals for XtendLan XL-ICA301A


Summary of Contents for XtendLan XL-ICA301A
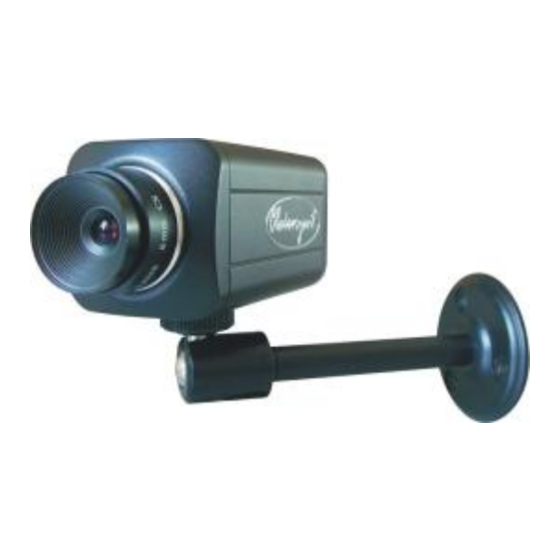
- Page 1 IP CAMERA User’s Manual XL-ICA301A Stand Alone Type SOHO SURVEILLANCE MANUAL...
- Page 2 IP CAMERA User’s Manual NOTE: This equipment has been tested and found to comply with the limits for a class digital device, pursuant to part 15 of the FCC Rules. These limits are designed to provide reasonable protection against harmful interference when the equipment is operated in a commercial environment.
- Page 3 IP CAMERA User’s Manual Trademarks and/or registered trademarks are the property of their respective owners The information presented in this publication has been carefully prepared and is believed to be correct at the time of publication. However, no responsibility will be assumed for any inaccuracies. Specifications are subject to change without notice.
-
Page 4: Table Of Contents
MART PHONES I.Snapshot: ............................45 II. Firefox (Server Push): ........................46 III. To play on MPlayer, VLC media player, Coreplayer (Smart Phones) ..........49 IV. Install XtendLan IP Camera Player on Smart Phones ..............51 F. 3 ........... 55 ARTY... - Page 5 IP CAMERA User’s Manual Notes, Cautions, and Warnings There are two levels of special notation used in this manual. They are: WARNING: If the actions indicated in a “WARNING” are not complied with, injury or major equipment damage could result. A warning statement typically describes the hazard, its possible effect, and the measures that must be taken to reduce the hazard.
-
Page 6: Package Content
IP CAMERA User’s Manual Package Content 1. Indoor Camera Outdoor Camera 2. Power Adapter : 5V, 1A (indoor) 5V, 1.5A (outdoor) 3. Utility CD :... -
Page 7: Installation
IP CAMERA User’s Manual 1. Installation 1-1 Connect IP CAMERA to your Local Network CAUTION: Please power adapter that is provided with the camera. Connecting camera to other power source will cause permanent damage to the camera. NOTE: Please use straight Ethernet cable (CAT. 5e) to connect camera to your home/ office network switch/ hub or a broadband router. - Page 8 IP CAMERA User’s Manual “Right Click” on the small icon in “System tray” (lower right of Taskbar) as indicated in above picture, Adjust the “IP Camera Tool“ to “English” mode, If you can’t see text normally. Select Camera then “Right Click” on selected camera: “IP Camera Tool”...
- Page 9 IP CAMERA User’s Manual with camera login screen. Note: You can choose to modify the camera to fixed IP by Choosing “Network Configuration” Warning: Please consult your office network administrator to get a free IP for your IP Camera, duplicated IP address will cause undesired problems.
-
Page 10: There Is Not Dhcp Server In Your Lan
IP CAMERA User’s Manual 1-1-2 There is DHCP Server in your LAN The camera will not be able to get IP from DHCP Server (Factory Setting). Please use “IP Camera Tool” in Utility CD to search and link to cameras. “IP Camera Tool”... - Page 11 IP CAMERA User’s Manual Type “ipconfig /all” at command prompt,...
- Page 12 IP CAMERA User’s Manual You will be able to find you computer network settings. After input correct network settings, press “OK” Follow the procedures described in 1-1-1 There is DHCP Server in your LAN There is no Password set by factory default, please leave the Password field blank as it is.
-
Page 13: Connect Ip Camera To Your Computer Directly
IP CAMERA User’s Manual 1-2 Connect IP CAMERA to your computer directly Because there is no DHCP Server available, you have to setup the network settings manually. Please follow the procedures in previous sections (1-1-2) to link to your camera. Note: Please be aware of "Your computer IP must be... - Page 14 IP CAMERA User’s Manual Example: http://your_camera.dyndns.org:port Please reference more details of Router & DynDNS setup on Reference User’s Manual. Note: 1. Broadband router is firewall in nature will block all accesses from Internet, you will need to set virtual server (port forwarding) on your router, normally we will always suggest to use port >...
-
Page 15: Software Installation
IP CAMERA User’s Manual 2. Software Installation 2.1 Utility CD. Please insert the “Utility CD” into your CD-ROM drive, auto-run program will start and below screen will guide you through installation. To install software and ActiveX plug-in Please click on the “Install 1st” tab to install software and ActiveX plug-in. - Page 16 IP CAMERA User’s Manual Click on “Next”,...
- Page 17 IP CAMERA User’s Manual Click on “Close”, The IP Camera search utility software icon will display on your desktop. Click on the “IP Camera Tool” tab to search IP CAMERA IP cameras in your local network.
-
Page 18: Login & Access Camera Video
IP CAMERA User’s Manual 2.2 Login & Access Camera video “Double Clicks” or ”Right Click” on the camera you want to connect, choose “Access IP Camera” will bring up IE browser with camera login screen. Type “admin” in User field, there is no admin Password set by factory in”... -
Page 19: Activex Security Setup
IP CAMERA User’s Manual 2.3 ActiveX Security Setup 1. Install “IP Camera Tool”, ActiveX controller is installed simultaneously (click on 1st” “Install tab). 2. Download ActiveX controls and set the safety property of IE in the PC when you view it at the first time only: In order to download &... - Page 20 IP CAMERA User’s Manual IE browserÆ“Tool”Æ“Internet Options”Æ“Security“Æ“Custom Level”Æ ”ActiveX control and Plug-ins” three settings should set to “Enable”,...
- Page 21 IP CAMERA User’s Manual Enable:Download unsigned ActiveX controls Enable:Initialize and script ActiveX controls not marked as safe Enable:Run ActiveX controls and plu-ins After installed CAMERA ActiveX controls, enable “Run ActiveX controls and plu-ins”, you can view camera video as followed:...
- Page 22 IP CAMERA User’s Manual Choose OSD to add time stamp; double click on video to view full screen Enable duplex audio by clicking “Listen” & “Talk-back” buttons...
- Page 23 IP CAMERA User’s Manual reversal : used to upside down the image for ceiling mount. Mirror : used to mirror image for ceiling mount. PAN/ TILT control...
- Page 24 IP CAMERA User’s Manual Description of Monitoring Page Resolution : 320x240(QVGA)/ 640x480(VGA) Working environment Mode : indoor ( 50Hz/ 60Hz) / outdoor Photo parameter modulation:Brightness, Contrast Scout menu : “Snapshot” and “Record” Scout window setting : 1. May see only current window 2.
- Page 25 IP CAMERA User’s Manual Note: If you will access from remote through Internet, please input URL (Domain name) in Host field. LAN IP won’t be accessible through Internet...
- Page 26 IP CAMERA User’s Manual Click on channels to start recording: To take snapshot of present scene on screen, click on the “snapshot” button:...
-
Page 27: Device Info
IP CAMERA User’s Manual Administrator setup page Page 2.3.1 Device Info Indicates Camera ID & Firmware version. Device Firmware Version x.x.x.17 or later will support below http command: admin Username: Password: Type the snapshot http commands to IE browser address field, you will get real time snapshot immediately, press F5 key (refresh) will update the new snapshot. -
Page 28: Date & Time Settings
IP CAMERA User’s Manual 2.3.3 Date & Time Settings Camera will synchronize with Internet Server every hour automatically. 2.3.4 Users Settings Administrator: Can change settings Operator: Can select Resolution, Indoor/ Outdoor, PTZ (PTZ model only) Visitor: Can only view. CAUTION: Please always write down the password and keep password in safe place. -
Page 29: Multi-Device Settings
IP CAMERA User’s Manual 2.3.5 Multi-Device Settings Add 3 more cameras from “Device List In LAN” Note: Please use URL in Host if you will access from Internet. LAN IP address will not be accessible from Internet. -
Page 30: Wireless Lan Settings (2.4Ghz Wi-Fi Ap Required)
IP CAMERA User’s Manual 2.3.6 Basic Networking Settings Factory default the “Using DCHP” is chosen, the IP Camera will try to get IP address automatically from DHCP SERVER of your network. You can also configure the IP address manually. IP: enter the IP address assigned. Mask: Enter the subnet mask. - Page 31 4. Go to command mode (C:\), use "ARP -d" to clear arp table 5. Access the same IP address (wired IP address) to connect IP CAMERA wirelessly. 6. If you will us multiple XtendLan Wi-Fi IP Cameras, please set your 802.11g/b AP to g only mode to get best...
-
Page 32: Adsl Settings
IP CAMERA User’s Manual faster. 2.3.8 ADSL Settings Connect camera LAN port directly to ADSL modem. Please request User account and Password from your ADSL service provider. If the IP is not fixed (dynamic), Click “Report ADSL IP by Mail” will result email notification every time the ADSL IP is changed. -
Page 33: Ddns Service Setting
IP CAMERA User’s Manual 2.3.10 DDNS Service Setting DDNS Setting: IP CAMERA IP camera supports protocols from three DDNS providers: 1. Oray.net 2. Dyndns.org 3. 3322.org Domain Name: the second-level name you apply for and acquire at Oray.net, Dyndns.org, or 3322.org please read more details in “Reference User’s manual” User and Password: the user name and password when applying for the DDNS service. -
Page 34: Mail Service Settings
IP CAMERA User’s Manual 2.3.11 Mail Service Settings Users can assign the e-mail boxes to receive and send mails. The email box is used for receiving the snapshots sent after alarm, report the public wan IP address after successful PPPoE dial-up. Note: Only Alarm Service Settings->... -
Page 35: Ftp Service Settings
IP CAMERA User’s Manual 2.3.12 FTP Service Settings Note: The Upload folder must be created before successful files upload. Remember to add “/” before folder name Don’t upload when Interval is zero. The filename will include the time stamp each snapshot being taken. FTP Mode: support standard(POST) mode and passive(PASV) mode. -
Page 36: Alarm Service Settings
IP CAMERA User’s Manual 2.3.13 Alarm Service Settings Note: Don’t upload when Interval is zero. IO Linkage will trigger alarm output. Motion DetectArmed: Motion object will trigger alarm, FTP upload to server will start to send snapshots for one minute, alarm emails will attach 5 snapshots. -
Page 37: Appendix
IP CAMERA User’s Manual Appendix A. IP CAMERA Rear Panel LAN: RJ-45/10-100 Base T ANT : For Wi-Fi wireless (optional) DC5V: 5V/1A Power supply (indoor, Wi-Fi) B. IP CAMERAIR Tail Wire RESET: Restore factory default in case of forgetting password. ALARM IN: Connect to Sensor/ Detector, Normal Open, will trigger alarm when Short circuit (closed) DC5V: 5V/1A Power supply (outdoor, IR, Wi-Fi) - Page 38 IP CAMERA User’s Manual To connect the Active Infrared Sensor to IP CAMERAR camera ALARM IN, will trigger alarm when light beams interrupted. Manually ON/OFF the alarm out...
- Page 39 IP CAMERA User’s Manual WARNING: If connect higher power loading (> 1A) directly to camera alarm out will cause damage the camera. Higher current (>0.5A) will accelerate aging of the relay on camera PCB, external relay box is always recommended to protect the camera.
-
Page 40: Technical Data
IP CAMERA User’s Manual C. Technical Data Image System - Compression: Video; Motion JPEG hardware compression AUDIO; ADPCM - 350,000 pixels CMOS sensor - Dynamic Range : 60dB - S/N ratio : 50dB - f: 6.0mm to infinity, C/CS mount lens - Min. - Page 41 IP CAMERA User’s Manual - Optional Digital FTP alarm, scheduling, NFS storage functions - Optional Alarm inputs and outputs, Power over Ethernet, Wi-Fi wireless - Optional DVR client software for 16 cameras monitoring. - OEM UPnP and firewall penetration, installation free solution available.
-
Page 42: Cross Ethernet Cable Making Tip
IP CAMERA User’s Manual D. Cross Ethernet Cable Making Tip I. LAN Plug Pin: 1 ~ 8 II. LAN Cable PART-A PART-B III. Connection Method a. Connect LAN Cable Part-A and LAN plug by order as one to one . b. - Page 43 IP CAMERA User’s Manual...
-
Page 44: Snapshots / Server Push / Smart Phones
IP CAMERA User’s Manual E. Snapshots / Server Push / Smart phones I.Snapshot: http://IPCAMERA-IP-address:port/snapshot.cgi?user=admin&pwd= Just type the snapshot http commands to IE browser address field, you will get real time snapshot immediately, press F5 key will refresh the new snapshot. admin is the IP CAMERA username, password is blank. -
Page 45: Firefox (Server Push)
IP CAMERA User’s Manual II. Firefox (Server Push): http:// IP CAMERA-IP-address:port/videostream.cgi?user=admin&pwd= admin is the IP CAMERA username, password is blank. - Page 46 IP CAMERA User’s Manual Due to the security concerns, the firefox explorer doesn’t support ActiveX controls by default, but we can add a plug-in named “IE-Tab” which will add ActiveX controls support to firefox, you can download the “IE-Tab” with the firefox explorer from below link: https://addons.mozilla.org/en-US/firefox/addon/1419 On the download page, select the right version for your browser, download it, then...
- Page 47 IP CAMERA User’s Manual After download complete, a dialog box will popup Click “Install Now”button to start installation After installation, click “Restart Frefox” button to restart the browser. Login your camera and locate the monitoring page, click your mouse’s right button, click the new menu item named View page in IE-Tab to login device again.
-
Page 48: To Play On Mplayer, Vlc Media Player, Coreplayer (Smart Phones)
IP CAMERA User’s Manual III. To play on MPlayer, VLC media player, Coreplayer (Smart Phones) Syntax http://user:pwd@host:port/videostream.asf http://user:pwd@host:port/videostream.cgi http://host:port/videostream.asf?user=&pwd= http://host:port/videostream.cgi?user=&pwd= Example http:// IP CAMERA_IP_Address:port /videostream.asf?user=admin&pwd= http://www.ipcamera.com.tw:8206/videostream.asf?user=user&pwd=1234 http://www.ipcamera.com.tw:8206/videostream.cgi?user=user&pwd=1234... - Page 49 IP CAMERA User’s Manual Play video stream on Linux:...
-
Page 50: Install Xtendlan Ip Camera Player On Smart Phones
Since there are too many mobile phones available in market, we are not able to guarantee that the XtendLan IP Camera Player we provide will work on all mobile phones, or guarantee 100% compatibility to all GPRS/3G mobile phones that support MIDP 2.0 (Mobile Information Device Profile). - Page 51 Use 2 4 6 8 keys to control PAN/ TILT (up down left right). Use 1 3 5 7 keys to control PAN Scan/Stop ; TILT Scan/Stop. If connect phones by Wi-Fi can search XtendLan ICA30x series IP cameras in LAN.
- Page 52 IP CAMERA User’s Manual...
- Page 53 IP CAMERA User’s Manual...
-
Page 54: Rd Party Video Surveillance And Recording Software
IP CAMERA User’s Manual F. 3rd Party Video surveillance and Recording Software I. go1984 Copyright © Logiware GmbH ( http://www.go1984.com IP CAMERA Settings: Uri : videostream.cgi... - Page 55 IP CAMERA User’s Manual ========================== The End =========================...
Need help?
Do you have a question about the XL-ICA301A and is the answer not in the manual?
Questions and answers