Table of Contents
Advertisement
Quick Links
OWNER'S MANUAL &
INSTALLATION GUIDE
Installer: This booklet must be given to the product owner. Please add important information below.
Model # ___________________________________ Purchase Date ___________________________________
Serial # ___________________________________
Note: Read all instructions before proceeding with installation.
All specifications are ± 3/8'' and are subject to change without notice. Dimensions listed in inches (mm).
Distributor ___________________________________
Advertisement
Table of Contents

Related Manuals for Aquatic ESTATE AIR-WHIRLPOOL


Summary of Contents for Aquatic ESTATE AIR-WHIRLPOOL
- Page 1 OWNER’S MANUAL & INSTALLATION GUIDE Installer: This booklet must be given to the product owner. Please add important information below. Model # ___________________________________ Purchase Date ___________________________________ Serial # ___________________________________ Distributor ___________________________________ Note: Read all instructions before proceeding with installation. All specifications are ± 3/8’’ and are subject to change without notice. Dimensions listed in inches (mm).
-
Page 2: Table Of Contents
Estate Air-Whirlpool Owner's Manual & Installation Guide TABLE OF CONTENTS PRODUCT WARRANTY REGISTRATION INFORMATION IMPORTANT SAFETY INSTRUCTIONS 4 – 5 USER INFORMATION FCC INFORMATION AQUATIC LIMITED LIFETIME WARRANTY INSTALLATION INSTRUCTIONS Pre-Installation Procedures Structural Preparation 9 – 10 Factory Installed Tile Flange... -
Page 3: Product Warranty Registration Information
Estate Air-Whirlpool Owner’s Manual & Installation Guide AQUATIC Product Warranty Registration Information Thank you for choosing an Aquatic bath. You have chosen one of the finest bath products in the industry! Aquatic supports your purchase with strong commitments to quality and customer satisfaction. IMPORTANT! IMPORTANT! To activate Product Warranty please register with Aquatic. -
Page 4: Important Safety Instructions
Estate Air-Whirlpool Owner's Manual & Installation Guide IMPORTANT SAFETY INSTRUCTIONS WARNING: When using this unit, basic precautions should always be followed. Failure to follow these instructions could result in personal injury, electric shock, or fire. READ AND FOLLOW ALL INSTRUCTIONS: •... -
Page 5: Important Safety Instructions
Estate Air-Whirlpool Owner’s Manual & Installation Guide IMPORTANT SAFETY INSTRUCTIONS Before taking your first air-whirlpool bath, be sure that you are familiar with all the controls and switches [See BATHSIDE CONTROL SYSTEMS starting on page 15.] and that the unit is operating properly. [See INSTRUCTIONS start- ing on page 4.]... -
Page 6: User Information
Estate Air-Whirlpool Owner's Manual & Installation Guide WHIRLPOOL USER INFORMATION PLEASE NOTE: The air-whirlpool action may cause even small amounts of bubble bath or shampoo to foam excessively. Exercise modera- tion in experimenting with different soap products. No servicing of this product should be done by the user. There are no user serviceable parts. All controls are located in the control recesses on the lip of the tub. -
Page 7: Aquatic Limited Lifetime Warranty
EXCLUSIVE REMEDY Aquatic will, at its option, repair or replace (without removal or installation) the affected components of any defective Unit or System; repair or replace (without removal or installation) the entire defective Unit or System; or refund the then-current list price of the Whirlpool, Air Bath, or Tub. In all cases, a reasonable time period must be allowed for warranty repairs to be completed. -
Page 8: Installation Instructions
4. With the pump running, turn on the blower. Check all functions. 5. Inspect the tub completely. Any defect must be reported to Aquatic, prior to installation in order to have it covered by warranty. Should inspection indicate any damage, do not install the bath. -
Page 9: Structural Preparation
Estate Air-Whirlpool Owner’s Manual & Installation Guide INSTALLATION INSTRUCTIONS STRUCTURAL PREPARATION Note: The bath should remain in its shipping carton until time of installation. 1. Literature dimensions are for reference only. Installation dimensions should be taken directly from the tub. An access panel of 16”w x 16”h minimum must be provided at the pump end of the air-whirlpool allowing sufficient clearance to... -
Page 10: Factory Installed Tile Flange
Estate Air-Whirlpool Owner's Manual & Installation Guide INSTALLATION INSTRUCTIONS STRUCTURAL PREPARATION (CONTINUED) 5. When placing the tub on a platform or cut out, the opening should be 1” smaller than the specified rim dimensions. Extreme care must be taken in this type of installation to ensure the tub will come to rest entirely on the leveling feet or ABS Support Base. -
Page 11: Installation Procedures For Integrally Skirted Models
Estate Air-Whirlpool Owner’s Manual & Installation Guide INSTALLATION INSTRUCTIONS INSTALLATION PROCEDURES FOR INTEGRALLY SKIRTED MODELS 1. To avoid obstructions during installation, make sure water lines, spout pipes and valve plumbing do not project into alcove. 2. Ledger Strip: Fasten a 1” x 3” (25mm x 75 mm) ledger strip along rear for alcove and along both sides in corner installations at Dimension LH. -
Page 12: Plumbing
5 minutes. Check for leaks carefully both while pump is running and has been turned off. Allow water to stand in tub for at least 30 minutes before draining. Aquatic WILL NOT BE RESPONSIBLE FOR WATER DAMAGE OF ANY KIND IN CONNECTION WITH ONE OF OUR WHIRLPOOL BATHS. - Page 13 Estate Air-Whirlpool Owner’s Manual & Installation Guide INSTALLATION INSTRUCTIONS ELECTRICAL INSTALLATION (CONTINUED) KEYPAD CABLE BLOWER WATER DETECTOR PROBE NEMA PLUG PUMP CONTROL BOX (OPTIONAL) UP/HAUT LIGHT CONTROL BOX UP/HAUT OUTPUT INTPUT W/D KEYPAD AUX OUTPUT INTPUT W/D KEYPAD AUX NEMA PLUG...
-
Page 14: Final System Test & Clean-Up
5. Dulled areas can be restored to a high gloss with white or cream-colored automotive rubbing compound, followed by application of carnauba wax or white or cream automotive paste wax and buffing. 6. Major gouges require professional repair. Contact Aquatic to arrange factory-authorized repair services. Aquatic... -
Page 15: Operation
Estate Air-Whirlpool Owner’s Manual & Installation Guide OPERATION BATHSIDE CONTROL SYSTEMS BLOWER CYCLES 4: SPEED INCREASE 2: ON/OFF BLOWER 5: SPEED DECREASE 1: ON/OFF PUMP KeyPad Functions 1: On/Off Pump 1st Press: The pump starts 2nd Press: The pump stops... - Page 16 Estate Air-Whirlpool Owner's Manual & Installation Guide BATHSIDE CONTROL SYSTEMS W/ OPTIONAL CHROMATHERAPY 4: SPEED INCREASE BLOWER CYCLES 5: SPEED DECREASE 2: ON/OFF BLOWER 6: CHROMATHERAPY 1: ON/OFF PUMP KeyPad Functions 1: On/Off Pump 1st Press: The pump starts 2nd Press: The pump stops...
-
Page 17: Jet Operations
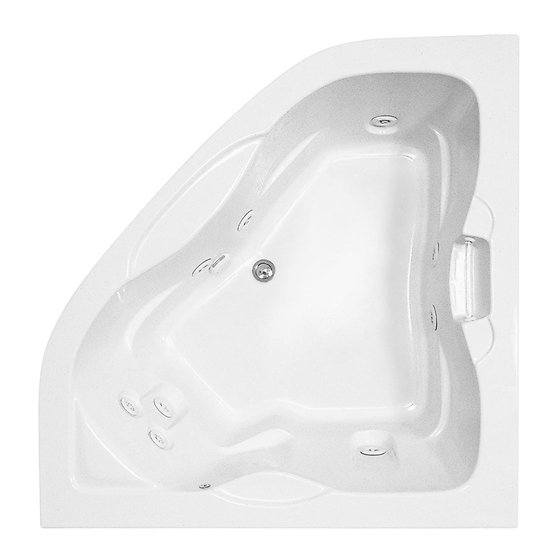
Estate Series Whirlpool Jets The Estate Series combines Full-Size Pressure-Flo Hydrotherapy Jets, Aquatic Rotary Massage Jets and StressEaz Neck and Shoulder Massage Jets (most models) to provide an invigorating hydrotherapy experience. Full Size Pressure-Flo Hydrotherapy Jet: Designed to facilitate targeted, deep tissue massage therapy. -
Page 18: To Replace Led Light
Estate Air-Whirlpool Owner's Manual & Installation Guide OPERATION TO REPLACE LED LIGHT 1. Disconnect the power to your bathtub. 2. Drain the bathtub. 3. Open the lens of the fixture using ONLY the proper tool provided for that purpose (see Figure 9). Do not attempt to remove the lens without the provided tool. -
Page 19: Tub Care
Turn ON air bath and run for approximately five minutes. Turn air bath unit OFF and drain tub. Aquatic recommends the above cleaning process on your air bath system once a month. -
Page 20: Repair
The model and serial numbers are located above the pump on the backside of the whirlpool. NOTE: ALL WARRANTY REPAIRS MUST BE AUTHORIZED BY AQUATIC BEFORE WORK IS STARTED. FOR SERVICE, ALWAYS CONTACT YOUR DEALER. -
Page 21: Water Quality
Estate Air-Whirlpool Owner’s Manual & Installation Guide WATER QUALITY CHEMICAL & WATER QUALITY Owners of fill and drain air bathtubs need to know basic information concerning water quality, how it affects the performance and enjoyment of the operation of their tubs, and steps that can be taken by the owner to correct related problems. - Page 22 CLEAN PLUS (Aquatic part #ST1010) manufactured by Stearns Packaging Corporation to rectify this condition. This may be obtained by contacting Aquatic at (800) 945-2726. It is recommended that you follow the instructions provided by the manufacturer with the product. Repeated use may be necessary. SUPER SYSTEMS CLEAN PLUS does not replace the necessity to purge your air system at least once a month with a low foaming detergent and bleach.
-
Page 23: Troubleshooting Guide
2) Refer to installer/dealer. 3) Suction line partly plugged. 3) Clean and unplug. 4) Pump not supported properly. 4) Contact Aquatic. (If you have a remote pump, refer to installer/dealer.) 5) Low voltage. 5) Contact electrician. Leakage of water at shaft 1) Shaft seal requires replacement. -
Page 24: Replacement Parts List
Estate Air-Whirlpool Owner's Manual & Installation Guide REPLACEMENT PARTS LIST ILLUSTRATION NO. PART # DESCRIPTION 8186ASSYxx FULL SIZE DIRECTIONAL JET 8186VJTB V-JET BODY 8186BDY 90 DEGREE JET BODY 8186WFTG WALL FITTING 2A.. 8184ROTxx STRESSEAZ JET INTERNAL 8184JTB STRESSEAZ JET BODY... -
Page 25: Replacement Parts Map
Estate Air-Whirlpool Owner’s Manual & Installation Guide REPLACEMENT PARTS MAP (no chromatherapy) (chromatherapy) Aquatic... -
Page 26: Replacement Parts Map
Estate Air-Whirlpool Owner's Manual & Installation Guide REPLACEMENT PARTS MAP 10a. 10d. 10b. 10c. (Option) Aquatic... - Page 28 AQUATIC Fax-On-Demand System: Toll Free (877) 618-7024 8101 E. Kaiser Blvd., Suite 200 • Anaheim, CA 92808 (800) 945-2726 • Fax (866) 544-5353 • www.aquaticbath.com 8MANEAW | F.O.D. 9002 | REV. 02.14...
Need help?
Do you have a question about the ESTATE AIR-WHIRLPOOL and is the answer not in the manual?
Questions and answers