Table of Contents
Advertisement
Installation & Operating manual
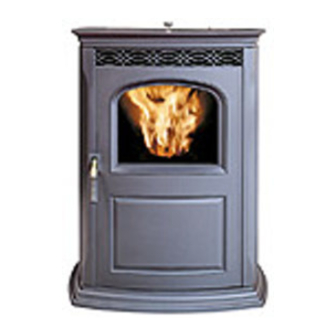
The Accentra Pellet Stove
r13
"Ce manuel est disponible en Français sur demande"
SAFETY NOTICE
PlEASE rEAd ThIS ENTIrE mANuAl bEFOrE YOu INSTAll ANd uSE YOur NEw rOOm hEATEr. FAIlurE
TO FOllOw INSTruCTIONS mAY rESulT IN PrOPErTY dAmAgE, bOdIlY INjurY, Or EvEN dEATh.
FOr uSE IN ThE u.S. ANd CANAdA. SuITAblE FOr INSTAllATION IN mObIlE hOmES
IF ThIS hArmAN ACCENTrA PEllET STOvE IS NOT PrOPErlY INSTAllEd, A hOuSE FIrE mAY rESulT. FOr
YOur SAFETY, FOllOw INSTAllATION dIrECTIONS.
CONTACT lOCAl buIldINg Or FIrE OFFICIAlS AbOuT rESTrICTIONS ANd INSTAllATION INSPECTION
rEQuIrEmENTS IN YOur ArEA.
CONTACT YOur lOCAl AuThOrITY (SuCh AS muNICIPAl buIldINg dEPArTmENT, FIrE dEPArTmENT, FIrE
PrEvENTION burEAu, ETC.) TO dETErmINE ThE NEEd FOr A PErmIT.
CETTE guIdE d'uTIlISATION EST dISPONIblE EN FrANCAIS. ChEz vOTrE CONCESSIONNAIrE dE hArmAN
hOmE hEATINg.
SAvE ThESE INSTruCTIONS.
Item # 3-90-08326
Advertisement
Table of Contents

Related Manuals for Harman The Accentra Pellet Stove


Summary of Contents for Harman The Accentra Pellet Stove
-
Page 1: Safety Notice
TO FOllOw INSTruCTIONS mAY rESulT IN PrOPErTY dAmAgE, bOdIlY INjurY, Or EvEN dEATh. FOr uSE IN ThE u.S. ANd CANAdA. SuITAblE FOr INSTAllATION IN mObIlE hOmES IF ThIS hArmAN ACCENTrA PEllET STOvE IS NOT PrOPErlY INSTAllEd, A hOuSE FIrE mAY rESulT. FOr YOur SAFETY, FOllOw INSTAllATION dIrECTIONS. -
Page 4: Manual Operation
0”/0cm 18”/46cm SErIAl NumbEr Shelled Corn, when mixed with Pellets SAFETY NOTICE: IF THIS HARMAN ACCENTRA PELLET Table of Contents STOVE IS NOT PROPERLY INSTALLED. A HOUSE FIRE MAY RESULT. FOR YOUR SAFETY, FOLLOW THE INSTAL- LATION DIRECTIONS. CONTACT LOCAL BUILDING OR... -
Page 5: Esp Control
Mode, Stove Temp Mode, or OFF. Also allows you only. Requires special DDM room temperature in Room to vary the distribution blower speed by turning monitor supplied to Harman Temp Mode using the outer the knob to the high or low side of each mode. Dealers exclusively. - Page 6 Automatic Ignition/Operation The Accentra pellet stove is more than just automatic ignition, it is also automatic temperature control. The automatic system will allow the fire size to be adjusted ..to match the heating needs and even put the fire out if necessary. If heat is needed after the fire is out, the Accentra will automatically re-ignite and adjust the fire size to match the heating need.
-
Page 7: Automatic Start Up
Automatic Start up Starting First Fire Igniter Switch to "AuTO" (down position) Make sure the unit is plugged into a 120 VAC, 60 HZ electrical source. The power light should be the only light lit. See Hint #7. Fig. 3 ImPOrTANT: To avoid unwanted smoke, Be sure 1"... - Page 8 Ignition/Operation The Accentra Pellet Stove is capable of manual operation. This allows the operator ..to manually control operation and fuel consumption. Manual operation can also be helpful during an emergency (i.e. igniter failure, or when using certain generators.) The unit can be switched between "AUTO"...
-
Page 9: Manual Start Up
manual Start up Starting First Fire Igniter Switch to "mANuAl" (up position) Fig. 8 Make sure the unit is plugged into a 120 VAC, 60 HZ electrical source. The power light should be the only light lit. ImPOrTANT: To avoid unwanted smoke, Be sure Fig. -
Page 10: Installation
This can be a minimum of a 20 gauge sheet metal 12" plate, ceramic tile with grouted joints, a UL listed stove board, or a Harman Cast Iron floor protector . The Harman Cast Iron Floor Protector is equal to the minimum dimensions,... - Page 11 Installation ImPOrTANT NOTE: The Accentra is shipped bolted Optional leg Kit to the skid through two holes in the cast base plate. There is a leg kit available for the Accentra (Item # 1- If these holes are not used to lag the unit to the floor 00-247211).
-
Page 12: Mobile Home Installation
Clothing and other flammable materials should not be Unit bolt down holes for mobile home installation placed on or near the Accentra Pellet Stove. lag to floor with 1/4" diameter lag bolts with washer. Installation and repair of the Accentra Pellet Stove (not supplied.) Note: If the optional leg kit is used,... -
Page 13: Low Draft Voltage Adjustment
low draft voltage Adjustment Combustion Motor Speed Control Low draft only set point. The small straight screwdriver slot is plastic; therefore, the unit can be adjusted while in operation. Fig. 18 Draft Meter bolt hole location Fig.17 These units are pre-tested at the factory with exactly A simple draft test should be performed after 120 Volts AC, 60 Hz. -
Page 14: Room Sensor Installation
room Sensor and rear Shield Installation rear Shields room Sensor Installation 5/16" Hex Head Screws (2 on 5/16" Hex Head each side) Screws (2 on each side) Fig. 19 Fig. 20 The room sensor is a small temperature sensor on The rear insulated shields are split in the middle the end of a 60"... -
Page 15: Important Notice
venting venting ImPOrTANT NOTICE A combustion blower is used to extract the combus- 3 or 4 inch Pellet Vent Pipe - tion gases from the firebox. This causes a negative (Type PL) Must be used. pressure in the firebox and a positive pressure in the venting system as shown in fig. - Page 16 Outside Air: • Vents should not be placed below ventilated harman home heating and hearth & home soffits. Run the vent above the roof. Technologies recommend attaching outside air in all installations, especially lower level and •...
- Page 17 venting #1 Preferred method This method provides excellent venting for normal operation and allows the stove to be installed clos- est to the wall. Two and a half inches from the wall is safe; however, three inches allows better access to remove the rear panel.
- Page 18 venting #4 Installing into an existing chimney This method provides excellent venting for normal operation. Check your local code requirements. Some areas require that a liner be installed to the top of the flue, as shown in method #7. This method will provide natural draft in the event of a power failure.
- Page 19 venting #6 Installing into an existing fireplace chimney This method provides excellent venting for normal operation. This method also provides natural draft in the event of a power failure. Some places in the US and Canada, it is required that the vent pipe extend all the way to the top of the chimney.
- Page 20 venting Storm collar Flashing 3" min. 3" min. 3" min. PL vent manufacturer's minimum flue vent configuration No insulation or f i r e s t o p s p a c e r a n d other combustible It is required that outside air support m a t e r i a l s a r e be installed with this venting...
- Page 21 venting requirements for Terminating the venting I. The clearance to service regulator vent outlet must WARNING: Venting terminals must not be recessed be a minimum of 6 feet. into a wall or siding. J. The clearance to a non-mechanical air supply inlet NOTE: Only "pellet"...
-
Page 22: Maintenance
Remove pieces if a creosote buildup has occurred. If creosote has carefully. Replace glass only with Harman replacement accumulated it should be removed to reduce the risk glass; do not use substitutes. -
Page 23: Maintenance & Cleaning
maintenance - Cleaning Ash removal Due to potential high temperatures, it is recommend- ed that the stove be out and cool prior to removing the ash pan. Open the front door and grasp the ash pan by the handle. With the ash pan removed, swing the handle upward for carrying. - Page 24 maintenance - Cleaning 2. Remove the combustion intake assembly. See Fig. 35. The combustion intake assembly is held into place with two swing latches. See Fig. 37. Swing each latch until it hangs down away from the retainer stud. Now the assembly can be taken out by tilting the right side outward first through the lower door opening.
- Page 25 maintenance - burn Pot burn Pot Cleaning and maintenance Whenever loading fuel into the hopper, take the opportunity to scrape the top holed surface and sides of the burn pot down to auger tube.(Fig 39) It is not necessary to completely remove all material from the burn pot.
-
Page 27: Fuel
Trouble-Shooting STOvE dOES NOT FEEd 1. No fuel in hopper. SmOKE IS vISIblE COmINg OuT OF vENT 1. Air-fuel ratio is too rich. 2. Firebox draft may be too low for sensing switch in A. Feed rate too high. feeder circuit to operate. Check for closed doors, B. -
Page 28: Fuel Specifications
Fuel Specifications Fuel and Fuel Storage Size Pellet fuel quality can fluctuate from manufacturer to • Pellets are either 1/4 inch or 5/16 inch (6-8mm) in manufacturer, and even from bag to bag. diameter Hearth & Home Technologies recommends using only •... -
Page 29: Specifications
Specifications Note: Installation of the optional leg kit adds 2.95 inches of height. weight 400 lbs. blower 150 cfm hopper Capacity 50 lbs. Fuel wood Pellets, Corn/Pellet mixture Outside Air Size 2 3/8 inches Fuse rating 5 amp bTu range 0 to 40,000 Feed rate .75 lbs./hr. - Page 30 Accentra wiring diagram...
- Page 31 Addendum for Burning Corn and Pellet Fuel Mixture Harman pellet burning, free-standing stoves and inserts have been tested to ASTM E1509 for burning shelled corn in a mixture with wood pellets. The listing approves up to a 50% corn and 50% pellet mixture. Different mixtures of corn will have distinctively different burn characteristics depending upon moisture content and variety.
- Page 32 Contact your dealer if you have questions about UPS compatibility with your appliance. harman Surefire 512h battery back-up The 512H connects to a 12 volt deep cycle battery that will run your appliance for up to eight (8) hours. It includes a trickle charge feature that keeps your battery charged when power is available.
-
Page 33: Limited Lifetime Warranty
Hearth & Home Technologies Inc. LIMITED LIFETIME WARRANTY Hearth & Home Technologies Inc., on behalf of its hearth brands (”HHT”), extends the following warranty for HHT gas, wood, pellet, coal and electric hearth appliances that are purchased from an HHT authorized dealer. WARRANTY COVERAGE: HHT warrants to the original owner of the HHT appliance at the site of installation, and to any transferee taking ownership of the appliance at the site of installation within two years following the date of original purchase, that the HHT appliance... -
Page 34: Warranty Conditions
WARRANTY CONDITIONS: • This warranty only covers HHT appliances that are purchased through an HHT authorized dealer or distributor. A list of HHT authorized dealers is available on the HHT branded websites. • This warranty is only valid while the HHT appliance remains at the site of original installation. •... - Page 35 Accentra-Cast Service Parts beginning manufacturing date: N/A Pellet Stove Ending manufacturing date: Active 1-90-02470-1 (black), 1-90-02470-2 (Charcoal), 1-90-02470-3 (goldenfi re), 1-90-02470-4 (metallic blue), 1-90-02470-5 (honey glo), 1-90-02470-10 (mojave red), 1-90-02470-12 (Forest green), 1-90-02470-13 (black Enamel), 1-90-02470-14 (majolica brown Enamel), 1-90-02470-15 (Sand Enamel) 37 and 38 Part number list on following page.
- Page 36 Accentra-Cast Service Parts beginning manufacturing date: N/A Ending manufacturing date: Active IMPORTANT: THIS IS DATED INFORMATION. When requesting service or replacement Stocked parts for your appliance please provide model number and serial number. All parts listed in this manual may be ordered from an authorized dealer. at depot ITEm description...
- Page 37 Accentra-Cast Service Parts beginning manufacturing date: N/A Ending manufacturing date: Active IMPORTANT: THIS IS DATED INFORMATION. When requesting service or replacement Stocked parts for your appliance please provide model number and serial number. All parts listed in this manual may be ordered from an authorized dealer. at depot ITEm description...
- Page 38 Accentra-Cast Service Parts beginning manufacturing date: N/A Ending manufacturing date: Active # 37 Pre Serial Number 00840001 Feeder Assembly 37.1 37.2 37.13 37.3 37.4 37.12 37.11 37.10 37.9 37.7 37.6 37.5 37.8 IMPORTANT: THIS IS DATED INFORMATION. When requesting service or replacement Stocked parts for your appliance please provide model number and serial number.
- Page 39 Accentra-Cast Service Parts beginning manufacturing date: N/A Ending manufacturing date: Active #38 Post Serial Number 008400001 Feeder Assembly 38.1 38.15 38.16 38.12 38.14 38.2 38.13 38.3 38.11 38.10 38.9 38.4 38.5 38.8 38.7 38.6 IMPORTANT: THIS IS DATED INFORMATION. When requesting service or replacement Stocked parts for your appliance please provide model number and serial number.
- Page 40 Accentra-Cast Service Parts beginning manufacturing date: N/A Ending manufacturing date: Active IMPORTANT: THIS IS DATED INFORMATION. When requesting service or replacement Stocked parts for your appliance please provide model number and serial number. All parts listed in this manual may be ordered from an authorized dealer. at depot ITEm description...
-
Page 41: Service & Maintenance Log
Service & maintenance log date Of Service Performed by description Of Service... - Page 42 Service & maintenance log date Of Service Performed by description Of Service...
- Page 44 Proudly Printed On 100% Recycled Paper...
Need help?
Do you have a question about the The Accentra Pellet Stove and is the answer not in the manual?
Questions and answers