GE DSXH47EG Technical Service Manual
Hide thumbs
Also See for DSXH47EG:
- Tech manual (25 pages) ,
- Dimensions and installation information (4 pages) ,
- Dimension manual (4 pages)

Related Manuals for GE DSXH47EG


Summary of Contents for GE DSXH47EG
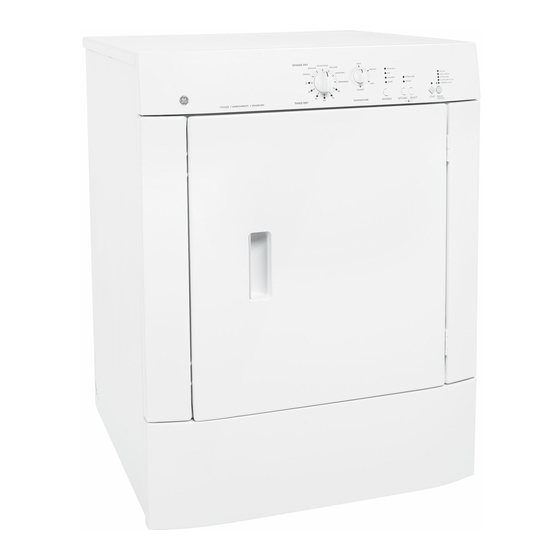
- Page 1 GE Consumer & Industrial Technical Service Guide December 2006 GE DRYER DSXH47EG DSXH47GG 31-9148 GE Appliances General Electric Company Louisville, Kentucky 40225...
-
Page 2: Safety Notice
If grounding wires, screws, straps, clips, nuts, or washers used to complete a path to ground are removed for service, they must be returned to their original position and properly fastened. GE Consumer & Industrial Technical Service Guide Copyright © 2006 All rights reserved. -
Page 3: Table Of Contents
SAFETY NOTICE ............................QUICK REFERENCE SHEET ........................Serial nameplate location ......................Tech sheet location ........................Function test sequence ........................ Specifications ..........................Component resistance chart ......................Wiring diagram for electric models .................... Wiring diagram for gas models ....................10 OPERATING INSTRUCTIONS ......................... 11 About the dryer control panel ..................... - Page 4 TEARDOWN ............................... 31 Removing the top panel ......................31 Removing the temp knob ......................31 Removing the console ......................... 31 Removing the control board ....................... 32 Removing the programming buttons and springs ..............Removing the temp knob shaft ....................Removing the selector knob shaft ....................Removing the selector knob ......................
-
Page 5: Quick Reference Sheet
QUICK REFERENCE SHEET 1. Serial nameplate location: On the front panel at the left side of the dryer door opening. 2. Tech sheet location: On the right-hand bodyside behind the front panel and inside rear access panel. -
Page 6: Function Test Sequence
QUICK REFERENCE SHEET Function test sequence b. When the DRYNESS key is pressed, all the dryness level LEDs should This is a functional test for the dryer. To activate this light. mode, perform the following steps: c. When the OPTIONS or Select key 1. -
Page 7: Specifications
QUICK REFERENCE SHEET SPECIFICATION ELECTRIC MODELS GAS MODELS Electrical Volts 120/208 or 120/240 120/208 or 120/240 Amps (circuit) Motor wattage 160-350 Watts 160-350 Watts Heat input (Watts @ 208/240 VAC) 3200/4500 Heat input (BTU/Hr.) 20,000 Auto. Elec. Ignition Drum Size (Cu. Ft.) Finish Power Paint Epoxy Power Paint Epoxy... -
Page 8: Component Resistance Chart
QUICK REFERENCE SHEET Gas Models Component Resistances* Electric Models Drive motor (120 volt, 60 Hz, 1/4 h.p. 1725 rpm) 4.5 Ohms Motor Start Winding 4.5 Ohms 3.8 Ohms Motor Run Winding 3.8 Ohms Heating Element 12.8 Ohms 50,000 Ohms Control Thermistor 50,000 Ohms Burner Assembly 50 - 400 Ohms... -
Page 9: Wiring Diagram For Electric Models
WIRING DIAGRAM FOR ELECTRIC MODELS... -
Page 10: Wiring Diagram For Gas Models
WIRING DIAGRAM FOR GAS MODELS... -
Page 11: Operating Instructions
OPERATING INSTRUCTIONS About the dryer control panel. Control Settings Drying Cycles The REGULAR, PERMA PRESS and DELICATE cycles automatically sense fabric dryness. Select MORE DRY for heavier fabrics, LESS DRY for lighter fabrics. The TIMED DRY cycle will run for a selected time. TOWELS For towels and heavy cottons. -
Page 12: About Your Dryer Features
About your dryer features. Signal Option NOTE: When the signal is on it will sound just before the end of the cycle to remind If items are removed before the end of you to remove the clothes. the cycle, press the CANCEL button twice. If the dried load cannot be removed Remove garments promptly at the sound promptly during the cycle, the Cycle... -
Page 13: How The Components Work
HOW THE COMPONENTS WORK Clothes dryers remove moisture from clothes by pull- ing air, either warmed or room temperature, through the clothes while they are being tumbled by a turning drum. The moisture from the clothes is exhausted through the dryer vent system to the outside of the house. -
Page 14: Control Thermistor
Control thermistor: Once inside the dryer cavity, the air is drawn between the rear wall of the dryer and the plenum. The holes in the plenum allow the air to be drawn across the heating element. In any cycle, other than No Heat, the heating element heats the air as it passes through. -
Page 15: Airflow Gas Dryers
The air passes through the drum, picking up moisture Airflow gas dryers: and is drawn through the lint filter into the ductwork at the front of the dryer. The airflow in gas dryers is similar to electric dryers except for the heat source and the rear of the drum. The air enters the cavity through the louvered opening in the right rear corner of the dryer. -
Page 16: Restrictions
Restrictions: Electrical Operation (Electric Dryer Models) Restrictions can occur any place in the airflow system, Note: Always refer to the wiring diagram or sche- but the most common are: matic with the product. 1. Installing the dryer in a small inclosed area, such as a closet without a louvered door that reduces the intake air. -
Page 17: Drive Motor Circuit
Drive Motor Circuit: The drive motor preforms two tasks in the dryer. A pulley attached to one end of the motor shaft uses a belt to When power is connected to the dryer, line 1 is applied drive the dryer drum. The blower wheel is attached to the through the thermal limiter (a non-resettable fuse other end of the motor shaft to pull the air through the mounted on the rear wall of the dryer) to the COM terminal... -
Page 18: Drying Time
The high limit thermostat is a safety device that prevents Electrical Operation (Gas Dryer Models) the dryer from overheating if the contacts of the RL 2 fail closed. The contacts of the high limit thermostat, Note: Always refer to the wiring diagram or normally closed, are set to open at a temperature above schematic with the product. -
Page 19: Temperature Sensing Circuit
The electronic control board reads the resistance of the relay RL 1 on the control board. When the control board thermistor and converts it into temperature. The electronic closes relay RL 1, power is applied through terminal J4- control compares the reading from the thermistor to the 1 to terminal M4 of the drive motor. -
Page 20: Drying Time
Since it takes less magnetic force to hold a solenoid open than it does to open it, the first solenoid remains open when the current through the booster coil is reduced. The reduction of current flow through the igniter reduces heat from the igniter but the sensor contacts are held open by the heat of the burner flame. -
Page 21: Troubleshooting
The four indicator lights of Drying, Cool Down, Extra TROUBLESHOOTING Care and Clean Lint Filter will flash the number of times for the first digit of the code after the E, and the START Service Error Codes indicator light will flash the number of times for the second digit after the E. -
Page 22: Error Code Chart
Error code chart Error code Fault condition Action E 10 Communication failure. - EEPROM Clear code, exit mode and start dryer. If the error persists, replace the control board. E 11 Communication failure. - Checksum Clear code, exit mode and start dryer. If the error persists, replace the control board. -
Page 23: Troubleshooting Flow Charts
TROUBLESHOOTING FLOW CHARTS Electric dryer completely inoperative. Note: Always check wiring to the components. Note: If a fault code is displayed, the dryer will not operate. Dryer completely inoperative. Does the control beep or the LED flash when the start button is pushed? Yes. -
Page 24: Gas Dryer Completely Inoperative
Gas dryer completely inoperative. Note: Always check wiring to the components. Note: If a fault code is displayed, the dryer will not operate. Dryer completely inoperative. Does the control beep or the LED flash when the start button is pushed? Yes. -
Page 25: Electric And Gas Dryers; Blower Motor Runs But Drum Does Not Turn
Electric and Gas dryers; blower motor runs but drum does not turn. Note: Always check wiring to the components. Drive motor runs but drum does not turn. Belt broken or off pulley. Electric and Gas dryers; longer than normal drying times. (Possible E 4A) Note: Always check wiring to the components. -
Page 26: Electric Dryer Not Heating Properly
Electric dryer not heating properly (Possible E 5b) Note: Always check wiring to the components. Electric dryer not heating properly. Program the dryer for a Normal Cycle with High Temp and touch Start. Measure the voltage drop between L1 and L2 at the termi- nal block. -
Page 27: Gas Dryer Not Heating Properly
Gas dryer not heating properly. (Possible E 5b) Note: Always check wiring to the components. Gas dryer not heating properly. Program the dryer for a Normal Cycle with Low Temp and touch Start. Listen to hear if the burner cycles. Burner does Burner cycle. -
Page 28: Electric Dryers; Drive Motor Runs But Dryer Does Not Heat
Electric dryer; drive motor runs but dryer does not heat. Note: Always check wiring to the components. Drive motor runs but dryer does not heat. More or less than Check the resistance of the 50,000 Ohms +/-10%. control thermistor at room temperature. -
Page 29: Gas Dryers; Drive Motor Runs But Dryer Does Not Heat
Gas dryer; drive motor runs but dryer does not heat. Note: Always check wiring to the components. Drive motor runs but dryer does not heat. More or less than Check the resistance of the 50,000 Ohms +/-10%. control thermistor at room temperature. -
Page 30: Electric And Gas Dryers; Clothes Not Dry In Auto Cycle
Electric and Gas dryer; clothes not dry in auto cycle. Note: Always check wiring to the components. Clothes not dry in the auto cycle. Tested good. Using the on function test, do the 3 o’clock test. (Refer to page 8.) Check that the dryer is level or slightly tipped Failed test. -
Page 31: Teardown
and (2) screws in the rear. TEARDOWN This section describes how to remove components from both gas and electric dryer. Unless stated, the procedure is the same on all dryers. Unless stated, reverse the procedure to reinstall the component. Always remove electrical power from the dryer when working in an area where electrical power is present. -
Page 32: Removing The Control Board
2. Remove the (4) screws, (2 on each side), holding the 4. Release the (2) tabs at the bottom and the (3) tabs console to the front panel and roll the console at the top and lift the control board out. forward. -
Page 33: Removing The Selector Knob Shaft
3. Lift the shaft out of the control. 2. Using pliers, squeeze the lock rim of the knob shaft and pull the knob out the front. Removing the loading door: Removing the selector knob shaft: 1. Open the door and while supporting the door, remove the (4) screws (2 from each hinge) holding 1. -
Page 34: Removing The Door Handle
2. Separate the panels on the hinge and slide the inner Removing the door seal: panel out from behind the flange of the outer panel. 1. The door seal is fastened to the inner door liner by expandable tabs pushed through slots in the liner. 2. -
Page 35: Removing The Front Access Panel
Removing the door switch 4. Pull out on the bottom of the front panel to release the spring load tabs. 1. Disconnect the dryer from electrical supply, open the door and remove the top. 2. Disconnect the wires from the door switch. 3. -
Page 36: Replacing The Sensor Bars
Replacing the sensor bars: Replacing the upper door catch: 1. Disconnect the dryer from electrical supply. 1. Disconnect the dryer from electrical supply and remove the front panel. 2. Open the dryer door and remove the lint screen. 2. Using a common screwdriver, release the spring 3. -
Page 37: Replacing The Drum Light Bulb
Replacing the drum light bulb: 2. Remove the top and disconnect the wires from the light socket. 1. Open the dryer door, release the clip holding the 3. Remove the light bulb, squeeze the tabs on the light shield by pushing up, and unscrew the bulb. side of the socket and push the socket into the housing. -
Page 38: Replacing The Foam Seal
Replacing the foam seal: 1. Disconnect the dryer from electrical supply. 2. Remove the front panel. 3. The foam seal, glued to front panel duct, seals between the front panel duct and the blower. 4. To replace the seal, pull the old seal off and glue the replacement to the duct. -
Page 39: Removing The Belt
4. Using the belt, raise rear of the drum to release the Removing the ball hitch from the drum: ball from the hitch and move the drum out the front. 1. Disconnect the dryer from electrical supply and remove the drum. 2. -
Page 40: Removing The Drum Heat Shield (Electric Dryers)
Removing the drum heat shield (Electric dryer): 1. Disconnect the dryer from electrical supply and remove the drum. 2. Remove the (3) screws holding the shield to the rear of the drum. Removing the high limit thermostat: 1. Disconnect the dryer from electrical supply and remove the top panel. -
Page 41: Removing The Heating Element Assembly (Electric Dryers)
Removing the heating element assembly 2. Disconnect the wires from the thermistor and re- move the (2) screws holding the thermistor to the (Electric dryer): blower housing. 1. Disconnect the dryer from electrical supply and remove the drum. 2. Disconnect the (2) wires from the heating element. 3. -
Page 42: Removing The Idler Pulley
4. Remove (2) screws holding the housing to the dryer Removing the idler pulley: base. 1. Disconnect the dryer from electrical supply and remove the rear access panel. 2. Release the belt from the motor pulley, remove the “C” clip from the shaft and slide the idler pulley off. -
Page 43: Removing The Burner (Gas Dryers)
2. Unplug the harness from the motor and remove the Removing the ignitor (Gas dryers): idler assembly. 1. Disconnect the dryer from electrical supply and 3. Unscrew the blower wheel from motor shaft. unplug the igniter harness. 4. Release the front motor lock from the blower housing. -
Page 44: Removing The Gas Valve Coils (Gas Dryers)
3. Using a 15/16” open end wrench, disconnect Removing the gas valve coils (Gas dryer): the manifold pipe from the valve. 1. Disconnect the dryer from electrical supply and remove the front panel. 2. Disconnect the wires from the coils, remove the (2) screws holding the coil bracket to the valve base and lift the coils off. -
Page 45: Removing The Duct And Heat Shield (Gas Dryers)
2. Remove the (2) screws holding the combustion chamber to the base, raise the end and pull the chamber out of the duct. Removing the duct and heat shield (Gas dryer): 1. Disconnect the dryer from electrical supply, remove the drum. Removing the manifold pipe (Gas dryer): 2. -
Page 46: Removing The Vent Pipe (Gas Dryers)
5. Remove the (2) screws holding the manifold pipe 3. Remove the vent pipe out the rear of the dryer to the base and lift the pipe out. and remove the gasket from the vent pipe. Removing the vent pipe (Gas dryer): 4.
Need help?
Do you have a question about the DSXH47EG and is the answer not in the manual?
Questions and answers