Table of Contents
Advertisement
Quick Links
User Manual
IR Sensor
SIA-0010I/0010/0030/0060
Important Safety Instructions
1.
Read these instructions.
2.
Keep these instructions.
3.
Heed all warnings.
4.
Follow all instructions.
5.
Do not use this apparatus near water.
6.
Clean only with dry cloth.
7.
Do not block any ventilation openings, Install in accordance with the manufacturer's instructions.
8.
Do not install near any heat sources such as radiators, heat reaisters, stoves, or other apparatus (including amplifi ers)
that produce heat.
9.
Do not defeat the safety purpose of the polarized or grounding-type plug, A polarized plug has two blades with one wider
than the other. A grounding type plug has two blades and a third grounding prong. The wide blade or the third prong
are provided for your safety, If the provided plug does not fi t into your outlet, consult an electrician for replacement of the
obsolete outlet.
10.
Protect the power cord from being walked on or pinched particularly at plugs, convenience receptacles, and the point
where they exit from the apparatus.
11.
Only use attachments/ accessories specifi ed by the manufacturer.
12.
Use only with the cart, stand, tripod, bracket, or table specifi ed by the manufacturer, or sold with
the apparatus. When a cart is used. Use caution when moving the cart/apparatus combination to
avoid injury from tip-over.
13.
Unplug this apparatus during lighting storms or when unused for long periods of time.
14.
Refer all servicing to qualifi ed service personnel. Servicing is required when the apparatus has been damaged in any way,
such as power-supply cord or plug is damaged, liquid has been spilled or objects have fallen into the apparatus, the
apparatus has been exposed to rain or moisture, does not operate normally, or has been dropped.
English _1
Advertisement
Table of Contents

Summary of Contents for Samsung SIA-0010I
-
Page 1: Important Safety Instructions
User Manual IR Sensor SIA-0010I/0010/0030/0060 Important Safety Instructions Read these instructions. Keep these instructions. Heed all warnings. Follow all instructions. Do not use this apparatus near water. Clean only with dry cloth. Do not block any ventilation openings, Install in accordance with the manufacturer’s instructions. -
Page 2: Explanation Of Graphical Symbols
WARNING TO REDUCE THE RISK OF FIRE OR ELECTRIC SHOCK, DO NOT EXPOSE THIS PROCUCT TO RAIN OR MOISTURE. DO NOT INSERT ANY METALLIC OBJECT THROUGH THE VENTILATION GRILLS OR OTHER OPENNINGS ON THE EQUIPMENT. Apparatus shall not be exposed to dripping or splashing and that no objects filled with liquids, such as vases, shall be placed on the apparatus CAUTION CAUTION... - Page 3 When used outside of the U.S., it may be used HAR code with fittings of an approved agency is employed. CAUTION These servicing instructions are for use by qualified service personnel only. To reduce the risk of electric shock do not perform any servicing other than that contained in the operating instructions unless you are qualified to do so.
-
Page 4: What's Included
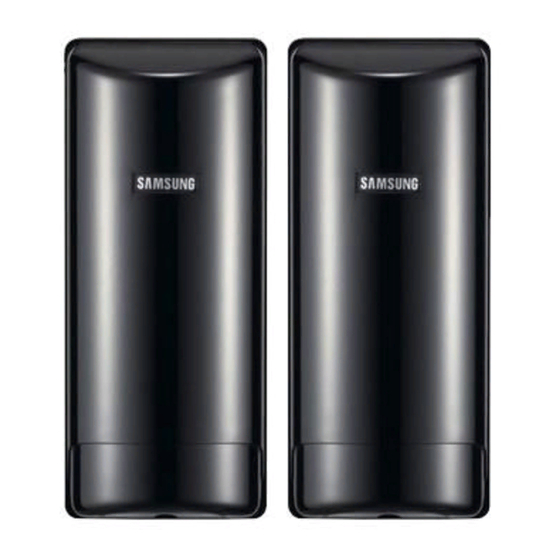
IR Sensor at a Glance Cover Receiver Transmitter Multipurpose Bracket Alarm LED Terminal Good LED Temper Power LED Response Time Monitor Jack Control Wheel Sight Window Lens Vertical Angle Adjustable Screw What’s Included Injection bracket (x2) Injection Bracket Wing (x4) Screw (x4) Steel Bracket x2 (optional) User Manual/Warranty Card... -
Page 5: Installation Instructions
Adjusting the response speed You can adjust the response time by turning the response time control wheel left or right. Turning it left will speed up the response time; turn it right to slow down the time. The factory default is set to 250 msec. •... - Page 6 Hook the upper hole of the sensor fi rst and fi t the lower hole into the wall bracket in the arrow direction. Remove the slot-shaped fi lling on the rubber hole of the sensor and pull out the cables through the hole. Rubber Hole When done, adjust the optical axis and insert the cover.
- Page 7 Put the cover as original. Adjusting the optical axis Connect both transmitter and receiver and turn them on. Look through the mirror of the sight and adjust the sensor so that the other sensor can be positioned in the center of the mirror. ...
-
Page 8: Troubleshooting
Troubleshooting Problem Reason Action The power indicator of the Power is not supplied. Apply the power. transmitter does not turn Loose connection or short-circuited Check if the cables are properly connected. Even if I block the infrared Power is not supplied. Turn on the sensor. - Page 9 Specifi cations & Appearance Specifi cations Item Description Model SIA-0010I SIA-0010 SIA-0030 SIA-0060 Work Range Outdoor 10m Outdoor 10m Outdoor 30m Outdoor 60m Detection System NIR Blocking System (Twin Beams) IR Light IR LED Response Time 50 ~ 500 ms Power Voltage DC 12V(±15%)
-
Page 10: Correct Disposal Of This Product
Correct Disposal of This Product (Waste Electrical & Electronic Equipment) (Applicable in the European Union and other European countries with separate collection systems) This marking on the product, accessories or literature indicates that the product and its electronic accessories (e.g. charger, headset, USB cable) should not be disposed of with other household waste at the end of their working life.


Need help?
Do you have a question about the SIA-0010I and is the answer not in the manual?
Questions and answers