Table of Contents
Advertisement
Available languages
Available languages
Quick Links
7OFK 897EJ X RU/HA
7OFKQ 897EC RU/HA
7OFK 898E CX RU/HA
7OFK 898ES CX RU/HA
English
Operating Instructions
OVEN
Contents
Operating Instructions,1
Description of the appliance,5
Русскии
Руководство по эксплуатации
ДУХОВОЙ ШКАФ
Содержание
Руководство по эксплуатации,1
Предупреждения,2
Сервисное обслуживание,3
Описание изделия,4
Описание изделия,5
Установка,16
Включение и эксплуатация,18
Программы,19
Предосторожности и рекомендации,23
Техническое обслуживание и уход,24
Неисправности и методы их устранения,25
Advertisement
Table of Contents

Related Manuals for Hotpoint Ariston 7OFK 897EJ X RU/HA


Summary of Contents for Hotpoint Ariston 7OFK 897EJ X RU/HA
-
Page 1: Table Of Contents
7OFK 897EJ X RU/HA 7OFKQ 897EC RU/HA 7OFK 898E CX RU/HA 7OFK 898ES CX RU/HA English Operating Instructions OVEN Contents Operating Instructions,1 Warnings,2 Assistance,3 Description of the appliance,4 Description of the appliance,5 Installation,6 Start-up and use,8 Modes,9 Precautions and tips,13... -
Page 2: Warnings,2
Warnings Предупреждения WARNING: The appliance and its ВНИМАНИЕ: Данное изделие и его accessible parts become hot during use. доступные комплектующие сильно Care should be taken to avoid touching нагреваются в процессе эксплуатации. heating elements. Children less than 8 Будьте осторожны и не касайтесь years of age shall be kept away unless нагревательных... -
Page 3: Assistance,3
Assistance Сервисное обслуживание Warning: Внимание: The appliance is fitted with an automatic diagnostic system Изделие оснащено системой автоматическ ой which detects any malfunctions. Malfunctions are signalled диагностики, позволяющей выявить возможные through messages of the following type: “F—” followed by неисправности. Неисправности показываются на numbers. -
Page 4: Position
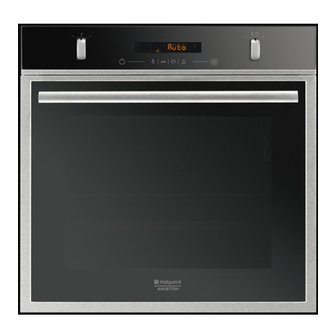
Description of the appliance Описание изделия Overall view Общии вид 1 POSITION 1 1 ПОЛОЖЕНИЕ 1 2 POSITION 2 2 ПОЛОЖЕНИЕ 2 3 POSITION 3 3 ПОЛОЖЕНИЕ 3 4 POSITION 4 4 ПОЛОЖЕНИЕ 4 5 POSITION 5 5 ПОЛОЖЕНИЕ 5 6 GUIDES for the sliding racks 6 ВЫДВИЖНЫЕ... -
Page 5: Description Of The Appliance
Description of the appliance Описание изделия Control panel Панель управления 1 SELECTOR knob 1 Рукоятка ПРОГРАММЫ 2 CONTROL PANEL POWER BUTTON 2 ВКЛЮЧЕНИЕ КОНСОЛИ УПРАВЛЕНИЯ 3 DISPLAY 3 ДИСПЛЕЙ 4 THERMOSTAT / TIMER knob 4 Рукоятка ТЕРМОСТАТА / НАСТРОЙКИ 5 START / STOP ПРОДОЛЖИТЕЛЬНОСТИ... -
Page 6: Installation
Installation Ventilation To ensure adequate ventilation, the back panel of the cabinet must be removed. It is advisable to install the oven ! Please keep this instruction booklet in a safe place for so that it rests on two strips of wood, or on a completely future reference. - Page 7 Electrical connection • The socket is compatible with the plug of the appliance. If the socket is incompatible with the plug, ask an Ovens equipped with a three-pole power supply cable are authorised technician to replace it. Do not use extension designed to operate with alternating current at the voltage cords or multiple sockets.
-
Page 8: Start-Up And Use
Start-up and use 3. Once you have reached the correct hour value, press icon. 4. Repeat the above process to set the minutes. WARNING! The oven is If a blackout occurs, it will be necessary to reset the clock. provided with a stop system to extract the racks and If the icon flashes on the display, this indicates that the... -
Page 9: Modes,9
Modes (for example: a cooking mode has been programmed to start at 20:30. At 19:30 a blackout occurs. When the power supply is restored, the mode will have to be reprogrammed). ! In order to guarantee wonderfully soft and crunchy foodstuffs, the oven releases –... - Page 10 PIZZA modes BREAD mode The top and circular heating elements switch on and the fan Use this function to bake bread. To obtain the best results, we begins to operate. This combination heats the oven rapidly. recommend that you carefully observe the instructions below: If you use more than one rack at a time, switch the position •...
-
Page 11: Practical Cooking Advice
PIZZA OVEN 4. Press the icon to begin cooking. 5. When cooking has finished, “END” appears on the display • Use a lightweight aluminium pizza pan. Place it on the and a buzzer sounds. rack provided. • For example: it is 9:00 a.m. and a duration of 1 hour and For a crispy crust, do not use the dripping pan as this 15 minutes is programmed. -
Page 12: Cooking Advice Table
Cooking advice table Rack position Recommended Cooking Modes Foods Weight Preheating (Kg) Temperature duration (°C) (minutes) standard sliding Manual guide rails guide rails 210-220 Multilevel* Pizza on 2 racks 2 and 4 1 and 3 20-25 Pies on two racks/cakes on 2 racks 2 and 4 1 and 3 30-35... -
Page 13: Precautions And Tips
Precautions and tips Disposal • When disposing of packaging material: observe local legislation so that the packaging may be reused. ! This appliance has been designed and manufactured • The European Directive 2012/19/EEC on Waste in compliance with international safety standards. The Electrical and Electronic Equipment (WEEE), requires following warnings are provided for safety reasons and that old household electrical appliances must not... -
Page 14: Replacing The Light Bulb
Replacing the light bulb • The inside of the oven should ideally be cleaned after each use, while it is still lukewarm. Use hot water and detergent, then rinse well and dry with a soft cloth. Do To replace the oven light not use abrasive products. -
Page 15: Troubleshooting
Troubleshooting Problem Possible cause Solution The appliance has just been Set the clock. The “Clock button” and the connected to the electricity mains digits on the display flash. or there has been a blackout. A programmed cooking mode There has been a blackout. Reprogram the cooking mode. - Page 16 Установка ! После встраивания изделия в кухонный элемент должна быть исключена возможность касания к электрическими частями. ! Важно сохранить данное руководство для его Расход электроэнергии, указанный на паспортной последующих консультации. В случае продажи, табличке изделия, был замерян для данного типа передачи...
- Page 17 ! Электрическии провод изделия не должен быть согнут Подсоединение сетевого кабеля или сжат. 1. Откройте зажимную ! Ре г у л я р н о п р о в е р я и т е с о с т о я н и е к а б ел я коробку, нажав...
- Page 18 Включение и эксплуатация при первом нажатии кнопки показывается текущее время. Вновь нажмите эту кнопку для настройки ВНИМАНИЕ! Духовой времени. шк аф ук омпл е к то ва н системой бл окировки После подключения к электросети или после отключения решеток, позволяющей энергоснабжения...
- Page 19 6. В процессе приготовления в любой момент можно: остаточного тепла. Отдельные сегменты шкалы - изменить температуру , повернув рукоятку ТЕРМОСТАТА последовательно гаснут, по мере того как температура (только для программ приготовления в ручном режиме); в духовке понижается. - запрограммировать продолжительность приготовления (см.
- Page 20 вертел (если он имеется). Сочетает однонаправленное ! После запуска обеих программ или при выделение жара с принудительной циркуляцией воздуха открывании дверцы духовки вертел останавливается. внутри духового шкафа. Это препятствует обгоранию поверхности продуктов, Программы приготовления в повышая проникающую способность жара. В процессе автоматическом...
- Page 21 Рецепт на 1000 гр. теста: 600 гр. муки, 360 гр. воды, 11 гр. 3. поверните рукоятку НАСТРОЙКА ВРЕМЕНИ в сторону соли, 25 гр. свежих дрожжей (или 2 пакетика сухих дрожжей) и для настройки завершения приготовления; Приготовление: 4. Выставив нужное время завершения программы, •...
- Page 22 Та а В Ра Р а П П а П П а а а а (°C) а а Р а а а а а О П а ( а 2- 210-220 20-25 а П а 2- а 2- 30-35 а 160-170 20-25 а...
- Page 23 Предосторожности и • Не ставьте предметы на открытую дверцу духового шкафа. рекомендации • Н е р а з р е ш а й т е д ет я м и г р а т ь с б ы т о в ы м электроприбором.
- Page 24 Техническое обслуживание и уход Отключение электропитания Перед началом какой-либо операции по обслуживанию или чистке отсоедините изделие от сети электропитания. Чистка изделия 3. Возьмитесь за дверцу руками • Причиной незначительных различий в оттенках на с двух сторон, плавно закройте фасаде духового шкафа является использование ее, но...
- Page 25 Крепление комплекта выдвижных 3. Закрепите две рамы с у с т а н о в л е н н ы м и направляющих н а п р а в л я ю щ и м и в специальных отверстиях в П...
- Page 28 195114236.00 05/2013 - XEROX FABRIANO...
Need help?
Do you have a question about the 7OFK 897EJ X RU/HA and is the answer not in the manual?
Questions and answers