Table of Contents
Advertisement
Available languages
Available languages
Quick Links
7OFK 1049L X RU/HA
7OFK 1049LS X RU/HA
English
Operating Instructions
OVEN
Contents
Operating Instructions,1
Description of the appliance,5
Русскии
Руководство по эксплуатации
ДУХОВОЙ ШКАФ
Содержание
Руководство по эксплуатации,1
Предупреждения,2
Сервисное обслуживание,3
Описание изделия,4
Описание изделия,5
Установка,19
Включение и эксплуатация,21
Программы,23
Предосторожности и рекомендации,30
Техническое обслуживание и уход,31
Неисправности и методы их устранения,32
Advertisement
Table of Contents

Related Manuals for Hotpoint Ariston 7OFK 1049L X RU/HA


Summary of Contents for Hotpoint Ariston 7OFK 1049L X RU/HA
-
Page 1: Table Of Contents
7OFK 1049L X RU/HA 7OFK 1049LS X RU/HA English Operating Instructions OVEN Contents Operating Instructions,1 Warnings,2 Assistance,3 Description of the appliance,4 Description of the appliance,5 Installation,6 Start-up and use,8 Modes,10 Precautions and tips,16 Maintenance and care,16 Troubleshooting,18 Русскии Руководство по эксплуатации... -
Page 2: Warnings,2
Предупреждения Warnings ВНИМАНИЕ: Данное изделие и его WARNING: The appliance and its доступные комплектующие сильно accessible parts become hot during use. нагреваются в процессе эксплуатации. Care should be taken to avoid touching Будьте осторожны и не касайтесь heating elements. Children less than 8 нагревательных... -
Page 3: Assistance,3
Assistance Сервисное обслуживание Warning: Внимание: The appliance is fitted with an automatic diagnostic system Изделие оснащено системой автоматическ ой which detects any malfunctions. Malfunctions are signalled диагностики, позволяющей выявить возможные through messages of the following type: “F—” followed by неисправности. Неисправности показываются на numbers. -
Page 4: Position
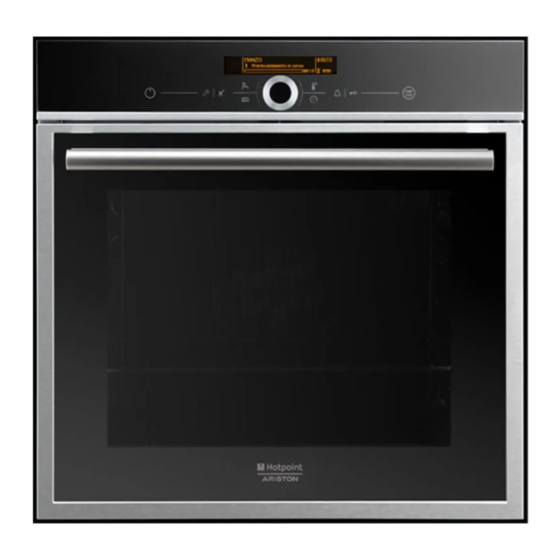
Description of the appliance Описание изделия Overall view Общии вид 1 POSITION 1 1 ПОЛОЖЕНИЕ 1 2 POSITION 2 2 ПОЛОЖЕНИЕ 2 3 POSITION 3 3 ПОЛОЖЕНИЕ 3 4 POSITION 4 4 ПОЛОЖЕНИЕ 4 5 POSITION 5 5 ПОЛОЖЕНИЕ 5 6 GUIDES for the sliding racks 6 ВЫДВИЖНЫЕ... -
Page 5: Description Of The Appliance
11 Символ ПОДТВЕРЖДЕНИЕ НАСТРОЕК 12 ВКЛЮЧЕНИЕ КОНСОЛИ УПРАВЛЕНИЯ Дисплей программирования Description of the appliance 13 Индикатор номера программы 14 Индикатор Выбранного режима 15 Индикатор температуры Control panel 16 Индикатор ПРОДОЛЖИТЕЛЬНОСТИ ПРИГОТОВЛЕНИЯ 1 SETTINGS icon 17 Рекомендует, что делать или что выполняет духовой шкаф 2 MANUAL COOKING MODES icon 18 Индикатор... -
Page 6: Installation
Installation Ventilation To ensure adequate ventilation, the back panel of the cabinet must be removed. It is advisable to install the oven ! Please keep this instruction booklet in a safe place for so that it rests on two strips of wood, or on a completely future reference. - Page 7 Electrical connection • The socket is compatible with the plug of the appliance. If the socket is incompatible with the plug, ask an Ovens equipped with a three-pole power supply cable are authorised technician to replace it. Do not use extension designed to operate with alternating current at the voltage cords or multiple sockets.
-
Page 8: Start-Up And Use
Start-up and use Setings menu commands To enter the settings menu, switch on the control panel and WARNING! The oven is press the icon. provided with a stop system Use the control dial to highlight the individual menu to extract the racks and commands. -
Page 9: Setting The Minute Minder
Setting the minute minder start at 20:30. At 19:30 a blackout occurs. When the power supply is restored, the mode will have to be reprogrammed). ! The minute minder may be set regardless of whether the oven is switched on or off. It does not switch the oven on ! There is no preheating stage for the GRILL mode. -
Page 10: Modes,10
Mode symbol appears on the display to indicate standby the heating elements through the forced circulation of the air mode. As soon as interaction with the machine resumes, throughout the oven. This helps prevent food from burning on system operation is restored. the surface and allows the heat to penetrate right into the food. - Page 11 stored for longer in the refrigerator; suggested again by the appliance when the programme is • organisational: thanks to the longer storage period, next used. If the temperature inside the oven is higher than dishes may be prepared well in advance; the suggested value for the selected mode, the text “OVEN •...
- Page 12 BEEF/VEAL/LAMB mode PAELLA mode Use this function to cook beef, veal and lamb. Place the This function was designed for quick and easy paella food inside the oven while it is still cold. The dish may also preparation; all ingredients are placed inside the oven while be placed in a preheated oven.
-
Page 13: Programming Cooking
of 50°C is ideal for preparing yoghurt. quickly and make the setting process easier. The display will show a graphic indicating the delayed start in bar format. Basic recipe for one litre of yoghurt: one litre of 4. Once you have reached the desired end time, press the whole UHT milk, one pot of natural yoghurt icon again. -
Page 14: Cooking Advice Table
Cooking advice table Modes Foods Weight Rack position Preheating Recommended Cooking (in kg) Temperature duration (°C) (minutes) Standard Sliding Manual guide rails guide rails Multilevel* Pizza on 2 racks 2 and 4 1 and 3 210-220 20-25 1 and 3 30-35 Pies on two racks/cakes on 2 racks 2 and 4... - Page 15 Cooking advice table Modes Foods Weight Rack position Preheating (in kg) Standard Sliding Automatic** guide rails guide rails Bread*** Bread (see recipe) 2 or 3 Beef Roast beef 1-1,5 2 or 3 Veal Roast veal 1-1,5 2 or 3 Lamb Leg of lamb 1-1,5 2 or 3...
-
Page 16: Precautions And Tips
Precautions and tips Disposal • When disposing of packaging material: observe local legislation so that the packaging may be reused. ! This appliance has been designed and manufactured • The European Directive 2012/19/EC on Waste in compliance with international safety standards. The Electrical and Electronic Equipment (WEEE), requires following warnings are provided for safety reasons and that old household electrical appliances must not... -
Page 17: Sliding Rack Kit Assembly
! Do not touch the light bulb directly with your hands. • The inside of the oven should ideally be cleaned after each use, while it is still lukewarm. Use hot water and ! Do not use the oven lamp as/for ambient lighting. detergent, then rinse well and dry with a soft cloth. -
Page 18: Troubleshooting
Troubleshooting Problem Possible cause Solution A programmed cooking mode There has been a blackout. Reprogram the cooking mode. does not start. The display shows ECO Mode. The appliance is in standby Press any button to exit standby mode. mode. An automatic mode has been The temperature inside the oven Wait for the oven to cool down. - Page 19 Установка ! После встраивания изделия в кухонный элемент должна быть исключена возможность касания к электрическими частями. ! Важно сохранить данное руководство для его Расход электроэнергии, указанный на паспортной последующих консультации. В случае продажи, табличке изделия, был замерян для данного типа передачи...
- Page 20 ! Электрическии провод изделия не должен быть согнут Подсоединение сетевого кабеля или сжат. 1. Откройте зажимную ! Ре г у л я р н о п р о в е р я и т е с о с т о я н и е к а б ел я коробку, нажав...
- Page 21 Включение и эксплуатация ! После выбора языка меню, по прошествии 30 секунд без нажатия каких-либо кнопок, дисплей автоматически переходит в режим программирования. ВНИМАНИЕ! Духовой шк аф ук омплек то ва н Меню настроек системой бл окировки Для входа в меню настроек включите консоль управления решеток, позволяющей...
- Page 22 или найдите при помощи рукоятки ESCI и нажмите - изменить температуру , нажав на символ поверните рукоятку и подтвердите , вновь нажав на символ символ (только для программ приготовления в ! Часы можно настроить также при выключенной ручном режиме); - запрограммировать продолжительность приготовления духовке, нажав...
- Page 23 Духовой шкаф может работать в режиме DEMO: при последующем использовании этой программы. отключаются все нагревательные элементы, остаются Если выбранная температура ниже фактической включенными только управления. температуры в духовке, на дисплее показывается Для активации режима DEMO выключите духовку, оставьте надпись “ДУХОВКА СЛИШКОМ ГОРЯЧАЯ”. В любом рукоятку...
- Page 24 Для применения этой техники необходимо иметь Программа РАССТОЙКА вакуумный аппарат и специальные пакеты. Строго Включаются круглый нагревательныйе элемент и следуйте инструкциям по вакуумной упаковке пищевых только в процессе нагрева - вентилятор. Температура продуктов. Техника приготовления в вакууме позволяет духового шкафа является оптимальной для расстойки также...
- Page 25 ДУХОВКА”, и начать приготовление невозможно; желаемую степень готовности: подождать охлаждения духовки. 1. Нажмите на символ На дисплее символ выбранной программы сменяется 2. рукояткой выберите “ХОРОШО ПРОЖАРЕННОЕ”, символом, рекомендующим нужный уровень. “СРЕДНЕЙ ГОТОВНОСТИ” И “С КРОВЬЮ”; ! В начале фазы начала приготовления духовой шкаф 3.
- Page 26 примерно 35х30х5 см в высоты Программа КОНДИТЕРСКАЯ ВЫПЕЧКА Эта программа идеально подходит для выпечки тортов из Рецепт на 4-6 человек: дрожжевого, недрожжевого теста и бисквитов. Изделия • 500 гр. риса помещаются в холодную духовку. Тем не менее Вы можете • 7мл воды или бульона разогреть...
- Page 27 Практические советы по приготовлению ! В режиме вентилируемого приготовления не используйте 1-ый и 5-ый уровни: они подвергаются прямому воздействию горячего воздуха, который может И а В В а сжечь деликатные продукты. ! При использовании БАРБЕКЮ и ГРАТИН, особенно Ш а а с...
- Page 28 Та а П а П В Ра П а Р а П а а а (°C) а а Р а а а а О 20-25 П а ( а 2- а 210-220 П а 2- а 2- а 30-35 а 160-170 20-25 Б...
- Page 29 Та а П а П В Ра П а а а а А а а а а а Х Х Г а Жа 1-1,5 Т а Жа 1-1,5 Ба а а Ба а а 1-1,5 С а Жа 1,2-1,5 К а...
- Page 30 Предосторожности и • Не ставьте предметы на открытую дверцу духового шкафа. рекомендации • Н е р а з р е ш а й т е д ет я м и г р а т ь с б ы т о в ы м электроприбором.
- Page 31 Техническое обслуживание и уход Отключение электропитания Перед началом какой-либо операции по обслуживанию или чистке отсоедините изделие от сети электропитания. Чистка изделия 3. возьмитесь за дверцу руками • Причиной незначительных различий в оттенках на с двух сторон, плавно закройте фасаде духового шкафа является использование ее, но...
- Page 32 195114258.00 05/2013 - XEROX FABRIANO 2. Выберите уровень, на Боковые и задние каталитические панели* который будет установлена Это панели, покрытые специальной эмалью, поглощающей выдвижная направляющая. жиры, выделяющиеся в процессе приготовления. Проверив направление Эта эмаль является довольно устойчивой для обеспечения в ы к а т ы в а н и я с а м о й установки...
Need help?
Do you have a question about the 7OFK 1049L X RU/HA and is the answer not in the manual?
Questions and answers