Table of Contents
Advertisement
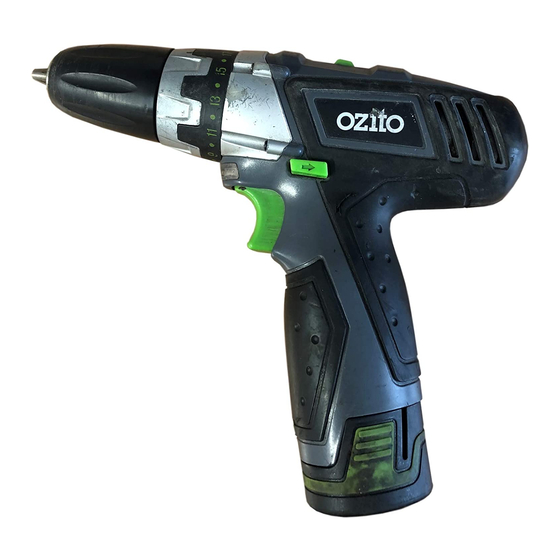
Cordless Drill
12V Li-Ion
Instruction Manual
3 Year Replacement Warranty
LIR-012
WARNING: Read all safety warnings and all instructions. Failure to follow the
warnings and instructions may result in electric shock, fire and /or serious injury.
Save all warnings and instructions for future reference.
912
www.ozito.com.au
To view the full range visit:
Advertisement
Chapters
Table of Contents

Related Manuals for Ozito LIR-012


Summary of Contents for Ozito LIR-012
- Page 1 12V Li-Ion Instruction Manual 3 Year Replacement Warranty LIR-012 WARNING: Read all safety warnings and all instructions. Failure to follow the warnings and instructions may result in electric shock, fire and /or serious injury. Save all warnings and instructions for future reference.
-
Page 2: Specifications
SPECIFICATIONS – MODEL NO. LIR-012 Motor: Charge time: 3 – 5 hours No load speed: 0 – 350/min, 0 – 1150/min Chuck: 10mm Keyless Torque: 15Nm Batteries: 2 x 1.3Ah Lithium Ion Weight with 1 battery: 1.05kg KNOW YOUR PRODUCT 1. -
Page 3: Table Of Contents
TABLE OF CONTENTS SPECIFICATIONS ……………………………………….. Page 1 INTRODUCTION………………………………………… Page 3 ELECTRICAL SAFETY…………………………………… Page 3 GENERAL POWER TOOL SAFETY WARNINGS….…. Page 4 BATTERY & CHARGER SAFETY FEATURE…………… Page 6 CHARGING THE BATTERY…………………………….. Page 7 INSTALLING OR REMOVING THE BATTERY...……… Page 8 DRILL OPERATION………………………………………... -
Page 4: Introduction
Drill. We aim to provide quality tools at an affordable price. We hope you will enjoy using this tool for many years. Your Lithium Ion Cordless Drill LIR-012 has been designed for general purpose drilling or screwdriving around the home and is intended for DIY use only. -
Page 5: General Power Tool Safety Warnings
ELECTRICAL SAFETY (cont.) • Never attempt to connect 2 chargers together. • DO NOT store or use the tool and battery pack in locations where the temperature may reach or exceed 40ºC (such as outside sheds or metal buildings in summer). •... - Page 6 General Power Tool Safety Warnings - Personal Safety e) When operating a power tool outdoors, use an extension cord suitable for outdoor use. Use of a cord suitable for outdoor use reduces the risk of electric shock. 3) Personal safety a) Stay alert, watch what you are doing and use common sense when operating a power tool.
- Page 7 General Power Tool Safety Warnings - Personal Safety Keep cutting tools sharp and clean. Properly maintained cutting tools with sharp cutting edges are less likely to bind and are easier to control. g) Use the power tool, accessories and tool bits etc. in accordance with these instructions and in the manner intended for the particular type of power tool, taking into account the working conditions and the work to be performed.
-
Page 8: Charging The Battery
CHARGING YOUR LITHIUM ION BATTERY The drill has been shipped in a low charge condition, and Fig. 1 requires charging prior to use. • Insert the charging adaptor (9) into the charging cradle (10) (see Fig. 1). Plug the charger adaptor (9) into a 240V power outlet. -
Page 9: Installing Or Removing The Battery
INSTALLING OR REMOVING THE BATTERY Always switch off the drill before insertion or removal of the battery (5). Installing the Battery • Holding the drill upright and picking up the battery (5) in your Fig. 2 opposite hand. Place two fingers over the battery release buttons (6) and insert the battery (5) until it clicks into place (See Fig. -
Page 10: Drill Operation
DRILL OPERATION Variable Speed Switch Fig. 3 Turn the drill ON by depressing the variable speed switch (7) . To turn the drill OFF release the variable speed switch (7) (See Fig. 3). Variable speed The speed can be varied from 0 to maximum in either switch gear, depending on the pressure applied to the variable speed switch (8). - Page 11 DRILL OPERATION (cont.) To Adjust Torque • Locate the arrow on the front of the drill housing (see Fig. 6). Fig. 6 • Identify the torque settings and 1 drill setting on the torque adjustment collar (2). • Rotate the torque adjustment collar (2) to the desired setting, aligning the required number on the torque adjustment collar (2) with the arrow on the drill housing.
- Page 12 DRILL OPERATION (cont.) Removing Drill/Driver Bits • Remove the battery (5) from the drill. • Loosen the keyless chuck (1) as described previously. • Remove the drill or driver bit from the keyless chuck (1). Note: Do not handle drill bits without gloves as drill bits and other accessories are sharp or can be hot after use, this can cause personal injury.
-
Page 13: Maintenance
• Blow out the ventilation slots with compressed air periodically . Note: Ozito Industries will not be responsible for any damage or injuries caused by repair of the drill by an unauthorised person or by mishandling of the drill. SPARE PARTS Limited spare parts are available subject to availability. -
Page 14: Description Of Symbols
DESCRIPTION OF SYMBOLS Volts Hertz Alternating current Watts ø Direct current Diameter Milliamperes No load speed Revolutions or Electrical Emissions reciprocation per minute Conformity (EMC) Read instruction manual Warning Indoor use only Double insulated Isolation transformer Polarity Thermal cut-out Transformer Energy protection at 130ºC Rating (MEPS) Do not use or store battery in... -
Page 15: Contents
1 x AC Charging adaptor 1 x Battery 1 x Instruction manual 1 x Extension adaptor OZITO INDUSTRIES PTY LTD USTR LI (Head Office) 1 - 23 Letcon Drive, Bangholme, Victoria, Australia 3175 Telephone: 1800 069 486 Facsimile: +61 3 9238 5588 Website: www.ozito.com.au... -
Page 16: Warranty
If the tool shows signs of damage or defects caused by or resulting from abuse, accidents or alterations. • Failure to perform maintenance as set out within the instruction manual. • If the tool is disassembled or tampered with in any way. OZITO Australia/New Zealand (Head Offi ce) 1-23 Letcon Drive, Bangholme, Victoria, Australia 3175... - Page 17 WARNING! Read all safety warnings and all instructions. Failure to follow the warnings and instructions may result in electric shock, fire and /or serious injury. Save all warnings and instructions for future reference. www.ozito.com.au To view the full range visit:...
-
Page 18: Know Your Product
SPECIFICATIONS – MODEL NO. LID-012 Battery power: Charge time: 3 – 5 hours No load speed: 0-2000 /min Impact speed: 0 - 3000bpm Torque: 80Nm Drive: 6.35mm ( ”) hex shank Batteries: 2 x 1.3Ah Lithium Ion Weight (tool only): 1.05kg KNOW YOUR PRODUCT 1. - Page 19 TABLE OF CONTENTS SPECIFICATIONS ……………………………………….. Page 1 INTRODUCTION………………………………………… Page 3 ELECTRICAL SAFETY…………….……………………… Page 3 GENERAL POWER TOOL SAFETY WARNINGS……… Page 4 BATTERY AND CHARGER SAFETY WARNINGS……… Page 6 ADDITIONAL SAFETY RULES FOR IMPACT DRIVERS…. Page 7 LITHIUM ION BATTERY AND CHARGER SAFETY FEATURES…………….…………………………...
-
Page 20: Introduction
Save these instructions and other documents supplied with this tool for future reference. Note: The supply of 230V and 240V on Ozito tools are interchangeable for Australia and New Zealand. This tool is double insulated in accordance with AS/NZS 60335-1;... -
Page 21: General Power Tool Safety Warnings
GENERAL POWER TOOL SAFETY WARNINGS - PERSONAL SAFETY Warning! Read all safety warnings and all instructions. Failure to follow the warnings and instructions may result in electric shock, fire and/or serious injury. Save all warnings and instructions for future reference. The term "power tool"... - Page 22 GENERAL POWER TOOL SAFETY WARNINGS - PERSONAL SAFETY e) Do not overreach. Keep proper footing and balance at all times. This enables better control of the power tool in unexpected situations. Dress properly. Do not wear loose clothing or jewellery. Keep your hair, clothing and gloves away from moving parts.
-
Page 23: Battery And Charger Safety Warnings
BATTERY & CHARGER SAFETY WARNINGS THIS MANUAL CONTAINS IMPORTANT SAFETY AND OPERATING INSTRUCTIONS FOR YOUR BATTERY CHARGER. • Before using the charger read all instructions and cautionary markings on the charger, battery pack and the product using the battery pack. Danger! If the battery pack case is cracked or damaged, do not insert it into charger. -
Page 24: Additional Safety Rules For Impact Drivers
ADDITIONAL SAFETY RULES FOR IMPACT DRIVERS • Hold power tool by insulated gripping surfaces, when performing an operation where the cutting accessory may contact hidden wiring or its own cord. Cutting accessory contacting a "live" wire may make exposed metal parts of the power tool "live"... -
Page 25: Lithium Ion Battery And Charger Safety Features
ADDITIONAL SAFETY RULES FOR IMPACT DRIVERS (cont.) • Stop the impact wrench before changing the direction of rotation. Always release the trigger switch and wait for the impact wrench to stop before switching the direction of rotation. • Never touch the socket whilst it is turning. Do not let the turning socket get near your hands or any other part of your body. -
Page 26: Charging Your Lithium Ion Battery
CHARGING YOUR LITHIUM ION BATTERY The drill has been shipped in a low charge condition, and requires charging prior to use. • Insert the charging jack (8) into the charging cradle (9) (see Fig. 1). Plug the charging adaptor (7) into a mains power outlet. -
Page 27: Installing Or Removing The Battery
INSTALLING OR REMOVING THE BATTERY Always ensure the forward/reverse lever (2) is in the lock position before insertion or removal of the battery. To Install the Battery • Holding the impact driver upright and picking up the battery (4) in your free hand. Place your two fingers over the battery release buttons (3) and insert the battery (4) until it clicks into place. -
Page 28: Operation
OPERATION Insertion and removal of driver bits and sockets WARNING! Always ensure the forward/reverse lever (2) is in the lock position and remove the battery (4) from the tool before inserting or removing a bit or socket or when making any adjustments to your tool. Installing a driver bit Pull the quick release chuck (1) forward and insert the hex shank of the appropriate driver bit into the quick... - Page 29 OPERATION (cont.) Installing a socket adaptor and socket Pull the quick release chuck (1) forward and insert the hex shank of the socket adaptor into the quick release chuck (1). (See Fig. 7) Fig. 7 Release the quick release chuck (1) and slowly pull the socket adaptor forward until you feel the ring engage with the groove in the adaptor indicating that the adaptor is locked in position (See Fig.
- Page 30 OPERATION (cont.) Changing the direction of rotation • The direction of rotation can be changed with the forward/reverse selector (2). This is located above the variable speed switch (5) (see Fig. 12). Fig. 12 • To select the forward driving or tightening position, push the forward/reverse selector (2) hard left.
-
Page 31: Maintenance
Never let any liquid get inside the tool; never immerse any part of the tool into a liquid. Note: Ozito Industries will not be responsible for any damage or injuries caused by repair of the tool by an unauthorised person or by mishandling of the tool. -
Page 32: Description Of Symbols
DESCRIPTION OF SYMBOLS Volts Hertz ac/~ Alternating current Watts Milliamperes Direct current Amp hour No load speed /min Revolutions or Beats per minute reciprocation per minute Electrical Emissions Newton meter Conformity (EMC) Read instruction manual Warning Indoor use only Double insulated Isolation transformer Polarity Thermal cut-out... -
Page 33: Pack Contents
4 x Sockets 1 x Charger base 2 x CRV bits 1 x Instruction manual OZITO INDUSTRIES PTY LTD USTR LI (Head Office) 1 - 23 Letcon Drive, Bangholme, Victoria, Australia 3175 Telephone: 1800 069 486 Facsimile: +61 3 9238 5588 Website: www.ozito.com.au... -
Page 34: Warranty
If the tool shows signs of damage or defects caused by or resulting from abuse, accidents or alterations. • Failure to perform maintenance as set out within the instruction manual. • If the tool is disassembled or tampered with in any way. OZITO Australia/New Zealand (Head Offi ce) 1-23 Letcon Drive, Bangholme, Victoria, Australia 3175... - Page 35 MFT-012 WARNING: Read all safety warnings and all instructions. Failure to follow the warnings and instructions may result in electric shock, fire and/or serious injury. Save all warnings and instructions for future reference. www.ozito.com.au To view the full range visit:...
- Page 36 SPECIFICATIONS - MODEL NO. MFT-012 Motor: Battery: 1.3Ah Lithium Ion Charge time: 3-5 hours No load speed: 5,000-16,000/min Orbit angle: 2.8° Sanding pad size: 92 x 92 x 92mm Weight (tool only): 1.15kg KNOW YOUR PRODUCT 1. On/off switch 10. Scraper blade 2.
- Page 37 TABLE OF CONTENTS SPECIFICATIONS………………………………………….. Page 1 KNOW YOUR PRODUCT…………………………………. Page 1 INTRODUCTION………………………………………….. Page 3 ELECRICAL SAFETY………………………………………. Page 3 GENERAL POWER TOOL SAFETY WARNINGS………… Page 4 MULTI FUNCTION TOOL SAFETY WARNINGS……… Page 6 LITHIUM ION BATTERY AND CHARGER SAFETY FEATURES……….……………………………… Page 7 CHARGING THE LITHIUM ION BATTERY……………….
-
Page 38: Introduction
INTRODUCTION Congratulations on purchasing an Ozito Lithium Ion Multi Function Tool. We aim to provide quality tools at an affordable price. We hope you will enjoy using this tool for many years. Your Lithium Ion Multi Function Tool MFT-012 has been designed for sanding, chiselling, cutting and many additional applications and is intended for DIY use only. - Page 39 ELECTRICAL SAFETY (cont.) • Never attempt to connect 2 chargers together. • DO NOT store or use the tool and battery pack in locations where the temperature may reach or exceed 40ºC (such as outside sheds or metal buildings in summer). •...
- Page 40 GENERAL POWER TOOL SAFETY WARNINGS e) When operating a power tool outdoors, use an extension cord suitable for outdoor use. Use of a cord suitable for outdoor use reduces the risk of electric shock. If operating a power tool in a damp location is unavoidable, use a residual current device (RCD) protected supply.
-
Page 41: General Power Tool Safety Warnings
GENERAL POWER TOOL SAFETY WARNINGS g) Use the power tool, accessories and tool bits etc. in accordance with these instructions, taking into account the working conditions and the work to be performed. Use of the power tool for operations different from those intended could result in a hazardous situation. -
Page 42: Lithium Ion Battery And Charger Safety Features
LITHIUM BATTERY AND CHARGER SAFETY FEATURES Over Charging Protection This feature ensures that the battery is never overcharged. When the battery has reached it’s full charge capacity the charger will shut off protecting the internal components of the battery from being damaged. Over Discharge Protection An internal component of the battery pack is an over discharge protector. -
Page 43: Charging The Lithium Ion Battery
CHARGING THE LITHIUM ION BATTERY The multi function tool has been shipped in a low charge condition, and requires charging prior to use. Initial Charging 1. Ensure that the charging cradle (16) is on a flat surface. Insert Fig. 1 the charging jack (17) into the charging cradle (16). -
Page 44: Installing Or Removing The Battery
INSTALLING OR REMOVING THE BATTERY Always switch off the multi function tool before insertion or removal of the battery (3). Installing the Battery 1. Insert the battery (3) into the battery recess in Fig. 2 the multi head tool until it clicks into place (Fig. -
Page 45: Assembly
ASSEMBLY Attaching Your Accessory Accessory Drive Spindle fixed 1. Choose the desired angle required for your application. to the Multi Function Tool 2. Position the perforated holes on the accessory over the locating pins on the accessory drive spindle (6) of the multi function head. -
Page 46: Operation
OPERATION Operating the On/Off Switch Fig. 7 1. Slide the on/off switch (1) forward to the "on" position (Fig. 7). 2. Slide the on/off switch (1) towards the back of the Multi Function Tool to the "off" position. Adjusting the Variable Speed NOTE: In various applications you will need to select Fig. - Page 47 OPERATION (cont.) Sanding NOTE: Ensure you have the correct sanding paper for your application. Always test on a scrap workpiece before using on your workpiece. 1. In sanding mode, the Multi Function Tool can be used on materials such as wood, plastic, metal and painted surfaces.
- Page 48 OPERATION (cont.) Sawing – Square Blade Caution: Clamp your workpiece securely before commencing your work. Note: Ensure your blades are not blunt or damaged in any way before commencing your application. 1. In sawing mode, the Multi Function Tool can be used on wood, plastics and sheet metal.
-
Page 49: Maintenance
Never immerse any part of the Multi Function Tool into a liquid. Note: Ozito Industries will not be responsible for any damage or injuries caused by the repair of the tool by an unauthorised person or by mishandling of the tool. -
Page 50: Spare Parts
SPARE PARTS Limited spare parts are available subject to availability. Please contact your local Bunnings Special Orders Desk to order the required spare parts. Most common spare parts listed below Spare Part Part No. Inner Flange SPDMP012-18 Locking Screw & Washer SPDMP012-21A 12V Battery Pack SPLIR012-06... -
Page 51: Description Of Symbols
DESCRIPTION OF SYMBOLS Volts Hertz Alternating current Watts ø Direct current Diameter Milliamperes No load speed Revolutions or Electrical Emissions reciprocation per minute Conformity (EMC) Read instruction manual Warning Indoor use only Double insulated Isolation transformer Polarity Thermal cut-out Transformer Energy protection at 130ºC Rating (MEPS) Do not use or store battery in... -
Page 52: Contents
1 x Hook & Loop sanding pad 1 x Allen key 1 x Cutting blade 1 x instruction manual OZITO INDUSTRIES PTY LTD USTR LI (Head Office) 1-23 Letcon Drive, Bangholme Victoria, Australia, 3175 Telephone: 1800 069 486 Facsimile: +61 3 9238 5588 Website: www.ozito.com.au... -
Page 53: Warranty
If the tool shows signs of damage or defects caused by or resulting from abuse, accidents or alterations. • Failure to perform maintenance as set out within the instruction manual. • If the tool is disassembled or tampered with in any way. OZITO Australia/New Zealand (Head Offi ce) 1-23 Letcon Drive, Bangholme, Victoria, Australia 3175...
Need help?
Do you have a question about the LIR-012 and is the answer not in the manual?
Questions and answers
I've heard the LIR-012 is no longer made? - Is this true and if so, where can I get 1.3Ah battery replacements?
The Ozito LIR-012 battery (12V Lithium Ion, 1.3Ah) is still available as a spare part with part number SPLIR012-06. You can order it through your local Bunnings Special Orders Desk.
This answer is automatically generated