Table of Contents
Advertisement
Quick Links
Advertisement
Table of Contents

Subscribe to Our Youtube Channel
Related Manuals for Planet VIP-351 PT


Summary of Contents for Planet VIP-351 PT
- Page 1 Enterprise PoE IP Phone VIP-351PT User’s manual Version 1.0.0 [1/52]...
- Page 2 PLANET has made every effort to ensure that this User’s Manual is accurate; PLANET disclaims liability for any inaccuracies or omissions that may have occurred.
-
Page 3: Table Of Contents
TABLE OF CONTENTS Chapter 1 ............................4 Introduction ..........................4 Overview..........................4 Product Features ......................4 VoIP Features........................4 Package Content........................5 Physical Details........................5 Chapter 2 ............................8 System Setup and Basic Operating.....................8 System Configurations for LCD / WEB .................8 Network Setup (Static) .....................8 Network Setup (PPPoE) ....................11 Network Setup (DHCP)....................14 SIP Server Information Setup ..................18 SIP Server Information Setup (Web Configuration) ..........21... -
Page 4: Chapter 1
Introduction Overview PLANET continues to bring innovation to the Voice over IP communications market with cutting edge products and Internet telephony manufacturing experience. PLANET now introduces the latest member of mainstream enterprise series 4-line desktop PoE IP phone family: the VIP-351PT. -
Page 5: Package Content
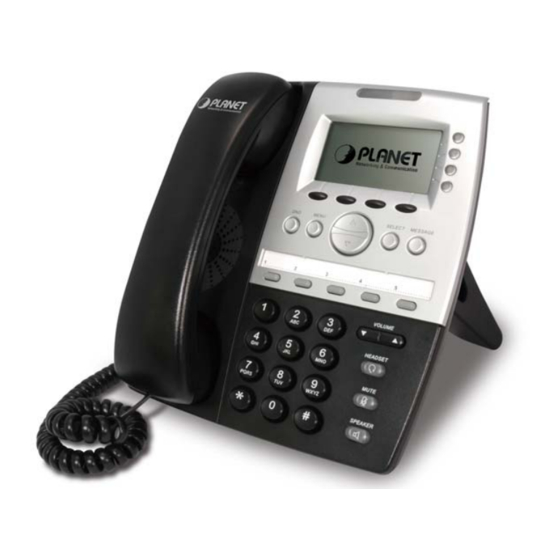
Package Content The contents of your product should contain the following items: VoIP IP Phone Power adapter Quick Installation Guide User’s Manual CD Reversible base stand Physical Details The following figure illustrates the front/rear panel of IP Phone. LCD Display Voice Message Indicator Soft-button... -
Page 6: Keypad Description
Keypad Description Voice Message Indicator The red light goes on-off when there is an incoming call. Menu and all status shall be displayed for users. LCD Display (128x64) To make 4 line accounts dial call by pressing the Line1 ~ Line 4. Line Key To control context page and sip account switch function button. - Page 7 Physical Interfaces RJ-45 connector, for Internet access, connected directly to Switch/Hub through straight CAT-5 cable. The WAN interface also can be connected with 802.3af PoE switch or converter for power supply RJ-45 connector, to maintain the existing network structure, connected directly to the PC through straight CAT-5 cable 5V DC Power input outlet 5V DC Handset Jack RJ-9 connector, for telephone handset...
-
Page 8: Chapter 2
After Power on IP phone, you should see some text on the LCD screen of IP phone now. If not, please redo step 5 to 6 until you can see some text on the LCD screen. 03:12 09/09 VIP-351PT PLANET Redial Network Setup (Static) To setup static IP address, please follow instructions described in this chapter: 1. - Page 9 3. Press ‘Up’ or ‘Down’ key until ‘4. System Configuration’ is selected, then press ‘Select’ key. 03:12 09/09 0123456 1. Language 2. Ring Type 3. Contrast 4. System Configuration Select Exit 4. Press ‘Select’ key on ‘1: Network Setting’, and use up or down key to change network setting to ‘Static’, then press ‘Save’...
- Page 10 When inputting IP address, each time you press ‘Clear’ key, you can erase a digit. Before you can input a brand new IP address, you must clear all previous IP address digits by pressing ‘Clear’ key for many times. After you’ve inputted the IP address you want, press ‘Save’ key, or press ‘Cancel’ key to discard.
-
Page 11: Network Setup (Pppoe)
8. You have to set the IP Address of DNS, and this is the last step of static IP setup. Please press ‘Up’ or ‘Down’ key until ‘5. DNS Server 1 (Static)’ is selected, and input the IP address of DNS server here. - Page 12 2. Press ‘Up’ or ‘Down’ key until ‘3. Setting’ is selected, then press ‘Select’ key. 03:12 09/09 0123456 1. Phone Book 2. Call Records 3. Settings Select Exit 3. Press ‘Up’ or ‘Down’ key until ‘4. System Configuration’ is selected, then press ‘Select’ key. 03:12 09/09 0123456 1.
- Page 13 6. Now press ‘Down’ key until ‘8. PPPoE Password’ is selected, and press ‘Select’ key. You’ll be prompted to enter your PPPoE password, please use the same method described in last step to enter your password. 03:12 09/09 0123456 7. PPPoE Username Planet 8. PPPoE Password planet123▊ Save Clear Cancel...
-
Page 14: Network Setup (Dhcp)
Press up or down key to select PPPoE authentication mode from ‘PAP’ and ‘CHAP’, after proper authentication mode is displayed, press ‘Save’ key to save the setting. 03:12 09/09 0123456 8. PPPoE Password Planet 9. PPPoE Authmode Planet123▊ Save Clear... - Page 15 3. Press ‘Up’ or ‘Down’ key until ‘4. System Configuration’ is selected, then press ‘Select’ key. 03:12 09/09 0123456 1. Language 2. Ring Type 3. Contrast 4. System Configuration Select Exit 4. Press ‘Select’ key on ‘1: Network Setting’, and use up or down key to change network setting to ‘DHCP’, then press ‘Save’...
- Page 16 1. Use the web browser on your computer to connect to the IP address of IP Phone. For example, The IP Phone’s default IP address is 192.168.0.1, please type ‘http://192.168.0.1’ in the browser’s address bar. A login window will appear, please enter the username and password. NOTE: default username is ‘root’, and password is blank (do not fill anything in password field).
- Page 17 4. Now click ‘Management’ link on the left of webpage, then click ‘Configuration Commit / Reset’ tab. Press ‘COMMIT…’ button, and you’ll see ‘Configuration OK’ message, which means the network settings you just made are properly saved. 5. Please click ‘Management’ link on the left of webpage, click ‘System Restart’ tab, and then click ‘RESTART…’...
-
Page 18: Sip Server Information Setup
SIP Server Information Setup After the network setup is done, you have to setup SIP server information, so your IP Phone can log onto service provider’s server. 1. Press ‘Menu’ button on IP Phone 03:12 09/09 0123456 1. Phone Book 2. - Page 19 5. Now press ‘Down’ key until ’11. SIP PortNum’ is selected, then press ‘Select’ key. Please enter the SIP server’s port number provided by your service provider here, by default it’s ‘5070’. 03:12 09/09 0123456 10. SIP Proxy 192.168.4.2 11. SIP PortNum 5060▊...
- Page 20 8. Press ‘Down’ key until ’13. SIP Password’ is selected, then press ‘Select’ key. Please use the numeric keypad to enter SIP phone number here, which is assigned by your service provider. 03:12 09/09 0123456 14. SIP Password 1234567890▊ 15. Codec 2.
-
Page 21: Sip Server Information Setup (Web Configuration)
11. Please press ‘Down’ key to move to next item ’17. Reboot System’, and press ‘Select’ key. You’ll see ‘Rebooting’ Message displayed on LCD screen. Please wait for about 1 minute, after the reboot procedure is completed, your IP Phone is ready with new network settings. - Page 22 4. Now click ‘Management’ link on the left of webpage, then click ‘Configuration Commit / Reset’ tab. Press ‘COMMIT…’ button, and you’ll see ‘Configuration OK’ message, which means the network settings you just made are properly saved. 5. Please click ‘Management’ link on the left of webpage, click ‘System Restart’ tab, and then click ‘RESTART…’...
-
Page 23: Accepting And Making Phone Calls
SIP server. The LCD screen will be shown as below, which means the IP Phone has successfully registered. 03:12 09/09 0123456 PLANET Redial If the phone is not register to any SIP server, you’ll see ‘Initializing SIP …’ message displayed on LCD screen. Please check the network cable and network setting again. - Page 24 Just pick up the handset when you hear the phone rings. After the phone session is end, please make sure the handset is placed on the IP Phone properly, or you will not be able to accept next call. During the phone session, a call timer will be displayed on LCD screen and start from 00:00:00, it will show the total time elapsed since the call is established.
- Page 25 03:12 09/09 0123456 1001 ON HOLD!! 1005 connecting… 00:00:06 Back Now the IP Phone will connect to the phone number you just dialed. After the connection is made, you’ll see the following message displayed on LCD screen: 03:12 09/09 0123456 1001 ON HOLD!! 1005 connected…...
- Page 26 If you want a blind transfer, please dial another phone number by numeric keypad and end with asterisk key - ‘ * ’, and you’ll see the following message displayed on LCD screen: 03:12 09/09 0123456 (null) disconnected… At this moment, the phone will be disconnected from original call and transfer to the number you want to transfer.
- Page 27 After the connection is made, you’ll see the following message displayed on LCD screen: 03:12 09/09 0123456 1002 ON HOLD!! 1005 connected… 3-way Now press ‘3-way’ softkey, and you’ll see following message displayed on LCD screen: 03:12 09/09 0123456 1002,1005 connected 3-way call in progress...
-
Page 28: Calling History
03:12 09/09 0123456 dialing 1234 failed … 3. After the phone session is end, please make sure the handset is placed on the IP Phone properly, or you will not be able to accept phone call. You can press ‘#” key after you have entered all numbers, this can speed up the Note dial process. - Page 29 ‘Dial’ key to dial the selected number again, ‘Delete’ to key to delete a selected number from list, or press ‘Exit’ to back to previous menu. Also, if you didn’t answer a call, you’ll see the following message displayed on LCD screen: 03:12 09/09 0123456 PLANET Redial Miss [29/52]...
-
Page 30: Call Rejection (Dnd)
LCD screen will disappear. 03:12 09/09 0123456 (0123456) PLANET Redial Using Speakerphone and Headset Excepting use the handset, you can also use speakerphone and headset, which provides a hands-free phone operating environment. When you’re working on computer or something that requires you to use 2 hands, this function will be very convenient. - Page 31 When you’re using headset, please turn down the volume. High volume setting Note would cause damage to your hearing! After the headset is connected to the IP Phone, you can press ‘HEADSET’ button to make and accept calls by headset, just like using a speakerphone. [31/52]...
-
Page 32: Chapter 2
Chapter 3 Advanced Functions and Configurations Advanced Function Configurations Speed Dial & Advanced Phone Configuration This IP Phone supports 5 speed dial button (1 to 5), which allow you assign a phone number to each speed dial button. To set a phone number for a speed dial button, refer to chapter 2-4 to open a web connection to the IP Phone, and follow the following instructions: 1. - Page 33 You can also define busy forward number (i.e. the number that incoming call will be transferred to if this phone is set to DND mode), no answer forward number (i.e. no one answers the phone when someone calls), and unconditional forward number (i.e. transfer all incoming calls to this phone numer), and DND forward number (i.e.
- Page 34 NTP Server Address: This IP Phone can adjust the time of internal clock via network, and you have to set a valid NTP server address here. Some NTP Server addresses are: time.nist.gov poo.ntp.org tick.stdtime.gov.tw tock.stdtime.gov.tw time.stdtime.gov.tw *: It’s recommended to use default value unless modification is requested by your service provider. How to set auto-forward number by LCD screen As instructed before, call forwarding settings can be set by web interface, but they can be set by LCD screen also:...
-
Page 35: Phone Book Management
4. You’ll be prompted to input the target number of selected call forward type, then press ‘Save’ key to save changes. You can press ‘Clear’ to erase a number, or press ‘Cancel’ to keep original number untouched. 03:12 09/09 0123456 10. - Page 36 3. You can access the phone book on the IP Phone directly, after the phone book entries are properly set. Please press ‘Menu’ button on IP Phone, and press ‘Select’ key on the first item: ‘1. Phone Book’. 03:12 09/09 0123456 1.
- Page 37 5. After you have selected one phone book entry, the phone number and owner’s name will be displayed on LCD screen. Press ‘Dial’ to dial the phone number, or ‘Exit’ to back to previous menu. 03:12 09/09 0123456 Stan Marsh 5570342 Dial Exit...
-
Page 38: Browse System Information
Browse System Information If you want to know the system information about the IP Phone, like IP address, model information, firmware version…etc., you can use both LCD screen and web browser to obtain these system-related information. On LCD screen: 1. Press ‘Menu’ button on IP Phone 03:12 09/09 0123456 1. - Page 39 4. All system-related information will be displayed here, please press ‘Up’ and ‘Down’ to browse, and press ‘Exit’ key when done. 03:12 09/09 0123456 1. Model Number VIP-351PT 2. MAC Address 00:30:4F:AA:BB:CC Select Exit By web browser: 1. After your web browser is connected to the IP Phone, click the ‘Status’ link on the left. 2.
-
Page 40: Change Ringer Type
Change Ringer Type If you want to change ringer’s sound you hear every time the phone rings, you can select a ringer sound from several options. Please follow the following instructions to change ringer sound: 1. Press ‘Menu’ button on IP Phone 03:12 09/09 0123456 1. -
Page 41: Adjust The Contrast Of Lcd Screen
4. All available ringer sound will be listed here, you can browse by pressing ‘Up’ and ‘Down’ key, and press ‘Select’ key to make decision, and press ‘Exit’ key to leave to previous menu after your decision is make. A ‘V’ sign will appear on the curreltly selected ringer sound. 03:12 09/09 0123456 1. - Page 42 3. Press ‘Up’ or ‘Down’ key until ‘3. Contrast’ is selected, then press ‘Select’ key. 03:12 09/09 0123456 1. Language 2. Ring Type 3. Contrast 4. System Configuraion Select Exit 4. Press ‘Up’ key to make the displayed messages dark, and press ‘Down’ key to make the displayed messages bright.
-
Page 43: Select Dtmf Types
Select DTMF Types DTMF (Dual-Tone Multiple Frequency) is the tone you heard when you press a numeric key or * and # key on conventional telephone. It’s impossible use certain online services (like online banking service) without DTMF function. To use DTMF function, you must select a proper DTMF type. Three types of DTMF are supported by this phone: Transparent, RFC2833 relay, and SIP info. -
Page 44: Select Dtmf Types
Select DTMF Types If you found that this IP Phone is working improperly, you can try to reboot the IP Phone to solve the problem. 1. Press ‘Menu’ button on IP Phone 03:12 09/09 0123456 1. Phone Book 2. Call Records 3. -
Page 45: Select Dtmf Types
4. Press ‘Up’ or ‘Down’ key until ’17. Reboot System’ is selected, and press ‘Select’ key to reboot the IP Phone. If you changed your mind, press ‘Exit’ key to back to previous menu. 03:12 09/09 0123456 17. Reboot System Press to reboot 18. - Page 46 2. Press ‘Up’ or ‘Down’ key until ‘3. Setting’ is selected, then press ‘Select’ key. 03:12 09/09 0123456 1. Phone Book 2. Call Records 3. Settings Select Exit 3. Press ‘Up’ or ‘Down’ key until ‘4. System Configuration’ is selected, then press ‘Select’ key. 03:12 09/09 0123456 1.
- Page 47 You can also erase all settings of this IP Phone from web browser. To do this, please refer to chapter 2-4 to open a web connection to the IP Phone, and follow the following instructions: 1. After your web browser is connected to the IP Phone, click the ‘Management’ link on the left. 2.
-
Page 48: Troubleshooting
The system software (firmware) used by this IP Phone is stored on a flash-ROM, and can be updated when newer version of system software is available. Please go to PLANET Website to check for new version of firmware. If there’s newer firmware available, we’ll publish its download information on the webpage. - Page 49 Please write the above information down, and use the web browser on your computer to connect to the IP Phone. Then follow the following instructions to update firmware: 1. Click ‘Management’ link on the left of webpage, then click ‘Firmware Update’ tab. 2.
-
Page 50: Recover From Unsuccessful Firmware Update
Recover from Unsuccessful Firmware Update If the downloaded firmware is corrupted, the firmware upgrade will be failed, and maybe the IP Phone will become malfunction, too. If this happens, please follow the following instructions to restore the IP Phone to normal state. 1. -
Page 51: Appendix A
Appendix A VIP-351PT Specifications Product Enterprise PoE IP Phone Model VIP-351PT Hardware 1 x 10/100 Base-TX RJ-45 port (802.3af support) 1 x 10/100 Base-TX RJ-45 port 128 * 64-pixels LCD with Back Light Display Function Keys 4 x Line Buttons (Green LED) 4 x Soft Buttons 2 x Navigation Buttons 2 x Volume Buttons... - Page 52 XML Configuration Network and Configuration Fixed IP, DHCP, PPPoE Internet Connection Type LCD / Keypad UI Management Web (HTTP) Remote Software Upgrade (TFP/FTP) Auto Provision (TFTP) 218 mm x 195 mm x 80 mm Dimension (W x D x H) 0~45 degree C, 0~95% humidity Operating Environment 5 V DC...
-
Page 53: Ec Declaration Of Conformity
*Model Number : VIP-351PT * Produced by: Manufacturer‘s Name : Planet Technology Corp. Manufacturer‘s Address: 11F, No 96, Min Chuan Road Hsin Tien, Taipei, Taiwan, R. O.C. is hereby confirmed to comply with the requirements set out in the Council Directive on the...
Need help?
Do you have a question about the VIP-351 PT and is the answer not in the manual?
Questions and answers
Default Username & Password
The default username for the Planet VIP-351PT is "root", and no password is required (the password field can be left blank).
This answer is automatically generated