WhisperKool Slimline 2500 Owner's Manual
Whisperkool slimline 2500 wine cellar owner's manual
Hide thumbs
Also See for Slimline 2500:
- Owner's manual (28 pages) ,
- System manual (20 pages) ,
- Manual (18 pages)
Table of Contents
Advertisement
Quick Links
Download this manual
See also:
System Manual
Advertisement
Table of Contents

Related Manuals for WhisperKool Slimline 2500


Summary of Contents for WhisperKool Slimline 2500
- Page 1 SlimLine Owner’s Manual Protect your Investment in Fine Wines...
- Page 3 SLIMLINE 2500 OWNER’S MANUAL The Coolest Thing In Wine Storage...
- Page 4 Vinothèque Wine Cellars reserves the right to make corrections or improvements to the information provided and to the related hardware at any time, without notice. Vinothèque and WhisperKOOL are registered trademarks, and ECE is a trademark of Vinothèque Wine Cellars. All rights re- served.
-
Page 5: Table Of Contents
TABLE OF CONTENTS WhisperKOOL Slimline Quick Reference Guide ......Introduction ....................Receiving & Inspecting The Unit............Preparing the Wine Cellar ..............Installation ....................Liquid Measuring Thermostat System ..........Drainline ...................... System Operation ..................Control Panel Features and Operation ..........Maintenance Schedule ................ -
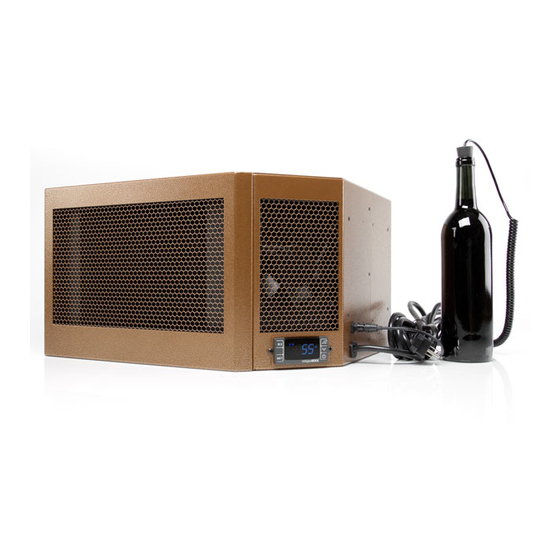
Page 6: Whisperkool Slimline Quick Reference Guide
WHISPERKOOL Slimline QUICK REFERENCE GUIDE Exhaust Side (out of cellar / condenser) Controller Grille Cold Side (inside cellar / evaporator) Power Cord Bottle Probe Grille Page 4 SL 020111... -
Page 7: Introduction
The-Wall’ application. The standard “Through-the-Wall” units are temperature controlled via a bottle probe. Temperature Setting The WhisperKOOL unit can be set at any temperature within the acceptable wine-aging range of 50°F to 67°F. It is designed to cool 30°F cooler than the ambient temperature of the space to which it is exhausting. -
Page 8: Receiving & Inspecting The Unit
Insulation Foam (8 strips) Please leave the WhisperKOOL unit in its original box until you are ready for installation. This will allow you to move the product safely without damaging it. When you are ready to remove the product from the box, refer to page 10 for installation instructions. -
Page 9: Preparing The Wine Cellar
PREPARING THE WINE CELLAR The performance and life of your WhisperKOOL unit are contingent upon the steps you take in preparing the wine cellar. Note: Improperly preparing your enclosure or incorrectly installing your WhisperKOOL unit may cause unit failure, leaking of condensation, and other negative side effects. -
Page 10: Mounting The Unit
The unit should be mounted within 18“ of the top of the room in order to achieve sufficient cooling. As the room cools down, the warm air will rise to the ceiling. Mounting the WhisperKOOL high in the room will create a consistently cool environment by capturing the warm air and replacing it with cool air. - Page 11 How to Build a Wine Cellar Instructional Video WhisperKOOL has a construction tutorial available on line at www.whisperkool.com. This tutorial will walk you through the steps of constructing a properly built wine cellar and the installation of our WhisperKOOL product line.
-
Page 12: Installation
Follow the local building codes and/or consult a license contractor Electrical Needs The WhisperKOOL System requires a dedicated 110-volt 20-amp circuit. The unit draws a large amount of amps at initial start up. By designating a dedicated circuit breaker, you will guarantee the unit has enough power to run effectively. - Page 13 The following installation examples are for reference only, door header construction and framing may vary. When not installing above a door, adequate framing inside of the wall is necessary. WhisperKOOL recommends consulting a licensed contractor for framing and construction needs.
- Page 14 WhisperKOOL system. Seal all cracks and gaps around the WhisperKool Slimline unit with an air- tight sealant or caulking to prevent air leakage. Note: If you use decorative molding, it should be attached to the walls and never to the cooling unit.
-
Page 15: Liquid Measuring Thermostat System
The thermostat can be set between 50°F and 67°F. Remember: The WhisperKOOL System is based on the temperature of the water. By measuring the liquid temperature rather than air, the unit will operate 75- 80% of the time. Drain Line All units come with a drain line for additional removal of excessive condensate. -
Page 16: System Operation
SYSTEM OPERATION: STANDARD & REMOTE Initial Start-Up Defrost Cycle When power is applied to the unit, the control will briefly display all symbols, and the Compressor The Defrost Cycle is a precautionary measure, as icing symbol will be displayed (if unit is calling for cooling). or frosting of the coil does not occur during normal There may be a brief delay prior to the evaporator operation. -
Page 17: Control Panel Features And Operation
CONTROL PANEL FEATURES AND OPERATION Button Normal Functions • The ON/OFF button allows the customer the convenience of turning the refrigeration sys- ON/OFF tem ON or OFF, from the control panel. This feature does not disconnect power from the unit, and the condenser fan will continue to run in the OFF position. In order for the power to be shut off from the unit, the power cord must be unplugged from the wall receptacle. - Page 18 Button Normal Functions cont. Energy 1. The ER feature can be used to save energy and aids in extending the life of the system. 2. The ER button is located at the top L/H side of the control. The ER feature is activated by Reduc- pressing the ER button one time, and the ER logo will appear on the digital display.
- Page 19 Button Normal Functions cont. • Fof - Humidity Management Enhancement: This parameter is normally set at 1. This pa- CPSM rameter should not be adjusted, as it simply provides an OFF cycle time for the fan, during Mode the compressor OFF cycle. However, the parameter is located within the CPSM as a conve- (Cont.) nience to the customer, should it need to be adjusted.
-
Page 20: Maintenance Schedule
MAINTENANCE SCHEDULE It is the user’s responsibility to remove any accumulated dust, lint, or other debris from the front and rear intake grilles. This will restrict the airflow and may affect the unit’s ability to function properly. Periodically cleaning the unit’s vents will help assure maximum cooling efficiency. -
Page 21: Troubleshooting Guide
TROUBLESHOOTING GUIDE Unit has ice forming on the evaporator Possible Cause Solution Clean filter and coil with a vacuum. Evaporator filter and/or coil are dirty. If coil is very dirty, use a small hand spray with a small amount of liquid dish washer detergent. Spray coil, let set for 5 min, then flush with fresh water. - Page 22 TROUBLESHOOTING GUIDE Unit leaks water Possible Cause Solution Unit is not level Unit should be level in wall to prevent leaking Drain line clogged or kinked Check drain line to make sure water can flow freely. Drain is clogged preventing water form escaping Disconnect drain and clear out Drain line does not have a downward slope Fix Drain line so there is a downward slope from the unit to the drain.
-
Page 23: Technical Assistance
TECHNICAL ASSISTANCE WhisperKOOL Customer Service is available Monday through Friday from 8:00 a.m. to 4:00 p.m. Pacific Time. The customer service representative will be able to assist you with your questions and warranty information more effectively if you provide them with the following: •... -
Page 24: Installation Terms And Conditions
Conditions is English. WhisperKOOL reserves the right, in its sole discretion, to change these Terms and Conditions at any time, for any reason, without notice. WhisperKOOL shall not be liable to Purchaser for any delay of delivery of a Product caused by Force Majeure, or any other cause beyond WhisperKOOL’s control. - Page 25 (5) Proof of purchase of the Product in the form of a bill of sale or receipted invoice, which is evidence that the Product is within the Limited Warranty Period, must be presented by the End User to WhisperKOOL in order to obtain limited warranty service.
- Page 26 Terms and Conditions, except that these Terms and Conditions shall be interpreted as through drafted jointly by WhisperKOOL and Purchaser. Any dispute will be resolved by the courts in the County of San Joaquin, State of California, and all parties, WhisperKOOL, Purchaser and End User, hereby irrevocably submit to the personal jurisdiction of such courts for that purpose.
- Page 27 NOTES Sl i mL i ne Model ______________________________________ Serial Number __________________________ Installed by __________________________________________ Date __________________________...
- Page 28 WhisperKOOL 1738 E. Alpine Ave Stockton, CA 95205 1(800) 343-9463 www.whisperkool.com...
Need help?
Do you have a question about the Slimline 2500 and is the answer not in the manual?
Questions and answers