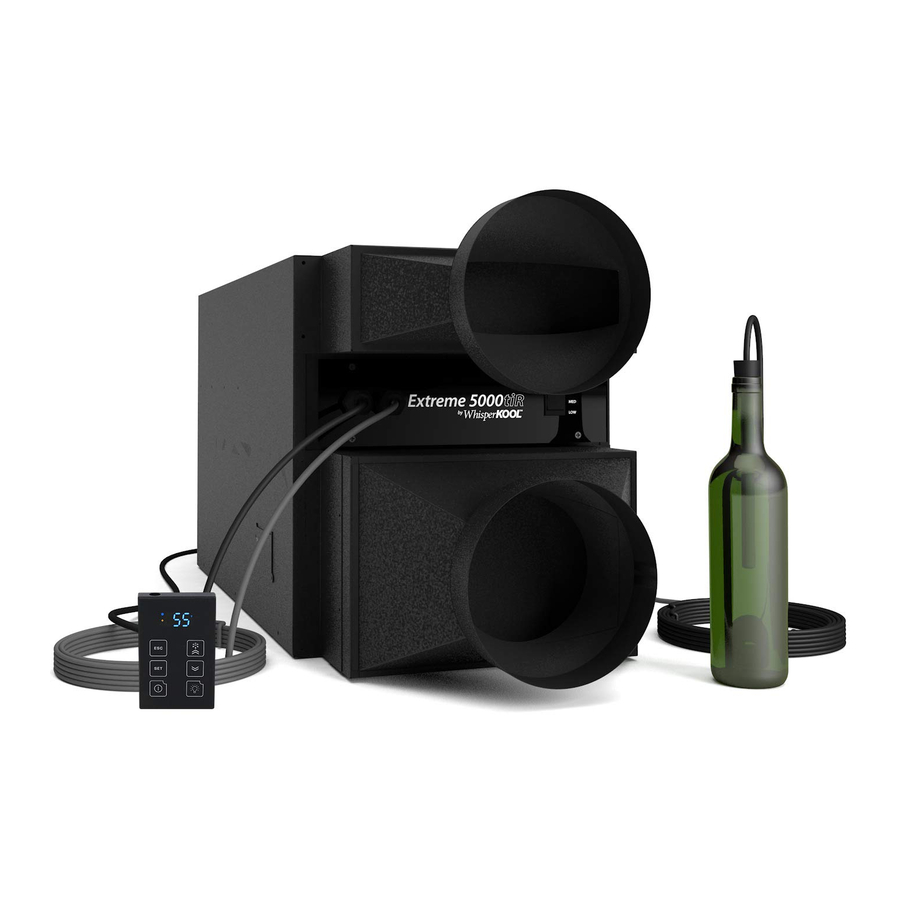
WhisperKool Extreme 3500 ti Owner's Manual

WhisperKool Extreme 3500 ti Owner's Manual

Extreme series
Hide thumbs Also See for Extreme 3500 ti:

Advertisement

EXTREME SERIES
OWNER'S MANUAL
Extreme 3500 ti
Extreme 5000 ti
Extreme 8000 ti
Extreme 3500 tiR
Extreme 5000 tiR
Extreme 8000 tiR
Extreme 5000 tiR FD
The Coolest Thing In Wine Storage

Advertisement

Table of Contents
loading
Need help?

Need help?

Do you have a question about the Extreme 3500 ti and is the answer not in the manual?

Questions and answers

Subscribe to Our Youtube Channel

Summary of Contents for WhisperKool Extreme 3500 ti

  • Page 1 EXTREME SERIES OWNER’S MANUAL Extreme 3500 ti Extreme 5000 ti Extreme 8000 ti Extreme 3500 tiR Extreme 5000 tiR Extreme 8000 tiR Extreme 5000 tiR FD The Coolest Thing In Wine Storage...
  • Page 2 WhisperKOOL. Every effort has been made to ensure that the information in this manual is accurate. WhisperKOOL is not responsible for printing or clerical errors.
  • Page 3: Table Of Contents

    Extreme Series TABLE OF CONTENTS Quick Reference Guide ............2 Standard Controller Layout .
  • Page 4: Quick Reference Guide

    QUICK REFERENCE GUIDE Front / Side View Grille w/Filter Controller Probe Input Compressor Access Panel Control Panel (see page 12 for details) Bottle Probe Fan Speed Control Rear / Side View Grille w/Filter Drain Line Access Rear Power Option Drain Port EXti 120915 Page 2 | 1-800-343-9463...
  • Page 5 Fully Ducted — Front / Side View Exhaust Plenum Supply Plenum Intake Plenum Compressor Access Panel Return Plenum Rear Controller w/Remote Box Control Panel (see page 12 for details) Drain Port Bottle Probe Fan Speed Control www.whisperkool.com | Page 3...
  • Page 6: Standard Controller Layout

    Standard Controller Layout If your unit is installed through-the-wall and does not have a remote keypad you have the Standard Controller Note: The 1 or 3–5 qualifies the amount of time in seconds that the button must be pushed to activate the feature. Refer to page 30 for complete listing of buttons and symbols.
  • Page 7: Fan Speed

    Under sized cooling units can lead to pre-mature failure and/or prevent the system from reaching the desired set temperature. As a result they are not covered under warranty. www.whisperkool.com | Page 5...
  • Page 8: Introduction

    Customer Service Thank you for purchasing a WhisperKOOL Extreme Series cooling unit. We strive to provide the highest quality products and the best possible customer service. If you have any questions about your WhisperKOOL unit, please call us at 1-800-343-9463 or visit whisperkool.com.
  • Page 9: Receiving And Inspecting The Unit

    • Connection “T” (1) Please leave the WhisperKOOL unit in its original box until you are ready for installation. This will allow you to move the product safely without damaging it. When you are ready to remove the product from the box, refer to the installation instructions.
  • Page 10: Quick Start Guide

    Do not use a GFI (Ground Fault Interrupter) line. 4. For your convenience, the WhisperKOOL unit has two power inlets: one on the side of the unit, and the other on the back. Use the selector switch, located on the right side of the unit, to select the inlet you would like to use.
  • Page 11: Preparing The Wine Cellar

    PREPARING THE WINE CELLAR The performance and life of your WhisperKOOL unit is contingent upon the steps you take in preparing the wine cellar. Note: Improperly preparing your enclosure or incorrectly installing your WhisperKOOL unit may cause unit failure, leaking of condensation, and other negative side effects.
  • Page 12 In cases where glass doors are used and the room size is close to the recommended unit size, the next larger size WhisperKOOL should be used. This will compensate for the insulation loss due to the lower insulating rating of glass.
  • Page 13 In some cases, it may be advisable to install a vent fan to dissipate heat from within the exhaust area. However, you must have a fresh air inlet as well. If your unit requires ducting, please contact WhisperKOOL to obtain a specially designed ducting plenum for the unit.
  • Page 14: Pre-Installation

    Electrical Needs The WhisperKOOL Unit requires a dedicated 115V 20A circuit. The unit draws a large amount of amps at initial start up. By designating a dedicated circuit breaker, you will guarantee the unit has enough power to run effectively. Contact an electrician for assistance with the installation of this dedicated electrical circuit: •...
  • Page 15: Through-The-Wall Installation

    Make sure that the internal height remains at 16” (3500ti/tiR & 5000ti/tiR) or 22.75” (8000 ti/tiR) so that the WhisperKOOL unit will fit snugly through the framed cut-out. www.whisperkool.com | Page 13...
  • Page 16 Single Piece Mounting Bracket This sturdy bracket is used to frame the installation location and secures the unit to the wall studs. The bracket has been designed to hold the unit at a 2° angle, this helps project the air into the space and aids in condensation drainage.
  • Page 17: Optional Exterior Grille

    4. Use the supplied self tapping screws to fasten the grille and bracket to the unit ensuring the bracket stays perpendicular/ square. 5. Continue through-the-wall installation. It is required to use the ½” self tapping screws provided. Do not drill holes into unit. Non-Flush Installation Flush Installation www.whisperkool.com | Page 15...
  • Page 18: Installing The Unit

    The screws should penetrate the studs as well as the upper and lower supports to provide adequate support for the WhisperKOOL unit (see illustration). Seal all cracks and gaps around the WhisperKOOL Extreme unit with an air-tight sealant or caulking to prevent air leakage.
  • Page 19: Ducted Installation

    • Install through-the-wall return air grilles at floor level, as they will collect dust from the floor. • Mount the unit lower than 18” from the ceiling. • Locate the supply or return air grille where it is blocked by bottles, boxes or cases. www.whisperkool.com | Page 17...
  • Page 20: Ducting Configurations

    Ducting Configurations There are a variety of ways to duct this unit, please review the different configurations to determine a basis for your particular installation. Remember to contact a wine cellar professional if you have any questions. Half Duct Configuration Wine Cellar Cold Air Supply Cellar Side Adjacent Room...
  • Page 21 Extreme Series Fully Ducted Attic Mounted Unit It is recommended to use our insulation box and condensate pan for this application. Insulation Box Condenser Exhaust Cold Air Condenser Intake Return Air Fresh Air Intake www.whisperkool.com | Page 19...
  • Page 22: Installing The Duct Plenums

    Installing the Duct Plenums 1. Remove the filter grill from the unit by unscrewing the screws that hold it in place. 2. Move the ducting adapters into place 3. Screw the ducting adapters into place using the supplied screws. EXti 120915 Page 20 | 1-800-343-9463...
  • Page 23: Remote Controller Installation

    Black Wire 4. Remove the mounting bracket and secure the bracket to the wall in the desired location. Reattach the controller to the bracket. the remote controller in a wine cellar. Below is an example configuration of www.whisperkool.com | Page 21...
  • Page 24 Mounting Bracket Cooling Unit Bottle Probe Remote Control EXti 120915 Page 22 | 1-800-343-9463...
  • Page 25: Condensation Drain Line

    The drain line will prevent overflow and leaking by allowing for discharge of the additional condensate. To prevent mold from growing, allow the drain line to hang above the water line. Drain Line T-Fitting WRONG: Drain line is under water. www.whisperkool.com | Page 23...
  • Page 26: Liquid Measuring Thermostat System (Bottle Probe)

    LIQUID MEASURING THERMOSTAT SYSTEM The WhisperKOOL Series cooling units come equipped with a liquid temperature-measuring thermostat. This system incorporates the following advantages: Self-Calibrating Bottle Probe The bottle probe contains a sensor chip, which communicates back and forth with the thermostat. This results in a consistent temperature setting and accuracy.
  • Page 27: Multi-Speed Fan Control

    * To get a feeling for decibels, a food blender at 3 ft. is 90 dBA, garbage disposal at 3 ft. is 85 dBA, vacuum cleaner at 10 ft. is 75 dBA, normal speech at 3 ft. is 79 dBA, dishwasher in the next room is 55 dBA, a quiet night is 35 dBA www.whisperkool.com | Page 25...
  • Page 28: Unit Operation

    (evaporator probe). Set Point Safety Features The set point is set from the factory (WhisperKool) at 55F°. It can Once the compressor relay is de-energized the controller must be adjusted by the customer between 50–70F° in one degree wait five minutes before re-energizing the relay. This prevents increments.
  • Page 29: Standard Controller

    Once the temperature of the evaporator gets back up to 40°F the cycle will deactivate and the unit will revert back to normal operating conditions. At the beginning of the cycle the symbol will display and the symbol is illuminated during the anti-frost cycle. www.whisperkool.com | Page 27...
  • Page 30: Alarm Codes

    Button/Symbol Normal Functions Press the SET button once and it will display the set point. After approximately 5 seconds, the display will return to normal operation and display the bottle probe temperature. Press and hold the SET button for 3–5 seconds until the set point is displayed and the Change the °F symbol blinks.
  • Page 31: Standard Controller Wiring Schematic

    Extreme Series Standard Controller Wiring Schematic www.whisperkool.com | Page 29...
  • Page 32: Remote Controller

    REMOTE High Temp / Pre-Chill CONTROLLER Low Temp If your unit has a remote keypad then you will have the Remote Controller. Display ON / OFF Set Point TEMPERATURE Functions Button/Symbol Normal Functions ON/OFF The ON/OFF button allows the customer the convenience of turning the refrigeration unit ON or OFF, from the control panel.
  • Page 33: Alarm Codes

    Compressor On time (Con) and Off time (Cof) with a P1 Alarm. These parameters are set at Con 40 min/Cof 10 min. In the event of a P1 Alarm, the compressor/refrigeration system automatically starts a predetermined ON/OFF cycle, which is controlled by the Con and Cof parameters. These parameters can be adjusted to maintain the desired bottle temperature. www.whisperkool.com | Page 31...
  • Page 34: Remote Controller Wiring Schematic

    Remote Controller Wiring Schematic For Models: 3500tiR 3500tiR FD 5000tiR 8000tiR 8000tiR FD  Neutral Line EXti 120915 Page 32 | 1-800-343-9463...
  • Page 35 Extreme Series Extreme 5000tiR FD Wiring Schematic  Neutral Line www.whisperkool.com | Page 33...
  • Page 36: Troubleshooting Guide

    TROUBLESHOOTING GUIDE Unit Has Ice Forming on the Evaporator Possible Cause Solution Evaporator coil is dirty Clean coil with a vacuum If coil is very dirty, use a spray bottle with a small amount of liquid dish washing detergent. Spray coil, let set for 5 min, then flush with fresh water Something is blocking the supply and/or return air Remove blockage...
  • Page 37 Condensing fan motor/capacitor faulty Call Customer Service at 1-800-343-9463 Compressor and/or starting components faulty Call Customer Service at 1-800-343-9463 Humidity in Cellar too Low Possible Cause Solution Not enough moisture Install something that makes humidity like a water fountain www.whisperkool.com | Page 35...
  • Page 38: Maintenance Schedule

    MAINTENANCE SCHEDULE Monthly 1. Check filters 2. Check for unusual noise or vibration 3. Check drain line to see if it is above the waterline when draining into a vessel Quarterly 1. Clean Filters 2. Replace Filters on ducted units 3.
  • Page 39: Technical Assistance

    Extreme Series TECHNICAL ASSISTANCE WhisperKOOL Customer Service is available Monday through Friday from 6:00 a.m. to 4:00 p.m. Pacific Standard Time. The appointed customer service representative will be able to assist you with your questions and warranty information more effectively if you provide them with the following: The model and serial number of your WhisperKOOL unit.
  • Page 40: Product Warranty Information

    A. Two (2) Year Limited Warranty: For the period of TWO (2) YEARS (the “Limited Warranty Period”) from the date of original sale of a Product by WhisperKOOL, if a WhisperKOOL Product is found to be defective in material or workmanship after undergoing WhisperKOOL’s Customer Service troubleshooting, then, subject to the WhisperKOOL Product Limited...
  • Page 41 16. No one has any authority to add to or vary the limited warranty on this Product. 3. Product Installation Requirements: A. Prior to installing a WhisperKOOL Product, the End User must read the WhisperKOOL Owner’s Manual and thereafter the End User must follow the required installation, use and maintenance procedures set forth by WhisperKOOL in WhisperKOOL’s Owner’s Manual.
  • Page 42 Product Limited Warranty And Product Installation Requirements), and further these Terms and Conditions of Sale shall be interpreted as though drafted jointly by WhisperKOOL and Purchaser. Any dispute will be resolved by the courts in and for the County of San Joaquin, State of California, and all parties, WhisperKOOL, Purchaser and End User, hereby irrevocably submit to the personal jurisdiction of such courts for that purpose.
  • Page 43 E-mail: support@whisperkool.com Web: www.whisperkool.com B. Technical Assistance: WhisperKOOL Customer Service is available Monday through Friday from 6:00 a.m. to 4:00 p.m. (PST). The Customer Service representative will be able to assist you with your questions and warranty information more effectively if you provide them with the following: 1.
  • Page 44 NOTES EXti 120915...
  • Page 45 Extreme Series NOTES www.whisperkool.com | Page 43...
  • Page 46 WhisperKOOL 1738 E. Alpine Ave Stockton, CA 95205 1-800-343-9463 www.whisperkool.com...

This manual is also suitable for:

Extreme 5000 tirExtreme 8000 tiExtreme 5000 tiExtreme 3500 tirExtreme 8000 tirExtreme 5000 tir fd

Table of Contents